Chevy Silverado Lower Dash Panel Removal (By Generation)
Removing a Chevy Silverado’s lower dash panel means pulling a handful of screws (7–13mm, varies by year) and releasing plastic clips, but the exact method differs across the four Silverado generations built since 1999. Forcing the wrong clip can snap a mounting tab GM no longer sells separately for older trucks. This guide covers generation-specific steps, real fastener sizes, and how the OBD2 port is affected — see our related guides, How to Check Mileage on a Chevy Silverado (Plus Fraud Check) and How to Burnout in a Chevy Silverado (Safely & Legally).
Quick Answer
There is no single removal method for every Silverado. On 1999–2006 trucks, the whole lower bezel snaps out as one piece with no visible screws. On 2007-and-newer trucks, look for 4 or more screws along the bottom edge of the panel — these must come out before the hidden clips will release. Match your dash to the generation table below before you start.
Which Generation Chevy Silverado Do You Have?
Chevy Silverado dash panels have been redesigned four times since 1999, and each generation uses a different fastener count and panel style. GMC Sierra trucks share the same platform and body architecture as each Silverado generation, so the same removal steps apply to both. For more Chevy Silverado maintenance guides, see our full Chevy Insights hub.
| Generation | Model Years | Panel Type | Fasteners | Removal Method |
|---|---|---|---|---|
| GMT800 (Classic Body) | 1999–2006 | One-piece snap-in bezel | No visible screws — push clips only | Pull steadily from the top edge near the radio, then work around the perimeter |
| GMT900 | 2007–2013 | Multi-piece screwed panel | 4–6 screws, usually 7mm | Remove screws first, then release the edge clips |
| K2XX | 2014–2018 | Multi-piece screwed panel | 4–8 screws, 7–10mm | Same as GMT900, but remove the steering column trim piece first |
| T1XX | 2019–2026 | Redesigned bezel with integrated USB/12V panel | 6–10 screws, 8–13mm, plus push clips | Different bezel shape; the USB/12V accessory panel usually unclips separately |
Understanding the Lower Dash Panel
Identifying the Components
The lower dash panel is the trim piece below the steering column and glovebox that covers the knee-bolster area. It typically hides the OBD2 port bracket, a fuse or connector block on some model years, and the wiring for the hood-release cable on trucks where it’s routed nearby.
Purpose of the Lower Dash Panel
The lower dash panel serves three practical purposes: it provides structural support near the base of the dashboard, it houses electrical components such as connectors and (on some years) a fuse block, and it conceals wiring harnesses to keep the cabin looking finished.

Preparing for Removal
Before removing the lower dash panel, set up your workspace: slide the driver’s seat all the way back for room to work underneath, and if the truck has a tilt steering wheel, raise it as far as it goes. This alone makes the job noticeably easier on trucks with a tight footwell.
Gathering Necessary Tools
Gather these tools before starting — exact fastener sizes depend on your generation from the table above:
- Flathead screwdriver
- Metric socket wrench set (7–13mm sockets cover every Silverado generation)
- Trim panel removal tool (no-scratch plastic pry tool)
- Torx screwdriver or bit set (some connector brackets use Torx screws)
- Protective gloves and safety goggles
Best Trim Removal Kit Pick
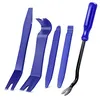
GOOACC 5PCS Auto Trim Removal Tool Kit
A no-scratch nylon pry tool set sized for releasing hidden dash and door panel clips without marring the plastic.
- Best for: releasing the hidden edge clips on any Silverado generation without cracking the trim
- Why we picked it: the flat, angled tips match the plastic trim clip style GM has used across all four generations covered above
- Main drawback: not rigid enough to also pull stubborn corroded screws — pair it with a socket set
Compare more dash removal tool options
 Option 1 WORKPRO 39-Piece Metric & SAE Socket Set
|
 Option 2 GOOACC 240-Piece Retainer Clip Assortment
|
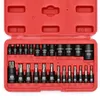 Option 3 MIXPOWER 25-Piece Torx Bit & Socket Set
|
As an Amazon Associate we earn from qualifying purchases.
Safety Precautions to Consider
- Disconnect the vehicle’s negative battery terminal before starting, to prevent accidental airbag deployment or a shorted connector
- Wear protective gloves to shield your hands from sharp trim edges
- Use safety goggles — clips can pop loose unexpectedly
- Never force a stuck panel; excess pressure is the most common cause of a snapped mounting tab
Step-by-Step Removal Process
Disconnect the battery, then follow these six steps. On 1999–2006 trucks, skip straight to Step 4 — there are no screws to remove.
- Disconnect the battery: Remove the negative terminal with a wrench or socket wrench before touching any dash wiring.
- Remove the steering column trim if it overlaps the panel: On K2XX and T1XX trucks, gently pop off the plastic trim piece around the steering column first, starting at one corner.
- Remove the screws and fasteners: Locate the screws along the bottom and top edge of the panel (see the generation table above for size and count) and take them out with a socket wrench, keeping them organized for reassembly.
- Release the hidden clips: Use a trim removal tool to pry gently around the edges until each clip disengages. Avoid excessive force to prevent breaking the plastic tabs.
- Disconnect any electrical connectors: Before fully removing the panel, unplug any wiring harnesses attached to it, such as a footwell light or accessory switch.
- Lower and remove the panel: With all clips and connectors free, carefully lower the panel from its mounting points, watching for any obstructions.
📊 The OBD2 diagnostic port on Chevy Silverado and GMC Sierra trucks is mounted exposed under the driver’s side dash, facing down — you do not need to remove the lower dash panel to plug in a scan tool. Source: youcanic.com, Chevrolet OBD2 port location guide.
Tips for Troubleshooting & Reassembly
Troubleshooting and careful reassembly matter as much as the removal itself — here’s what to check before you button everything back up:
Checking for Damaged Components
Before reassembling, inspect every clip, screw boss, and connector for cracks or wear. Pay extra attention to the wiring harness and connectors to confirm they’re intact and properly seated. Address any damaged component now, before the panel goes back on.
Ensuring Proper Alignment During Reassembly
Misalignment during reassembly is the leading cause of a rattling lower dash panel on GMT900 and K2XX trucks — take the time to seat every mounting point before pressing the last clip home, and double-check alignment before finalizing the reassembly.
“The entire 1999–2006 Silverado lower bezel releases as one piece — there’s no screw to find because the design uses clips only.”
Post-Reassembly Checklist
After reinstalling the lower dash panel, run through this checklist before considering the job finished.
Verifying Proper Installation
Check that the panel sits flush and aligned with the surrounding trim, with every attachment point fastened and no visible gaps.
Ensuring All Components Are Secure
Confirm that adjacent wiring harnesses, cables, and mounting brackets are properly seated and weren’t pinched during reinstallation — this matters for both function and safety.

Frequently Asked Questions
What tools are needed to remove the lower dash panel in a Chevy Silverado?
You’ll need a metric socket set (7–13mm), a flathead or Torx screwdriver, and a no-scratch trim removal tool. These three cover every Silverado generation from 1999 to 2026.
How do you safely detach the lower dash panel in a Chevy Silverado?
Disconnect the battery, remove any visible screws for your generation, then gently pry the clips loose with a trim tool while watching for electrical connectors attached to the panel. Always handle it with care to avoid damage.
What are common mistakes to avoid when removing the lower dash panel?
Avoid forcefully pulling or tugging on the panel before every screw and clip is released, since this cracks the plastic. Also watch for connected wires or components that can be damaged if yanked loose.
What size screws hold the lower dash panel on a Chevy Silverado?
Screw sizes range from 7mm on 2007–2013 GMT900 trucks up to 13mm on some 2019-and-newer T1XX panels. 1999–2006 GMT800 trucks use no visible screws at all — the bezel is clip-only.
Do you need to remove the lower dash panel to access the OBD2 port?
No. The OBD2 port on every Silverado and Sierra generation is mounted exposed under the driver’s side dash and faces downward, so it’s accessible for a scan tool without removing any panel.
How long does it take to remove a Chevy Silverado’s lower dash panel?
Expect roughly 15–30 minutes for the single-piece 1999–2006 bezel, and 30–60 minutes for 2007-and-newer panels that require removing screws first, depending on how many clips are stiff or how much room you have to work under the dash.
Conclusion
Removing a Chevy Silverado’s lower dash panel comes down to matching your removal method to your generation: pull the single-piece bezel free on a 1999–2006 truck, or remove the screws first on a 2007-and-newer model before releasing the clips. Follow the steps above and the panel comes off — and goes back on — without a cracked clip or a rattle.
Products related to this article
Sponsored / affiliate links. As an Amazon Associate I earn from qualifying purchases. I may earn additional commission from eligible campaigns.