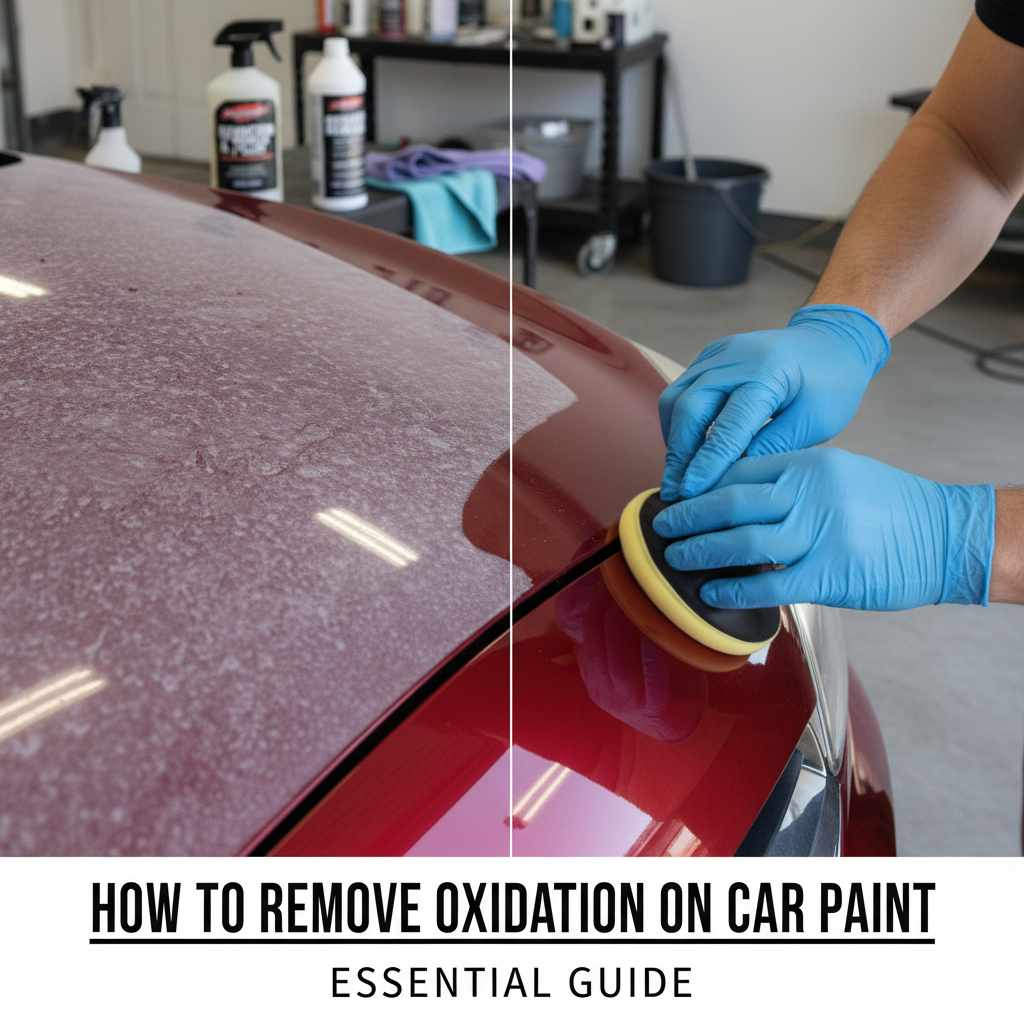
How to Remove Oxidation on Car Paint: Essential Guide
Removing oxidation from car paint is achievable for beginners! You’ll need a few key supplies and a step-by-step approach using rubbing compound, then polish, and finally wax to restore your car’s shine and protect its finish.
Seeing that dull, chalky film on your car’s once-vibrant paint can be frustrating. It’s a clear sign of oxidation, a natural process where the paint’s clear coat breaks down due to UV rays, pollution, and harsh weather. This guide will walk you through exactly how to remove oxidation on car paint, making your car look fantastic again.
We’ll break it down into simple, easy-to-follow steps so you can confidently tackle this common car care problem.
To remove oxidation from car paint: wash the car thoroughly, apply automotive rubbing compound in small sections using back-and-forth motion, wipe clean and inspect, then follow with polishing compound to restore gloss, and finish with car wax or sealant to protect the surface. For light haze, polishing compound alone may be enough. For deep chalky oxidation, start with rubbing compound.
Understanding Car Paint Oxidation
The very top layer of your car’s finish is the clear coat — an invisible layer that shields the colored paint underneath from the elements. When the clear coat starts to break down due to prolonged exposure to sunlight (UV radiation), acid rain, bird droppings, or harsh washing chemicals, it loses its gloss.
This breakdown is oxidation. It appears as a chalky, dull, or powdery residue on the surface of your car’s paint. It’s most visible on darker colored cars, but it affects all paint colors. Ignoring it makes it worse — eventually leading to permanent damage if left untreated.
The good news is that surface oxidation can usually be removed effectively, restoring the original shine and clarity of your car’s paint with the right products and technique.

Is My Car Paint Oxidized? Signs to Look For
How can you tell if your car is suffering from oxidation? Here are the telltale signs to look for:
- Dull and Lifeless Finish: The most obvious sign is a loss of shine. Your car’s paint will look faded, matte, or chalky, even after washing.
- Chalky Residue: If you wipe the paint with a clean microfiber cloth and it leaves behind a white or grayish powdery residue, that’s oxidation.
- Fading Color: The color of your car may appear less vibrant than it used to be.
- Rough Texture: The surface can feel slightly rough or gritty to the touch, even after washing.
- Spots or Patches: Oxidation often starts in specific areas where the paint is most exposed to sun or environmental contaminants.
If you see any of these, it’s time to address the oxidation. The sooner you act, the easier it will be to restore your paint.
Essential Tools and Supplies
To tackle paint oxidation, you’ll need a few key items available at most auto parts stores or online:
- Car Wash Soap and Buckets: Wash the car first to remove dirt and grime that could scratch during compounding. Use the two-bucket method (one for soapy water, one for rinsing your wash mitt) to prevent spreading dirt.
- Microfiber Wash Mitt: Soft on paint and won’t introduce scratches.
- Drying Towels: High-quality microfiber drying towels prevent water spots and scratches.
- Rubbing Compound: Your primary tool for removing oxidation. An abrasive polish designed to cut through the oxidized clear coat layer.
- Polishing Compound (Recommended): Used after rubbing compound to refine the finish, remove micro-hazing and swirl marks, and restore clarity.
- Car Wax or Sealant: Protects the restored paint and provides a barrier against future damage.
- Applicator Pads: Foam or microfiber pads for applying compounds and wax.
- Microfiber Towels: Several clean towels for buffing off compounds, polishes, and wax.
- Gloves: Protect your hands from chemicals in polishing products.
Having these items ready ensures a smooth, effective detailing session without stopping mid-job.
Step-by-Step Guide: How to Remove Oxidation on Car Paint
Work in a shaded area — direct sunlight causes products to dry too quickly and makes buffing difficult.
Step 1: Thoroughly Wash and Dry Your Car
This is crucial. Any dirt or grit left on the surface can cause scratches when you start compounding. Use a pH-neutral car wash soap and the two-bucket method. Rinse thoroughly, then gently dry the entire car with clean microfiber towels. The paint must be completely dry before moving on.
Step 2: Assess the Oxidation
Take a close look at the affected areas. Is it just a light haze, or is the paint noticeably chalky and dull? This determines how aggressive you need to be with the rubbing compound. For heavy oxidation, use a more aggressive compound. For lighter oxidation, a finer compound or even just polishing compound may suffice.
Step 3: Apply Rubbing Compound
Put on your gloves. Shake the rubbing compound well. Apply a small amount (about a quarter-sized dollop) to an applicator pad. Work on one section at a time (half a hood or a quarter of a door panel) to prevent the compound from drying out.
Using moderate pressure and overlapping back-and-forth or circular motions, work the compound into the paint. You’re abrading away the oxidized layer — the compound will start to break down and become clear as it works. Don’t press excessively; let the product do the work. Continue until the chalky appearance in that section disappears.
The table below shows abrasion levels across different products — choosing the right one for your oxidation severity is key:
| Product Type | Primary Function | Abrasion Level | Typical Use |
|---|---|---|---|
| Car Wash Soap | Cleaning | None | Initial wash |
| Clay Bar | Removing embedded contaminants | Very Light | After washing, before compounding |
| Rubbing Compound | Removing oxidation, heavy scratches, and defects | Heavy | Correcting oxidized paint |
| Polishing Compound/Polish | Removing swirl marks, restoring gloss | Medium to Light | Refining surface after compounding |
| All-in-One Product | Cleaning, polishing, and protecting | Light to Medium | Light oxidation and maintenance detailing |
| Wax/Sealant | Protection and shine enhancement | None | Final step after paint correction |
Step 4: Wipe Off and Inspect
Once the oxidation starts to lift, use a clean microfiber towel to gently wipe away the residue. Inspect the area. If the paint looks clearer, move to the next section. If oxidation remains, apply another light coat of compound and work the area again.
Step 5: Repeat for the Entire Car
Continue section by section until you’ve treated the entire painted surface. Work systematically — roof, hood, trunk, then doors and lower panels — so no area is missed.
Step 6: Polish the Paint (Recommended)
Rubbing compound is abrasive and can leave fine scratches or slight haze. Polishing compound refines the surface. Apply a small amount to a clean applicator pad and work it in with lighter pressure and smaller motions than the rubbing compound. Buff off with a clean microfiber towel. The gloss and depth improvement at this step is significant — it’s what makes the paint truly pop.
Step 7: Apply Protection (Wax or Sealant)
This is the critical final step. Choose a high-quality car wax (carnauba for a warm glow) or a synthetic paint sealant (for longer-lasting durability). Apply with an applicator pad and buff off with a clean microfiber towel. This protective layer slows future oxidation and maintains the restored shine. A synthetic sealant typically lasts 3–6 months; carnauba wax lasts 1–3 months depending on climate and washing frequency.
Tips for Best Results
- Work in manageable sections: Never try to do the whole car at once — work half a panel at a time.
- Use clean towels: Always use fresh microfiber towels. Contaminated towels introduce scratches.
- Proper pressure: Let the product do the cutting. Excess pressure damages clear coat.
- Read the product instructions: Application methods vary between brands. Follow manufacturer directions.
- Test spot: Test any new product on an inconspicuous area first — a lower door panel or inside the trunk lid.
- Clay bar first: For deeply embedded contaminants that washing alone won’t remove, use a clay bar after washing but before compounding. This makes the compound more effective and reduces abrasion time.
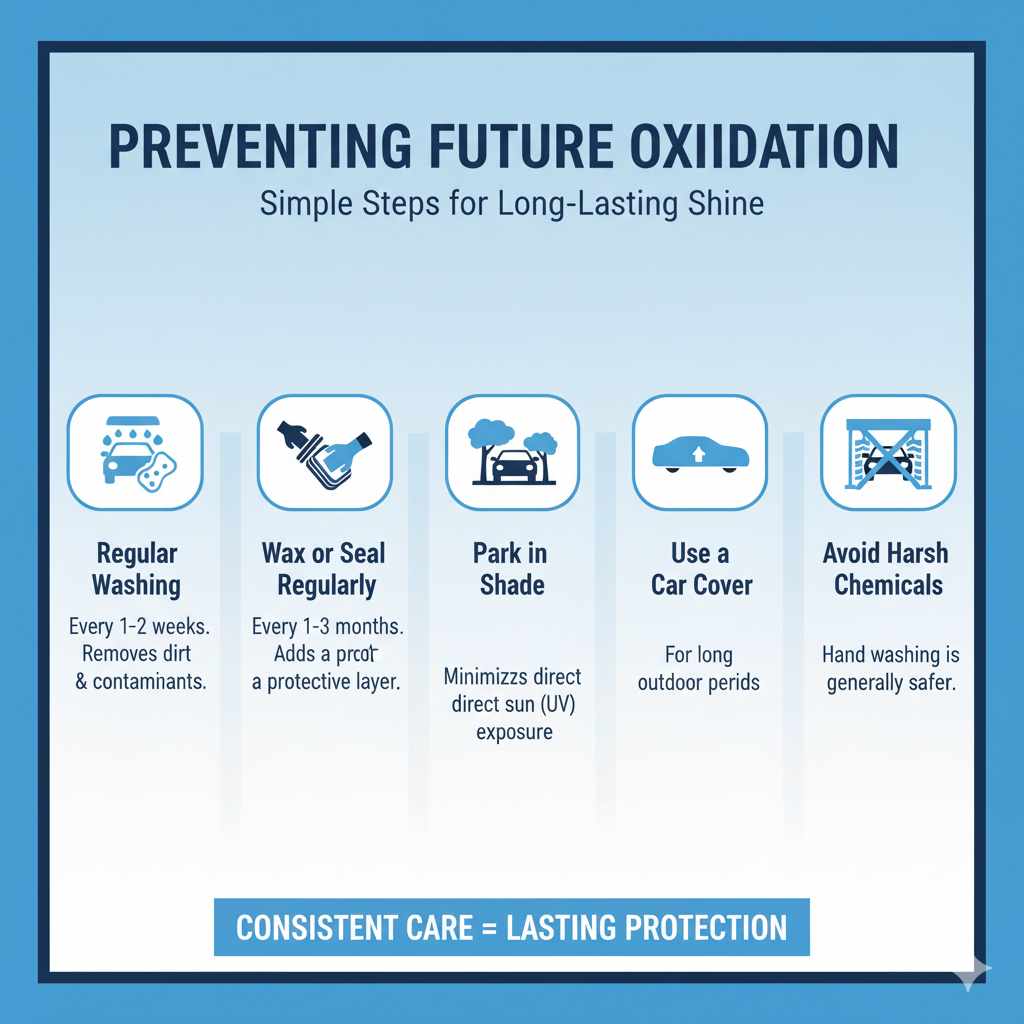
Preventing Future Oxidation
- Regular washing: Wash your car every 1–2 weeks to remove contaminants like bird droppings, bugs, and road grime before they etch into the paint.
- Wax or seal regularly: Apply wax or sealant every 2–3 months. This protective layer is your paint’s primary defense against UV degradation.
- Park in shade: Minimize direct sun exposure by parking in a garage or shaded area. UV rays are the primary driver of clear coat breakdown.
- Use a car cover: For vehicles parked outdoors for extended periods, a quality car cover provides excellent UV and environmental protection.
- Avoid harsh chemicals: Be cautious with automatic car washes that use aggressive brushes or strong detergents. Hand washing with pH-neutral soap is safer for the paint long-term.
Frequently Asked Questions (FAQs)
How long does it take to remove oxidation?
For a beginner working on a typical sedan, it takes 3–6 hours depending on car size and oxidation severity. It’s best to dedicate a full day or a weekend morning to do it properly without rushing cure times.
Can I use a power polisher instead of doing it by hand?
Yes — a dual-action (DA) polisher significantly speeds up the process and delivers more consistent results. However, it requires a learning curve. For beginners, starting by hand is safer and more forgiving. If using a polisher, research proper technique to avoid burning through thin clear coat on edges and body lines.
What if the oxidation is very deep and doesn’t come off with rubbing compound?
If extensive compounding doesn’t remove the oxidation, the clear coat may have been fully consumed, exposing the base coat. In that case, professional touch-up paint or a respray is necessary — compounding bare base coat will damage it further. Most surface oxidation, however, responds to rubbing compound.
How often should I wax my car after removing oxidation?
Apply wax or sealant immediately after the paint correction is complete. Reapply carnauba wax every 1–3 months and a synthetic sealant every 3–6 months, depending on the product’s durability rating and how much sun and weather exposure the car receives.
Is it safe to wash my car right after waxing?
Yes — a regular wash won’t remove the wax layer, especially a synthetic sealant. Wait at least 24 hours after waxing before washing to allow the wax to fully cure and bond to the paint. Use a mild pH-neutral car soap and the two-bucket method to avoid stripping the protection.
Can I use household cleaners to remove oxidation?
No — household cleaners like kitchen degreasers, ammonia-based products, or abrasive scrubs are too harsh for automotive clear coat and can strip or scratch the paint. Use automotive-specific rubbing and polishing compounds only.
What’s the difference between rubbing compound and polishing compound?
Rubbing compound is more abrasive — it removes heavy defects like oxidation and deep scratches by cutting through the top layer of clear coat. Polishing compound is less abrasive and refines the surface after compounding, removing fine swirl marks and restoring high gloss. You always polish after compounding, never the reverse.
Conclusion
Tackling car paint oxidation is a manageable DIY task with the right approach and products. By washing thoroughly, applying rubbing compound to cut through the oxidized layer, polishing to restore depth and gloss, and protecting with wax or sealant, you can successfully revive your car’s appearance and save the cost of professional detailing.
Consistent maintenance — regular washing, waxing every few months, and parking in shade when possible — keeps your car looking its best and significantly slows the return of oxidation.