How to Remove Refrigerant (Freon) From a Car AC System
Removing refrigerant from a car’s AC system means recovering it into a sealed tank with an EPA-approved recovery machine — not cracking a fitting and letting it vent into the air, which is illegal under Section 609 of the Clean Air Act. Most cars built from the mid-1990s through around 2020 use R-134a, while most 2018-and-newer models use R-1234yf, and the two refrigerants require separate, non-interchangeable recovery equipment. You’ll need an EPA Section 609 certification to do the recovery yourself, or a shop can pull the refrigerant for you in under an hour.
A few years back my own sedan’s AC started blowing warm air, and tracking down a bad compressor meant recovering the refrigerant myself before I could replace it. Below is the full legal process, the tools it actually takes, what a DIY recovery job costs versus paying a mechanic, and where to find the mistakes most people make.
What Is Refrigerant and Why Remove It?
First, let’s talk about what refrigerant is. When my AC stopped blowing cold, I had no clue what was inside the system. Refrigerant is a special fluid that makes your car’s air conditioner blow cold air. It absorbs heat from inside your car and releases it outside through the condenser. Most cars in the U.S. use R-134a (common from the mid-1990s through roughly 2020) or R-1234yf (most 2018-and-newer models); pre-1994 vehicles used the now-banned R-12. My sedan used R-134a, which is still common in older models.
You might need to remove refrigerant for a few reasons. Maybe you’re fixing a leak, replacing a part like the compressor, or upgrading the system. For me, I had to remove it because my AC compressor was shot, and I needed to replace it. Removing refrigerant is tricky because it’s harmful to the environment if released into the air. That’s why doing it right is so important.
Why Is It Dangerous to Release Refrigerant?
I didn’t realize how serious refrigerant could be until I started digging. Releasing refrigerant into the atmosphere is bad news. It’s a greenhouse gas that can harm the ozone layer and contribute to climate change. When I learned this, I felt responsible for handling it properly.
Refrigerant is also dangerous to you directly. It’s stored under high pressure, so a leak can cause instant frostbite or burns on skin, and in a closed space it can displace enough oxygen to make breathing difficult. That’s why ventilation and gloves aren’t optional. Under EPA rules tied to Section 609 of the Clean Air Act, it’s illegal to knowingly vent refrigerant — R-134a, R-1234yf, or the older R-12 — into the atmosphere during service, maintenance, or disposal; only small, unavoidable losses that happen while properly connecting and disconnecting recovery equipment are exempt from that rule. Violations can carry civil penalties running into the tens of thousands of dollars per day (the exact cap is adjusted periodically for inflation), so I made sure to follow the rules to the letter.
Tools and Equipment You’ll Need
BEST FOR DIY AC REFRIGERANT RECOVERY
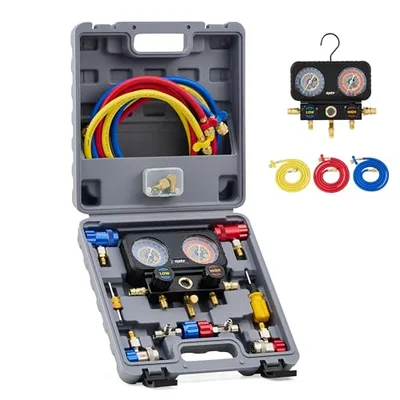 |
OMT AC Manifold Gauge Set (R134a/R1234yf) – $75.99 A 3-way manifold gauge set like this is the exact tool this guide uses in Step 5 to connect the recovery machine and read system pressure.
|
Before I started, I gathered the right tools. Removing refrigerant isn’t a job for a basic toolbox—you need specialized gear. Here’s what I used:
- Refrigerant Recovery Machine: This pulls refrigerant out safely and stores it. I rented one for $50 a day from an auto parts store.
- Manifold Gauge Set: This checks pressure in the AC system. I bought a set for $60.
- Recovery Tank: A special cylinder to hold the refrigerant. I got one with the rental machine.
- Hose Set: Connects the recovery machine to your car. These came with my gauge set.
- Safety Gear: Gloves, safety glasses, and a mask to protect against leaks. I had these at home.
- Wrench Set: To loosen fittings. My basic set worked fine.
- Vacuum Pump (Optional): For evacuating the system after removal. I borrowed one from a friend.
- EPA Section 609 Certification: In the U.S., you need this to handle refrigerants legally. I took an online course for $20.
Having these ready made the job smoother, though a shop can still do the whole thing for you if you’d rather not buy the equipment at all.
Understanding Your Car’s AC System
I had to learn how my car’s AC worked before I could remove the refrigerant. It’s like a loop with a few key parts. The compressor pumps refrigerant through the system. The condenser cools it down, turning it from gas to liquid. The evaporator absorbs heat from inside the car, making the air cold. Hoses and valves connect everything.
Refrigerant flows through this loop under high pressure. My sedan’s system held about 1.5 pounds of R-134a. Knowing this helped me understand where to connect my tools and why I needed to be careful. Check your car’s manual or under-hood sticker to find out what refrigerant type and amount your system uses.
Legal Requirements for Handling Refrigerant
When I started, I was surprised to learn there are laws about this. In the U.S., the EPA regulates refrigerants under the Clean Air Act. You can’t just open a valve and let it escape—that’s illegal. I needed an EPA Section 609 certification to handle refrigerants, even for my car. It’s a short online course that teaches you how to do it safely and legally.
Certification isn’t the whole story, either — the EPA also requires that recovery/recycling equipment meet SAE standards, and the two refrigerant families use separate, non-interchangeable machines: SAE J2210 equipment is built for R-134a, while SAE J2843 equipment is dedicated to R-1234yf. You can’t recover both refrigerants through the same hoses or tank without cross-contaminating them, which is part of why the “don’t mix refrigerants” warning later in this guide applies to your recovery gear just as much as it does to what you recharge with. Get it wrong and civil penalties can run into the tens of thousands of dollars per day, so I wasn’t taking any chances and got certified before touching anything. If you’re not certified, a licensed mechanic can remove the refrigerant for you — it’s worth doing it right to avoid trouble and a contaminated system.
Step-by-Step Guide to Removing Refrigerant
Now, let’s get to the main event—removing the refrigerant! I’ll walk you through how I did it on my sedan. It took me a couple of hours, but it was straightforward with the right steps:
Step 1: Get Certified
I started by getting my EPA Section 609 certification. I took a $20 online course and passed the test in an hour. This made sure I was legal and knew the safety rules.
Step 2: Gather Your Tools
I rented a recovery machine and tank from an auto parts store. I also grabbed my manifold gauge set, hoses, safety gear, and wrenches. Having everything ready saved time.
Step 3: Set Up Safely
I parked my car on a flat surface in a well-ventilated garage. I wore gloves, safety glasses, and a mask. I made sure no kids or pets were around. Safety first, right?
Step 4: Locate the AC Ports
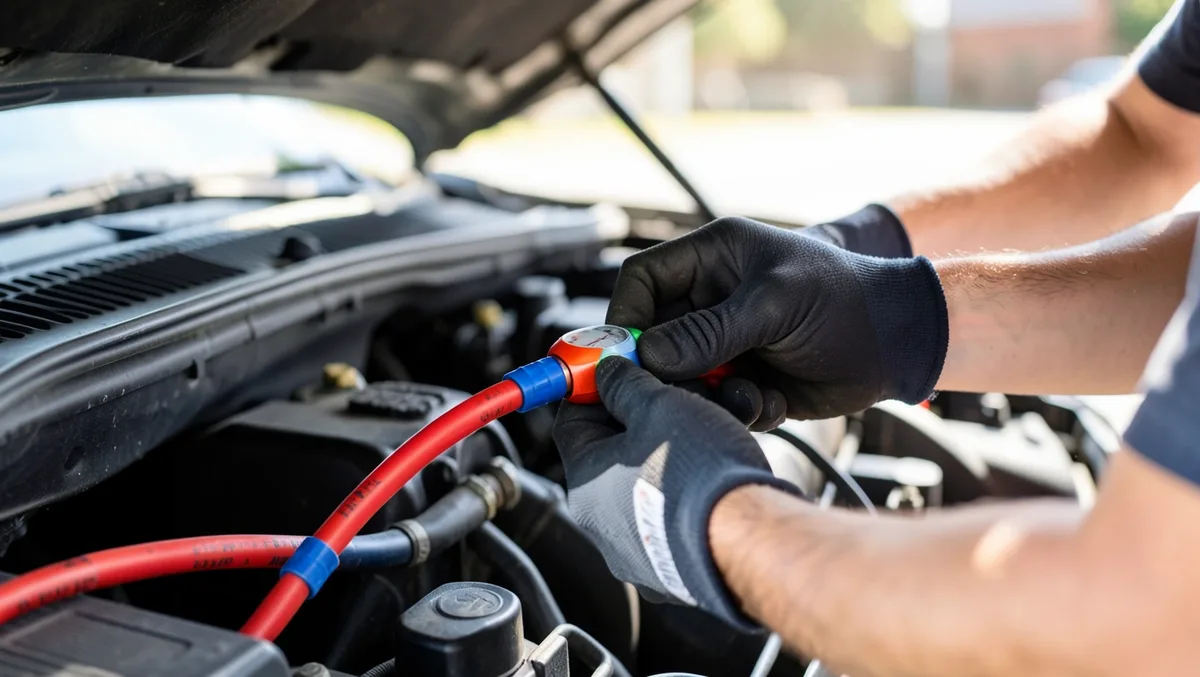
I popped the hood and found the AC service ports. They’re usually on the metal lines near the compressor. My sedan had a low-pressure port (blue cap) and a high-pressure port (red cap). Check your manual if you’re not sure.
Step 5: Connect the Manifold Gauges
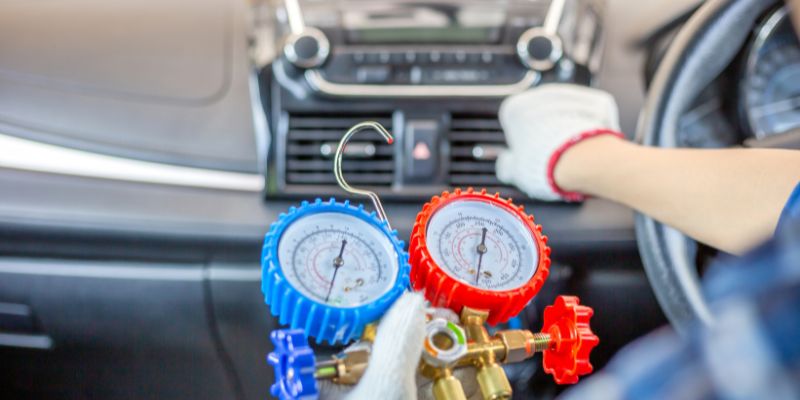
I attached the blue hose to the low-pressure port and the red hose to the high-pressure port. The yellow hose went to the recovery machine. I tightened the connections with a wrench to avoid leaks. I double-checked everything—leaks are dangerous.
Step 6: Set Up the Recovery Machine
I connected the recovery machine to the recovery tank. I opened the tank’s valve and turned on the machine to make sure it was working. The machine’s manual had clear instructions, which I followed closely.
Step 7: Start the Recovery Process
I turned on the recovery machine and opened the manifold’s low-pressure valve. The machine started pulling refrigerant out of the system. I watched the gauges—the pressure dropped as the refrigerant moved into the tank. It took about 20 minutes for my system to empty.
Step 8: Check for Completion
When the gauges showed zero pressure, I knew the system was empty. I closed the manifold valves and turned off the machine. I waited a few minutes to make sure no refrigerant was left.
Step 9: Disconnect and Store
I carefully disconnected the hoses, starting with the recovery machine. I capped the AC ports to keep dirt out. I closed the recovery tank’s valve and stored it upright in a cool, dry place. I returned the rental equipment the next day.
Step 10: Evacuate the System (Optional)
To prep for repairs, I used a vacuum pump to remove air and moisture from the system. I connected it to the manifold and ran it for 30 minutes. This step isn’t always needed, but it helps if you’re adding new refrigerant later.
Here’s a table summarizing the steps:
| Step | Action | Tools Needed |
|---|---|---|
| Get Certified | Park in a ventilated area, wear gear | Computer, $20 |
| Gather Tools | Rent or buy recovery gear | Recovery machine, gauges, tank |
| Set Up Safely | Attach hoses to the ports and machine | Gloves, glasses, mask |
| Locate Ports | Find low- and high-pressure ports | Car manual |
| Connect Gauges | Pull refrigerant into the tank | Manifold gauges, wrench |
| Set Up Machine | Attach hoses to the ports and the machine | Recovery machine, tank |
| Start Recovery | Remove hoses, store the tank safely | Recovery machine, gauges |
| Check Completion | Ensure zero pressure | Manifold gauges |
| Disconnect/Store | Remove hoses, and store the tank safely | Wrench, storage area |
| Evacuate System | Remove air/moisture (optional) | Vacuum pump |
This process worked like a charm for me, and my AC was ready for repairs.
Safety Tips for Handling Refrigerant
Working with refrigerant can be risky, so I took precautions. Here’s what kept me safe:
- Wear Protective Gear: I wore gloves, safety glasses, and a mask to avoid frostbite or breathing fumes.
- Work in a Ventilated Area: I opened my garage door to let fresh air in. This prevented fumes from building up.
- Avoid Sparks: Refrigerants like R-1234yf are flammable. I kept flames and cigarettes away.
- Handle Hoses Carefully: I checked for leaks and tightened connections to prevent accidental releases.
- Store Properly: I kept the recovery tank upright and away from heat sources.
These steps made sure I stayed safe and followed EPA rules.
DIY vs. Professional Refrigerant Removal
I debated whether to do this myself or hire a pro. Here’s how I weighed it:
-
DIY Removal:
- Pros: Saves money. I spent $130 on rentals and certification versus $200 for a shop. It was empowering to learn.
- Cons: Takes time and effort. I spent a weekend on it, and you need to be precise to avoid mistakes.
-
Professional Removal:
- Pros: Quick and hassle-free. A shop can do it in an hour with pro-grade equipment.
- Cons: Costs $100-$300, depending on the shop. It adds up if you’re already fixing other AC parts.
I went DIY because I love tinkering and wanted to save cash. If you’re not comfortable or don’t have time, a mechanic is the way to go.
Cost of Removing Refrigerant
Cost was a big factor for me. Here’s what I spent and what to expect in the U.S.:
- Certification: $20 for the EPA Section 609 course.
- Recovery Machine Rental: $50-$100 per day. I paid $50.
- Manifold Gauge Set: $60-$150. Mine was $60.
- Recovery Tank: Often included with rental, or $50-$100 to buy.
- Vacuum Pump (Optional): $100-$300 to buy, or borrow like I did.
- Professional Service: $100-$300 if you go to a shop.
My total was $130 for DIY, compared to $200 at a shop. Prices vary by region, so get quotes if you’re going pro.
What to Do with the Recovered Refrigerant
After removing the refrigerant, I had a tank of R-134a. You can’t just toss it—it’s hazardous waste. I took mine to an auto shop that recycles refrigerants. They tested it for purity and either reused or disposed of it properly. Some shops charge $10-$20, but mine did it for free since I was a regular.
You can also sell clean refrigerant to a certified reclaimer, but I didn’t bother since it was a small amount. Never vent it or dump it—that’s illegal and bad for the planet.
Common Mistakes to Avoid
I made a few slip-ups at first, so here’s what to watch out for:
- Skipping Certification: I almost started without it, but the EPA rules are strict. Get certified to stay legal.
- Loose Connections: A loose hose can leak refrigerant. I double-checked all fittings.
- Working in a Closed Space: I started in a shut garage—bad idea. Open doors for ventilation.
- Mixing Refrigerants: Using the wrong type (like R-134a in an R-1234yf system) can ruin your AC. I checked my manual.
- Ignoring Safety Gear: I skipped gloves once and got a cold burn. Always wear protection.
Avoiding these kept my project safe and smooth.
Environmental Impact of Proper Refrigerant Removal
I felt good knowing I handled the refrigerant responsibly. Releasing R-134a or R-1234yf into the air harms the ozone layer and traps heat, worsening climate change. By recovering it, I prevented that damage. Recycling the refrigerant also reduces the need for new production, which saves energy and resources. It’s a small way to help the planet while fixing your car.
After Removing Refrigerant: Next Steps
Once the refrigerant was out, I replaced my bad compressor. I used a vacuum pump to clear the system, then added new refrigerant (with a pro’s help since I wasn’t ready to recharge myself). Check for leaks before recharging—my system had a small hose leak I fixed for $20. If you’re not sure what’s next, a mechanic can guide you.
Why I Loved Fixing My AC
Removing the refrigerant and fixing my AC was so rewarding. My sedan went from a sauna to an icebox, and I saved hundreds by doing it myself. I learned a new skill, stayed legal, and helped the environment. Every time I crank the AC, I smile knowing I made it happen. It’s a job worth tackling if you’re up for it.
Wrapping It Up
So, how do you remove refrigerant from a car’s AC? It’s a careful process, but doable with the right tools and know-how. I went from clueless to confident by getting certified, using a recovery machine, and following safety rules. Whether you’re fixing a leak or swapping parts, removing refrigerant the right way saves your car, your wallet, and the planet. So, grab your gear, stay safe, and get that AC chilling again. You’ll love the cool breeze and the pride of doing it yourself!
FAQs
Do I need certification to remove refrigerant from my car’s AC?
Yes, in the U.S., you need an EPA Section 609 certification. I got mine online for $20. It’s the law, even for DIY.
How much does it cost to remove refrigerant from a car’s AC?
DIY costs $100-$300 for rentals and tools. I spent $130. A shop charges $100-$300, depending on location.
Is it safe to remove refrigerant myself?
Yes, if you’re careful. I wore gloves, glasses, and worked in a ventilated area. Follow safety rules to avoid burns or fumes.
What do I do with the refrigerant after removing it?
Take it to a shop or recycler for recycling. I dropped mine off for free at a local auto shop. Don’t vent it—it’s illegal.
Can I reuse the refrigerant I removed?
Maybe, if it’s clean. A shop can test it. I recycled mine since recharging is tricky and needs professional equipment.
Can I remove refrigerant without a recovery machine?
No. Legally, you need EPA-approved recovery equipment to capture the refrigerant into a sealed tank; simply cracking a fitting and letting it hiss out is venting, which is illegal under Section 609 and can also spray oily refrigerant residue into the engine bay. If you don’t want to buy or rent a recovery machine yourself, most auto parts stores that sell recharge kits will also do a quick recovery for a small fee, or a mechanic can handle it in under an hour.
Products related to this article
Sponsored / affiliate links. As an Amazon Associate I earn from qualifying purchases. I may earn additional commission from eligible campaigns.