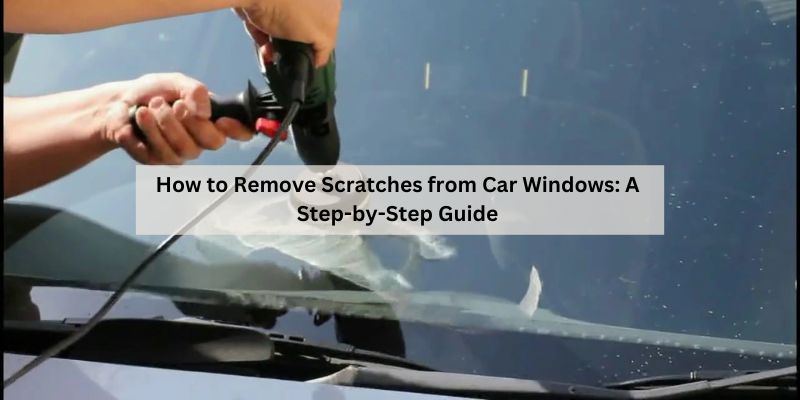
How to Remove Scratches from Car Windows: A Step-by-Step Guide
Most car window scratches can be removed at home without replacing the glass — surface scratches disappear with toothpaste or baking soda in under 10 minutes, while deeper scratches need cerium oxide and 20–30 minutes of polishing. The key is the fingernail test: run your nail across the scratch — if it glides over, it’s a surface scratch you can fix; if it catches, it’s deeper and needs cerium oxide or a professional. This guide covers the full 6-step process, when to call a glass shop, and how to prevent new scratches.
Quick Answer
To remove scratches from car windows: for surface scratches (nail glides over), apply non-gel toothpaste or baking soda paste with a microfiber cloth in circular motions — rinse and repeat. For deeper scratches (nail catches), mix cerium oxide powder with water into a slurry, apply to a polishing pad, and polish in circular motions keeping the glass wet. Both methods work on side windows, rear glass, and windshields outside the driver’s line of sight.
Understanding Car Window Scratches
Car windows are made of tempered glass (side and rear windows) or laminated glass (windshields) — tough but not scratch-proof. Scratches come from grit on wiper blades, improper cleaning with rough materials, road debris, or tree branches. There are two main types: surface scratches that only affect the top glass layer, and deep scratches that go further into the glass. The fingernail test tells you which you’re dealing with — if your nail glides over it, it’s a surface scratch; if it catches, it’s deeper and needs more aggressive treatment.
Why Fixing Scratches Is Worth It
Scratches disrupt visibility — sunlight or oncoming headlights scatter through them, creating glare exactly where you’re trying to see. They can also weaken glass over time, particularly on windshields where small scratches can spread into cracks after temperature changes. Fixing a surface scratch with toothpaste costs nothing. Cerium oxide runs about $15 and handles most deeper scratches. Compare that to windshield replacement at $200–$1,000 — it’s worth trying the DIY approach first for any scratch that doesn’t fully catch your fingernail. A clear, clean window also means better visibility in rain and fog.
What You’ll Need to Remove Scratches
| Item | Purpose | Where to Find It |
|---|---|---|
| Microfiber cloths | Cleans glass without scratching — use multiple, never reuse dirty ones | Auto stores, online |
| Glass cleaner (ammonia-free) | Removes dirt before polishing — ammonia damages tinted windows | Auto stores |
| Cerium oxide powder | Professional-grade glass polishing compound — works on deeper scratches | Auto stores, online (~$15) |
| Non-gel toothpaste or baking soda | Mild abrasive for surface scratches only | Supermarket |
| Spray bottle with water | Keeps area wet during cerium oxide polishing — critical step | Hardware stores |
| Polishing pad or soft cloth | Applies polishing compound without adding scratches | Auto stores |
| Electric buffer (optional) | Reduces polishing time significantly for deeper scratches | Auto stores |
| Masking tape | Protects rubber seals and paint from cerium oxide | Hardware stores |
Step 1: Clean the Window Thoroughly
Spray ammonia-free glass cleaner on the window and wipe with a microfiber cloth, working in small sections to avoid streaks. For windshields, clean both inside and out — what looks like a bad scratch from inside is sometimes just a smear on the interior surface. Dry with a fresh microfiber. Dirt left on the glass will get ground into the scratch during polishing, making it worse.
Step 2: Assess the Scratch
Run your fingernail firmly across the scratch at a right angle. If it glides smoothly: surface scratch — toothpaste or baking soda will fix it. If it catches slightly: medium scratch — cerium oxide needed. If it catches hard and is clearly visible from both sides of the glass: deep scratch — professional tools required, or replacement may be necessary. Also note the location: scratches in the driver’s direct line of sight on the windshield should be handled by a pro — even light polishing in that zone can create optical distortion that’s worse than the scratch. Side and rear windows have much more tolerance for DIY work.
Step 3: Try a Household Remedy for Light Scratches
For surface scratches, baking soda paste and non-gel toothpaste both work as mild abrasives. Baking soda method: mix 2 parts baking soda with 1 part water to form a paste. Apply to the scratch with a microfiber cloth and rub in circular motions for 30 seconds. Rinse and inspect. Repeat up to 3 times — most surface scratches from wiper blades or light grit disappear in 1–2 rounds. Toothpaste method: dab a small amount directly on the scratch and rub with a soft cloth for 60 seconds. Both methods work by very gently abrading the glass surface level. If the scratch persists after 2–3 attempts, move to cerium oxide — don’t keep rubbing with household products hoping for a different result.
Step 4: Use Cerium Oxide for Deeper Scratches
Mix cerium oxide powder with water in a spray bottle — approximately 1 tablespoon powder to 2 tablespoons water — and shake well. Before starting, tape off the surrounding paint, rubber trim, and seals with masking tape. Cerium oxide dries white and is difficult to remove from trim. Apply the slurry to a polishing pad and work over the scratch in circular motions, keeping the area wet with the spray bottle throughout. Dry polishing burns the glass surface and can cause permanent hazing. Polish for 2–3 minutes, wipe clean, and inspect. For stubborn scratches, an electric buffer on low speed cuts work time significantly and produces more even results. Repeat cycles of polish → clean → inspect until the scratch is gone or reduced to acceptable level — typically 2–4 rounds for moderate scratches.
Step 5: Clean and Inspect the Window
After polishing, spray glass cleaner and wipe with a fresh microfiber to remove all cerium oxide residue — dried compound hazes the glass. Inspect under multiple light sources: sunlight from different angles, shade, and a flashlight held at a low angle to the glass. A scratch can appear gone under one light but still be visible under another. Do the fingernail test again — if it still catches, do another polish round. If the scratch is visually gone but the glass feels slightly rough, one final light polish round will smooth it. If after 4–5 rounds the scratch is still clearly visible and the fingernail catches firmly, it’s beyond DIY range.
Step 6: Protect the Window
Apply a glass sealant after removing the scratch — it adds a hydrophobic layer that repels water and grime and makes the glass more resistant to future scratches from wiper blades. Also inspect your wiper blades: worn blades with exposed metal or hardened rubber are the most common source of windshield scratches. Replace them every 6–12 months or when they start leaving streaks.
Top Pick: Cerium Oxide Glass Scratch Remover

Cerium Oxide Glass Polishing Powder
Professional-grade cerium oxide for removing scratches, water spots, and hazing from car windows. Mix with water to form a slurry — works on windshields, side glass, and rear windows.
- Best for: Deeper scratches that toothpaste or baking soda can’t fix
- Why we picked it: Same compound used by professional glass shops — effective on most DIY-range scratches
- Main drawback: Requires masking tape prep to protect trim — messy if you skip it
More glass scratch repair tools
 Option 1 Microfiber Glass Polishing Pads
|
 Option 2 Glass Sealant & Rain Repellent
|
 Option 3 Variable Speed Electric Buffer
|
As an Amazon Associate we earn from qualifying purchases.
When to Call a Professional
Call a glass shop when the scratch catches your fingernail hard, is in the driver’s direct line of sight on the windshield, or is visible from the inside of the glass. Professional glass shops have diamond-tipped polishers and optical-grade compounds that handle damage beyond DIY range. Most glass shops charge $50–$100 for scratch polishing — significantly less than windshield replacement at $200–$1,000. Most shops offer free inspections, so if you’re unsure whether it’s fixable, go in for an assessment before attempting DIY on a critical windshield scratch.

Common Causes of Car Window Scratches
- Wiper blades: Worn blades with exposed metal or hardened rubber drag grit across the glass with every wipe. Replace every 6–12 months.
- Improper cleaning: Paper towels, rough cloths, or abrasive household cleaners mark glass. Always use microfiber and automotive glass cleaner.
- Road debris: Sand and small stones kicked up at highway speed can nick side windows and windshields — most common on the leading edge of the windshield.
- Tree branches and bushes: Parking near overgrown vegetation scratches side windows. The scratches are typically light enough to fix with toothpaste.
Maintenance Tips to Prevent Scratches
- Use microfiber cloths exclusively for all glass cleaning — they won’t scratch even under pressure.
- Clean wiper blades monthly: Wipe with a damp microfiber to remove trapped grit. Replace blades every 6–12 months.
- Apply glass sealant quarterly: A hydrophobic coating reduces friction from wiper blades and makes glass easier to clean without scrubbing.
- Use ammonia-free glass cleaner — ammonia degrades window tint film over time, eventually causing peeling that creates a rough surface that scratches the glass.
- Park away from construction zones and heavy vegetation when possible.
Common Mistakes to Avoid
- Using steel wool or abrasive scrub pads: These create hundreds of new scratches — worse than the original.
- Skipping the cleaning step: Dirt ground into the glass during polishing deepens the scratch.
- Over-polishing with cerium oxide: Too many rounds without inspecting creates a hazy spot. Polish → inspect → repeat as needed, not all at once.
- Polishing dry: Keep the glass wet with your spray bottle throughout — dry cerium oxide burns the glass surface.
- DIYing windshield scratches in the driver’s eye line: Even light polishing can create subtle optical distortion in that zone that’s more dangerous than the scratch.
FAQs
Can all scratches on car windows be fixed at home?
Surface scratches (where your fingernail glides over) can almost always be fixed at home with toothpaste or cerium oxide. Deep scratches that firmly catch your fingernail, or any scratch in the windshield’s driver sight line, need professional tools or glass replacement. When in doubt, get a free inspection at a glass shop before attempting DIY on a critical area.
Is toothpaste safe for car windows?
Yes — non-gel toothpaste is safe for light surface scratches. It works as a very mild abrasive that smooths the top glass layer. Do not use gel toothpaste (not abrasive enough) or whitening toothpaste with large abrasive particles (too aggressive). Apply with a microfiber cloth only.
How long does it take to remove a scratch?
Surface scratches with toothpaste or baking soda: 5–10 minutes including cleaning and inspection. Deeper scratches with cerium oxide: 20–30 minutes per session including masking, polishing, cleaning, and inspection. Multiple rounds may be needed for stubborn scratches.
Will fixing a scratch affect my windshield’s strength?
Light surface polishing does not weaken the glass. However, aggressive over-polishing of deep scratches removes more glass material and can thin the glass locally. Avoid excessive polishing on windshields — if a scratch needs more than 4–5 rounds of cerium oxide, it’s a professional job.
Can I use cerium oxide on tinted windows?
Yes, carefully. Tint film is on the inside of the glass, so external polishing on the outside surface won’t touch it. If the scratch is on the inside of a tinted window, do not polish that surface — cerium oxide will damage or remove the tint film. Always test on a small inconspicuous area first regardless.
How do I prevent scratches on my car windows?
Replace wiper blades every 6–12 months and wipe the blades monthly to remove grit. Use microfiber cloths and ammonia-free glass cleaner for all window cleaning. Apply a glass sealant every 3–6 months. Avoid parking near construction zones or overgrown vegetation. See our full guide on car scratch prevention for paint and glass maintenance tips.