How to Remove Scratches From Car Paint: Fix by Scratch Depth
To remove scratches from car paint, first find out how deep they go. A scratch your fingernail glides over lives in the clear coat and often polishes out by hand. One that catches your nail has reached the color layer and needs touch-up paint. Bare metal or primer needs repair soon, before rust starts. Below: a depth-by-depth fix table, product limits from the makers, and when to stop.
How to Identify Your Scratch Type
Best Hand-Applied Scratch Remover Pick | |
 |
Turtle Wax Scratch Repair & Renew, 7 oz. Price at last check: $11.03 A hand-friendly polish for the clear coat scratches your fingernail glides over, with machine directions on the label if you move up to a dual action polisher.
|
As an Amazon Associate we earn from qualifying purchases. This is a spec-based pick, not a hands-on test. | |
Factory paint is a stack: primer, a color basecoat, then clear coat on top. The clear layer is thin. DeFelsko, a paint thickness gauge maker, puts it at 1.5 to 2.0 mils (35 to 50 microns) on a typical vehicle, inside a total paint film of roughly 4 to 7 mils. Every repair choice depends on how many of those layers the scratch cuts through.
The Fingernail Test
Wash and dry the area first, because dirt can mimic a scratch. Drag a fingernail across the scratch, at a right angle to it, with light pressure. If the nail glides over without catching, the damage is almost certainly confined to the clear coat. If it catches, assume the scratch has gone deeper. Turtle Wax says the same about its own polish on its product page: if the scratch catches your nail, it may be too deep for repair.
The test has a blind spot. A scratch can be shallow in the middle yet catch at a rough edge, so judge by what you see as well: a gray, white or silver line in the bottom of the groove means the color layer is gone.
Scratch Severity Levels
Use this table to match what you see and feel to a fix. The product column lists makers whose own pages say what each product is meant for. Pairing by depth is our editorial reading of those pages, not a lab test.
| Scratch depth | What you see and feel | DIY fix that can work | Products to look at |
|---|---|---|---|
| 1. Clear coat only (swirls, light scuffs) | Nail glides over it. Light, hazy lines, mostly visible in sun. | Hand polish, then protect with wax or sealant. | Turtle Wax Scratch Repair & Renew; Meguiar’s Ultimate Compound (listed as safe on glossy paints and clear coats) |
| 2. Deeper clear coat | Nail just barely senses it. Lines look white or hazy. | Dual action polisher with a cutting compound, then a finishing polish. Can soften it, may not erase it. | Chemical Guys VSS (maker: light to moderate scratches and 2500-grit sanding marks); 3M Perfect-It EX AC (maker: P1200 and finer scratches) |
| 3. Through the color layer | Nail catches clearly. Color of the scratch differs from the paint. | Touch-up paint in your exact color code, clear coat over it, then gentle polishing around the edges. | OEM-code touch-up pen or bottle (see the paint code section) |
| 4. Down to primer | Gray, white or tan base shows in the groove. | Touch-up primer, color and clear in thin layers, or a shop repair. Compound cannot add paint back. | Touch-up kit that includes primer, or a body shop |
| 5. Bare metal or rust | Silver steel or dull aluminum, possible orange rust. | Seal it quickly. Anything larger than a chip belongs in a shop. | Body shop; for early rust see how to stop rust on a car from spreading |
Not sure whether it is a scratch at all? Paint transfer from a bumper or a scuff mark can look just like one, and this scuff versus scratch guide shows how to tell them apart. For levels 4 and 5, our deep scratch depth and cost guide goes into sanding and shop pricing.
What Polish and Compound Can and Cannot Fix
Polish and compound are abrasives. They shave a microscopic layer off the clear coat until the surface is level with the bottom of the scratch. That works only if the bottom of the scratch is still clear coat.
Myth: scratch removers fill the scratch. Chemical Guys describes VSS as restoring the finish without filling in or covering up swirls, scratches or defects, which is the abrasive method at work. Some products do add a sealing resin on top; Turtle Wax lists protective resins that seal in the repair. A sealed scratch can look fixed until the coating wears off, which is why the nail test matters more than how it looks right after polishing.
The clear coat budget is small. DeFelsko reports that most automotive manufacturers recommend removing a maximum of about 0.3 mils (8 microns) of clear coat to avoid UV damage to the layers underneath. Against a 35 to 50 micron clear coat, 8 microns is roughly one sixth to one quarter of the layer for the whole life of the paint. So polishing is a limited resource: use the mildest product that works, and stop when the scratch stops improving.
How to Remove Scratches from Your Car (Step-by-Step)
This works for level 1 scratches, and for level 2 if you are patient. Work in shade on cool paint.
How to Remove Scratches from Car Paint (Clear Coat Method)
- Wash and dry the panel. Grit left on the paint turns into new scratches under a polishing pad.
- Run the fingernail test. Stop here and skip to touch-up paint if the nail catches.
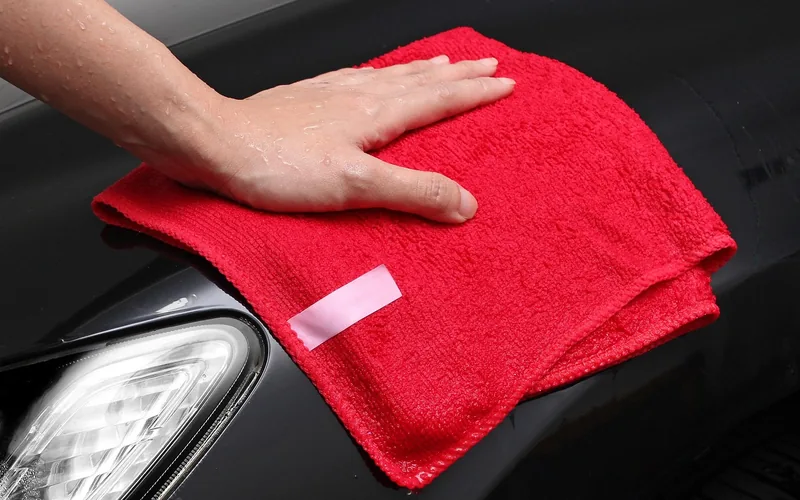
- Put a dime-size amount of polish on a microfiber towel or foam pad. This is the amount Turtle Wax directs for hand use.
- Work over the scratch in circular motions with light to moderate pressure. Keep the area small, about a two-foot square.
- Wipe off the residue and inspect in good light. Do not judge it while the polish is still wet on the paint.
- Repeat only if the scratch is visibly improving. After a few rounds with no change, the scratch is deeper than the product can reach.
- Protect the area with wax or sealant. Polishing leaves bare clear coat.
How to Buff Out Scratches on a Car
A dual action (DA) polisher moves the pad in an orbit as well as a spin, which makes it far more forgiving than a rotary tool. The makers’ own directions are consistent about the technique. Chemical Guys directs 4 to 5 drops on the pad and moderate pressure until the product turns clear on a DA, and only the weight of the machine on a rotary. Turtle Wax says to start at low speed and work up. 3M’s data sheet for Perfect-It EX AC rubbing compound calls for 1200 to 2000 rpm with a wool or foam compounding pad; see the 3M technical data sheet for the full limits. That sheet is written for professionals; start with a DA and a finishing polish.
Machine polisher safety:
- Wear eye protection. Compound can sling from a spinning pad.
- Keep the pad flat on the panel. A tilted pad concentrates pressure on one edge and cuts unevenly.
- Stay off sharp body lines, panel edges and door edges. Paint is thinnest there and burns through fastest, so work these by hand if at all.
- Do not hold a rotary polisher in one spot; keep it moving and the cord clear of the paint.
- Stop and check the surface often. Paint that is hot to the touch needs a break.
- Do not use compound on matte or satin paint, wraps, or paint protection film. Turtle Wax lists its polish for glossy paint surfaces only; see caring for matte paint for the right approach there.
For a full walkthrough of machine technique, read how to use a car polish machine, or how to cut and buff a car for the compound and finishing polish sequence. If the marks you see are fine circular hazes rather than single scratches, those are swirls, covered in this swirl mark guide, and very fine hairline marks are covered in our micro scratch guide.
Using Toothpaste and Other Household Fixes
Skip them. Toothpaste, baking soda pastes, and kitchen abrasives are not made for automotive clear coat, and their grit is not controlled the way a compound’s is. None of the maker pages quoted in this article list toothpaste as a safe use. At best it does nothing; at worst it leaves a cloudy patch you then need a compound to fix. Abrasive pads and sandpaper cut far faster than any polish.
Also match the product to the surface. Compounds are for glossy paint. For unpainted or textured plastic bumpers use the bumper scratch guide, and for glass see how to remove scratches from car windows. Polishing the wrong surface can leave it hazy and does not fix the scratch.
Trying Scratch Removal Kits
A kit bundles a compound, pads and sometimes touch-up paint. What matters is what is inside and what the label says it removes. Three examples, using only what the makers state:
- Turtle Wax Scratch Repair & Renew: a hand polish with machine directions; fine for level 1.
- Chemical Guys VSS: starts as a cutting compound and finishes like a fine polish; designed for a dual action or rotary polisher.
- 3M Perfect-It EX AC Rubbing Compound: a professional rubbing compound for sanding scratches and tough clear coats; machine use at a controlled speed.
Want a wider list of options? Our best scratch remover for car paint roundup covers more products. Whatever you pick, a kit cannot remove a scratch that is deeper than the clear coat.
Applying Touch-up Paint
For level 3 and 4 scratches, you add paint instead of removing it. Touch-up paint has to match your car’s code exactly. On most vehicles the code is on a sticker in the driver’s door jamb, labeled paint, color or exterior; on some it is under the hood, in the glove box or in the trunk. Because layouts vary by brand, confirm the location in your owner’s manual, then use our paint code lookup guide for brand-specific locations.
- Clean the scratch with soap and water, then dry it. Remove wax or sealant from the spot.
- Test the color on a hidden spot and let it dry.
- Apply paint in thin layers with a fine brush or pen tip, letting each layer dry. Thick globs do not level out.
- Add clear coat once the color is dry, if your kit includes it.
- Wait the cure time on the label before any polishing, then polish gently around the repair.
Step-by-step help, including blob control, is in how to apply touch-up paint to car scratches. Do not sand scratches to prep them unless you are ready to repaint. Refinish paint maker PPG, for example, specifies that shops lightly scuff the edge of a primer-sealer spot repair with P800 to P1200 paper; that is a repair procedure with its own materials, not a way to remove scratches.
When to Stop and Call a Body Shop
- The scratch exposes bare metal and you see rust or cannot seal it right away.
- The scratch runs across a body line or panel edge, where paint is thin.
- It is wider than a pen line, or several panels are damaged.
- The paint is cracked, bubbling or peeling, which means the clear coat is failing and not just scratched.
- Your first polishing attempt made the area hazy or dull instead of better.
Polishing and Waxing, and Preventing Future Scratches
After any polishing, apply wax or a sealant so the exposed clear coat is not left bare. Most new scratches come from wash habits, not accidents: gritty towels, dry wiping dust, and automatic brushes.
- Rinse the car well before touching it, then wash with a clean mitt and wash soap.
- Use a different microfiber towel for each job and wash towels apart from other laundry.
- Never wipe a dusty car dry. Rinse it or use a lubricating spray.
- Park away from shopping carts and tight garage walls, and avoid rubbing bushes along the driveway.
Frequently Asked Questions
How can I remove scratches from my car at home?
Wash the car, do the fingernail test, then polish the scratch by hand with a compound made for clear coat. If your nail glides over the scratch, polish may work. If it catches, you need touch-up paint in your exact paint code, or a shop repair.
What is the best scratch remover for cars?
It depends on scratch depth. For light clear coat scratches, a hand-applied polish such as Turtle Wax Scratch Repair and Renew works within its limits. For light to moderate scratches, makers such as Chemical Guys and 3M offer compounds designed for a polisher. Nothing in a bottle removes a scratch that reaches primer or metal.
Can all car scratches be fixed with polish?
No. Polish and compound remove clear coat to level the surface, so they only work on scratches that stay in the clear coat. A scratch that catches your fingernail, shows color, primer or metal needs paint added back instead.
How do I know if a car scratch needs professional repair?
Get a professional repair if bare metal or rust shows, the scratch sits on an edge or body line, several panels are damaged, or the clear coat is peeling. A first polishing attempt that makes the area dull is another reason to stop.
What do car detailers use to remove scratches?
Detailers use a dual action or rotary polisher with a cutting compound and then a finishing polish, measuring paint thickness first when they can. Measuring matters because only a few microns of clear coat can be safely removed over the life of the paint.
Conclusion
To remove scratches from car paint, match the fix to the depth: polish for scratches your nail glides over, touch-up paint when it catches, and a shop when you see primer, metal or rust. Use the mildest product that works, keep the clear coat budget in mind, and protect the repair with wax.
Products related to this article
Sponsored / affiliate links. As an Amazon Associate I earn from qualifying purchases. I may earn additional commission from eligible campaigns.
 Car Scratch Remover for Vehicles, Car Paint Scratch Repair Kit for Light Scratches, Swirl Marks, Scuffs & Water Spots, Comes with Sponge, Safe for All Paint Colors, 100g, 1 Pack
 Car Scratch Remover,Car Paint Scratch Repair-Erase Car Scratches Scratch Repair Wax with Wipe and Sponge for Deep Scratches (5PC)