How to Repair Sun Damaged Car Paint
Hey there! If you’re reading this, chances are your car’s paint is looking a bit worse for wear, maybe a little faded or chalky from all that time under the scorching sun. I get it—living in the USA, where summer rays can be relentless, our cars take a beating. I’ve been there, staring at my once-shiny ride, wondering how to bring back that showroom glow. Sun damage is a common issue, but the good news is, you can fix it! In this article, I’m sharing everything I’ve learned from my own experience and research about repairing sun-damaged car paint.
Whether you’re a DIY enthusiast or just want to know what to expect when you take your car to a pro, I’ve got you covered with practical tips, step-by-step advice, and some insider tricks. Let’s dive in and get your car looking vibrant again!
Understanding Sun Damage to Car Paint
Let’s start with the basics. Sun damage happens when ultraviolet (UV) rays from the sun break down the chemicals in your car’s paint. I first noticed it on my old sedan—faded patches on the hood and a dull, almost powdery look on the roof. It’s not just about looks; sun damage weakens the paint’s protective layer, leaving your car vulnerable to scratches, rust, and further deterioration.
UV rays attack the clear coat, which is the glossy top layer of your car’s paint. Over time, this causes oxidation, making the paint look faded or chalky. You might also see peeling or cracking in severe cases. Hot climates, like those in Arizona or Florida, speed up this process. Parking in the open without shade, like I used to do, doesn’t help either. Understanding this helped me realize why my car’s vibrant red turned into a washed-out pinkish hue.
Assessing the Damage
Before you jump into fixing the paint, you need to know how bad the damage is. I learned this the hard way when I tried polishing my car without checking the extent of the problem. Walk around your car in good lighting. Look for signs like faded color, a chalky texture, or peeling clear coat. Run your hand over the surface—if it feels rough or powdery, that’s oxidation at work.
Here’s a quick way to assess the damage:
- Mild Damage: Slight fading or dullness, but the paint still feels smooth.
- Moderate Damage: Noticeable fading, chalky texture, or minor clear coat peeling.
- Severe Damage: Deep fading, significant peeling, or exposed primer/undercoat.
For mild cases, you can often fix it yourself with some elbow grease. Moderate damage might need more intensive work, while severe cases could require professional help. When I checked my car, it was moderate—faded but not peeling—so I decided to tackle it myself.
Tools and Materials You’ll Need
Repairing sun-damaged paint requires the right tools. I’ve made the mistake of using cheap products, and trust me, it’s not worth it. Quality materials make a huge difference. Here’s what I recommend based on my experience:
| Item | Purpose | Recommended Brands |
|---|---|---|
| Car wash soap | Clean the car before repair | Meguiar’s, Chemical Guys |
| Microfiber towels | Avoid scratches while cleaning/drying | The Rag Company, Viking |
| Clay bar kit | Remove contaminants from paint | Mothers, Griot’s Garage |
| Polishing compound | Remove oxidation and restore shine | 3M, Meguiar’s M105 |
| Wax or sealant | Protect the paint after repair | Turtle Wax, Collinite 845 |
| Orbital polisher (optional) | Easier polishing for larger areas | Porter-Cable, Griot’s Garage |
| Applicator pads | Apply polish or wax evenly | Lake Country, Chemical Guys |
| Car cover or tarp | Protect the car during the process | Covercraft, OxGord |
You’ll also need a bucket, water, and some patience. If you’re on a budget, you can skip the orbital polisher and do it by hand, like I did for my first attempt. Just be ready for a workout!
Step-by-Step Guide to Repairing Sun-Damaged Paint
Now, let’s get to the fun part—fixing the damage! I’ll walk you through the process I followed to restore my car’s paint. It’s straightforward, but take your time to do it right.
Step 1: Wash the Car Thoroughly
Start with a clean slate. Dirt or grime can scratch the paint during polishing, so washing is crucial. I used a two-bucket method—one with car wash soap and one with clean water—to rinse my sponge. Wash from top to bottom, and don’t skip the wheels or crevices. Dry with microfiber towels to avoid water spots. My car looked better already, but the faded spots were still there.
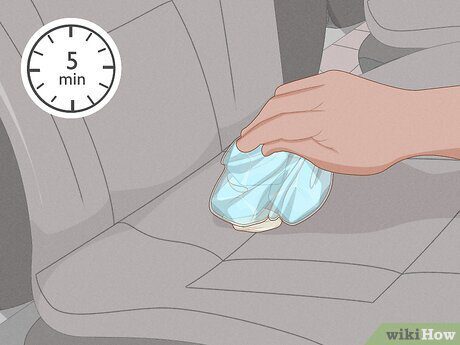
Step 2: Clay Bar the Surface
This was a game-changer for me. A clay bar removes tiny contaminants that washing misses, like tree sap or road tar. Spray a lubricant (usually comes with the clay bar kit) on a small section of the car. Rub the clay bar gently over the surface. It feels weird at first, like kneading dough, but you’ll feel the paint get smoother. Fold the clay to expose a clean side as it picks up dirt. I did this on my hood, and it felt like glass afterward!
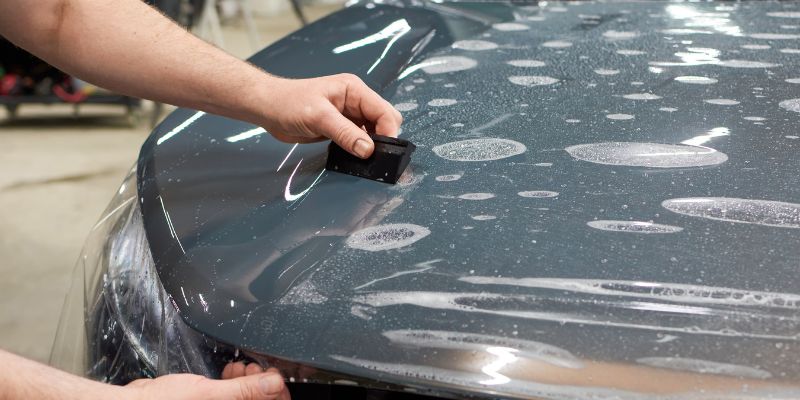
Step 3: Polish to Remove Oxidation
Polishing is where the magic happens. Apply a small amount of polishing compound to an applicator pad or your orbital polisher. Work in small sections (about 2×2 feet). Rub the compound in circular motions with moderate pressure. I did this by hand, and my arms were sore, but it was worth it. The faded, chalky look started to disappear, and the color came back. Wipe off the residue with a microfiber towel. If the damage is deep, you might need a more aggressive compound, but start with a mild one to be safe.
Step 4: Wax or Seal for Protection
After polishing, your paint is vulnerable without a protective layer. I learned this when my car started fading again a few months later. Apply a wax or sealant with a clean applicator pad. Spread it thinly and evenly, let it haze (usually 5-10 minutes), then buff it off with a microfiber towel. Wax gives a warm glow, while sealants last longer. I used a sealant, and my car stayed shiny for months.
Step 5: Maintain the Finish
To keep your car looking great, maintenance is key. I started parking in the shade whenever possible and used a car cover during long trips. Wash your car every two weeks, and reapply wax or sealant every 3-4 months. This prevents future sun damage and keeps the paint vibrant.
When to Seek Professional Help
Sometimes, the damage is too severe for a DIY fix. If you see peeling clear coat or exposed metal, it’s time to call a pro. I took my car to a shop when I noticed some deep scratches after my DIY attempt. Professionals have tools like dual-action polishers and can repaint if needed. Expect to pay $200-$1,000 depending on the damage and your location. It’s pricier, but it can save your car from rust or further damage.
Tips to Prevent Future Sun Damage
Prevention is easier than repair, trust me. Here are some tips I wish I knew earlier:
- Park in the Shade: Use a garage, carport, or tree cover. I started parking under a tree, and it made a huge difference.
- Use a Car Cover: A good cover blocks UV rays. I got a breathable one to avoid trapping moisture.
- Apply Ceramic Coating: This is a step up from wax. It’s pricier but lasts years. I haven’t tried it yet, but friends swear by it.
- Regular Washing: Dirt attracts heat, which worsens sun damage. Keep your car clean.
- Avoid Midday Sun: If you can, don’t leave your car in direct sunlight from 10 AM to 4 PM when UV rays are strongest.
Common Mistakes to Avoid
I made plenty of mistakes when I started. Don’t repeat them! Avoid using dish soap—it strips wax. Don’t skip the clay bar; it’s tempting, but contaminants will scratch your paint. Don’t over-polish, or you’ll thin the clear coat. And never work in direct sunlight—products dry too fast, leaving streaks. I learned these the hard way, so take it slow and follow the steps.
My Personal Experience
When I first noticed my car’s paint fading, I felt overwhelmed. It was my first car, and I wanted it to look good without breaking the bank. After researching and experimenting, I found that patience and the right products were key. The first time I polished my hood, I was amazed at how the color popped. It wasn’t perfect, but it felt like a win. Now, I enjoy the process—it’s like giving your car a spa day!
Conclusion
Repairing sun-damaged car paint is totally doable, whether you’re a beginner or a seasoned DIYer. With a little time, the right tools, and some care, you can bring back your car’s shine and protect it for the future. I’ve been there, frustrated by a faded finish, but seeing my car gleam again was so rewarding. Follow the steps I shared—wash, clay bar, polish, and protect—and your car will thank you. If the damage is too much, don’t hesitate to call a pro. Your car is more than just a ride; it’s a reflection of you. Keep it shining, and hit the road with pride!
FAQs
How Can I Tell If My Car’s Paint Is Sun-Damaged?
Look for fading, a chalky texture, or peeling clear coat. Run your hand over the surface—if it’s rough or powdery, that’s a sign of oxidation. I noticed this on my car’s hood first, where the red looked more like pink.
Can I Fix Sun-Damaged Paint Without Professional Help?
Yes, for mild to moderate damage! Wash, clay bar, polish, and wax as I described. Severe damage, like peeling or exposed metal, might need a pro. I fixed my moderately faded paint myself and saved a lot.
How Long Does It Take to Repair Sun-Damaged Paint?
For a DIY job, expect 4-6 hours for a whole car, depending on size and damage. I spent a Saturday afternoon on my sedan. Professionals might take a day or two for more extensive repairs.
How Often Should I Wax My Car to Prevent Sun Damage?
Wax every 3-4 months for solid protection. I use a sealant, which lasts a bit longer. Regular washing and parking in the shade help too.
Is Ceramic Coating Worth It for Sun Protection?
From what I’ve heard, yes! It’s more expensive (around $500-$2,000), but it lasts years and offers great UV protection. I’m saving up to try it on my car next.