How to Replace a Pinion Bearing on a Chevy Truck: Preload Guide
A whining or howling noise from the rear axle usually means the pinion bearing is on its way out, and Chevy truck owners often try to save money by tackling the repair themselves. The job looks straightforward until you get to the one step most tutorials gloss over, which is exactly where DIY attempts go wrong and expensive parts get damaged. This guide walks through replacing a pinion bearing on a Chevy truck from start to finish, including the preload method that determines whether the repair actually lasts.
Quick Answer
Remove the differential cover, pull the pinion shaft nut, press off the old bearing, and press on the new one. The critical step most guides skip: setting pinion bearing preload to 20–30 in-lbs of rolling torque on new bearings (8–11 in-lbs if reusing broken-in bearings) using either a crush sleeve or a shim/crush-sleeve-eliminator kit before final assembly.
Importance Of Pinion Bearings
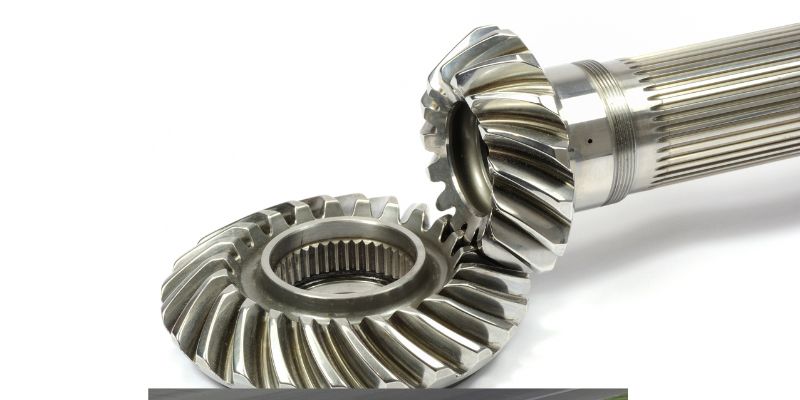
The pinion bearing is a critical component in the drivetrain of a Chevy truck. It plays a crucial role in ensuring smooth and efficient power transfer from the driveshaft to the rear axles. The importance of pinion bearings cannot be overstated, as they directly impact the vehicle’s performance, handling, and overall driving experience.
Significance In Vehicle Performance
The pinion bearing is essential for maintaining the proper alignment and rotation of the driveshaft and rear axles. When the pinion bearing is in optimal condition, it allows for seamless power transmission, ensuring that the rear wheels receive the necessary torque from the engine. A well-maintained pinion bearing contributes to improved fuel efficiency, reduced noise and vibration, and overall smooth operation of the vehicle.
Common Signs Of A Failing Pinion Bearing
- Excessive noise: A worn-out or failing pinion bearing often produces a distinct rumbling or whining noise, especially during acceleration or deceleration.
- Vibration: Unusual vibrations felt through the drivetrain, particularly at specific speeds, can indicate potential issues with the pinion bearing.
- Leakage of gear oil: If there is evidence of gear oil leaking from the rear differential, it could be a sign of a failing pinion seal or bearing.
- Uneven tire wear: A failing pinion bearing can lead to uneven tire wear, as it affects the proper distribution of power to the rear wheels.
Identifying and addressing these common signs of a failing pinion bearing is crucial to prevent further damage to the drivetrain and ensure the continued reliable performance of your Chevy truck.
Preparing For Pinion Bearing Replacement
Before jumping into the process of replacing the pinion bearing on your Chevy truck, it’s important to properly prepare. This includes gathering necessary tools and materials as well as taking precautions and safety measures to ensure a smooth and efficient replacement process.
Gathering Necessary Tools And Materials
When preparing to replace the pinion bearing on your Chevy truck, having the right tools and materials at your disposal can make the job much more manageable. Here’s a list of essential items you’ll need for a successful pinion bearing replacement:
- Jack and jack stands: To elevate the truck safely and securely.
- Socket set: Including various sizes to fit different nuts and bolts.
- Torque wrench: Essential for tightening bolts to the correct specifications.
- Bearing puller: For removing the old pinion bearing.
- New pinion bearing: Ensure you have the correct replacement part for your specific Chevy truck model.
- Gasket sealant: To reseal any components that require it.
- Protective gloves and eyewear: To keep your hands and eyes safe from potential hazards.
Precautions And Safety Measures
Working on any vehicle requires a keen focus on safety to prevent accidents and injuries. Here are some important precautions and safety measures to observe when replacing the pinion bearing on your Chevy truck:
- Secure the truck: Ensure the truck is on a level surface and securely supported by jack stands.
- Disconnect the battery: Prevent electrical mishaps by disconnecting the battery before starting work.
- Use proper lifting techniques: When using a jack to lift the truck, follow safe lifting practices to avoid injury.
- Follow manufacturer guidelines: Refer to the Chevy truck’s service manual for specific instructions and torque specifications.
- Handle tools with care: Use tools with caution and keep them in proper working condition to avoid accidents.
- Dispose of old parts: Properly dispose of old and worn-out parts according to local regulations and environmental guidelines.
Step-by-step Guide To Replace Pinion Bearing
When it comes to maintaining your Chevy truck, replacing the pinion bearing is a critical task to ensure smooth and efficient operation. The pinion bearing plays a crucial role in the drivetrain, and a worn-out or damaged one can lead to significant issues. In this step-by-step guide, we will walk you through the process of replacing the pinion bearing on your Chevy truck, ensuring that you can tackle this task with confidence and precision.
Removing The Differential Cover
The first step in replacing the pinion bearing is to remove the differential cover. To do this, follow these steps:
- Secure the vehicle on a level surface and engage the parking brake.
- Place a drain pan beneath the differential and remove the cover bolts using a suitable wrench or socket.
- Carefully pry off the cover, allowing the gear oil to drain into the pan.
Extracting The Old Pinion Bearing
Once the differential cover is removed, it’s time to extract the old pinion bearing. Follow these steps to complete this task:
- Locate the pinion gear and remove the pinion shaft nut using the appropriate tools.
- Use a bearing puller to extract the old pinion bearing from the pinion gear shaft, ensuring that no damage is caused to the surrounding components.
- Clean the pinion gear shaft thoroughly to prepare for the installation of the new bearing.
Installing The New Pinion Bearing
With the old pinion bearing removed, it’s time to install the new bearing. Follow these steps for a successful installation:
- Carefully place the new pinion bearing onto the pinion gear shaft, ensuring that it is seated properly and aligned with the gear.
- Use the appropriate tool to press the bearing onto the shaft, ensuring that it is fully seated and secure.
- Apply the recommended amount of gear oil to the bearing to ensure proper lubrication.
Setting Pinion Bearing Preload: Crush Sleeve vs. Shim Method
This is the step most guides skip, and it’s the difference between a repair that lasts and one that howls within a few hundred miles. Preload is the rolling resistance on the pinion bearings before the ring gear is installed — too loose and the bearings shift under load, too tight and they overheat and fail early.
- Crush sleeve method (original equipment): Tighten the pinion nut gradually, checking rolling torque with an in-lb torque wrench after each small turn. Target 20–30 in-lbs of rolling torque for new bearings, or 8–11 in-lbs if you’re reusing broken-in bearings. The sleeve itself crushes gradually as you tighten — it takes roughly 300–400 ft-lbs of force to fully crush, and once it’s crushed too far, you need a new sleeve. There’s no fixed torque spec on the nut itself; you’re tightening to a preload reading, not a torque number.
- Shim / crush-sleeve-eliminator method: Install the spacer and shims, torque the pinion nut to 125 ft-lbs, then check rolling torque. If preload is off, remove the nut, adjust shim thickness in roughly 0.002-inch increments, and retorque to 125 ft-lbs again until the rolling torque lands in the 20–30 in-lb range. This method is more forgivable than a crush sleeve since you can readjust without buying a new sleeve.
Reassembling The Differential Components
Once preload is confirmed, it’s time to reassemble the differential components. Follow these steps to complete the process:
- Confirm the pinion shaft nut is torqued to the correct preload reading (not just “manufacturer’s specifications” — see the preload section above).
- Thoroughly clean the differential cover and apply a new gasket or sealant to ensure a proper seal.
- Carefully reattach the differential cover, ensuring that it is securely in place and tightened to the appropriate torque specifications.
Testing And Troubleshooting
The final stage in the process of replacing the pinion bearing on your Chevy truck is testing and troubleshooting. This critical step ensures that the new pinion bearing is correctly installed and that any potential issues are addressed. By verifying correct installation and addressing any potential issues, you can be confident in the performance and longevity of the replacement pinion bearing.
Verifying Correct Installation
After replacing the pinion bearing on your Chevy truck, it’s essential to verify that the installation was done correctly. Here are some steps to ensure the correct installation:
- Check the alignment: Ensure that the pinion bearing is properly aligned and seated in place.
- Inspect for any damage: Carefully examine the new pinion bearing for any signs of damage or defects.
- Perform a functional test: Test the functionality of the pinion bearing by rotating the pinion shaft to ensure smooth operation.
Addressing Any Potential Issues
While replacing the pinion bearing, it’s possible to encounter potential issues that need to be addressed. Here’s how to troubleshoot and resolve any problems:
- Abnormal noise: If there is any abnormal noise coming from the pinion area, it may indicate a problem with the installation or the new bearing. Recheck the installation and replace the bearing if necessary.
- Excessive play: Excessive play or movement in the pinion shaft can be a sign of improper installation or a defective bearing. Inspect and re-install the bearing if needed.
- Leakage: Any sign of leakage of lubricant from the pinion area requires immediate attention. Check the seals and connections for any damage or improper installation.
DIY vs. Shop Repair: What It Actually Costs
A shop typically charges $675–$750 total for a pinion bearing replacement (roughly $280 in parts and $410 in labor), though independent mechanics often quote closer to $600 and dealerships can run as high as $1,950. Doing it yourself cuts the labor cost, but this is a repair where a small mistake — an incorrect preload by even a fraction of a turn — can turn into a much bigger bill.
📊 Aftermarket pinion bearing sets typically cost 30–50% less than OEM parts, and if you attempt the job yourself, budgeting $75–$150 for a mechanic to verify your final preload setup is far cheaper than replacing a damaged differential. Source: PartCatalog, 2026
Best Pinion Bearing Job Essentials
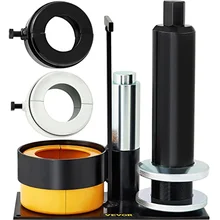
VEVOR Carrier & Pinion Bearing Puller (Dana 30-80)
- Best for: Pulling the old pinion bearing off the shaft without damaging the gear or shaft splines.
- Why we picked it: Fits Dana 30/40/50/60/70/80 and common Ford/GM differentials, covering most Chevy truck axles in one kit.
- Main drawback: A dedicated puller like this costs more than a generic bearing separator, but it prevents the shaft damage a cheaper tool risks.
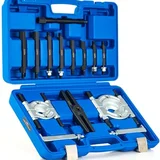 Orion Motor Tech 5-Ton Bearing Puller Set
|
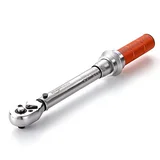 Amazon Basics 1/4-Inch Drive Inch-Pound Torque Wrench
|
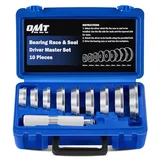 Orion Motor Tech 10pc Bearing Press Kit
|
Pro Tips For Smooth Pinion Bearing Replacement
Getting the preload right the first time saves a comeback repair. Here’s expert guidance and long-term maintenance tips for keeping the new pinion bearing running smoothly.
Expert Recommendations For Optimal Results
Replacing the pinion bearing on your Chevy truck requires precision and attention to detail. Here are expert recommendations to ensure optimal results:
- Use high-quality replacement bearings from trusted manufacturers such as Timken or SKF to ensure durability and longevity of the new bearing.
- Always follow the manufacturer’s torque specifications when tightening the pinion nut to ensure proper preload on the bearing.
- Enlist the help of a torque wrench to accurately tighten the pinion nut to the recommended torque, preventing over-tightening or under-tightening.
- Inspect the pinion seal for any signs of wear or damage and replace it if necessary to prevent oil leaks and contamination of the new bearing.
Maintenance Tips For Prolonged Bearing Life
Maintaining the pinion bearing is essential for prolonged bearing life and optimal performance of your Chevy truck. Here are some maintenance tips to keep the pinion bearing in top condition:
- Regularly check and maintain the gear oil level to ensure proper lubrication of the pinion bearing, preventing premature wear and damage.
- Inspect the pinion bearing for any signs of noise, vibration, or roughness during routine maintenance, and address any issues promptly to prevent further damage.
- Clean the surrounding area of the pinion bearing during routine maintenance to prevent the buildup of dirt and debris, which can affect the performance of the bearing.
- Periodically check and adjust the pinion bearing preload as per the manufacturer’s recommendations to maintain proper meshing of the gears and prevent premature wear.
Frequently Asked Questions On How To Replace Pinion Bearing On Chevy Truck
How Do I Know If My Chevy Truck’s Pinion Bearing Needs To Be Replaced?
You may notice a whining or rumbling noise coming from the rear of your Chevy truck, along with vibration or excessive play in the driveshaft. These are signs that the pinion bearing may need to be replaced.
What Are The Tools Needed To Replace The Pinion Bearing On A Chevy Truck?
You will require a torque wrench, bearing puller, drive pinion nut socket, and a standard mechanic’s toolset. Additionally, you may need a bearing press kit and a dial indicator to ensure the proper setup of the pinion bearing.
Can I Replace The Pinion Bearing On My Chevy Truck Without Professional Help?
While it’s possible to replace the pinion bearing on your Chevy truck yourself, it’s a complex repair that requires mechanical expertise. If you’re not confident in your abilities, it’s best to seek the assistance of a professional mechanic.
What Are The Potential Risks Of Driving With A Faulty Pinion Bearing In My Chevy Truck?
Continued driving with a faulty pinion bearing can lead to extensive damage in the differential, resulting in costly repairs. It can also affect the overall performance and safety of your Chevy truck, so it’s crucial to address any issues promptly.
Conclusion
Replacing a pinion bearing on a Chevy truck comes down to one thing most DIYers get wrong: preload. The bearing swap itself is straightforward with the right pullers and a press, but skipping the 20-30 in-lb rolling-torque check is what turns a $280 parts job into a $1,000+ differential rebuild. Take your time on the preload step, verify it before final torque, and the rest of the job is routine driveline work.
With proper care, your truck will stay reliable for miles to come.
Products related to this article
Sponsored / affiliate links. As an Amazon Associate I earn from qualifying purchases. I may earn additional commission from eligible campaigns.