How to Restore Trim on Your Car: A Step-by-Step Guide
Hey there! If you’re like me, you love keeping your car looking sharp. But over time, the trim on your car—those plastic or rubber bits around the windows, bumpers, or grille—can fade, crack, or look downright tired. I’ve been there, staring at my car’s dull trim, wondering how to bring it back to life. Restoring car trim isn’t as hard as it seems, and I’m excited to share my experience with you. In this guide, I’ll walk you through everything I’ve learned about how to restore trim on car, from cleaning to protecting, so your ride can shine like it just rolled off the lot.
Why Car Trim Fades and How to Spot the Problem
Let’s start with why your car’s trim looks so beat up. The plastic or rubber trim on your car takes a beating from the sun’s UV rays, rain, road grime, and even car wash chemicals. Over time, this exposure causes the trim to fade, turn gray, or develop a chalky texture. I noticed this on my old sedan’s bumper trim—it went from sleek black to a sad, patchy gray.
The first step is spotting the damage. Check your car’s trim around the windows, side mirrors, or bumpers. Is it faded? Does it feel rough or look discolored? If so, it’s time to act. Ignoring it can make the trim brittle, and cracks are much harder to fix. Trust me, I learned that the hard way when I ignored a small crack that spread across my grille trim.
Cleaning the Trim: The Foundation of Restoration
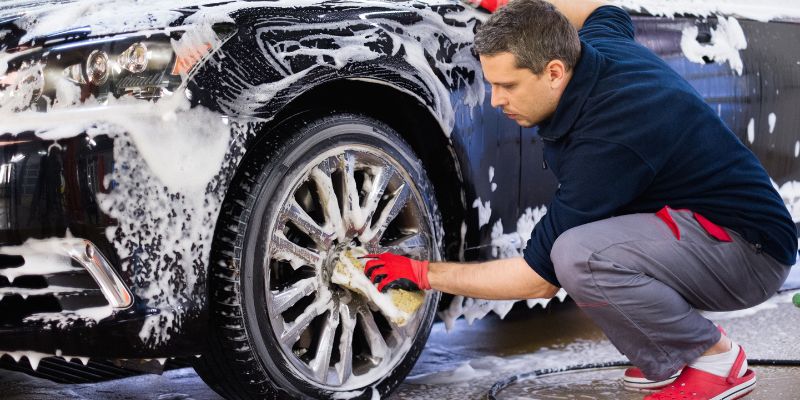
Before you do anything, you need to clean the trim properly. Dirty trim won’t hold onto any restoration products, and you’ll just waste your time. I start by washing my car with a mild car shampoo to get rid of loose dirt. Then, I focus on the trim itself.
Here’s what I do:
- Grab a bucket, some warm water, and a few drops of dish soap. It cuts through grease like a charm.
- Use a soft-bristled brush or an old toothbrush to scrub the trim gently. Don’t go too hard—you don’t want to scratch it.
- For stubborn grime, I use a degreaser made for automotive use. Spray it on, let it sit for a minute, and scrub again.
- Rinse thoroughly with water and dry with a microfiber towel. Wet trim can mess up the next steps.
Pro tip: Avoid using harsh chemicals like bleach. I made that mistake once, and it dried out the trim even more. Stick to automotive-safe products.
Assessing the Damage: What’s Fixable and What’s Not
Not all trim can be saved, and I’ve learned to check the damage before diving in. If the trim is just faded or chalky, you’re in luck—it’s usually fixable. But if it’s cracked, deeply pitted, or peeling, you might need to replace it. I had to swap out a piece of trim on my truck’s door because it was too far gone.
To assess the damage:
- Run your fingers over the trim. Is it rough or smooth?
- Look for cracks or deep scratches. Small scratches are okay, but big ones are trouble.
- Check if the color is completely gone. If the trim is gray or white instead of black, it’ll need more work.
If the trim is salvageable, you’re ready to move forward. If not, check with your local auto parts store for replacement trim. It’s usually not too expensive, and I found a perfect match for my car online.
Choosing the Right Restoration Products
There are tons of products out there for restoring car trim, and I’ve tried a bunch. Some work better than others, so let me break it down. You’ve got three main options: trim restorers, plastic conditioners, or heat-based methods. Here’s a quick comparison table I put together based on my experience:
| Product Type | Pros | Cons | Best For |
|---|---|---|---|
| Trim Restorer | Long-lasting, deep color restoration | Can be pricey, needs reapplication | Heavily faded or chalky trim |
| Plastic Conditioner | Easy to apply, affordable | Fades faster, less dramatic results | Lightly faded trim |
| Heat Gun Method | No products needed, permanent fix | Risk of damage if not careful | Experienced users, stubborn trim |
I usually go for a trim restorer like Cerakote or Solution Finish. They’re easy to apply and give great results. If your trim is only slightly faded, a plastic conditioner like Meguiar’s Ultimate Black works well. For the heat gun method, I’ll explain more later—it’s not for beginners.
Step-by-Step Trim Restoration Process
Now, let’s get to the fun part—actually restoring the trim. I’ve done this on my cars a few times, and this process works like a charm. Follow these steps, and you’ll see a big difference.
Step 1: Tape Off the Area
Use painter’s tape to cover the paint around the trim. I skipped this once, and I got restorer on my car’s paint. It was a pain to clean off. Take your time and tape carefully.
Step 2: Apply the Trim Restorer
Grab your trim restorer and a clean microfiber cloth. Put a small amount of product on the cloth and rub it into the trim in circular motions. Work in small sections so you don’t miss any spots. I usually do one piece of trim at a time, like the window surrounds or bumper strips.
Let the product sit for a few minutes—check the bottle for exact times. Some restorers need to cure for 24 hours, so plan ahead. I learned to do this on a sunny day so the trim dries faster.
Step 3: Wipe Off Excess
After the product has set, use a clean microfiber cloth to wipe off any excess. This keeps the trim looking even and prevents streaks. I usually go over it twice to make sure it’s perfect.
Step 4: Buff for Shine
Some restorers leave a matte finish, but I like a bit of shine. Use a clean cloth to buff the trim gently. It brings out the deep black color and makes it look brand new.
The Heat Gun Method: A Risky but Effective Trick
If you’re feeling brave, the heat gun method can work wonders on faded plastic trim. I tried this on my old Jeep’s bumper, and it brought the color back like magic. But be warned—it’s easy to mess up.
Here’s how I do it:
- Get a heat gun and set it to low or medium heat.
- Hold it about 6 inches from the trim and move it slowly back and forth.
- Watch for the plastic to start looking glossy. That’s when the oils in the plastic are coming back to the surface.
- Stop immediately if you see bubbling or melting. I burned a small spot on my first try, so go slow.
This method is permanent because it reactivates the plastic’s natural oils. But it’s not for everyone. If you’re nervous, stick to a trim restorer.
Protecting Your Restored Trim
Once your trim looks amazing, you want to keep it that way. I’ve found that protecting the trim is just as important as restoring it. UV rays and weather will fade it again if you’re not careful.
Here’s what I do to protect my trim:
- Apply a UV protectant spray every few months. Products like 303 Aerospace Protectant are great.
- Avoid parking in direct sunlight all the time. I use a car cover when I know my car will sit outside for days.
- Wash the trim regularly with mild soap to prevent grime buildup.
I also wax my car’s paint regularly, which helps protect the trim indirectly. It’s a small step that makes a big difference.
Common Mistakes to Avoid
I’ve made plenty of mistakes while restoring car trim, so let me save you some trouble. Here are the big ones to watch out for:
- Don’t use household cleaners like bleach or ammonia. They’ll dry out the trim.
- Don’t skip cleaning. Applying restorer to dirty trim is like painting over rust—it won’t stick.
- Don’t overdo the heat gun. Too much heat can melt or warp the plastic.
- Don’t expect miracles from cheap products. I tried a bargain-bin restorer once, and it faded in a week.
Take your time, and you’ll get great results.
When to Replace Instead of Restore
Sometimes, restoration just won’t cut it. If the trim is cracked, peeling, or too brittle, it’s time to replace it. I had to replace the trim on my truck’s tailgate because it was falling apart. Here’s how to handle it:
- Find the right part number for your car’s trim. Check your owner’s manual or ask at an auto parts store.
- Order from a reputable supplier. I like RockAuto or AutoZone for affordable options.
- Watch YouTube tutorials for your car model. Swapping trim is usually easy with a few clips or screws.
Replacing trim can be pricey, but it’s worth it for a clean look. My truck looked ten years younger after I swapped out the old pieces.

My Favorite Products for Trim Restoration
Over the years, I’ve tested a lot of trim restoration products. Here are my top picks:
- Cerakote Ceramic Trim Coat: Long-lasting and gives a deep black finish. It’s my go-to.
- Solution Finish Black Plastic Restorer: Great for heavily faded trim. It’s a bit messy, so wear gloves.
- Meguiar’s Ultimate Black: Affordable and easy to apply. Perfect for beginners.
- 303 Aerospace Protectant: Not a restorer, but awesome for protecting trim after restoration.
You can find these online or at auto parts stores. I usually keep a bottle of each in my garage.
Conclusion
Restoring the trim on your car is one of those projects that feels so rewarding. I remember the first time I brought my sedan’s faded trim back to life—it was like giving my car a new personality. With a little elbow grease, the right products, and some patience, you can make your car’s trim look brand new. Whether you’re scrubbing away grime, applying a trim restorer, or protecting it from the sun, every step counts. So grab your supplies, put on some music, and get to work. Your car will thank you, and you’ll love showing it off.
FAQs
How often should I restore my car’s trim?
It depends on the product and your car’s exposure to the elements. I usually reapply a trim restorer every 6-12 months. If you live in a sunny area, you might need to do it more often. Regular cleaning and UV protectant help stretch the time between restorations.
Can I use household products to restore trim?
I wouldn’t recommend it. Household products like vinegar or bleach can dry out the trim and make it worse. Stick to automotive-grade trim restorers or plastic conditioners for the best results.
Is the heat gun method safe for all trim?
No, it’s risky. I only use the heat gun on sturdy plastic trim and never on rubber or thin pieces. If you’re not confident, go with a chemical restorer instead. It’s safer and easier.
How long does trim restoration last?
A good trim restorer can last 6 months to a year, depending on the product and weather. I’ve had Cerakote last over a year with proper care. Regular maintenance, like using a UV protectant, helps it last longer.
Can I restore trim in cold weather?
It’s not ideal. Most trim restorers work best in warm, dry conditions. I tried restoring trim in the winter once, and it took forever to dry. Wait for a mild day, or work in a heated garage if you can.