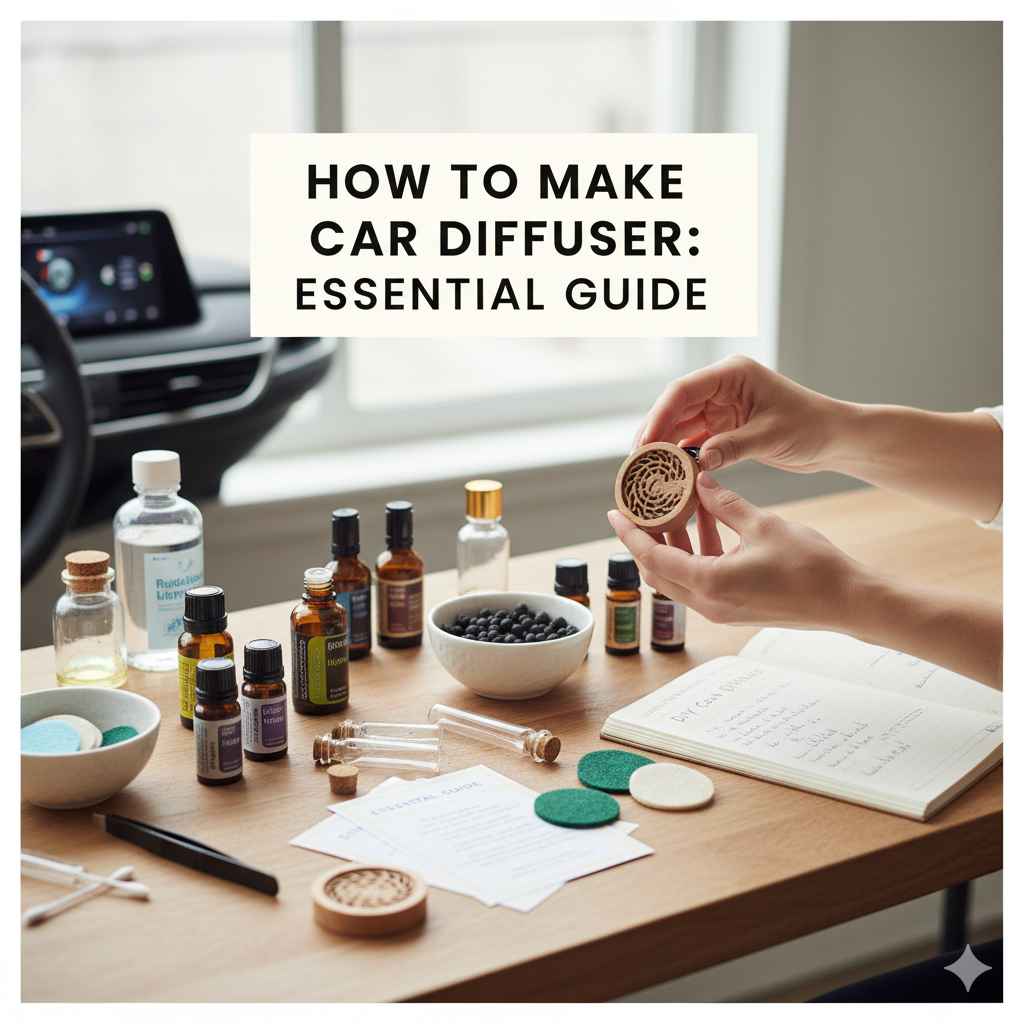
HowTo Make Car Diffuser: Essential Guide
Make your car smell amazing and personalized with a DIY car diffuser! It’s an easy and budget-friendly way to enjoy your favorite scents on the go, replacing stale air with a refreshing aroma.
Ever stepped into your car and wished for a hint of your favorite fragrance instead of that lingering “car smell”? Keeping your car smelling fresh is a common desire, but those store-bought diffusers can sometimes feel a bit pricey or not quite match your taste. What if I told you that creating your very own custom car diffuser is not only possible but also incredibly simple? You don’t need any special tools or fancy ingredients. We’re going to walk through how to make a car diffuser that’s perfectly tailored to you and your car. Get ready to transform your driving experience!
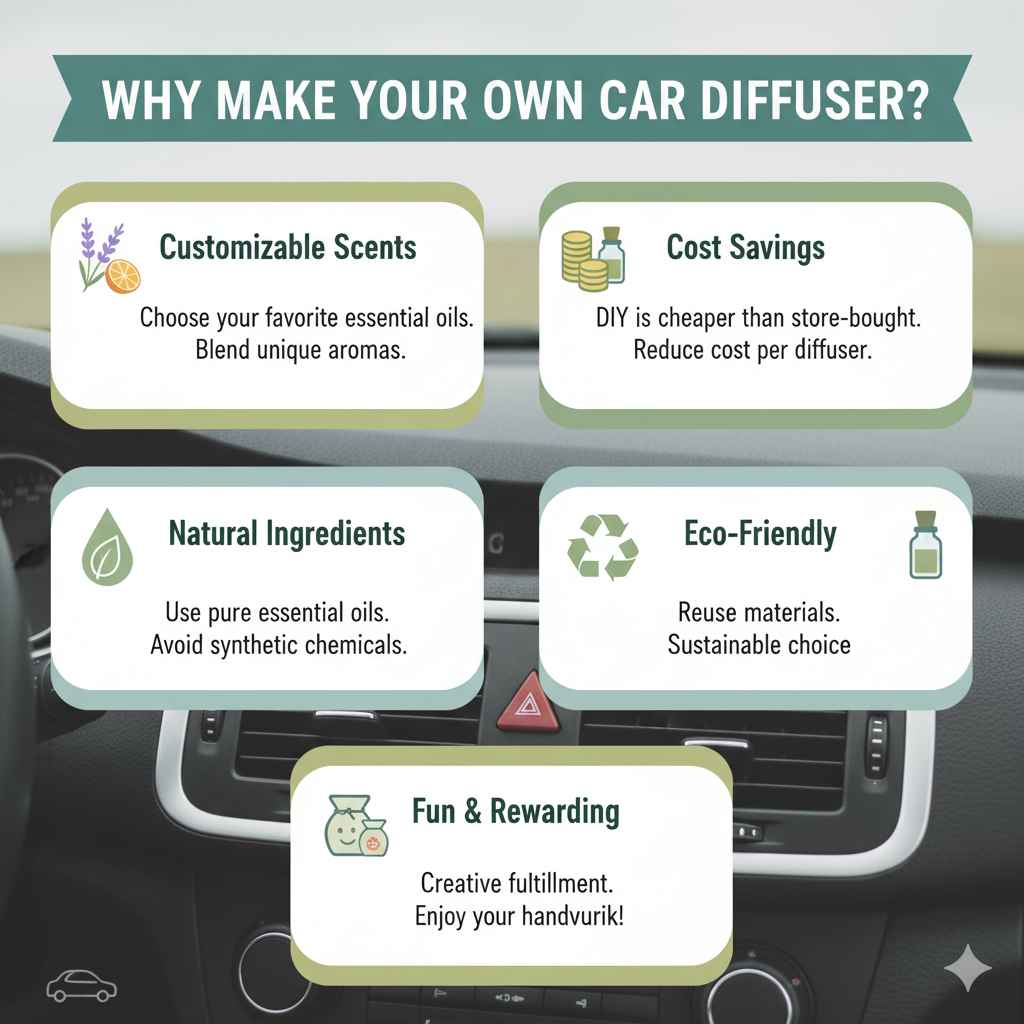
Why Make Your Own Car Diffuser?
Making your own car diffuser offers a fantastic blend of personalization, cost-effectiveness, and creative fulfillment. Unlike commercial options, you have complete control over the scent, intensity, and even the look of your diffuser.
Customizable Scents: You choose exactly what you want your car to smell like. Love lavender for relaxation? Need a citrus boost for energy? It’s all in your hands. You can even blend scents for a truly unique aroma.
Cost Savings: DIY projects are almost always cheaper than their store-bought counterparts. By sourcing your own materials, you can significantly reduce the cost per diffuser.
Natural Ingredients: For those mindful of chemicals, making your own allows you to use natural essential oils instead of synthetic fragrances, which can be a breath of fresh air for sensitive individuals.
Eco-Friendly: Reusing materials like jars or fabric scraps can be a more sustainable choice than constantly buying new plastic diffusers.
Fun and Rewarding: There’s a simple joy in creating something useful with your own hands. Plus, your car will smell delightful as a constant reminder of your handiwork!
Understanding Car Diffuser Basics
Before we dive into making one, let’s quickly cover what makes a car diffuser work. Most car diffusers rely on a porous material that absorbs and slowly releases scented liquid. This material is usually housed in a container that can be safely placed in your car. The gentle airflow in your car, or even a slight breeze when parked, helps to evaporate the scent from the material.
Essential Components of a Car Diffuser
To craft your DIY car diffuser, you’ll need a few key components. We’ll break down the most common choices and what makes them work.
The Container
This is what holds your scented liquid and material. It needs to be secure enough to prevent spills but also allow the scent to escape.
Small Glass Jars: Think baby food jars, spice jars, or small jam jars. These are great because glass doesn’t react with essential oils. Ensure they have a lid that can be modified or a wide enough opening.
Cloth Bags: Small drawstring pouches made from natural fibers like cotton or linen are excellent. They are breathable and allow for easy scent release.
Clay or Terra Cotta Pendants: These porous materials naturally absorb and diffuse scents. They often come with a string to hang them.
Upcycled Containers: Get creative! Small tin cans with punched holes, hollowed-out wooden beads, or even felt cut into shapes can work.
The Wicking Material
This is what draws the scented liquid up and exposes it to the air for diffusion.
Cotton Twine or String: Natural cotton is highly absorbent and readily available.
Felt Strips: Wool felt is particularly good at absorbing and holding essential oils.
Wooden Beads or Small Wooden Objects: Porous wood can absorb oils.
Reeds: While often used in home diffusers, small bamboo skewers can also work for car diffusers.
The Scent Source
This is where the lovely aroma comes from!
Essential Oils: These are concentrated plant extracts and the most popular choice for DIY diffusers. They offer a wide range of scents and potential therapeutic benefits. Some popular choices include:
Lavender: Calming and relaxing.
Peppermint: Invigorating and can help with motion sickness.
Lemon/Orange: Uplifting and refreshing.
Eucalyptus: Cleansing and can help with congestion.
Tea Tree: Antibacterial and purifying.
Fragrance Oils: These are synthetic and can offer stronger, more variety in scent profiles. However, some people prefer to avoid them due to potential sensitivities.
Perfume or Cologne: A sparingly used spray of your favorite scent can also work, though it might not last as long as essential oils.
The Base Liquid (Optional, for Jar Diffusers)
If you’re using a jar diffuser, you might need a carrier liquid to dilute the essential oils and help them travel up the wick.
Rubbing Alcohol (Isopropyl Alcohol): A small amount helps the oil mixture evaporate more effectively. Use at least 70% concentration.
Vodka: A clear, odorless spirit can also serve this purpose.
Fractionated Coconut Oil: A lighter oil that doesn’t solidify and can help carry the scent slowly.
Step-by-Step: How to Make a Jar Car Diffuser
This is one of the most popular and effective DIY car diffuser methods. It’s simple, looks neat, and works wonderfully.
What You’ll Need:
A small glass jar with a lid (e.g., 2-4 oz baby food jar, spice jar)
Essential oils of your choice
Cotton twine or thick string
A small drill bit or sharp tool to make holes in the lid
Carrier liquid (optional, e.g., rubbing alcohol or vodka)
Steps:
1. Prepare the Lid:
Clean the jar and lid thoroughly.
Using a drill with a small bit, or carefully with a sharp awl or nail, punch several holes into the lid of the jar. These holes are crucial for allowing the scent to escape. Space them out evenly. Be cautious when using sharp tools, and consider wearing protective gloves.
2. Add Essential Oils:
Carefully drop your chosen essential oils into the empty jar. The amount depends on the size of your jar and how strong you want the scent. Start with 15-20 drops for a 2-4 oz jar. You can always add more later. If you’re using a carrier liquid, add about 1-2 tablespoons of rubbing alcohol or vodka to the jar with the essential oils.
3. Thread the Wick:
Cut a piece of cotton twine or thick string. It should be long enough to reach the bottom of the jar and have a generous amount hanging out.
Thread one end of the string through one of the holes in the lid from the inside of the lid. Pull it through so that about an inch or two of string is on the outside of the lid.
Tie a knot at the end of the string that’s inside the jar. This knot will sit at the bottom of the jar and prevent the string from pulling back out.
Alternatively, if using a stronger string, you can tie the knot around the inside of the lid.
4. Assemble the Diffuser:
Securely screw the lid back onto the jar, making sure the string is hanging down into the oil mixture.
The string will absorb the oil mixture and, through capillary action, draw it up and diffuse the scent through the holes in the lid.
5. Hang and Enjoy: You can either
Tie another piece of string around the neck of the jar to create a hanger that drapes over your rearview mirror. Make sure it doesn’t obstruct your vision – safety first!
Use the existing string hanging from the lid to tie it up.
Place the jar securely in a cup holder.
The scent will begin to diffuse gradually.
Tip: If the scent seems too weak, you can add a few more drops of essential oil. If it’s too strong, add a little more carrier liquid or simply let it air out for a day.
Step-by-Step: How to Make a Cloth Bag Car Diffuser
This method is super simple and requires minimal materials. It’s perfect for hanging from your gear shifter or mirror.
What You’ll Need:
A small, breathable cloth bag with a drawstring (like a linen or cotton pouch, about 3×4 inches)
Essential oils of your choice
Cotton balls or felt scraps
Steps:
1. Prepare the Bag:
Ensure the bag is clean and dry.
2. Add Filler:
Place 2-3 cotton balls or a few small scraps of felt inside the cloth bag. These will act as the absorbent material.
3. Add Essential Oils:
Gently add 10-15 drops of your chosen essential oils directly onto the cotton balls or felt inside the bag. Don’t overdo it; you don’t want the oils to soak through the fabric too much.
4. Close and Hang:
Pull the drawstring tight to close the bag securely.
Hang the bag from your rearview mirror, gear shifter, or any other safe spot in your car. The fabric will allow the scent to diffuse naturally.
Tip: To refresh the scent, simply open the bag and add a few more drops of essential oil to the cotton balls or felt.
Step-by-Step: How to Make a Clay or Wooden Bead Diffuser
This is a visually appealing and natural way to scent your car.
What You’ll Need:
Unfinished terracotta beads, clay pendants, or wooden beads (porous ones work best)
Essential oils of your choice
Natural twine or a leather cord for hanging
Steps:
1. Prepare the Beads/Pendant:
Ensure your beads or pendant are clean and dry.
2. Apply Essential Oils:
Place a few drops of your essential oils directly onto the surface of the bead or clay pendant. Let it soak in; these materials are porous and will absorb the oil. You may need to rotate the bead or pendant to ensure even absorption.
3. Thread and Hang:
Thread the beads onto your twine or cord, or attach the pendant.
Create a loop or tie the cord to form a hanger.
Hang it in your car. The scent will release slowly as the oil evaporates from the material.
Tip: For continuous scent, simply reapply essential oils to the beads or pendant every few days or when the fragrance fades.
Popular Essential Oil Blends for Your Car
Choosing the right scent can dramatically improve your driving experience. Here are some popular blends to get you started, focusing on common needs and preferences.
| Blend Name | Essential Oils | Benefits / Purpose |
|---|---|---|
| Morning Boost | 5 drops Lemon + 5 drops Peppermint | Energizing, helps improve focus, and combats motion sickness. |
| Calm Commute | 6 drops Lavender + 4 drops Chamomile | Soothes nerves, reduces stress, and eases anxiety during traffic. |
| Fresh & Clean Air | 4 drops Eucalyptus + 4 drops Tea Tree + 3 drops Lemon | Purifies the air, neutralizes odors, and creates a fresh, clean atmosphere. |
| Focus Fuel | 5 drops Rosemary + 5 drops Peppermint | Enhances concentration, mental clarity, and alertness. |
| Sweet Dreams (for passengers) | 7 drops Lavender + 3 drops Bergamot | Promotes relaxation, peace, and better rest during long rides. |
| Citrus Zest | 7 drops Orange + 3 drops Grapefruit | Uplifting, cheerful, and refreshing scent for a positive mood. |
Note: Always use high-quality, pure essential oils. Be mindful of how strong scents might affect passengers, especially those sensitive to smells or prone to headaches.
Safety and Best Practices
While making and using a car diffuser is generally safe, a few precautions will ensure a positive experience for everyone.
Avoid Visual Obstruction: Never hang anything from your rearview mirror that obstructs your view of the road. If the diffuser hangs low, consider placing it in a cup holder.
Prevent Spills: Ensure your jar diffuser is screwed on tightly. If using a cloth bag or bead diffuser, make sure the oils are not so saturated that they drip. Oils can damage car surfaces like dashboards and upholstery.
Consider Passengers: Some essential oils can be too strong for certain individuals, especially children, pregnant women, or those with respiratory issues. Start with a subtle scent and gauge reactions.
Temperature Fluctuations: Extreme heat can cause oils to evaporate faster and potentially become overwhelming. It can also increase the risk of spills in sealed containers.
Ventilation: Ensure some form of ventilation. If using a tightly sealed jar with no holes, it won’t diffuse properly and could build pressure.
Essential Oil Quality: Always opt for 100% pure essential oils from reputable brands. Adulterated oils may not smell as good and could contain harmful substances. For more information on essential oil safety, the National Center for Complementary and Integrative Health (NCCIH) offers reliable resources.
Maintaining Your DIY Car Diffuser
To keep your car smelling wonderful, a little regular maintenance goes a long way.
Refreshing the Scent: When the fragrance fades, simply add a few more drops of essential oil to your chosen diffuser medium (cotton balls, felt, beads, or the jar). For jar diffusers, you might want to give the jar a gentle swirl to mix the oils.
Replacing the Wick: For jar diffusers, the cotton twine or string wick might eventually become saturated or clogged with oil residue and lose its wicking ability. It’s a good idea to replace the wick every few months or when you notice the scent diffusion decreasing significantly.
Cleaning: If you decide to change scents or notice any residue build-up, clean your jar thoroughly with soap and water and allow it to dry completely before refilling. For cloth bags, you might need to replace them periodically.
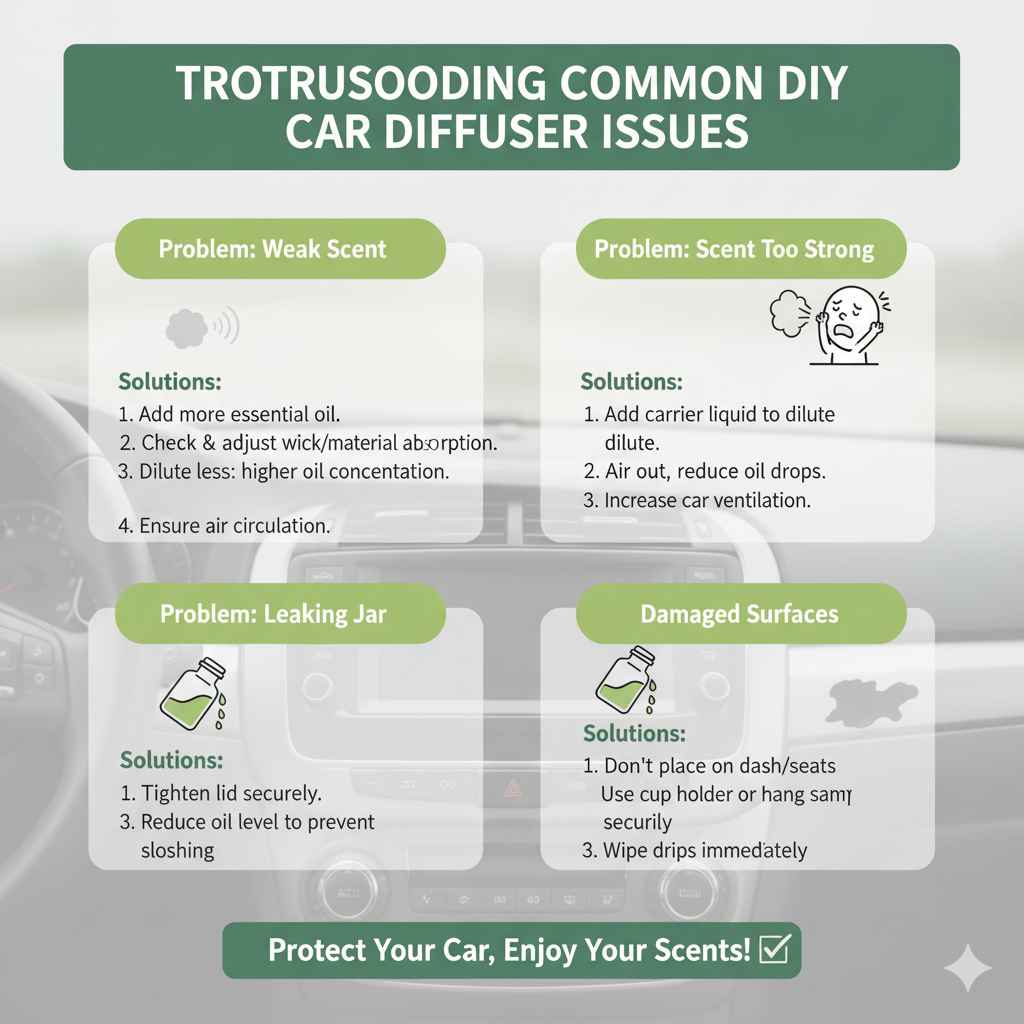
Troubleshooting Common Issues
Even the best DIY projects can hit a snag. Here are some common problems and how to fix them.
Problem: No Scent or Very Weak Scent.
Solution:
Add more essential oil.
Ensure the wick is properly absorbing the oil. For jar diffusers, check that the string reaches the bottom and is saturated.
If using a carrier liquid and it’s too much, the scent might be diluted too much. Try a higher concentration of essential oils.
For fabric diffusers, the material might not be absorbent enough, or you may need to add more oil.
Consider the air circulation in your car. Sometimes a slight breeze helps.
Problem: Scent is Too Strong.
Solution:
For jar diffusers, add a little more carrier liquid (alcohol or vodka) to dilute the blend.
For all types, let the diffuser air out for a while or reduce the number of essential oil drops added.
Ensure good ventilation in your car.
Problem: Leaking Jar.
Solution:
Make sure the lid is screwed on tightly.
Check that the jar isn’t cracked or damaged.
If the oil level is too high, it can slosh out when the car moves. Reduce the amount of oil or carrier liquid.
Problem: Oils Damaging Interior Surfaces.
Solution:
Never place a leaky diffuser directly on your dashboard, console, or seats.
Use a cup holder or ensure your diffuser is securely hung and won’t tip over.
If you notice drips, wipe them up immediately with a damp cloth.
Frequently Asked Questions About DIY Car Diffusers
Q1: Can I use any type of essential oil in my car diffuser?
A1: It’s best to use 100% pure essential oils or high-quality fragrance oils. Avoid highly diluted or synthetic oils that might not diffuse well or could contain unwanted chemicals. Always check individual oil safety guidelines, especially if you or your passengers have sensitivities.
Q2: How long does a DIY car diffuser scent last?
A2: The longevity varies depending on the type of diffuser, the amount of oil used, temperature, and air circulation. Typically, a DIY diffuser can last anywhere from a few days to a couple of weeks before needing a scent refresh. Jar diffusers with carriers might last a bit longer.
Q3: Is it safe to hang a diffuser from my rearview mirror?
A3: Yes, but only if it doesn’t obstruct your field of vision. If your diffuser is large or hangs low, it’s safer to place it in a cup holder or another stable location where it won’t interfere with driving. Safety is always the top priority.
Q4: What’s the difference between essential oils and fragrance oils for car diffusers?
A4: Essential oils are natural extracts from plants and offer therapeutic properties along with scent. Fragrance oils are synthetic and can offer a wider variety of smells but lack the natural benefits. For a healthier, more natural aroma, essential oils are generally preferred.
Q5: How do I choose the right scent for my car?
A5: Consider the mood you want to create. Citrus scents are energizing, lavender is calming, and peppermint can help with focus and motion sickness. You can also create custom blends. Test small amounts at first to see how you like the scent in your car environment.