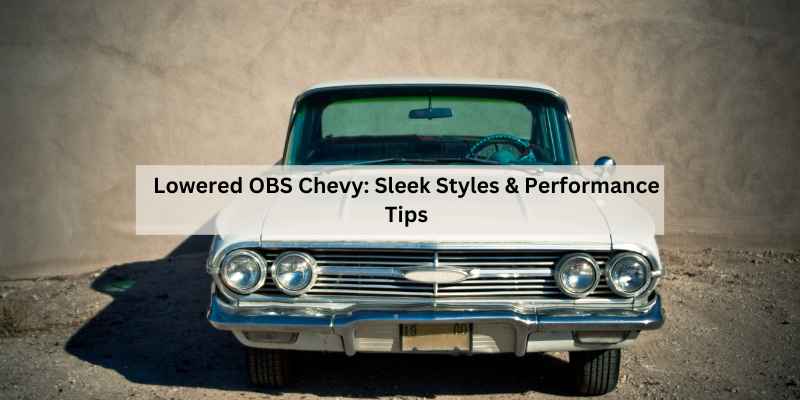
The Complete Owner’s Manual for a Lowered OBS Chevy
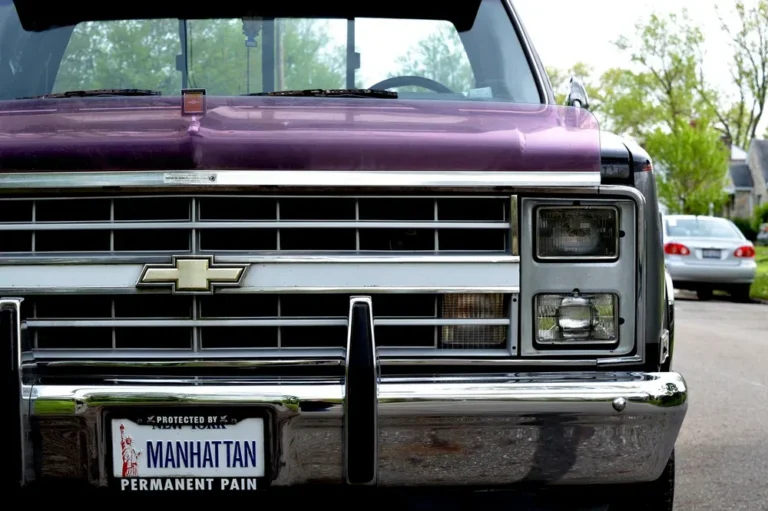
You know the look. A 1988-1998 Chevy C1500 sitting low, tucked over the rear tires, with just the right amount of rake. It’s the truck that turns heads at every gas station and car meet. But getting there isn’t just about buying springs and hoping for the best. A proper lowered OBS Chevy takes planning, the right parts, and an understanding of what happens to the suspension geometry when you drop it.
This guide walks you through the entire process. You’ll learn the difference between drop kits, what parts you actually need, the correct install order, and the steering and alignment fixes that separate a clean daily driver from a truck that eats tires and wanders all over the road. We’ll also cover realistic costs so you don’t end up halfway through the job with no budget left.
Generic
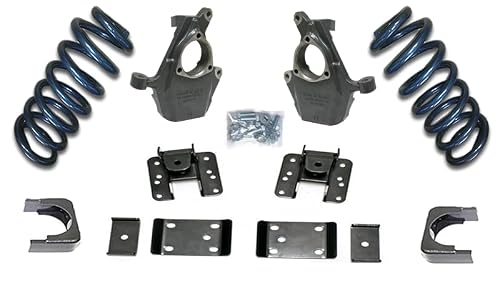
HD Suspension 4" Front / 6" Rear…
- Vehicle Compatibility: Fits 2007-2018 Chevy Silverado and Sierra 1500 models with 6 lug configuration, compatible with both 2WD an…
- Complete Lowering Kit Components: Includes drop spindles, lowering coil springs, and rear flip kit with all necessary plates and h…
- Durable Steel Construction: Made of high-strength steel and ductile iron materials engineered for long-lasting durability and reli…
If you’re starting from scratch, a complete kit like the HD Suspension 4″ Front / 6″ Rear Lowering Kit for the 2026-2026 Silverado covers the basics for newer trucks. For the OBS platform, you’ll be piecing together spindles, springs, and a flip kit, but the principles—and the geometry fixes—are the same.
Why Lowering an OBS Chevy Is Still the Best Mod
The 88-98 body style has aged incredibly well. The boxy lines and simple design look right with a mild drop. A 2/4 drop gets you a sportier stance without sacrificing much ride quality. A 4/6 drop is the sweet spot most people chase—it fills the wheel wells, eliminates the factory gap, and still clears speed bumps if you take them at an angle.
Lowering also improves handling. The center of gravity drops, so body roll in corners decreases noticeably. You’ll feel more confident merging onto highways and taking off-ramps. It’s not sports car territory, but it’s a real improvement over the stock wallow.
There’s a practical side too. A lowered truck is easier to load. Bikes, coolers, and heavy boxes don’t have to be lifted as high. If you use the bed regularly, you’ll appreciate that every day, not just on weekends.
4/6 Drop vs. 5/7 Drop – Which Is Right for You?
This is the first decision you’ll make, and it shapes everything else. A 4/6 drop uses drop spindles up front (which preserve your factory spring travel) and a flip kit out back. It’s the most popular setup for a reason—it looks aggressive but stays functional.
A 5/7 drop is a different animal. That extra inch up front usually means cutting or replacing springs, which hurts ride quality. The 7-inch rear drop requires a serious C-notch and often a custom driveshaft to avoid vibration. You’re also scraping frame rails on any decent dip in the road.
Here’s the honest trade-off: 4/6 is a daily driver. 5/7 is a show truck. If you tow anything, haul heavy loads, or drive on roads with potholes, stick with 4/6. If the truck is a weekend cruiser that never sees a trailer, 5/7 looks incredible but demands constant attention to drive.
| Drop Amount | Front Setup | Rear Setup | Ride Quality | Best For |
|---|---|---|---|---|
| 2/4 Drop | Drop springs or spindles | Shackles or hangers | Nearly stock | Daily driving, towing light loads |
| 4/6 Drop | Drop spindles + springs | Flip kit + C-notch (recommended) | Firm but compliant | Best all-around street use |
| 5/7 Drop | Cut or custom springs | Flip kit + full C-notch | Harsh, bottoming out risk | Show trucks, weekend cruisers |
One thing nobody tells you about the 5/7: the driveshaft angle gets steep. You’ll likely need shims or a carrier bearing drop to stop vibration. That’s extra cost and extra labor. The 4/6 usually gets away with just a set of shock extenders.
The Complete Parts List (With Real Prices)
Let’s talk money. A quality 4/6 drop for an OBS Chevy isn’t cheap, but it’s not outrageous either. Here’s what a realistic budget looks like for a DIY install versus paying a shop.
Front Components (Spindles, Springs, Shocks)
Drop spindles are the backbone of the front drop. They lower the truck without compressing the spring, so ride quality stays close to stock. Belltech and DJM are the go-to brands for the 88-98 platform. Expect to pay $300-$450 for a quality set.
Drop springs work alongside the spindles. A typical 4/6 front setup uses a 1-inch drop spring with a 3-inch spindle, or a 2-inch spring with a 2-inch spindle. Springs run $150-$250. Don’t cheap out here—cutting your factory springs ruins ride quality and can cause the coil to pop out of the pocket.
Shocks are the part people forget. Your stock shocks are too long for a dropped truck. They’ll bottom out and ride like a brick. You need shortened shocks or shock extenders. A set of drop shocks runs $150-$200. Add a front sway bar drop bracket ($30-$50) to keep the bar geometry correct.
Rear Components (Flip Kit, C-Notch, Shocks)
The flip kit is the heart of the rear drop. It moves the axle from on top of the leaf springs to underneath them. That’s worth about 5-6 inches of drop. A flip kit for the OBS Chevy includes new spring perches and U-bolts, and it runs $200-$300.
Here’s where the C-notch comes in. With a 6-inch rear drop, the axle housing will hit the frame on bumps. A C-notch cuts a section out of the frame and welds in a reinforcing plate to give the axle clearance. This is not optional at 6 inches—it’s a safety issue. A bolt-in C-notch runs $150-$250; a weld-in unit is similar in price but requires more skill.
Rear shocks are also a must. You’ll need shorter shocks or relocate the upper mounts. Budget $100-$150. Add shock extenders ($40) if you keep the stock mounts.
Total realistic budget: $1,200-$1,800 in parts. If you pay a shop, add $800-$1,200 in labor. A DIY install in your driveway on jack stands will take a full weekend if you’ve done suspension work before, longer if you haven’t.
Step-by-Step Install Order (Do It Right the First Time)
The order matters more than you think. Do the front first, then the rear. Here’s the sequence that avoids rework.
- Front spindles before springs. The spindle is the harder job—it requires removing the caliper, rotor, and ball joints. Once that’s done, the spring swap is straightforward. If you do springs first, you’ll have to compress them again to get the spindle out.
- Front springs with the control arm loose. Use a proper spring compressor. Do not use the floor jack method unless you’ve done it a dozen times. The spring is under immense pressure and can kill you if it slips.
- Rear flip kit with the axle supported. Support the axle with jack stands before removing the U-bolts. The axle will drop suddenly if you don’t. Mark the driveshaft and pinion flange before removal so you can reinstall it in the same orientation.
- C-notch after the flip kit. You need the truck on the ground to see where the axle actually hits the frame. Mark the contact point, then cut and weld the notch. If you notch before the flip kit, you’ll likely cut in the wrong spot.
- Shocks and sway bar last. Once the drop is done, you can measure for the correct shock length. Install the sway bar drop brackets to keep the bar level.
Take the time to torque everything to spec. The control arm bolts, U-bolts, and ball joint nuts all have specific torque values. Get them wrong and you’ll have clunks or, worse, a component failure at speed.
Steering and Alignment Fixes You Can’t Skip
Drop the front 4 inches and the steering geometry changes. The tie rods now sit at an angle instead of parallel to the ground. That creates bump steer—the truck darts left or right when you hit a bump. It’s unnerving and dangerous.
The fix is a dropped pitman arm. It lowers the steering linkage to match the new suspension height. A pitman arm drop costs $60-$100 and takes an hour to install. It’s the single most important steering upgrade for a lowered OBS Chevy.
You’ll also want an adjustable track bar. The track bar centers the axle under the truck. Lower the truck and the axle shifts slightly to one side. An adjustable track bar lets you recenter it. Skip this and the truck will track crooked and wear tires unevenly.
After the drop, get a professional wheel alignment. The camber will be off, and you’ll chew through the inside edge of your front tires in 5,000 miles if you don’t. A good alignment shop can set camber, caster, and toe. Expect to pay $80-$120.
One more thing: check the front sway bar end links. With the drop, the bar sits at a different angle. The end links may bind. Aftermarket end links with adjustable length solve this for about $40.
Tire and Wheel Fitment Guide (No Rubbing)
Wheel fitment is where most people mess up. The wrong backspacing turns a clean drop into a rubbing nightmare.
For a 4/6 drop, you want wheels with 4.5 to 5 inches of backspacing on an 8-inch wide wheel. That pushes the tire out slightly but keeps it tucked. A 20×8.5 wheel with a 5-inch backspace fits great. On the front, a 255/45R20 tire works without rubbing the fender or the frame. On the rear, a 275/40R20 fits nicely with the flip kit.
If you go with 18-inch wheels, use a 245/45R18 front and 265/40R18 rear. The smaller diameter gives you more room to play with.
Avoid wheels with less than 4.5 inches of backspacing. They stick out too far and will rub the outer fender lip on bumps. Also avoid tires wider than 275 on the rear—they’ll hit the inner fender well when you hit a dip.
Here’s a tip: measure your current clearance before buying anything. Jack the truck up, put it on stands, and cycle the suspension by hand. See where the tire gets close to anything. That tells you exactly how much room you have to work with.
Common Mistakes and How to Avoid Them
Everyone makes at least one of these mistakes. Here’s how to skip the pain.
Skipping the C-notch. At 6 inches of rear drop, the axle will hit the frame. It’s not a question of if, it’s when. The first big bump at highway speed will send a jarring impact through the cab. The C-notch isn’t just for looks—it’s structural protection.
Using stock shocks. They’re too long and will bottom out internally. You’ll hear a clunk over every bump, and the ride will be harsh. Shortened shocks cost the same as a tank of gas.
Forgetting the pitman arm. The bump steer is real. You’ll be driving down the highway, hit a seam, and the truck will swerve a foot. It’s exhausting to fight. Install the dropped pitman arm before you drive it.
Cutting springs. It ruins the spring rate and can cause the coil to unseat. Buy proper drop springs. They’re not that expensive, and they’re engineered for the load.
Ignoring the alignment. A dropped truck needs a professional alignment. The factory specs don’t apply anymore. Find a shop that knows lowered trucks and get it dialed in.
Final Verdict – Is a Lowered OBS Chevy Worth It?
Yes, absolutely. A 4/6 drop transforms the 88-98 Chevy from a work truck into something with real presence. The handling improves, the stance looks right, and the truck still does truck things. It’s not a perfect setup—you’ll feel bumps more, and speed bumps require a little planning—but the trade-off is worth it.
Just don’t rush it. Buy quality parts, follow the install order, and budget for the C-notch and steering fixes. Do that, and you’ll have a truck you want to drive every single day.
- Stick with a 4/6 drop for daily driving; save the 5/7 for a show truck.
- Budget $1,200-$1,800 in parts and a full weekend for a DIY install.
- Never skip the C-notch at 6 inches of rear drop—it’s a safety part.
- Install a dropped pitman arm to eliminate bump steer.
- Get a professional wheel alignment after the drop; it saves your tires.
- Use wheels with 4.5-5 inches of backspacing to avoid rubbing.
- Buy proper drop springs and shocks—cutting or reusing stock parts ruins the ride.
If you run into electrical issues while working on your truck—like a P0327 code or a faulty ignition switch wiring problem—check those guides before tearing into the harness. And if you’re also considering lowering a newer truck, the same geometry principles apply to the Honda Ridgeline.
Products related to this article
Sponsored / affiliate links. As an Amazon Associate I earn from qualifying purchases. I may earn additional commission from eligible campaigns.