Chevy 350 HEI Distributor Firing Order: The Complete First-Start Guide
You just finished bolting together a fresh small block Chevy, or maybe you pulled the distributor out for a cam swap and lost track of where the rotor pointed. Now you’re staring at an unmarked HEI cap, a handful of spark plug wires, and a crankshaft that’s been turned a few times. The engine won’t start, or it backfires through the carburetor, or it runs like it’s missing on half the cylinders. Nine times out of ten, the problem isn’t the engine itself. It’s the firing order.
This guide walks you through the entire process from a dead engine to a smooth idle. You’ll learn the exact cylinder numbering layout, how to find top dead center on the compression stroke, how to identify the #1 terminal on a cap with no markings, and how to route wires counter-clockwise so the engine actually runs. We’ll also cover setting base timing and diagnosing the specific symptoms of crossed wires, so you can fix it fast instead of guessing.

JDMSPEED
HEI Distributor Cap and Rotor Replacement For…
- Distributor Cap Assembly Replacement For Chevy, Replacement For Ford, Replacement For Hei Aftermarket Distributors
- This distributor cap kit can be widely Replacement For K549 SBC 283 305 307 327 350 400 BBC 454 396 427
- Package Include: 1x Distributor Cap Rotor Kit; Color: Black
Before we get deep into the mechanical steps, having a clean cap and rotor makes this job far less frustrating. A worn or carbon-tracked cap can cause misfires that look exactly like a wiring problem. A fresh HEI distributor cap and rotor kit with brass terminals ensures you’re not chasing a ghost while trying to diagnose your firing order. It’s a cheap insurance policy that eliminates one variable from the equation.
Why the Firing Order Matters (And What Happens When It’s Wrong)
The firing order isn’t just a sequence of numbers. It’s the exact sequence in which each cylinder’s spark plug fires, matched to the engine’s mechanical rhythm. For a Chevy 350, that sequence is 1-8-4-3-6-5-7-2. The crankshaft and camshaft are designed around this specific order. When you get it right, the engine idles smoothly, makes full power, and doesn’t vibrate excessively. When you get it wrong, you get a violent shaking, a popping sound through the intake, or a spitting noise out the exhaust.
A crossed wire—say, swapping #5 and #7—doesn’t just cause a slight stumble. It creates a dead miss that gets worse under load. The engine might start and idle poorly, but it will sound like a Subaru with a broken exhaust when you rev it. In severe cases, a wire that’s off by one position can cause backfiring that damages the intake manifold gasket or the throttle body. It’s not a subtle problem.
Getting the order correct on an HEI distributor is actually easier than on older points-style units because the cap is larger and the terminals are clearly numbered on most aftermarket caps. But when they’re not marked, or when you’re working with a used cap, you need a methodical approach. That starts with understanding which cylinder is which.
The Correct Chevy 350 Firing Order: 1-8-4-3-6-5-7-2
Memorize this sequence: 1-8-4-3-6-5-7-2. It’s the same for virtually every small block Chevy, from the 283 to the 400, and it’s also used on big block Chevy engines. The distributor rotor spins counter-clockwise, which means the spark jumps from terminal to terminal in that direction as the engine runs.
One common confusion point: the distributor gear is driven by the camshaft, so the rotor turns at half crankshaft speed. That doesn’t change the firing order, but it does mean you have to be careful when aligning the rotor to #1. You’re not looking at crankshaft position on the cap; you’re looking at the rotor position relative to the cap terminals.
Cylinder Numbering on a Small Block Chevy (Bank Layout)
You need to know which cylinder is #1 before you can wire anything. On a small block Chevy, the cylinders are numbered in a specific pattern. The driver’s side bank (left side when sitting in the car) is 1, 3, 5, 7, counting from the front of the engine to the rear. The passenger’s side bank (right side) is 2, 4, 6, 8, also counting from front to rear.
So cylinder #1 is the very first cylinder on the driver’s side, right behind the water pump. Cylinder #2 is the first one on the passenger’s side. This is the same layout for all Chevy V8s, including the 350 and the 305 vs 350 comparison you might have read elsewhere. If you’re working on a truck or a car, orientation is always from the front of the engine, not from where you’re standing.
Write this on a piece of tape and stick it to the fender. You’ll reference it constantly while routing wires.
HEI Distributor Anatomy: Cap, Rotor, and Coil Basics
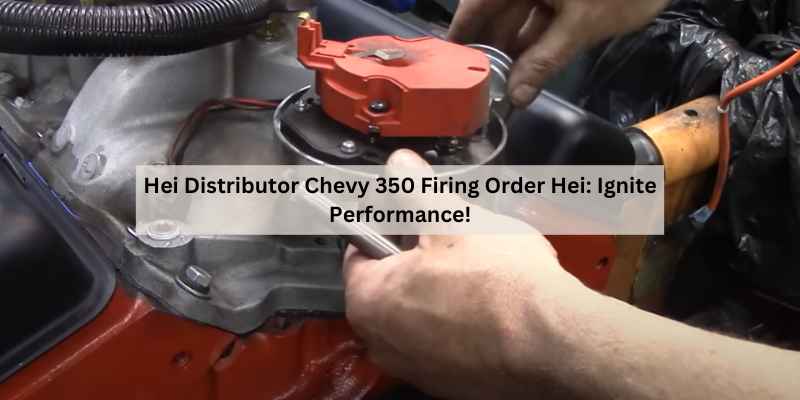
An HEI distributor is a self-contained ignition system. The coil sits inside the distributor cap, which is why the cap is so much larger than a points-style cap. The rotor sits on top of the distributor shaft and spins inside the cap. As the rotor passes each terminal, the coil fires, sending voltage through the rotor, across a small gap, and into the terminal, then down the spark plug wire.
The cap has a center terminal that receives voltage from the coil. Around the perimeter, you’ll see eight terminals arranged in a circle. On most caps, the #1 terminal is marked with a small ‘1’ or a notch. But not always. Some aftermarket caps have no markings at all, and some have markings that are faint or worn off.
The rotor itself has a metal strip on top. When the rotor points at a specific terminal, that’s the cylinder that’s about to fire. The rotor position is your ground truth for wiring. You align the rotor to the #1 terminal, then route the other wires in the firing order counter-clockwise.
How to Find #1 TDC on the Compression Stroke
This step trips up more people than anything else. You need the #1 piston at top dead center (TDC) on the compression stroke, not the exhaust stroke. If you’re on the exhaust stroke, the distributor will be 180 degrees off, and the engine won’t start no matter how you route the wires.
Here’s the reliable method. Remove the #1 spark plug. Put your thumb over the hole. Have someone bump the starter, or turn the crankshaft by hand with a breaker bar. You’ll feel air pressure pushing against your thumb. That’s the compression stroke. Continue turning slowly until the timing mark on the harmonic balancer lines up with the 0-degree mark on the timing tab.
If you don’t feel pressure, you’re on the exhaust stroke. Turn the crankshaft one full revolution (360 degrees) and try again. The piston will come up twice per cycle—once on compression, once on exhaust. You want the one where the valves are closed and pressure builds.
With the #1 piston at TDC on compression, the rotor should be pointing at the #1 terminal on the cap. If it’s not, loosen the distributor hold-down clamp and rotate the housing until it does. This is your starting point.
Routing Spark Plug Wires on the HEI Cap (Step-by-Step)
Now you have the rotor pointing at the #1 terminal. The engine is at TDC. The distributor is locked down. The rest is just careful routing.
Determining the #1 Terminal on an Unmarked Cap
If your cap has no visible mark for #1, you have two options. The first is to look at the distributor base. On most HEI distributors, there’s a small notch or a dimple on the housing where the rotor points when the engine is at TDC. That notch corresponds to the #1 terminal position on the cap. Transfer that location to the cap with a grease pencil.
The second method is more precise. Pull the cap off, leaving the rotor in place. Use an ohmmeter or a test light. With the ignition on (but not cranking), probe the terminals one at a time while manually rotating the distributor shaft slightly. The terminal that shows continuity with the rotor’s metal strip is your #1. This works because the rotor is currently positioned at #1 TDC. It’s a bit fiddly, but it’s foolproof.
The Counter-Clockwise Wire Routing Rule
Here’s the rule that solves everything: the rotor spins counter-clockwise. Therefore, the firing order must be routed counter-clockwise around the cap. Starting at the #1 terminal, the next terminal counter-clockwise is #8, then #4, then #3, and so on.
Let’s visualize the cap as a clock face. Put #1 at the 12 o’clock position. Then #8 is at roughly 10 o’clock. #4 is at 8 o’clock. #3 is at 6 o’clock. #6 is at 4 o’clock. #5 is at 2 o’clock. #7 is back near 12 o’clock but slightly offset, and #2 fills the remaining gap. If that sounds uneven, it is—the terminals aren’t perfectly spaced on an HEI cap, which is normal.
Route each wire from its terminal to the corresponding cylinder. Keep the wires separated with looms or zip ties where possible. HEI systems produce high voltage, and wires that run parallel to each other for long distances can induce crossfire—a condition where a spark jumps to the wrong wire. This is especially common between #5 and #7 because they’re adjacent in the firing order and physically close on the cap.
Setting Base Timing After Wiring
Firing order correct? Engine starts? Good. But you’re not done. You still need to set base timing, or the engine will run poorly and may overheat.
First, disconnect the vacuum advance hose from the distributor and plug it. You want to set timing without the vacuum advance pulling timing in. Loosen the hold-down clamp just enough to rotate the distributor housing.
Connect a timing light to the #1 spark plug wire. Start the engine and let it warm up to operating temperature. The engine should be idling around 700-800 RPM. Aim the timing light at the harmonic balancer. The timing mark should line up with the base timing spec for your specific engine. Most Chevy 350s run best at 8-12 degrees before top dead center (BTDC), but check your camshaft card or vehicle specs. A big cam may want 14-16 degrees.
Rotate the distributor to adjust. Turning it clockwise retards timing; turning it counter-clockwise advances it. Tighten the clamp, re-check the timing, then reconnect the vacuum advance. Your initial timing is now set.
One thing to note: if you have a newer engine with a computer-controlled timing curve, this procedure doesn’t apply. But for a standard carbureted small block with an HEI distributor, this is the whole ballgame.
Troubleshooting: Symptoms of a Crossed Wire (Misfire, Backfire, Rough Idle)
You wired everything, but it’s not running right. Here’s how to read the symptoms.
A misfire that’s constant, not random, usually points to one specific wire being wrong. If the engine idles rough but smooths out slightly at higher RPM, check the firing order again. The most common mistake is swapping #5 and #7. These two cylinders are next to each other on the driver’s side, and their terminals are close on the cap. The sound is distinctive: a rhythmic ‘chug-chug-chug’ at idle, like a tractor. It won’t smooth out with throttle.
Backfiring through the carburetor means the spark is firing on the intake stroke. That happens when a wire is off by one position—for example, if you accidentally skipped a terminal and put #2 where #8 should be. The engine is igniting fuel while the intake valve is still open. Stop the engine immediately to avoid damaging the intake manifold or carburetor base plate.
Popping through the exhaust is the opposite problem. The spark is firing on the exhaust stroke, igniting unburned fuel in the muffler. This often happens when the distributor is 180 degrees off, or when you wired the order backwards (clockwise instead of counter-clockwise).
If the engine won’t start at all, and you’ve confirmed TDC and the firing order, check the rotor. If the rotor is worn or the carbon button in the center of the cap is missing, you’ll get a weak spark that can’t jump the gap under compression.
For a deeper dive into related ignition issues, check out this ignition switch wiring diagram to rule out power delivery problems.
Frequently Asked Questions (FAQs)
What is the firing order for a Chevy 350 with an HEI distributor?
The firing order is 1-8-4-3-6-5-7-2. The rotor turns counter-clockwise, so you route the spark plug wires in that direction around the distributor cap.
How do I know which direction the rotor turns?
Stand over the engine, looking down at the distributor. The rotor turns counter-clockwise. You can verify this by watching it while someone bumps the starter, or by turning the crankshaft by hand with a socket on the harmonic balancer bolt.
What happens if the distributor is 180 degrees off?
The engine will either backfire through the carburetor or won’t start at all. The fix is to pull the distributor, rotate the oil pump drive shaft 180 degrees, and reinstall. Or, simply remove the distributor, turn the rotor half a turn, and drop it back in.
Can I use any spark plug wire with an HEI distributor?
You need wires designed for HEI systems. They have larger terminals and thicker insulation to handle the higher voltage. Standard points-style wires will arc through the boot and cause misfires.
Does the firing order change for a reverse-rotation marine engine?
Yes. Some marine engines (like certain Mercruiser models) use a reverse-rotation camshaft. The firing order becomes 1-2-7-5-6-3-4-8, and the distributor rotor turns clockwise. If you’re working on a boat, verify the camshaft specification before wiring anything.
Final Checklist for a Perfect First Start
- Confirmed #1 cylinder is on the compression stroke at TDC, not the exhaust stroke.
- Rotor points at the #1 terminal on the cap when the engine is at TDC.
- Wires are routed counter-clockwise in the order 1-8-4-3-6-5-7-2.
- Double-checked the #5 and #7 wires—they’re the easiest to swap.
- Used HEI-rated spark plug wires with proper boots and terminals.
- Set base timing to 8-12 degrees BTDC with the vacuum advance disconnected.
- Reconnected vacuum advance and verified the engine idles smoothly without popping or misfiring.
Take your time on the wiring. A clean, organized layout prevents crossfire and makes future troubleshooting easier. If the engine still doesn’t run right after all this, check the cap and rotor for wear. A fresh set, like the firing order on a Chevy 5.3 article explains, can be the difference between a frustrating weekend and a smooth-running engine. And if you’re dealing with a different platform entirely, the 460 Ford firing order guide covers that V8’s specific sequence.
Products related to this article
Sponsored / affiliate links. As an Amazon Associate I earn from qualifying purchases. I may earn additional commission from eligible campaigns.