Neon Yellow Car Accessories: The Visibility Upgrade That Actually Works
You’ve seen them at car meets and on the highway: cars that pop with fluorescent yellow trim, calipers, or mirror caps. They’re impossible to miss, and that’s the point. But most buyers treat neon yellow as a pure style flex. That’s a mistake. The color has a genuine functional advantage—it’s one of the most visible hues to the human eye, especially in low light or bad weather. Think of it as safety equipment that happens to look aggressive.
This guide covers the practical side of going neon yellow. You’ll learn which accessories deliver the most visual impact for the money, how to match shades across brands like 3M and Avery, what it actually costs to wrap versus paint, and how to keep the color from fading into a sad, pale lemon. You’ll also get a clear installation path that avoids the common bubble-and-peel disasters.

MEAJOO
MEAJOO 4PCS Fluorescent Tire Valve Stem Caps…
- Premium Material: The valve stem caps are made of High quality plastic, which can protect your valves from dirt and corrosion, hea…
- Cool Design: There is skull fluorescent Style on the car tire valve stem caps, which can show your personality to some extent.If y…
- Large Quanity & Wide Usage: Each valve cap measures 0.63" x 0.47" with a thread hole diameter of 8mm. The universal size tire stem…
Whether you’re planning a full vinyl wrap or just want a few bold accents, the information here will save you time and money.
Why Neon Yellow? Style Meets Safety
Neon yellow, also called fluorescent yellow or signal yellow, sits at the peak of human color perception. Our eyes are most sensitive to that wavelength range, which is why it’s used on safety vests, construction equipment, and emergency vehicles. On a car, it serves the same purpose: it makes you visible.
This isn’t just about vanity. A study on motorcycle visibility found that riders wearing high-visibility yellow had a 37% lower risk of multi-vehicle crashes. Cars with neon yellow accents get the same benefit, especially in rain, fog, or at dusk. You’re not just customizing; you’re reducing the chance someone pulls out in front of you.
There’s a secondary benefit that doesn’t get talked about enough: parking lots. You will never lose your car in a sea of white, black, and silver SUVs. That alone is worth the price of a few accessories.
A simple, low-cost way to start is with neon light for car accents, but the easiest entry point is a set of fluorescent valve stem caps. The MEAJOO 4PCS Fluorescent Tire Valve Stem Caps glow in the dark and add a subtle yellow accent to each wheel. They’re a five-minute install that requires no tools, and they protect your valve stems from dirt and corrosion while you’re at it. It’s a small touch, but it’s the kind of detail that signals you put thought into the build.
The Neon Yellow Accessory Checklist: Interior and Exterior
You don’t need to wrap the entire car to get the effect. Strategic placement matters more than total coverage. Here’s what works, ranked by visual impact per dollar.
Exterior Bolt-Ons
Yellow brake calipers. This is the classic move. Painted or powder-coated calipers behind dark wheels are a strong statement. You can buy pre-painted caliper covers for around $200–$400, or have a shop powder-coat your existing calipers for $500–$800. The powder coat lasts longer and handles heat better than spray paint.
Yellow mirror caps. For many cars, these are simple clip-on replacements. A set of OEM-style or aftermarket caps in fluorescent yellow costs $50–$150. They create a nice contrast against black, white, or gray paint. Installation takes about ten minutes with a trim tool.
Yellow front splitters and rear diffusers. These are bigger commitments. A polyurethane splitter in neon yellow can run $150–$400. They do add actual aerodynamic function, but mostly they change the car’s stance. Just be aware that a low front splitter will scrape on steep driveways. I’ve seen more than one expensive splitter cracked on a parking curb.
Yellow license plate frames. A cheap, reversible option at $10–$30. It’s the least permanent choice, and it’s a good way to test if the color works for you before spending more.
Glow-in-the-dark valve stem caps. The MEAJOO caps I mentioned earlier fit here. They’re universal (8mm thread), so they fit most cars, trucks, and motorcycles. The skull design is a bit loud for some tastes, but the fluorescent yellow is exactly the right shade for a subtle accent.
Interior Accents
Yellow seat belts. This is one of the highest-impact interior changes. Replacing all five belts (or four in a coupe) costs $300–$600 at a shop that does custom webbing. It’s not a DIY job for most people because the retractor mechanisms need to be handled carefully. But the result looks factory-custom, and you see it every time you drive.
Yellow steering wheel cover. A latching cover in bright yellow runs $20–$50. It’s a quick fix, but it won’t look as clean as a custom-wrapped wheel. A professional re-wrap in yellow leather or Alcantara costs $400–$800 and feels much better. That’s a personal choice based on budget.
Yellow shift knob. A weighted metal knob in neon yellow is $30–$80. If you have a manual transmission, this is a cheap way to add a daily tactile reminder of the theme.
Yellow floor mats. All-weather mats in yellow are rare. Most brands offer black with yellow stitching, which is the safer choice because yellow mats show dirt immediately. If you go full yellow, plan to clean them weekly.
Yellow trim kits. You can buy pre-cut vinyl pieces for the dashboard, door handles, and center console. A full interior kit for a popular model runs $50–$150. The quality varies widely, and you’ll need patience to apply them without bubbles.
Vinyl Wraps vs. Painted Parts: Pros, Cons, and Costs
This is the biggest decision you’ll make. Wraps and paint both deliver the neon yellow look, but they behave differently over time.
| Factor | Vinyl Wrap | Painted Parts |
|---|---|---|
| Cost (full car) | $2,500 – $5,000 | $5,000 – $10,000 |
| Cost (partial/hood) | $500 – $1,500 | $1,000 – $2,500 |
| Installation time | 2–5 days | 5–10 days |
| Durability | 3–5 years with care | 10+ years with care |
| UV resistance | Good, but fades faster | Excellent with clear coat |
| Removable? | Yes, without damage | No, needs repaint |
| Color matching | Easy with brand swatches | Harder, needs paint code |
| Resale impact | Can be removed to original | Hurt unless buyer wants it |
My honest take: for a first-time neon yellow build, a partial wrap is the smart move. You get the visual punch on the hood, roof, or mirrors without committing to a full color change. If you decide you hate it in a year, you peel it off and the original paint is untouched. Paint is permanent and expensive. It’s the right choice only if you’re certain you want this color for the life of the car.
One more thing on wraps: a cheap wrap job is worse than no wrap. A bad installer will leave bubbles, cut lines that lift, and edges that peel. Pay for a reputable shop. Look at their previous work in person, not just on Instagram.
How to Match Neon Yellow Shades Across Brands
Here’s the trap: there is no single standard for neon yellow. 3M’s Gloss Bright Yellow (2080) is different from Avery Dennison’s Yellow (SW900-117-O). OEM paint codes vary by manufacturer. If you mix a 3M wrapped hood with painted calipers that were color-matched to a different sample, the mismatch will be obvious in direct sunlight.
Your first step is to pick a reference. Decide which material will be your primary surface—usually the largest one, like the roof or hood. If that’s a 3M wrap, use 3M’s color swatch as the master. Then take a physical swatch (order a sample for $5) to your painter and have them mix a custom paint to match it. Do not rely on a photo on your phone; screens shift colors.
For smaller accessories like mirror caps or caliper covers, you have two options. Some companies sell pre-painted parts specifically matched to popular wrap brands. If you’re buying generic parts, expect a slight mismatch. A 5% difference in hue is noticeable to an enthusiast but invisible to most people. Decide if that matters to you.
One practical trick: apply a layer of clear ceramic coating over both the wrap and the painted parts. This unifies the gloss level, which goes a long way toward making two different materials look like they match.
If you’re mixing in yellow light for car accents, be aware that lighting changes how the color reads. LED bulbs have a color temperature that can make neon yellow look greenish or orange. Test any lighting accessories at night before you commit.
Installation Guide: DIY vs. Professional
You can install some neon yellow accessories yourself. You cannot install a full wrap yourself on the first try. Let’s be clear about the difference.
DIY-friendly (30 minutes or less):
- Valve stem caps: unscrew the old caps, screw on the new ones. Done.
- License plate frames: two screws, no tools beyond a screwdriver.
- Mirror caps (clip-on type): use a plastic trim tool to pop off the old caps, snap on the new ones. Watch a YouTube video for your specific car model first.
- Shift knob: most pull straight off or use a set screw.
Professional recommended:
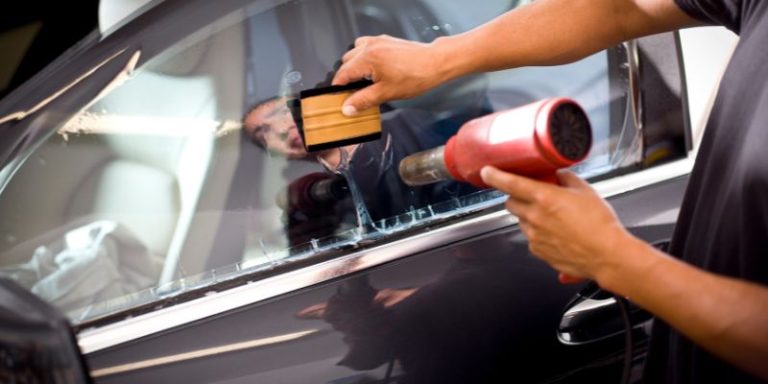
- Full or partial vinyl wrap: requires heat guns, squeegees, and experience with complex curves. A DIY wrap on a flat hood might look okay, but bumpers and mirrors will fight you.
- Seat belt replacement: the retractor mechanism is a safety device. Screwing it up can mean a belt that doesn’t lock in a crash.
- Brake caliper painting: you need to remove the caliper, clean it thoroughly, mask the piston, and cure the paint at the right temperature. A drip on the rotor is a safety hazard.
How to avoid bubbles in vinyl: The secret is surface prep. Wash the panel, then wipe it with isopropyl alcohol. Work in a clean, dust-free garage. Use a squeegee at a 45-degree angle, pushing air from the center outward. If you get a bubble, don’t panic—pierce it with a pin and press the air out. And never stretch the vinyl around a curve; heat it with a hair dryer and let it relax.
For a yellow sport car look, the wrap is the centerpiece. Everything else is supporting cast. Get the wrap right, and the small parts will fall into place.
Protecting Your Neon Yellow: UV Resistance and Cleaning Do’s and Don’ts
Neon yellow fades. It’s a fact of the pigment chemistry. Fluorescent dyes are less stable than standard pigments, so they break down faster under UV light. You can slow this down, but you can’t stop it entirely.
The biggest enemy is the sun. Park in the shade or a garage when possible. If you park outside daily, expect noticeable fading within 2–3 years on a wrap. Painted parts with a quality clear coat will last longer, but the clear coat itself will eventually yellow.
For cleaning, avoid anything abrasive. No dish soap, no harsh degreasers, no automatic car washes with stiff brushes. Use a pH-neutral car shampoo and a microfiber mitt. Rinse the car first to remove grit, then wash in straight lines, not circles.
For vinyl wraps specifically, never use a pressure washer at close range. The high-pressure stream can lift the edges. Keep the nozzle at least 12 inches away and use a wide spray pattern.
Apply a ceramic coating designed for vinyl. It adds a sacrificial layer that blocks some UV and makes future cleaning easier. Reapply every 6–12 months depending on how much sun the car sees.
Winter is another concern. Road salt is corrosive. It can stain vinyl and pit painted parts. Rinse the car weekly during winter, especially the wheel wells and calipers. If you have painted calipers, don’t use an acidic wheel cleaner on them. It will eat the paint.
Frequently Asked Questions
Will neon yellow accessories fade quickly?
Yes, faster than standard colors. A vinyl wrap will show noticeable fading in 3–5 years, sooner if you park in direct sun every day. Painted parts with a good clear coat last longer. To slow fading, park in shade, use a ceramic coating, and avoid harsh cleaners.
Is neon yellow legal for all car parts?
In most places, yes. There are restrictions on flashing or strobe lights that mimic emergency vehicles. Check your local laws for underglow. Exterior paint colors are generally unrestricted, but some countries have rules about reflective materials. When in doubt, check with your local DMV or road authority.
Will neon yellow accessories hurt my car’s resale value?
It depends. A full permanent paint job in neon yellow will hurt resale for most buyers. A vinyl wrap is safer because it can be removed. Small accessories like valve stem caps or a license plate frame have no impact. If you’re worried, keep all original parts and be prepared to swap them back.
Can I install a vinyl wrap myself?
You can, but the results usually show. Flat panels like a hood are doable for a patient beginner. Curved panels like bumpers and side mirrors are extremely difficult. Most DIY wraps have bubbles, wrinkles, or lifted edges within a few weeks. Budget for professional installation unless you’re experienced.
How do I match neon yellow between different brands?
Use physical swatches, not photos. Order a sample from the wrap brand you plan to use. Take that swatch to a painter for custom-mixed paint. For pre-painted parts, ask the seller which wrap brand their color matches. A slight mismatch is common and only visible in direct sunlight.
Final Thoughts: Start Small, Plan Big
- Start with cheap, reversible accessories like valve stem caps or a license plate frame to test the color.
- Choose one primary surface for the main color reference, whether it’s a wrap or paint.
- Budget for professional installation on anything larger than a mirror cap.
- Apply a ceramic coating to protect against UV fading and make cleaning easier.
- Park in shade whenever possible; it’s the single best protection for neon yellow.
- Keep original parts for resale or if you change your mind.
- Remember the safety angle: you’re more visible, and that’s a genuine benefit.
Neon yellow isn’t for everyone. It’s loud, it demands attention, and it requires more maintenance than a standard color. But if you want a car that stands out for a reason—not just for the sake of standing out—it’s a smart choice. Start with a few small pieces, see how they look in your parking spot at dusk, and build from there.
Products related to this article
Sponsored / affiliate links. As an Amazon Associate I earn from qualifying purchases. I may earn additional commission from eligible campaigns.