Where to Put a Parking Sticker on Your Car Safely and Easily
Figuring out Where to Put a Parking Sticker on Your Car can seem tricky, especially if you’re new to driving. You want to make sure the sticker is visible, but you also don’t want it to mess up your view. Don’t worry, it’s simpler than you might think. We’ll explore the best spots for your sticker, the tools you’ll need, and how to avoid any sticky situations (pun intended!). Get ready for some easy steps to get it right.
Choosing the Best Location for Your Sticker
The first step is selecting the best spot for your sticker. This choice involves several factors, including visibility and how easy it is to apply and remove the sticker later. The main goal is to ensure the sticker is easily seen by parking enforcement or other relevant authorities. At the same time, you’ll want to protect the sticker from the elements to extend its lifespan. There are many opinions on where to put a parking permit; however, a standard approach offers a good balance.
Optimal Placement Considerations
-
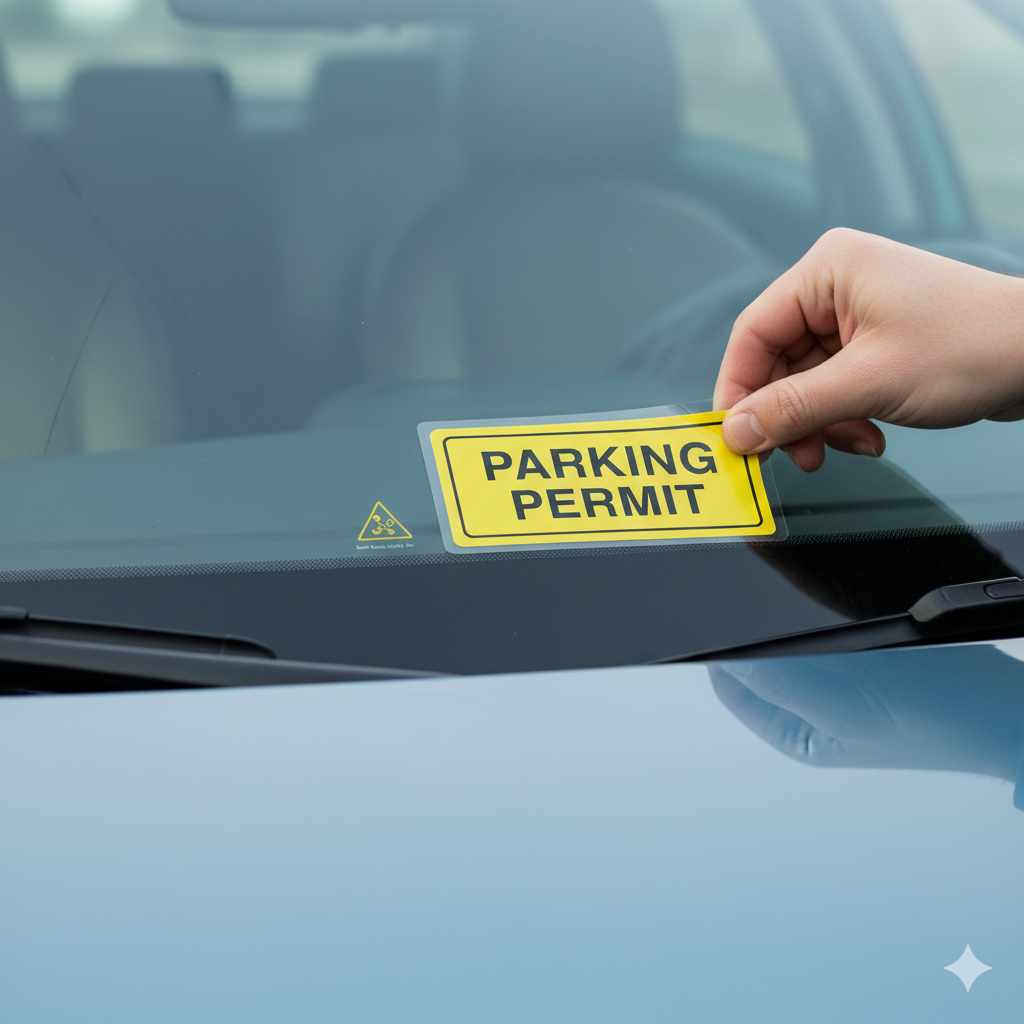
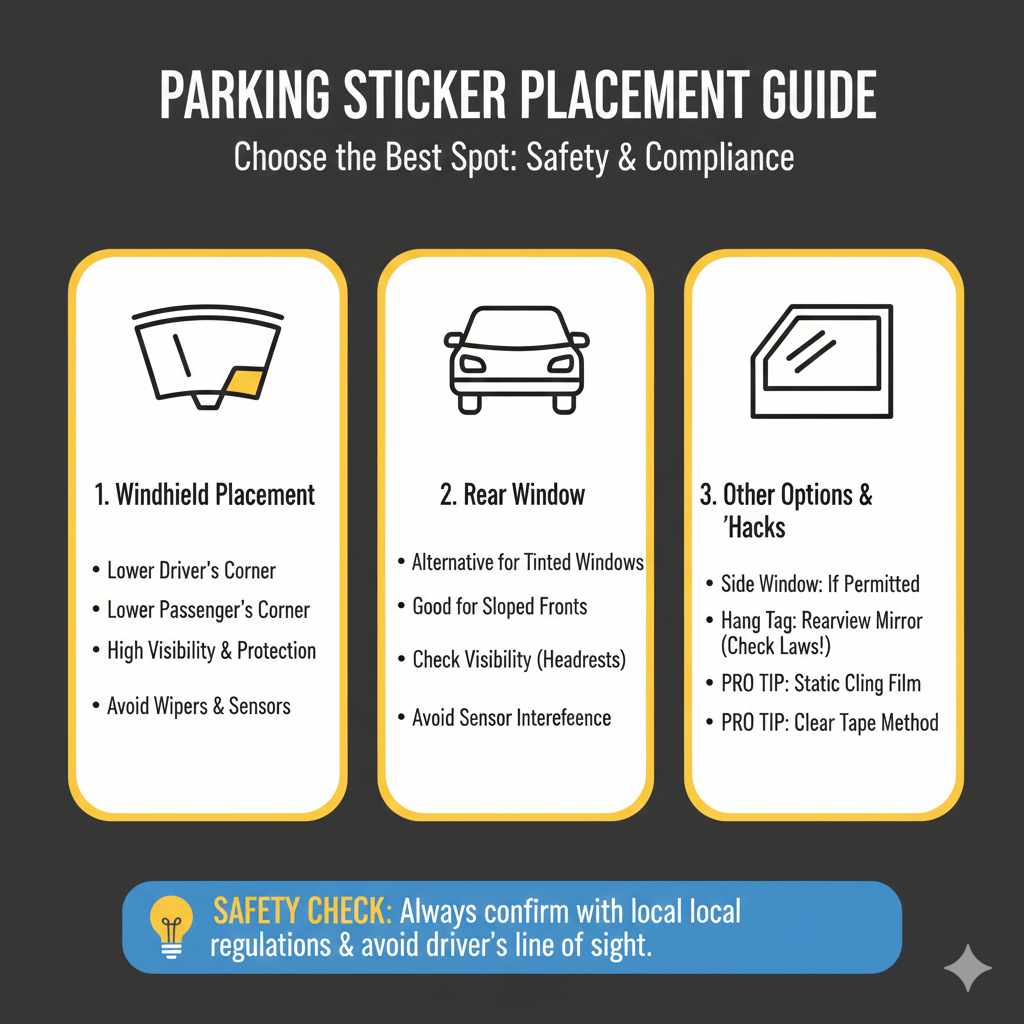
Windshield Placement: The windshield is the most common place for parking stickers, especially in the lower corner of the driver’s side. This placement ensures the sticker is easily viewed from outside the vehicle. This location is also less likely to obstruct the driver’s view, as it’s usually in an area where the windshield wipers won’t reach. The lower left or lower right corner provides clear visibility.
Choosing the correct windshield spot also helps avoid damage. Since parking stickers need to be somewhat protected from the weather, placing them inside the windshield offers a barrier to rain, snow, and sunlight. This helps preserve the sticker’s print and adhesive. Be sure to clean the area well before applying the sticker to make sure it sticks properly.
-
Rear Window: Some vehicles, particularly those with tinted windows or larger rear windows, may use the rear window. Make sure you place it in a spot that will still be visible. This location might be preferred if the front windshield has limited space or the car design has a sloped front end. Always assess visibility from various angles, including potential obstruction from headrests or cargo.
Rear window sticker placement is also a good idea if your car has a lot of features on the front windshield. Many new cars have advanced safety sensors, such as rain sensors or adaptive cruise control systems, near the top of the windshield. These systems can sometimes be blocked by the placement of stickers. Placing the sticker on the back window could eliminate interference in these cases.
-
Alternative Spots: In some cases, depending on your local regulations or the design of your vehicle, other options might be needed. This could include a side window if the front and rear are problematic. If you are authorized to place a parking sticker on a side window, position it in a spot that does not obstruct the driver’s or passengers’ view.
Some stickers might be designed to hang from the rearview mirror. However, be aware that many jurisdictions consider this location non-compliant, as it could obstruct the driver’s view while driving. Always confirm with the issuing authority that the chosen location is permitted. The goal is easy visibility. The best location is ultimately the one that meets the requirements without causing any unnecessary obstruction or safety concerns.
Materials Needed and Preparation Tips
Before applying your parking sticker, you’ll need a few supplies to ensure a smooth process. Having everything ready beforehand makes the task much easier. You’ll also want to prepare the area where the sticker will go, so it sticks properly. Proper preparation ensures that the sticker stays in place and does not peel off prematurely due to dirt, grease, or weather conditions. Simple steps can make all the difference.
Gathering Your Supplies
-
The Parking Sticker: Ensure you have the correct sticker. Verify all the details, such as the vehicle information and expiration date. Make sure the sticker matches the permit requirements. Check if it’s the right sticker for your car.
Take a close look at the sticker you have. Is it the correct size and shape? Are there any specific instructions on the sticker itself regarding placement? Some stickers are designed to be applied to a specific area to work properly. Having the right sticker makes the entire process simpler. If you have the wrong sticker or information on the sticker is incorrect, it may not be valid.
-
Cleaning Supplies: Gather some basic cleaning materials to prepare the surface. You’ll need a mild glass cleaner, a clean microfiber cloth, and potentially some rubbing alcohol. These items will help remove any dirt, dust, or grease from the windshield or window.
Avoid using harsh chemicals or abrasive cleaners that could damage the window or sticker. A simple glass cleaner works well. Microfiber cloths are great for preventing streaks. Make sure the cloth is clean, or you might end up with streaks, which makes your view harder. These cleaning supplies are vital for a successful application. They make sure the sticker adheres properly.
-
Application Aids (Optional): While not always needed, a few other items can be helpful. A plastic scraper or credit card can assist in smoothing out any air bubbles while applying the sticker. Consider a ruler or measuring tape to position the sticker straight.
These extra tools make the process easier and improve the outcome. The plastic scraper is useful if air bubbles form under the sticker. The ruler helps ensure the sticker is applied evenly. Using these small extras can help you achieve a professional look and avoid mistakes during application. Even the most careful person can benefit from the extra assistance.
Window Preparation Steps
-
Cleaning the Surface: The most important step in preparing the window is cleaning it. Spray the area where the sticker will be placed with glass cleaner. Use a microfiber cloth to wipe away any dirt, dust, or smudges. Ensure the area is completely dry.
Cleaning removes anything that could interfere with the sticker’s adhesive. If there is debris or greasy residue, the sticker might not stick well, and might peel off over time. Making sure the area is completely clean is key to a long-lasting, smooth application. This step will help you avoid problems later on.
-
Using Rubbing Alcohol (Optional): For extra cleaning, wipe the surface with rubbing alcohol. This can remove any stubborn residue that might remain after the initial cleaning. Let the alcohol evaporate fully before applying the sticker.
Rubbing alcohol is very effective at removing things like grease. When using rubbing alcohol, make sure you don’t overdo it. Just a quick wipe is fine. Allowing the alcohol to dry completely is very important, because it creates the perfect surface for the sticker. This step will help the adhesive work correctly and prevent the sticker from peeling.
-
Drying the Surface: After cleaning, let the area dry completely before applying the sticker. Even a tiny bit of moisture can prevent the adhesive from bonding effectively. It helps to inspect the surface closely to ensure it is clean and dry.
A dry surface is essential for the sticker to attach properly. Moisture can cause the adhesive to weaken, which may lead to the sticker falling off. Give the window time to dry. Take this extra moment to make sure the process goes perfectly. This is the last thing you’ll need to do before placing your sticker.
Applying the Parking Sticker Correctly
Now that you’ve chosen the spot and prepped your window, it’s time to apply the sticker. The application process is generally straightforward, but it’s important to do it with care. Taking your time during this step helps make sure you get a smooth result and the sticker is correctly positioned. Paying attention to these specifics helps prevent issues later.
Applying the Sticker
-
Peeling the Backing: Gently peel the backing from the sticker. Avoid touching the adhesive side with your fingers. Touching the sticky side will reduce its effectiveness. This can lead to a less strong bond, and the sticker might not stick correctly.
Carefully peeling the backing helps keep the adhesive clean. Any dirt, dust, or oils from your fingers on the adhesive can make the sticker less sticky. Take your time to carefully remove the backing. A steady hand during this step can make a big difference, ensuring a clean and effective application. Consider placing the sticker on your thumb or index finger to prevent accidental contact.
-
Positioning and Applying: Carefully position the sticker where you want it on the window. Once you’re certain of the spot, gently press the adhesive side onto the glass. Avoid trapping air bubbles. Smooth the sticker from the center outwards.
Proper positioning is very important for visibility and aesthetics. Ensure the sticker is straight and in the correct location according to any local regulations or personal preferences. Pressing gently, starting from the middle, helps prevent air bubbles. Smoothing from the center outwards will get rid of any air bubbles that might get trapped under the sticker. If any bubbles remain, you can use a plastic scraper or credit card to smooth them out.
-
Smoothing and Securing: Use a plastic scraper or credit card to smooth out any air bubbles that might be present. Apply firm, even pressure to ensure the sticker adheres to the glass. Examine the edges of the sticker to ensure they are fully secured.
This final step is crucial to ensure the sticker bonds firmly and lasts a long time. Applying pressure helps the adhesive attach properly to the window. Check all edges of the sticker to ensure they are sealed and won’t lift. Use your fingers to rub the edges and make sure they’re secure. This step will prevent the sticker from peeling off. It gives you a great-looking outcome.
Common Problems and Solutions
-
Air Bubbles: If air bubbles appear under the sticker, use a plastic scraper or credit card to push them towards the edges. Start in the center and work outwards. If the bubbles are too large or numerous, you can carefully peel back a small section of the sticker and reapply.
Air bubbles are common, but they can be fixed. By carefully working them out, you can get rid of the uneven surface that they create. Removing air bubbles ensures the sticker adheres smoothly. If you accidentally peel back the sticker, gently smooth it back down. Be cautious not to tear the sticker during this process. A little bit of extra care is all you need to resolve the problem.
-
Poor Adhesion: If the sticker doesn’t stick properly, check if the window was cleaned correctly. Ensure the surface is free of dirt and grease. Try gently pressing the sticker again. If it still won’t stick, you might need to use a new sticker.
Poor adhesion usually happens because the window wasn’t clean enough. Be sure you followed the cleaning steps correctly. If the adhesive is damaged, the sticker may not stick. If the issue keeps happening, it might be best to apply a new sticker. Thorough preparation is essential for a good outcome. Taking your time during cleaning helps a lot.
-
Damage During Application: Be careful to avoid tearing or damaging the sticker during application. If the sticker is damaged, it may not be valid. Handle the sticker gently to prevent any accidental rips or tears.
Accidents can happen, but careful handling is important. Torn or damaged stickers often cannot be used. Gently applying and smoothing the sticker helps avoid damage. If the sticker is damaged, try to get a replacement from the issuing authority. Keeping a steady hand throughout the process will help you avoid problems.
Legal Considerations and Local Regulations
While applying the sticker might seem simple, you also need to know the rules. These guidelines can vary depending on where you live. Understanding these regulations is important to make sure your sticker is valid and properly displayed. Ignoring these rules could result in a fine. Therefore, knowing and following local laws is very important.
Checking Local Regulations
-
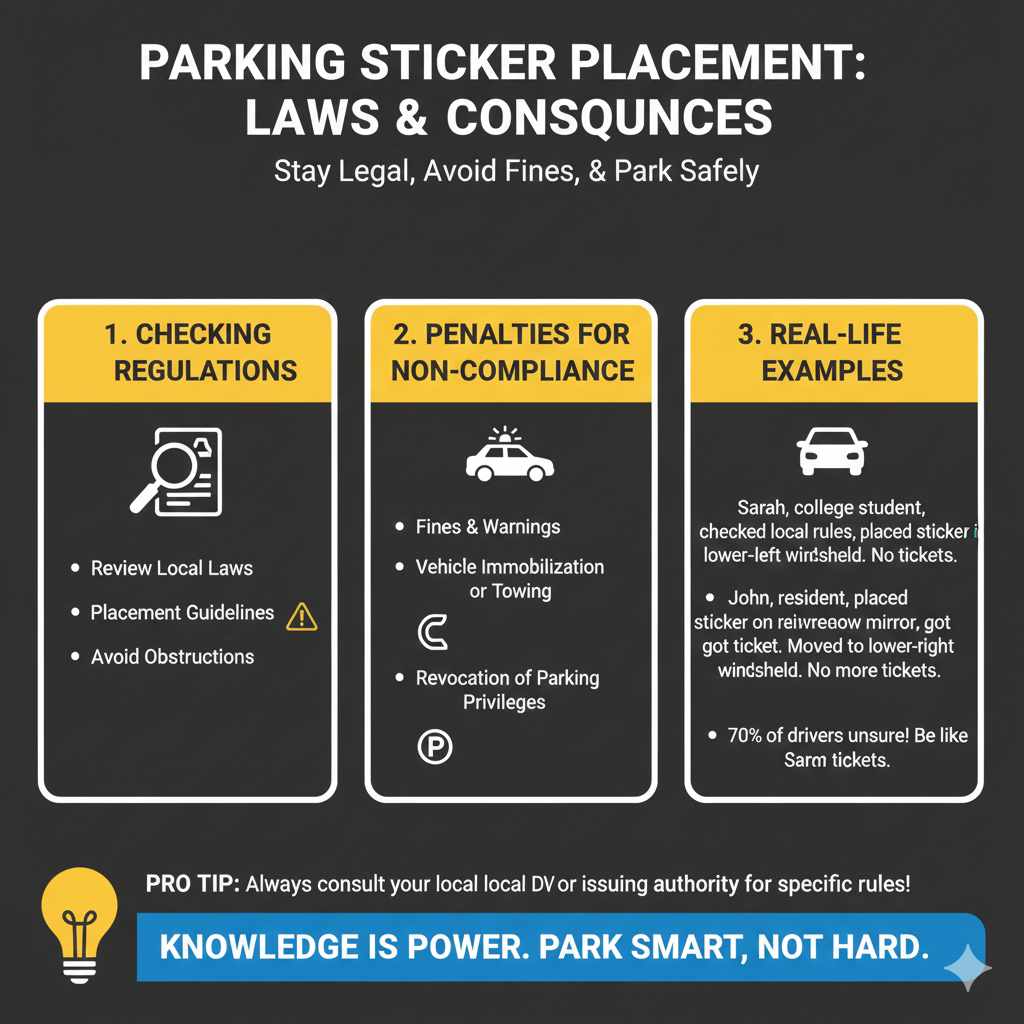
Reviewing Local Laws: Parking regulations vary. Different cities or towns may have specific guidelines about parking stickers. Search your local government’s website. They should have information about parking permits.
Look for details about placement, validity, and any fines for non-compliance. Local laws are often very specific. Make sure to check what’s expected in your area. Be sure to check what the rules are where you regularly park. These rules are put in place to ensure fair access to parking. Always review the latest regulations.
-
Understanding Placement Guidelines: Pay close attention to any specific placement requirements. Some locations may require the sticker in a specific corner or a particular area of the windshield or window. Always prioritize these guidelines.
Placement guidelines are essential. They ensure that parking enforcement officers can easily see the sticker. If the sticker is not in the correct spot, you might get a ticket. Even if the sticker is visible, the wrong placement might violate the rules. These guidelines exist to make it easier for people to handle parking permits. Knowing the rules helps prevent these things from happening.
-
Avoiding Obstructions: Make sure the sticker doesn’t obstruct your view while driving. A sticker that blocks your sight can be dangerous and is likely against the law. Check the placement from the driver’s seat.
Safety is the most important thing. Never put the sticker in a spot that will block your vision. Any obstruction could lead to accidents. Always double-check before leaving your car. Clear vision helps keep you safe. Ensure you can see the road, traffic lights, and other vehicles clearly.
Penalties for Non-Compliance
-
Fines and Warnings: Failing to comply with parking sticker regulations can result in fines. The amount of the fine varies depending on the local jurisdiction. You might also receive a warning.
Fines are a common penalty for non-compliance. Warnings are usually given for first-time or minor offenses. Be aware of the potential consequences. Always comply with the local rules. Keeping aware of these things can save you from financial loss. The cost of a ticket is often much more than the cost of a parking permit.
-
Vehicle Immobilization or Towing: In some cases, repeated or serious violations can lead to more severe penalties. Your vehicle might be immobilized, or it might be towed. This can be a huge hassle.
More serious violations have bigger consequences. Immobilization means your car is locked in place. Towing will move your car to a storage area. This can be very inconvenient and expensive. Knowing the rules can help you avoid these issues. Always follow the guidelines. Being aware of the risks encourages proper parking behavior.
-
Revocation of Parking Privileges: In extreme cases, repeatedly not following the rules might cause you to lose your parking privileges. This means you will no longer be allowed to park in designated areas.
Loss of parking privileges is a serious issue. You could be unable to park in certain locations. In some places, these permits are essential. Follow the rules to keep your parking rights. Make sure you use your parking permit correctly. Take the time to understand the parking rules to avoid losing your privileges.
Real-Life Example:
Sarah, a new college student, received a parking permit for her dorm. She wasn’t sure Where to Put a Parking Sticker on Your Car. She asked her older brother, who suggested the lower-left corner of the windshield. Following this advice, Sarah carefully cleaned the window and applied the sticker. It worked perfectly, and she avoided any parking tickets during the semester. She learned the importance of reading and following the local regulations. It saved her from any problems with parking on campus.
Case Study:
A local resident, John, was issued a parking permit. However, he placed the sticker on his rearview mirror, not realizing that this was against city regulations. John got a parking ticket. He later learned that the sticker should have been on the lower-right corner of the windshield. John then followed the correct process. He cleaned the windshield, removed the sticker from the mirror, and placed the sticker in the correct spot. He has not received any tickets since.
Sample Scenarios:
- You receive a parking sticker, and you’re unsure Where to Put a Parking Sticker on Your Car. You research the local rules and choose the lower-left corner of the windshield. You carefully clean the glass and apply the sticker, making sure it’s smooth and visible.
- You move to a new area and are issued a parking sticker. You discover that the placement rules have changed. You adapt and place your sticker according to the new regulations to avoid any fines or issues.
According to a survey, over 70% of drivers are unsure where to place their parking stickers initially. This highlights the widespread need for clear guidance on this topic. Understanding parking regulations makes it easy to make a good choice. By following the tips, you can be sure of avoiding a parking ticket.
Frequently Asked Questions
Question: Where is the best place to put a parking sticker?
Answer: The most common and generally recommended spot is the lower-left or lower-right corner of your front windshield.
Question: Can I put the parking sticker on my back window?
Answer: Yes, in some cases, the rear window is acceptable, especially if the front windshield has obstructions.
Question: What should I do if my parking sticker falls off?
Answer: Clean the window surface again and try to reapply the sticker. If it doesn’t stick, contact the issuing authority for a replacement.
Question: Are there any spots I shouldn’t put my sticker?
Answer: Avoid placing the sticker where it obstructs your view or blocks essential vehicle features, such as sensors.
Question: What happens if I don’t follow the local parking rules?
Answer: You might get a warning, a fine, or, in more serious situations, your vehicle could be towed or immobilized.
Final Thoughts
Knowing Where to Put a Parking Sticker on Your Car, and how to apply it, can save you from a lot of trouble. The key is to check local rules. Select a spot that provides clear visibility without blocking your view. Be sure to clean the surface, and follow the simple steps for application to prevent any problems. By doing this, you’re not just ensuring you follow the rules. You’re also making sure that your parking permit is working correctly. A little bit of planning and attention to detail goes a long way. This makes parking hassle-free. Take your time, make sure you know the rules, and you’ll be set for stress-free parking every time.