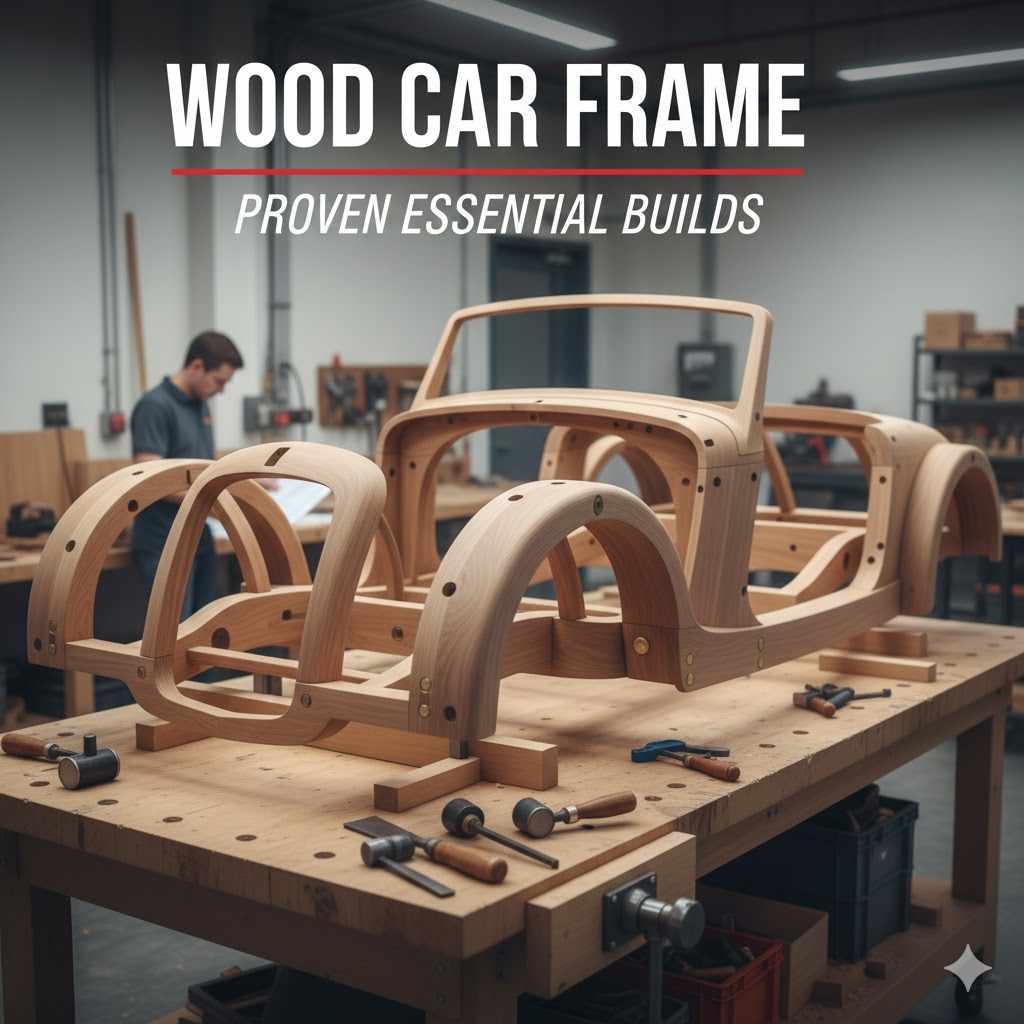
Wood Car Frame: Proven Essential Builds
A wood car frame, often called a wood subframe or wooden structure in older vehicles or custom builds, provides the essential mounting base for the body panels and mechanical components. Proven essential builds utilize strong, treated lumber for durability and reliable support, ensuring vehicle integrity and safety.
Are you curious about how classic cars or certain custom vehicles hold their shape? Maybe you’ve heard the term “wood car frame” and felt a little confused. Don’t worry, this isn’t as complicated as it sounds! For many older vehicles, especially those with classic bodies, the frame that supports the metal body panels is actually made of strong wood, not just metal.
Understanding this wooden structure is key if you plan to restore, repair, or build a custom classic car. It is essential for keeping everything aligned and safe. This guide will walk you through the proven, essential ways these wood frames are built, using simple terms so you can feel confident tackling this part of your project. We will look at the materials, the core designs, and the steps to make sure your build lasts for years to come.
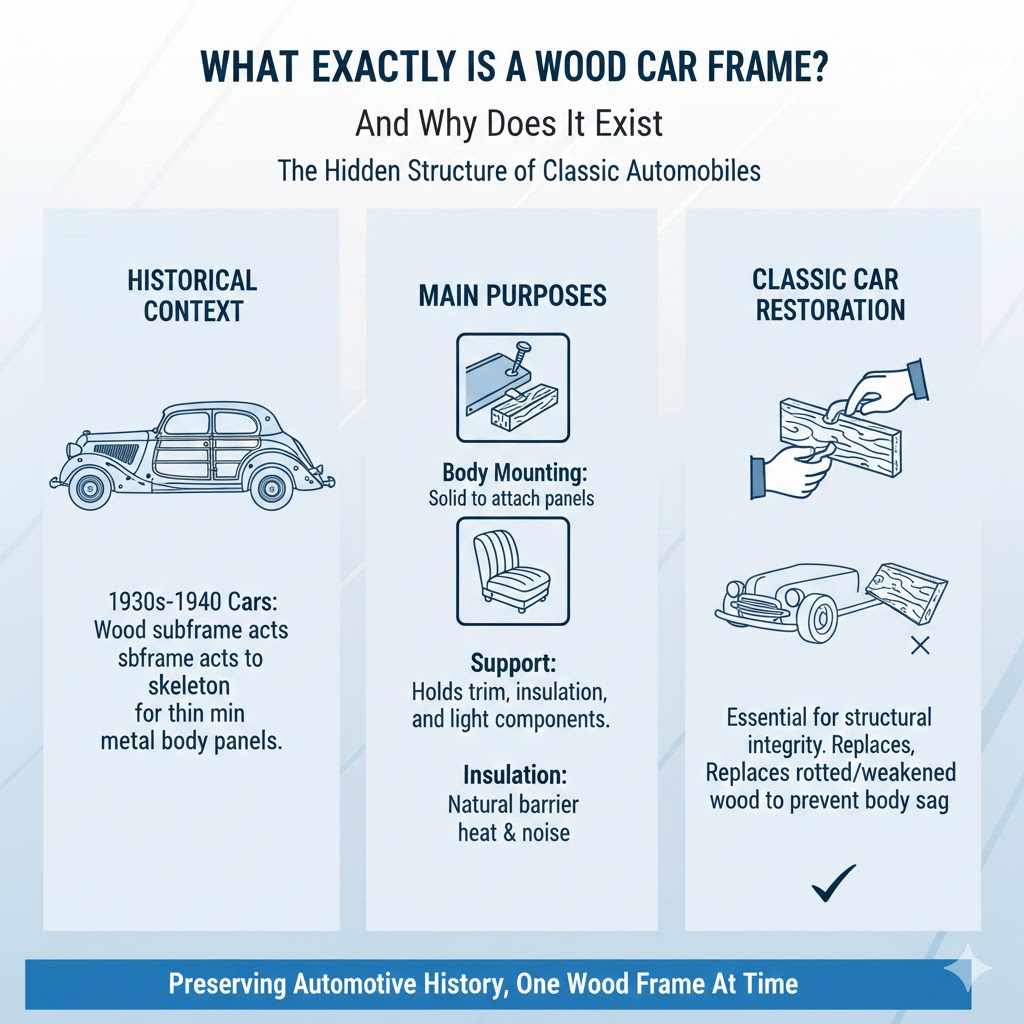
What Exactly is a Wood Car Frame? (And Why Does It Exist?)
When we talk about a modern car, the “frame” is usually a heavy-duty ladder or unibody made entirely of steel or aluminum. But picture a car from the 1930s or 1940s. The outer body (the metal shell you see) was often built like a boat hull—a wooden skeleton underneath that the outer panels were nailed or screwed onto.
This structure is often referred to as the “wood structure,” “wood subframe,” or “wood buck.” It serves three main purposes:
- Body Mounting: It gives a solid place to attach the often-thin metal body panels, preventing them from vibrating or cracking.
- Support: It supports lighter loads like interior trim, insulation, and sometimes even components like battery trays.
- Insulation: Historically, wood also provided a small amount of natural insulation against heat and noise compared to direct metal contact.
For many classic car restorers, replacing or repairing these essential wood components is necessary to maintain the vehicle’s original shape and structural integrity. If the wood rots or weakens, the body will sag or warp.
The Essential Woods for Frame Construction
You can’t just grab any plank from the hardware store! The wood chosen for a car frame must withstand constant vibration, temperature changes, and potential moisture. Choosing the right material is the first proven step to a successful build.
Characteristics of Good Frame Wood
The best wood for these builds needs high density, strength, and resistance to decay. We are looking for materials that are dimensionally stable—meaning they won’t warp easily when humidity changes.
- High density and hardness (to resist compression).
- Natural resistance to rot and insects, or excellent sealing properties.
- Straight grain (to prevent warping during drying or use).
- Availability in large, defect-free sections.
Proven Essential Wood Types
Experts often rely on a few specific types of wood that have stood the test of time in automotive and boat building. These materials offer the best balance of strength and durability for the stresses a vehicle experiences.
| Wood Type | Key Benefit for Frames | Common Application |
|---|---|---|
| Ash | Very strong, flexible, and shock-absorbent. Excellent for structural joints. | High-stress areas, main structural beams. |
| Mahogany (Genuine or African) | Highly rot-resistant, dimensionally stable, and durable. Often used in luxury classics. | Body structure, areas exposed to more moisture. |
| White Oak | Extremely strong and water-resistant, though heavier than ash. | Heavy-duty framework sections. |
| Poplar/Basswood (Treated) | Lighter and easier to shape, often used for non-structural body filler sections. | Interior bracing, panel backing. |
Important Note on Treatment: No matter which wood you choose, it must be properly dried (kiln-dried is best) and often treated with wood preservatives or sealants specifically designed for high-use applications, similar to marine-grade sealants. You can learn more about wood durability standards from organizations like the Forest Products Laboratory (FPL), which offers great insight into wood properties.
Essential Step 1: Planning and Templating the Frame Build
Building a wood frame is more like building a boat hull than framing a house. Precision is everything because the metal body panels were crafted to fit this exact wooden shape.
Gathering Necessary Information
Before you cut a single piece of wood, you must have a perfect reference. Trying to build without one often leads to panels that won’t fit later.
- Original Blueprints or Manuals: Search specialized forums or classic car clubs for factory repair manuals related to your specific year and model. These often show the exact placement of all wooden components.
- Existing Frame Photos: If you are replacing a rotted frame, take dozens of detailed photos from every angle before removing any piece.
- Body Buck Templates: If the body is still in good shape, the best method is to create a “body buck” or template directly from the body itself.
Creating the Body Buck Template
A body buck is essentially a temporary mold of your car body built onto your existing chassis or a flat, level surface. This ensures the new wood frame perfectly matches the metal shell.
To make a template, you often use lightweight wood strips or even thin plywood to trace the inner contours of the metal body. These templates are then mounted securely to the metal chassis rails (if you are keeping the original chassis). This gives you a perfect guide for shaping the larger structural wood pieces.
Essential Step 2: Preparing and Treating the Lumber
Freshly cut lumber contains a lot of moisture. If you use wet wood, it will shrink and twist as it dries, ruining the fit of your body panels. This step is non-negotiable for a reliable build.
Drying the Wood
The wood must reach an internal moisture content (MC) suitable for automotive use—usually around 6% to 8% MC. Kiln-drying is the most reliable way to achieve this quickly and uniformly. If you buy pre-milled lumber intended for restoration, it should already be dried.
Applying Protective Coatings
Wood is susceptible to moisture absorption, which leads to swelling, shrinking, and eventual rot, especially where it meets the metal chassis. Proper sealing protects your investment.
- Boric Acid Solution: Applying a solution of boric acid or a commercial wood preservative helps protect against fungal decay and insects. This is crucial for any wood touching the steel frame.
- Epoxy Sealing: Once dry, critical joints and all surfaces that will contact metal or the road environment should be sealed completely with marine-grade epoxy resin. This creates a moisture barrier.
- Underbody Protection: The bottom surfaces of the frame—those closest to road spray—should receive a heavy coating of a modern, flexible undercoating product after assembly to prevent water ingress.
Remember, the goal is to isolate the wood from water as much as possible. Think of it like sealing the wood on a high-end boat.
Essential Step 3: Constructing the Core Frame Structure
The build process generally follows the structure of the original vehicle, often starting from the floor up or by assembling the main structural components separately.
Understanding Frame Components
A typical wood car frame isn’t one solid block. It is an assembly of various pieces designed to handle specific loads:
- Sills/Rocker Panels: The main longitudinal beams that run under the doors and connect the front and rear sections. These carry the most vertical load.
- Floor Supports: Cross-members that provide a flat surface for the floorboards and support the transmission/drivetrain mounts (though the heaviest drivetrain components usually sit on the main metal chassis).
- Firewall Support: The wooden structure surrounding the engine bay area, crucial for dash mounting.
- Body Mount Blocks: Small, dense blocks of wood placed strategically between the wood frame and the metal body panels. These prevent metal-on-metal contact and act as vibration dampeners.
Assembly Techniques: Joinery is Key
Since you cannot weld wood, the strength of the frame relies entirely on high-quality joinery and powerful fasteners. Traditional woodworking joints are preferred over simple butt joints.
- Mortise and Tenon Joints: This is the classic, strongest joint. A protruding tongue (tenon) on one piece fits perfectly into a slot (mortise) cut into the other. This joint is usually reinforced with glue and dowels or bolts.
- Lap Joints: Used where two pieces run parallel and overlap. These are strong when glued and bolted securely across the overlapping area.
- Fasteners: Use only high-quality, corrosion-resistant fasteners. Stainless steel or bronze screws and bolts are mandatory. Traditional iron or zinc-plated fasteners will corrode when trapped against wood over time, leading to frame failure.
When gluing, use a waterproof, structural adhesive, such as a high-quality polyurethane construction adhesive or a slow-curing, gap-filling epoxy formulated for wood bonding. A strong glue line is often stronger than the wood itself!
Essential Step 4: Attaching the Frame to the Chassis
In most classic applications, the wood frame sits on top of the original metal ladder frame rails. It does not replace the metal frame; it supports the body resting on it. This relationship is critical for safety.
The Importance of Isolation Pads
You must avoid allowing the wood frame to sit directly against the metal chassis rails. This contact point is where moisture can get trapped, leading to accelerated rot where the wood meets the steel.
Proven essential builds always use spacers or isolation pads between the wood and the metal frame. These are typically:
- Thick pieces of high-density synthetic rubber.
- Phenolic resin blocks (a hard, thermosetting plastic that resists compression and moisture).
- Thick pieces of sealed, dense hardwood (less ideal, but sometimes used historically).
These pads should be strategically placed wherever the wood frame will be bolted to the metal chassis. Bolting should occur only where the original body mounts were located, as the chassis is engineered to handle loads at those specific points.
Bolting Down the Structure
Use long, heavy-duty, corrosion-resistant bolts that pass completely through the wood sill and into the appropriate mounting points on the metal chassis. Use large washers on both the top (under the wood) and the bottom (under the chassis nut) to distribute the clamping load and prevent the wood or metal from crushing over time.
Essential Step 5: Fitting the Body Panels to the New Wood Frame
This is the moment of truth. If your templates were accurate and your construction precise, the metal body panels should align beautifully.
Alignment and Shimming
It is rare for panels to drop on perfectly. You will need to use shims to fine-tune the fit, ensuring even gaps around doors, fenders, and the hood.
Shims are thin pieces of material used to adjust the height or angle of a panel. For wood frame cars, shims are often made of:
- Thin, sealed strips of hardwood (like maple).
- Heavy-duty plastic or phenolic material.
- Sometimes, lead sheeting (used traditionally, but epoxy or plastic is safer and more modern).
When installing the outer body panels (like the fenders or doors), you typically attach them directly to the wood structure using specialized, short screws, often brass or stainless steel, to prevent rust streaks. The attachment points must go into the thickest, most stable part of the underlying wood member.
Checking for Squareness and Level
Throughout the body panel fitting process, continuously check that the entire assembly remains “square” (all corners are exactly 90 degrees) and level from front to back. Use precision measuring tools, like a long level or a surveyor’s string line, across the main body opening lines.
This constant verification prevents cumulative errors from making the final paint job impossible or causing doors to bind. This methodical approach is what separates a quick repair from a proven, essential build.
Safety Considerations: Why Precision Matters
While wood might sound inherently weaker than steel, a properly built and sealed wood frame is incredibly robust for supporting the relatively light body shells of vintage vehicles. However, cutting corners compromises safety.
Structural Integrity and Vibration
The biggest danger in a compromised wood frame is not sudden collapse, but rather fatigue failure caused by vibration. Constant engine and road vibration will work loose poorly fastened panels or crack weakened wood members. A loose body panel is a road hazard.
Always ensure that fasteners are tight, glue joints are sound, and that the wood itself is free of knots or natural defects in high-stress areas. Referencing official maintenance documentation, such as those often shared by entities like the National Highway Traffic Safety Administration (NHTSA) regarding vehicle structure, reminds us that the frame dictates overall vehicle stability, even in older designs.
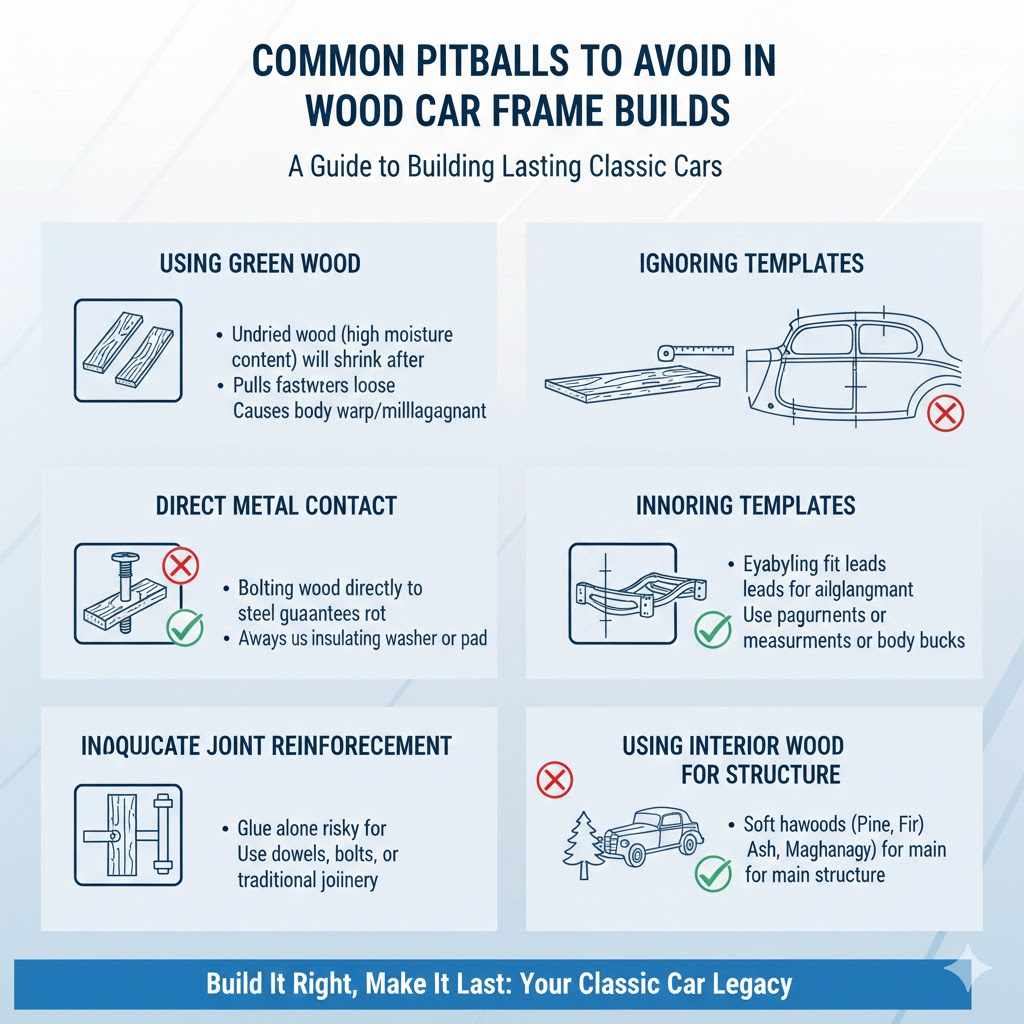
Common Pitfalls to Avoid in Wood Frame Builds
As an automotive guide, I see newcomers make the same mistakes repeatedly. Avoiding these will save you time, frustration, and potential rework:
- Using Green Wood: As mentioned, wood that hasn’t dried to the correct moisture content (MC) will shrink after assembly, pulling fasteners loose and warping the body.
- Direct Metal Contact: Never bolt wood directly to steel without a protective, insulating washer or pad. This guarantees rot at the bolt location.
- Inadequate Joint Reinforcement: Relying only on glue for large structural joints is risky. Always use dowels, bolts, or traditional joinery techniques for maximum load-bearing capability.
- Ignoring Templates: Trying to “eyeball” the fit of the body panels based on how they look is a recipe for misalignment. Use precise measurements or body bucks.
- Using Interior Wood for Structure: Do not use soft woods like pine or fir for load-bearing sills, even if they are sealed. Stick to hardwoods like Ash or Mahogany for the main structure.
Frequently Asked Questions (FAQ) About Wood Car Frames
Q1: Can I replace my wood car frame with a modern metal frame?
A: Yes, you can, but it is a massive undertaking called a “frame-off restoration.” For classic cars, replacing the original wood structure with a new wood frame is usually preferred because it maintains the original structure needed to correctly mount the original body panels and trim.
Q2: How long should a well-built wood car frame last?
A: If built using the correct, treated hardwood and properly sealed against moisture, a wood frame can easily last for decades, often matching the lifespan of the metal chassis it sits upon.
Q3: What is the difference between a wood frame and a body-on-frame construction?
A: Body-on-frame means the body is bolted onto a separate, heavy metal ladder frame (like a truck). A “wood car frame” refers to the wooden skeleton under the body shell itself, which in many vintage cars, sits atop the metal frame.
Q4: What is the best sealant to use on the wood frame?
A: Marine-grade epoxy resin is highly recommended for sealing all interior surfaces and joints. For the bottom surfaces exposed to road spray, a thick, flexible rubberized undercoating applied over the sealed wood works very well.
Q5: Can I repair a small section of rotten wood, or do I need to replace the whole frame?
A: Small, localized rot can often be professionally repaired by cutting out the bad section and scarf-jointing in a new, matching piece of hardwood, which is then glued and bolted securely. If the rot is extensive or compromises a main sill, replacement is safer.
Q6: Do modern cars use any wood in their structure?
A: Almost universally, no. Modern vehicles rely on high-strength steel alloys and aluminum for their unibody or full ladder frames for crash performance and weight savings. Wood is reserved mainly for custom builds, hot rods, or classic restorations.
Conclusion: Building Confidence in Your Classic Structure
Tackling a wood car frame build might seem daunting, but by understanding that it relies on proven woodworking principles—strong joints, dense materials, and absolute protection from moisture—you can approach the task with confidence. These essential builds are less about automotive mechanics and more about precise carpentry, using materials that have supported vehicles for nearly a century.
Focus on the foundations: select high-quality, correctly dried lumber like Ash or Mahogany; ensure every joint is strong and reinforced; and religiously seal every surface that could ever touch water or metal. By treating this wooden structure with the respect it deserves, you are ensuring that your vehicle’s body remains perfectly aligned, structurally sound, and ready to look great for many years to come. You have the knowledge now; take your time, measure twice, and you will have a solid, proven frame beneath your classic ride.