2026 Honda CR-V Battery Replacement: A Complete Electrical System Check
You turn the key and get a single click. Or the dash lights dim and the engine turns over like it’s wading through mud. The 2026 Honda CR-V is a dependable SUV, but its factory battery rarely survives past the four-year mark, and replacements often die early because owners skip a few critical steps during the swap.
This guide walks you through the entire process, from diagnosing the real problem to torquing the terminals to spec. You’ll learn how to remove the stubborn hold-down bracket, clean the tray, reset your electronics, and test the alternator so your new battery actually lasts. By the end, you’ll have done a full electrical system health check, not just a battery swap.
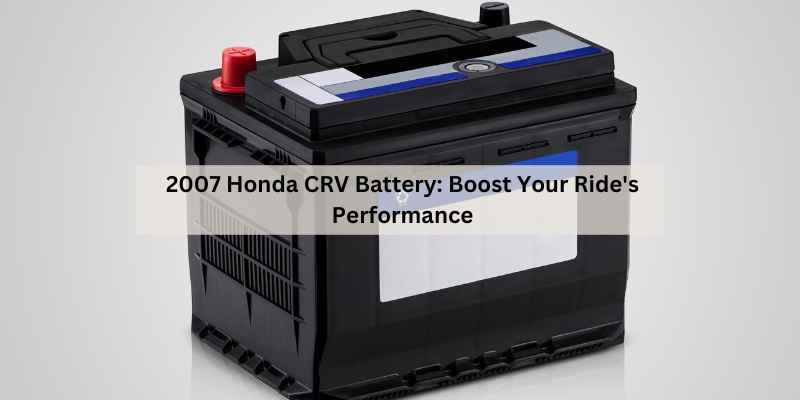
If you’re looking for a solid drop-in replacement, the Weize Platinum AGM Battery (Group 96R) is worth a look. It delivers 600 cold cranking amps and 90 reserve capacity, which comfortably exceeds the CR-V’s minimum requirements. The AGM construction handles heat and vibration better than a standard flooded battery, and it’s sealed, so you won’t deal with corrosion on the terminals.
Why Your 2026 CR-V Battery Fails
The CR-V’s battery sits in the engine bay, right next to the exhaust manifold. That location exposes it to constant heat, which accelerates the chemical breakdown inside the cells. In warm climates, a typical flooded battery in this car lasts about three years. In cooler regions, you might squeeze out four or five.
Another killer is short trips. If you drive less than 15 minutes at a time, the alternator never fully recharges the battery after starting. Over weeks, the state of charge slowly drops, and the lead plates sulfate. Once that happens, capacity is gone for good.
Parasitic drain is a third factor. The CR-V’s clock, security system, and the ECU’s keep-alive memory draw a small current even when the ignition is off. Most cars draw about 20 to 50 milliamps. If you’ve added an aftermarket alarm or a dash cam that’s wired incorrectly, that drain can spike to 200 milliamps or more, killing a healthy battery in a week.
Tools and Parts: What You Need for a 51R Swap
The 2026 CR-V takes a Group 51R battery. That’s a specific size with the terminals reversed—negative on the left, positive on the right when you’re facing the battery from the front of the car. Do not buy a Group 51 (without the R); the cables won’t reach.
Here’s what you’ll need:
- 10mm socket and ratchet (for the hold-down bolt and terminal nuts)
- Wire brush or battery terminal cleaner
- Baking soda and water in a spray bottle (for neutralizing acid)
- Anti-corrosion spray or dielectric grease
- Multimeter (for post-install testing)
- Safety glasses and gloves
For the battery itself, you have options. The Interstate MTX-51R is a solid AGM choice with 500 CCA and a 36-month free replacement warranty. The Optima 8025-160 is another AGM option with 500 CCA and a 36-month warranty, though it costs more. If you want a standard flooded battery, the OEM-equivalent from Honda or a Duralast Gold from AutoZone will work fine, but expect a shorter lifespan in hot weather.
The Weize Platinum AGM is a Group 96R, which is slightly different from the 51R. Before you buy it, measure your battery tray. The 96R is 9.53 inches long, 6.89 inches wide, and 6.89 inches tall. The 51R is roughly 9.4 inches long, 5.1 inches wide, and 8.8 inches tall. The 96R is wider and shorter, so it may not fit the factory hold-down bracket without modification. Always verify dimensions against your current battery before ordering.
Safety First: Critical Precautions Before You Start
Batteries store a lot of energy and contain sulfuric acid. A short circuit can weld a wrench to the frame or cause the battery to explode. Follow these rules strictly.
- Turn the ignition off and remove the key. Do not attempt this with the engine running.
- Wear safety glasses. If acid splashes into your eyes, you have about 10 seconds to rinse before permanent damage occurs.
- Remove all metal jewelry—rings, watches, bracelets. A ring that touches both terminals will get red hot instantly.
- Work in a ventilated area. Hydrogen gas from charging can ignite.
- Disconnect the negative terminal first, then the positive. Reverse the order when installing. This prevents a short if your wrench touches the chassis while loosening the positive clamp.
One more thing: if your battery is leaking or the case is swollen, treat it as an emergency. That’s a sign of internal failure and potential explosion risk. Stop and call a professional.
Step-by-Step Battery Replacement Procedure
This section assumes you’ve confirmed the battery is the problem. If you haven’t, skip to the diagnosis section below to avoid wasting money.
Removing the Old Battery and Hold-Down Bracket
Pop the hood and prop it securely. The battery is on the driver’s side, near the front. You’ll see a black plastic cover over the positive terminal—flip it up.
Start with the negative terminal. Use a 10mm socket to loosen the nut on the black cable clamp. Do not pry on the terminal post itself; that can crack the lead. Instead, use a battery terminal puller or gently twist the clamp side to side while pulling upward. Once it’s free, tuck the cable away so it can’t touch the positive post.
Repeat for the positive terminal, but be extra careful. The red cable runs directly to the fuse box. If it touches the chassis, you’ll blow fuses or worse.
Now find the hold-down bracket. It’s a metal bar that spans the bottom of the battery, secured by a 10mm bolt on the side of the tray and a J-hook that goes into a hole in the tray floor. Remove the bolt first. If the J-hook is rusted, spray it with penetrating oil and wait 10 minutes before trying to turn it. If it’s seized, use a vice grip on the top of the hook while you turn the nut from below. Some owners have had to cut the hook with a hacksaw—that’s a last resort, but it works.
Lift the battery straight up and out. It weighs about 30 to 40 pounds, so use both hands and lift with your legs, not your back.
Cleaning the Tray and Terminals
Before the new battery goes in, inspect the tray. If you see white or blue powdery corrosion, that’s dried acid. Spray it with the baking soda solution and scrub with a wire brush. Rinse with clean water and dry thoroughly. If the tray has rust holes, you need a replacement tray—a new battery won’t fix a structural problem.
Check the battery cables too. The clamps should be clean and shiny on the inside. If they’re corroded, clean them with the wire brush until you see bare metal. If a clamp is cracked or stretched out, replace it. A loose clamp causes intermittent electrical issues that mimic a dying battery.
Also inspect the ground strap that connects from the negative terminal to the chassis. Follow it down to the engine block. If it’s frayed or corroded at the connection point, clean that too. A bad ground is a common cause of slow cranking that a new battery won’t fix.
Installing the New Battery and Torque Specs
Place the new battery in the tray. Make sure the positive terminal is on the right side (facing the front of the car) and the negative is on the left. Double-check the labels on the battery case before you commit.
Reinstall the hold-down bracket. The J-hook goes through the hole in the tray, and the 10mm bolt secures the other side. Tighten it until the battery doesn’t move when you push on it. Do not overtighten—you can crack the battery case. The spec is about 8 ft-lbs, which is snug but not gorilla-tight.
Connect the positive terminal first, then the negative. Tighten the clamp nuts to 6-8 ft-lbs. That’s roughly a quarter turn past hand-tight. If you overtighten, you’ll strip the threads or crack the lead post. If you undertighten, the clamp will loosen over time and cause intermittent power loss.
After both terminals are connected, apply a thin coat of dielectric grease or anti-corrosion spray to the posts and clamps. This prevents oxidation and makes future removal easier. It’s not a substitute for a tight connection, but it helps.
Post-Installation: Resetting Electronics and Testing the Alternator
Once the battery is in, you’ll notice the clock is blinking and the radio presets are gone. That’s expected. But there are two other resets you should do.
First, the power windows. Roll each window down halfway, then roll it all the way up and hold the switch for 2 seconds after it closes. This resets the auto-up feature. If you skip this, the window will only go up while you hold the switch.
Second, the ECU needs to relearn the idle. After reconnecting the battery, start the engine and let it idle for 10 minutes with the AC off. Then turn the AC on and let it idle for another 5 minutes. This lets the computer adjust the idle air control valve. If you skip this, the engine might idle rough or stall for the first few drives. It’s not harmful, but it’s annoying.
Now test the alternator. Set your multimeter to DC volts. With the engine off, the battery should read about 12.6 volts. Start the engine and check again—it should read between 13.8 and 14.5 volts. If it’s below 13.5, the alternator isn’t charging enough. If it’s above 15, it’s overcharging and will cook the new battery. In either case, you need to fix the alternator before the new battery dies prematurely.
With the engine running, turn on the headlights, AC, and rear defroster. The voltage should drop slightly but stay above 13 volts. If it drops below 12.5, the alternator is weak under load. This test takes two minutes and saves you from replacing a battery that wasn’t the problem.
Common Symptoms vs. Battery Problems (Click vs. Slow Crank)
Before you buy anything, figure out what’s actually wrong. A dead battery isn’t the only cause of a no-start.
- One loud click, no crank: The starter solenoid is engaging, but the motor isn’t turning. This is often a bad starter, not a dead battery. Test the battery first—if it reads 12.6 volts, the starter is the likely culprit.
- Rapid clicking (like a machine gun): Low battery voltage. The starter tries to pull current, the voltage drops, the solenoid releases, and the cycle repeats. Charge the battery and retest.
- Slow crank, then nothing: The battery is weak, or the connections are corroded. Check the terminals and the ground strap. If they’re clean, test the battery with a load tester.
- No sound at all, dash lights dim: Dead battery or a bad connection. Check the terminals first, then test the battery.
- Everything works, but the engine won’t turn: Could be a starter, a neutral safety switch, or a blown fuse. Not a battery issue.
If your battery is over three years old and you see any of these symptoms, the battery is probably the problem. But if it’s less than two years old, suspect the alternator or a parasitic drain before you replace it.
2026 CR-V Battery Cost Breakdown (DIY vs. Shop)
Here’s what you’re actually paying for, and where you can save money.
| Option | Parts Cost | Labor | Total | Notes |
|---|---|---|---|---|
| DIY with flooded battery | $120–$160 | $0 | $120–$160 | Basic battery, 3-4 year lifespan |
| DIY with AGM battery | $180–$260 | $0 | $180–$260 | Better heat resistance, 5-7 year lifespan |
| Shop install (flooded) | $150–$200 | $30–$60 | $180–$260 | Convenience, but you don’t learn anything |
| Shop install (AGM) | $200–$300 | $30–$60 | $230–$360 | Dealer prices are usually the highest |
Prices vary by region and brand. The battery itself is the bulk of the cost. Labor is usually a half-hour minimum at a shop, so the DIY route saves you $30 to $60. More importantly, you’ll know the job was done right—the terminals are torqued, the tray is clean, and the hold-down is secure.
One hidden cost: battery disposal. Most auto parts stores take your old battery for free, and some give you a $5 to $10 core credit when you buy a new one. If you toss it in the trash, you’re looking at a fine in most states. Recycle it properly.
Frequently Asked Questions
How long does a 2026 CR-V battery last?
Expect 3 to 5 years depending on climate and driving habits. Hot climates shorten battery life significantly. If you live in Arizona or Texas and take short trips, plan on replacing it every 3 years. In cooler regions with longer drives, 5 years is realistic.
Can I use a Group 96R battery instead of a 51R?
Only if the dimensions fit your tray and the terminal orientation matches. The 96R is wider and shorter than the 51R. Measure your battery tray before buying. If the 96R fits, it’s a fine upgrade—more capacity and often better cold cranking amps. But the factory hold-down bracket might not line up with the wider case. Check that first.
Do I need to register the battery with the ECU?
No. The 2026 CR-V doesn’t have battery registration like some BMWs or Mercedes. The ECU will relearn the idle after a few minutes of running. You just need to reset the clock, radio presets, and power windows.
Why does my new battery die after a week?
Either the alternator isn’t charging it, or something is draining it. Test the alternator with a multimeter as described above. Then check for parasitic drain by disconnecting the negative cable and connecting a multimeter set to amps in series. A draw above 50 milliamps is a problem. Common culprits are aftermarket stereos, alarms, and dash cams wired to the wrong fuse.
What is the correct terminal torque for the battery cables?
6 to 8 ft-lbs for the clamp nuts. That’s snug with a 10mm socket, about a quarter turn past hand-tight. Overtightening strips the threads on the clamp or cracks the lead post. Undertightening leads to a loose connection and intermittent electrical problems.
When to Call a Professional
If you’ve followed all the steps and the car still won’t start, stop guessing. A professional can run a load test on the battery, check the starter current draw, and test the alternator output under load. They have tools you don’t, like a carbon pile tester and an oscilloscope.
Also call a pro if you see any of these:
- Swollen or cracked battery case—that’s a safety hazard
- Heavy corrosion on the cables that extends beyond the terminal clamps
- You suspect a parasitic drain but can’t find it after checking the obvious stuff
- The check engine light comes on after the battery swap—that’s a separate issue
Most battery swaps are straightforward, but this car has its quirks. The hold-down bracket can be a pain, and the terminal orientation confuses people. If you’re not comfortable working around electrical systems, paying a shop $60 for labor is money well spent.
What to Remember for Next Time
- Group 51R is the correct size—don’t buy a Group 51 without the R
- Disconnect the negative terminal first, reconnect it last
- Clean the tray and inspect the ground strap before installing the new battery
- Torque the hold-down to 8 ft-lbs and the terminal nuts to 6-8 ft-lbs
- Reset the power windows and let the ECU idle-relearn after reconnecting
- Test the alternator with a multimeter—13.8 to 14.5 volts at idle is healthy
- Check the current price on Amazon for a Weize Group 96R AGM battery if you want a longer-lasting option
For more CR-V maintenance tips, check out our guide on resetting your CR-V after a battery change and the correct tire size for the 2026 model. A little preparation goes a long way toward keeping this SUV on the road for another 200,000 miles.
Products related to this article
Sponsored / affiliate links. As an Amazon Associate I earn from qualifying purchases. I may earn additional commission from eligible campaigns.