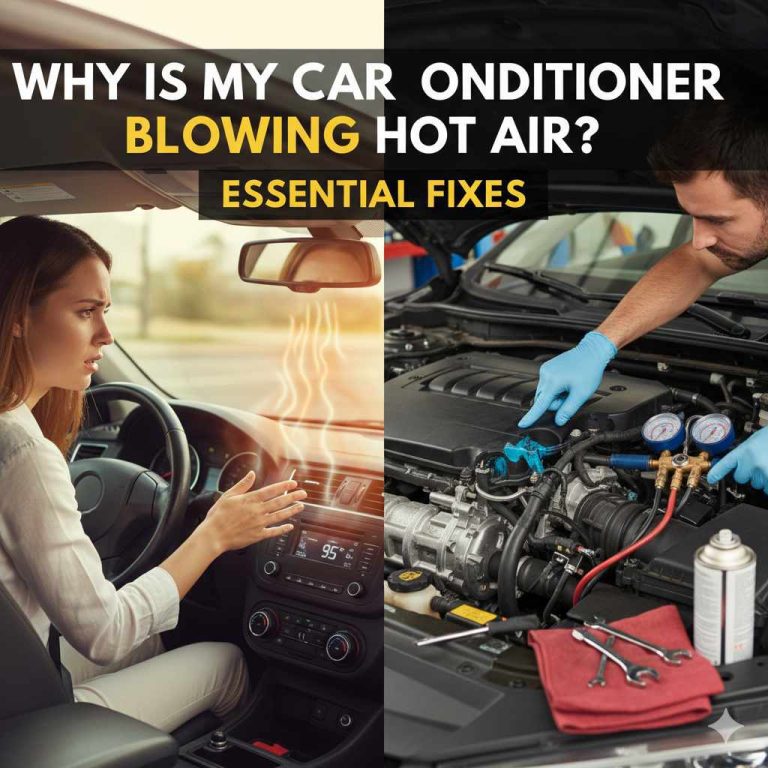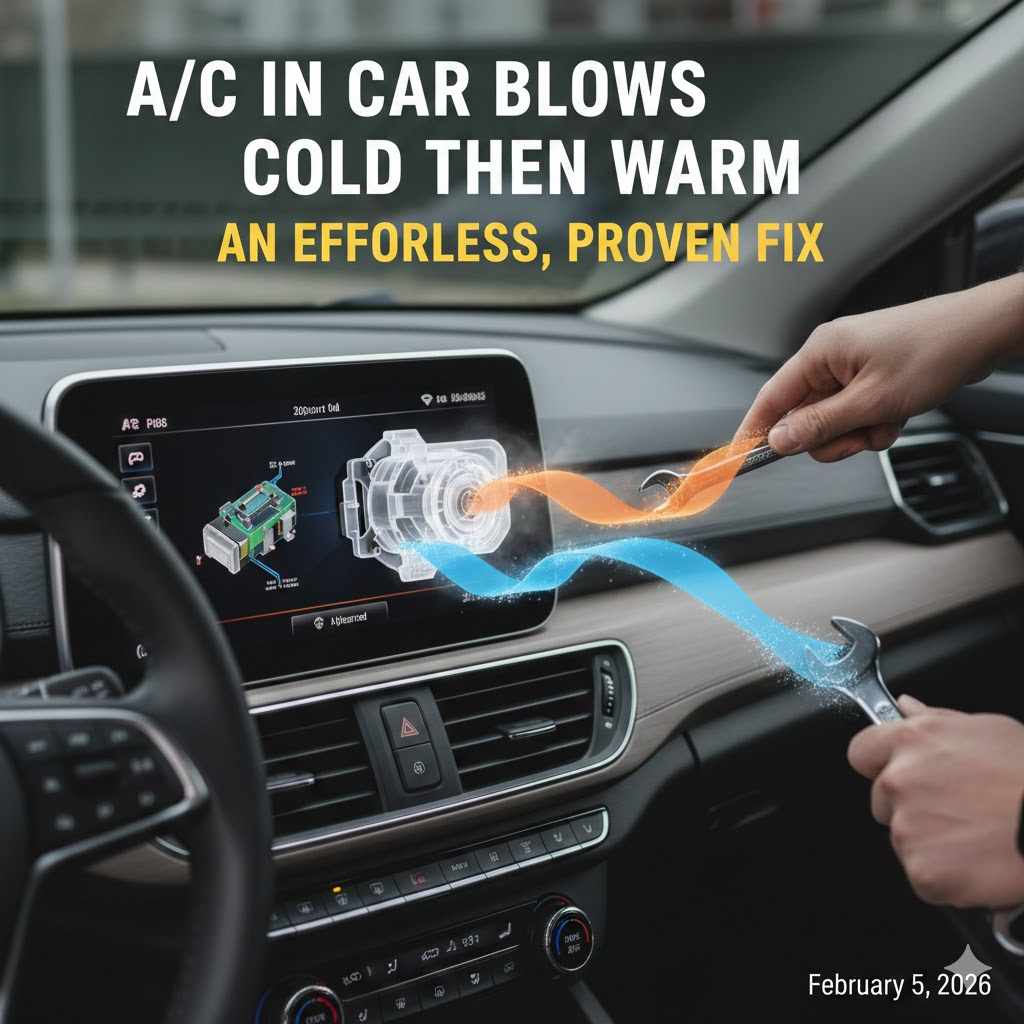
A/C in Car Blows Cold Then Warm: An Effortless, Proven Fix
If your car’s A/C blows cold then warm, it’s most often due to low refrigerant. The system has just enough to start cooling, but not enough to sustain it, causing the compressor to shut off. A simple, cost-effective fix is to use a DIY A/C recharge kit to add the correct amount of refrigerant back into the system.
Is your car’s air conditioner playing tricks on you? One minute you’re enjoying a blast of icy cold air, and the next, it’s just blowing warm, stuffy air. It’s a frustrating problem, especially on a hot day. You might worry about a huge repair bill, but I have good news for you. This is one of the most common A/C issues, and the fix is often surprisingly simple and affordable.
You don’t need to be a master mechanic to solve this. In fact, many drivers can fix this right in their own driveway. In this guide, I’ll walk you through the entire process, step by step. We’ll figure out why it’s happening and how you can fix it yourself. Let’s get that cold air blowing consistently again!
Why Your Car A/C Goes From Cold to Warm
To understand the fix, it helps to know a little about what’s going on behind the scenes. Your car’s A/C is a closed-loop system that circulates a special gas called refrigerant. Think of it like the cold-carrying lifeblood of your A/C. When everything is working perfectly, this refrigerant cycles through components, absorbing heat from your cabin and releasing it outside.
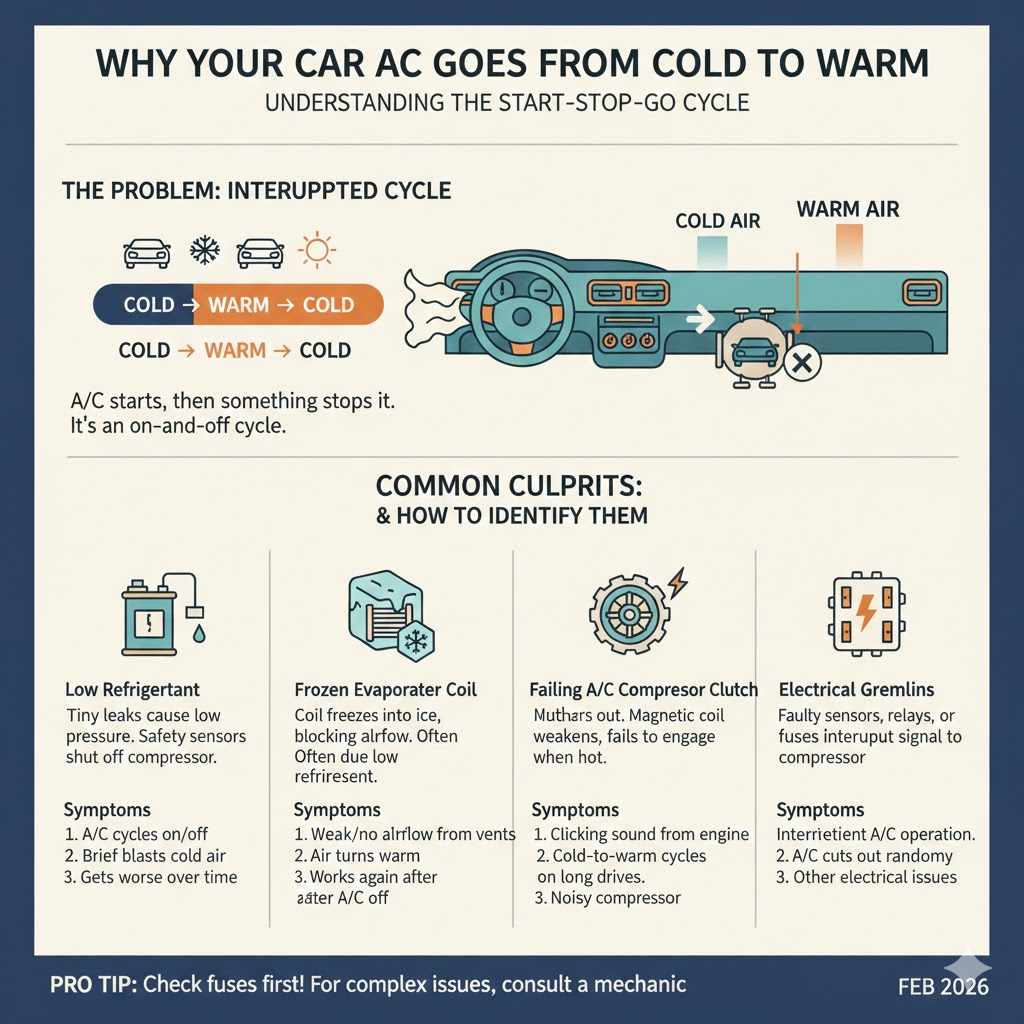
When your A/C blows cold and then warm, it means this cycle is being interrupted. It starts working, but something stops it. Here are the most common culprits, starting with the one you can most likely fix yourself.
1. Low Refrigerant: The Most Common Cause
This is the number one reason for an A/C system that can’t make up its mind. Over time, tiny amounts of refrigerant can escape through seals and connections in the system. When the level gets low, the A/C struggles.
- How it happens: The system has just enough refrigerant to kick on the A/C compressor and produce some cold air. However, safety sensors detect the pressure is too low to operate safely, so they shut the compressor off to prevent damage.
- The cycle: After a few moments, the pressure equalizes, the sensor allows the compressor to turn back on, and you get another brief blast of cold air. This on-and-off cycle is what you feel as cold, then warm, then cold again.
The good news? Topping off the refrigerant is a straightforward DIY task that we will cover in detail.
2. A Frozen Evaporator Coil
Inside your dashboard is a part called the evaporator, which acts like a mini-radiator. It’s where the magic of cooling happens. Sometimes, this component can literally freeze into a block of ice.
- Why it freezes: A frozen evaporator is often another symptom of low refrigerant. Low refrigerant causes pressure to drop too much, making the evaporator get excessively cold and freeze any moisture from the air passing through it. Restricted airflow from a dirty cabin air filter can also contribute.
- What you feel: When it freezes, air can’t pass through it, so you get weak or warm airflow from your vents. After you turn the A/C off for a while and the ice melts, it might start working again—until it freezes over once more.
3. A Failing A/C Compressor Clutch
The A/C compressor is the heart of the system, responsible for pumping refrigerant. On the front of the compressor is a clutch that engages and disengages it, much like the clutch on a manual transmission car.
- The problem: As the clutch wears out, the magnetic coil that pulls it in can weaken. When it gets hot from use, it might fail to stay engaged, stopping the compressor. After it cools down, it might work again for a short time.
- Symptoms: You might hear a clicking sound as the clutch tries to engage and disengage repeatedly. The cold-to-warm cycle often gets worse as the engine bay heats up on longer drives.
4. Electrical Gremlins
Modern A/C systems rely on a network of sensors, relays, and fuses. A problem with any of these can cause intermittent operation. A faulty pressure switch, a failing relay, or even a blown fuse can interrupt the signal that tells your A/C compressor to stay on.
While this sounds complicated, checking fuses is a simple first step. However, diagnosing faulty relays or sensors often requires more advanced tools and is best left to a professional if you’re not comfortable with vehicle electronics.
Your Step-by-Step Guide to the Effortless Fix: Recharging Your A/C
Since low refrigerant is the most likely cause, we’ll focus on the proven DIY fix: recharging your A/C system. This process is safe and easy if you follow the steps carefully. It can save you over $100 compared to a trip to the mechanic.
Safety First!
Before you start, safety is key. Refrigerant can cause frostbite if it contacts your skin and can be harmful to your eyes.
- Wear Safety Glasses: This is non-negotiable. Protect your eyes at all times.
- Wear Gloves: Nitrile or mechanic’s gloves will protect your hands.
- Work in a Well-Ventilated Area: Work outdoors or in an open garage.
- Never Overcharge the System: Adding too much refrigerant can cause serious damage. The gauge is your best friend here.
Tools and Materials Needed
You only need one key item for this job, which you can find at any auto parts store.
- A/C Recharge Kit: Get one with a built-in pressure gauge. This is crucial for adding the right amount of refrigerant. Choose a kit that contains R-134a refrigerant (for most cars made before 2015) or R-1234yf (for newer vehicles). Check your car’s manual or a sticker under the hood to confirm which type you need.
- Gloves and Safety Glasses: As mentioned above.
- A Clean Rag: To wipe down any dirty ports.
Step 1: Locate the Low-Pressure A/C Service Port
With the engine off, open your hood and find the low-pressure A/C port. This is where you’ll connect the recharge can.
- Look for a metal pipe, usually on the passenger side of the engine bay, running from the firewall towards the front of the car.
- There will be two service ports on the A/C lines. You want the low-pressure one. It will have a plastic cap, often black or blue, with an “L” on it.
- The low-pressure port is the smaller of the two. The recharge kit’s coupler is designed to fit only on this smaller port, so you can’t accidentally connect it to the high-pressure side.
Once you find it, unscrew the cap and keep it somewhere safe.
Step 2: Get a Baseline Pressure Reading
Before adding any refrigerant, you need to see where your system is at. This will confirm that low refrigerant is indeed the problem.
- Start the Car: Turn your car on and turn the A/C to its highest fan speed and coldest setting. Make sure the “A/C” button is on, not just the fan.
- Let it Run: Allow the engine and A/C to run for 2-3 minutes to let the pressure stabilize.
- Connect the Gauge: Following the instructions on your recharge kit, connect the hose to the can of refrigerant first. Then, attach the quick-connect coupler to the low-pressure port you just located. It should snap on firmly. Do not pull the trigger yet.
- Read the Gauge: Look at the pressure reading. The gauge will have color-coded zones. You are looking for a reading in the “Low” or “V” (for vacuum) zone, often colored white or green. This confirms your system is low on refrigerant.
| Gauge Reading | What It Means | Next Step |
|---|---|---|
| Low (White/Green Zone) | System is undercharged. This is the expected reading for our problem. | Proceed to Step 3 to add refrigerant. |
| Normal (Green/Blue Zone) | Refrigerant level is okay. The problem is likely elsewhere (clutch, electrical). | Do not add refrigerant. See the section “When to See a Pro.” |
| High (Yellow/Red Zone) | System is overcharged or has a blockage. This is dangerous. | Do not add refrigerant. Disconnect immediately and consult a professional. |
Step 3: Carefully Add Refrigerant
Now for the main event. You will add refrigerant in short bursts while monitoring the pressure gauge.
- Shake the Can: Give the refrigerant can a good shake.
- Press the Trigger: Squeeze the trigger or turn the valve on the can for 5-10 seconds to release refrigerant into the system.
- Release and Check: Release the trigger and wait about 30 seconds for the pressure to stabilize and give you an accurate reading on the gauge.
- Rotate the Can: While charging, slowly rotate the can between the 12 o’clock and 3 o’clock positions as recommended by the kit’s instructions. This helps the refrigerant flow properly.
- Repeat: Continue this process—charge for 5-10 seconds, release, wait, and check the gauge—until the needle is in the “Normal” or “Filled” range (usually the green or blue zone). It’s crucial not to let it enter the “High” (red) zone.
Pro Tip: Pay attention to the air coming from your vents inside the car. As you add refrigerant, you should notice it getting consistently colder. You will also hear the A/C compressor clutch (located on the front of the compressor pulley) click on and stay engaged, instead of cycling on and off.
Step 4: Final Check and Finish Up
Once the gauge shows a steady reading in the proper range and your A/C is blowing consistently cold, you’re done!
- Disconnect the coupler from the service port. You might hear a tiny hiss of gas, which is normal.
- Screw the plastic cap back onto the low-pressure port. This is important as it keeps dirt and debris out.
- Store any remaining refrigerant in a cool, dry place for future use.
Congratulations! You’ve just saved yourself time and money by fixing your car’s A/C yourself. Proper handling of refrigerants is important for our environment. For more information on regulations and safety, you can visit the U.S. Environmental Protection Agency (EPA) website.
When the DIY Fix Isn’t Enough: Knowing When to See a Pro
Sometimes, a simple recharge isn’t the answer. If you’ve recharged the system and the problem returns in a few days or weeks, you likely have a significant leak. If the pressure gauge showed “Normal” or “High” from the start, the issue lies elsewhere.
Here’s a quick guide on when to head to a trusted mechanic.
| Symptom | Potential Problem | DIY or Pro? |
|---|---|---|
| A/C gets warm again after a week. | Moderate refrigerant leak. | Pro. They have tools to detect leaks and repair them. |
| Loud grinding or squealing from the engine bay when A/C is on. | Failing A/C compressor. | Pro. Compressor replacement is a major job. |
| Pressure gauge reads in the red (High) zone. | System is overcharged or has a blockage. | Pro. This requires specialized equipment to diagnose and fix safely. |
| A/C works at high speeds but gets warm at idle. | Failing cooling fan or A/C clutch issue. | Pro. Requires more advanced diagnostics. |
| Oily, greenish residue on A/C lines or components. | A significant refrigerant leak (the oil circulates with the refrigerant). | Pro. The source of the leak must be found and repaired. |
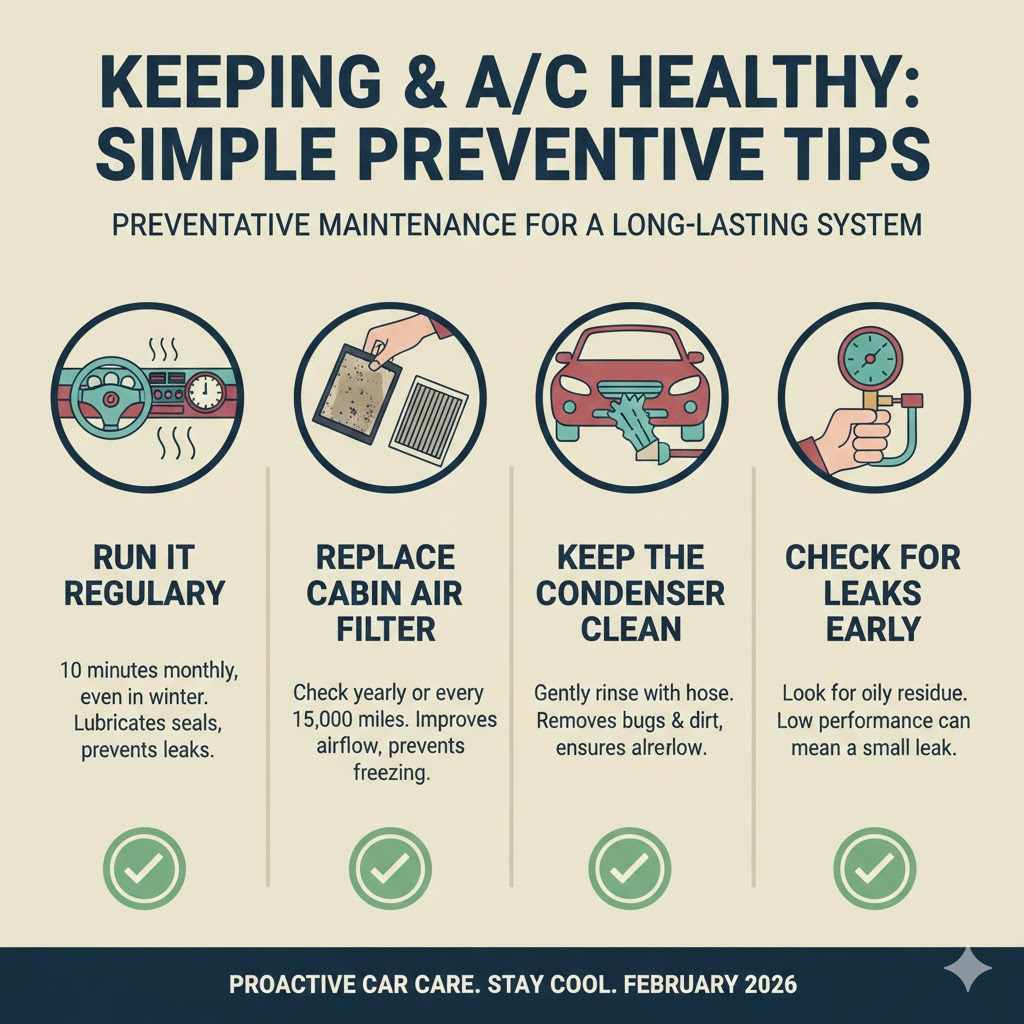
Keeping Your A/C Healthy: Simple Preventive Tips
To avoid future issues, a little prevention goes a long way. Here are a few simple habits to keep your A/C system in top shape:
- Run it Regularly: Even in the winter, run your A/C for about 10 minutes once a month. This circulates the oil in the system, keeping seals lubricated and preventing them from drying out and cracking.
- Replace Your Cabin Air Filter: A clogged filter restricts airflow, putting a strain on your A/C system and potentially causing the evaporator to freeze. Check it once a year or every 15,000 miles.
- Keep the Condenser Clean: The condenser sits in front of your car’s radiator. Gently rinse it with a hose (don’t use high pressure) when you wash your car to remove bugs, leaves, and dirt that can block airflow.
Frequently Asked Questions (FAQ)
1. How much does it cost to fix an A/C that blows cold then warm?
If you do it yourself with a recharge kit, it typically costs between $30 and $60. If you take it to a shop, a simple recharge service can range from $120 to $250. If the problem is a leak or a failing component like a compressor, the cost can rise to several hundred dollars or more.
2. Is it safe to drive my car if the A/C is not working properly?
Yes, it is generally safe. An A/C that blows cold then warm will not affect your car’s ability to drive. The worst part is the discomfort on a hot day. However, if you hear loud grinding noises, it’s best to stop using the A/C until it can be inspected to prevent further damage to the compressor.
3. Can I use an A/C recharge kit on any car?
Most recharge kits are designed for cars using R-134a refrigerant, which is standard for vehicles made from 1994 to around 2015. Newer cars use a different refrigerant called R-1234yf, which requires different, more expensive equipment. Always check under your hood or in your owner’s manual to confirm which type your car uses before buying a kit.
4. Why does my car A/C get warm when I stop or idle?
This is often caused by a faulty radiator cooling fan or fan clutch. When you are driving, air is forced through the condenser, which helps cool the refrigerant. When you stop, the car relies on the cooling fan to pull air through. If the fan isn’t working correctly, the pressure in the A/C system gets too high, and a safety switch will turn off the compressor, causing the air to go warm.
5. How often should I recharge my car’s A/C?
You shouldn’t have to. A car’s A/C system is a sealed unit and should not lose refrigerant. If you find yourself needing to recharge it every year, you have a small leak that should be professionally diagnosed and repaired. A simple DIY recharge is a great fix for a system that has lost a small amount of refrigerant over many years of use.
6. What’s the difference between R-134a and R-1234yf refrigerant?
R-134a was the industry standard for many years. However, R-1234yf is a newer, more environmentally friendly refrigerant with a much lower global warming potential. The two are not interchangeable, and their service ports are different sizes to prevent accidental mixing. Using the wrong type can damage your A/C system.
Conclusion: Stay Cool and Confident
That frustrating cycle of your car’s A/C blowing cold then warm is more of an annoyance than a catastrophe. For most drivers, the root of the problem is simply a low level of refrigerant. As you’ve seen, this is something you can confidently and safely fix on your own with a simple recharge kit.
By taking a few minutes to diagnose the pressure and carefully add refrigerant, you can restore that consistent, ice-cold air you rely on during hot weather. Not only will you save money, but you’ll also gain the satisfaction of having solved a common car problem yourself. So next time your A/C acts up, don’t sweat it. You’ve got the knowledge and the steps to handle it like a pro.