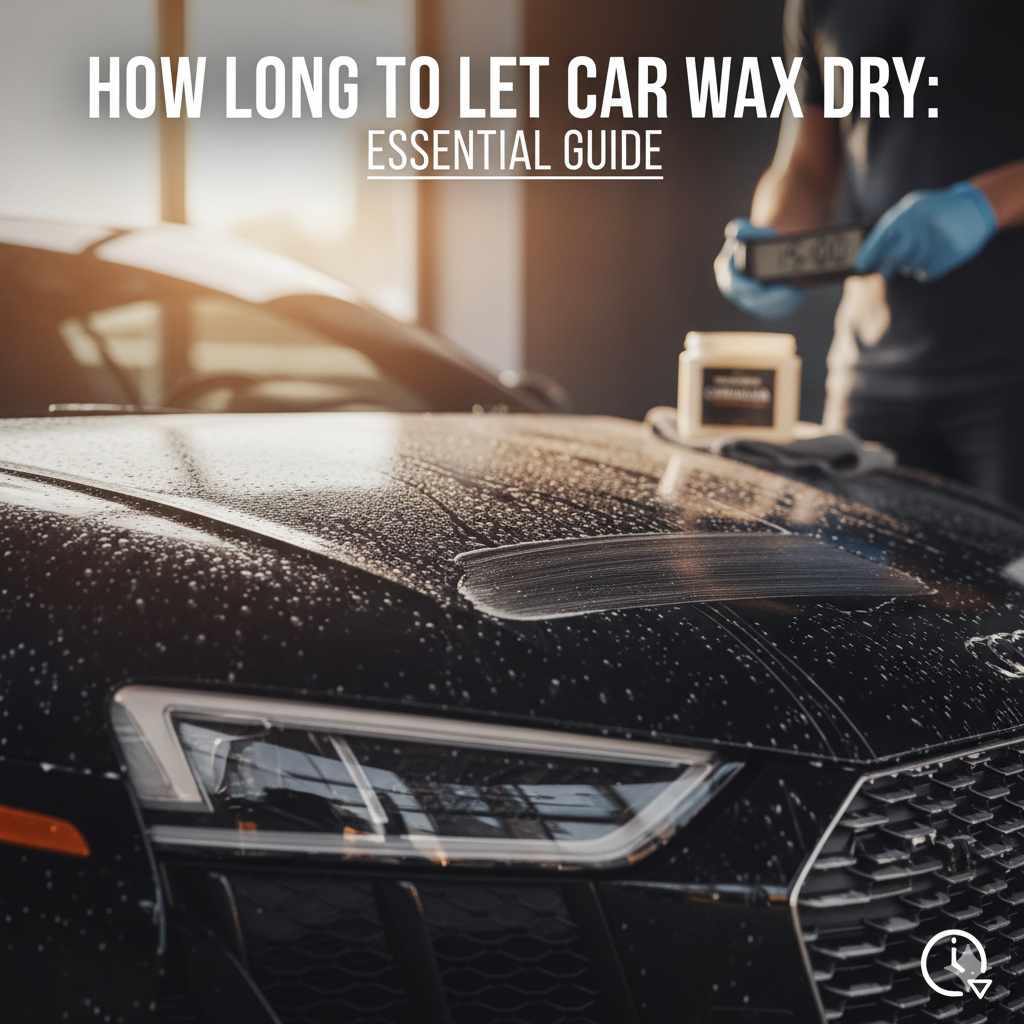
How Long To Let Car Wax Dry: Essential Guide
Allow car wax to dry for 5-15 minutes before buffing. Too little dry time causes smearing, while too much can make it hard to remove. Look for a hazy, matte finish – that’s your sign it’s ready to shine!
Hey there, fellow car enthusiasts! Md Meraj here, your guide to making car care as easy as fixing a flat. Ever stood there after waxing your ride, unsure if it’s time to grab that buffer or if you should just wait a bit longer? You’re not alone! That moment of uncertainty about how long to let car wax dry can lead to frustrating streaks or a stubborn, dusty residue. But don’t sweat it. We’re going to break down exactly what you need to know, step-by-step, so you can achieve that showroom gleam with confidence. Let’s get your car looking its absolute best!
Understanding Wax Drying Time: The Science Behind the Shine
So, why is there a “right” amount of time to let car wax dry? It all comes down to how the wax works its magic. Car waxes, whether they’re natural carnauba or synthetic sealants, contain polymers and solvents. When you apply a thin layer, the solvents begin to evaporate. As they do, the protective polymers left behind harden slightly, forming a barrier on your car’s paint. This barrier is what gives your car that beautiful shine and protection against the elements.
If you try to buff it off too soon, those solvents haven’t fully evaporated, and you’ll just be smearing a wet, oily film across your paint. On the other hand, letting it dry for way too long can make the wax become overly brittle and difficult to remove, potentially leaving behind micro-scratches or a dull finish. Finding that sweet spot is key!
The goal is for the wax to reach a state where it’s no longer wet or oily, but a light, hazy film that can be easily wiped away. This hazy appearance is your visual cue that the solvents have mostly done their job and the wax is ready for the next step. Think of it like paint drying – you don’t want to touch it when it’s still wet and sticky, but you also don’t want to wait until it’s rock hard and brittle.
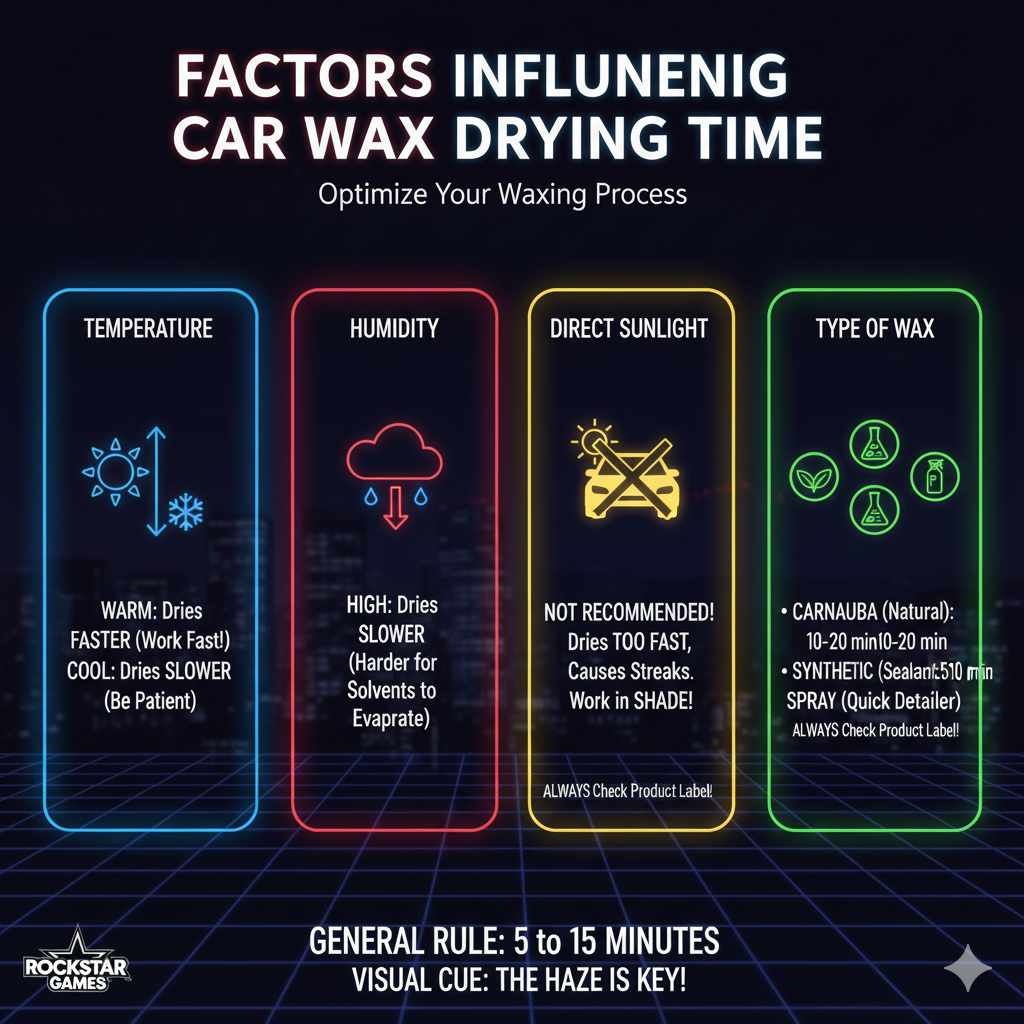
Factors Influencing Wax Drying Time
The exact time your car wax needs to dry isn’t a one-size-fits-all number. Several environmental factors play a significant role. Understanding these will help you adjust your drying time accordingly and achieve the best results.
Temperature
Warmer temperatures will help the solvents in the wax evaporate faster. If you’re waxing on a hot, sunny day, you might find your wax dries and hazes over more quickly than on a cooler day. This can be great for efficiency, but it also means you need to work in smaller sections and buff off the wax sooner to prevent it from hardening too much.
Conversely, cooler temperatures slow down the evaporation process. If it’s chilly out, you’ll need to give the wax a bit more time to dry. Don’t rush it; patience is a virtue, especially in colder conditions.
Humidity
High humidity is the enemy of fast wax drying. When the air is already saturated with moisture, it’s harder for the solvents in the wax to evaporate into it. This means that on a humid day, your wax might take significantly longer to haze over. You might notice it feels slicker for a longer period. It’s best to wax on days with moderate to low humidity if possible. If you must wax on a humid day, you’ll likely need to extend the drying time slightly and perhaps work in even smaller sections.
Direct Sunlight
Applying wax in direct sunlight is generally not recommended by most manufacturers for a few reasons. Firstly, the heat can cause the wax to dry too quickly, particularly on certain areas of the car like the hood or roof. This makes it difficult to spread evenly and can lead to dark spots or streaks if you don’t buff it off immediately. Secondly, the sun’s UV rays can potentially interact with the wax as it dries, which might affect its curing process and the durability of the protective layer. It’s always best to work in the shade or on a cloudy day if you can. If you absolutely must work in the sun, be prepared to work in very small sections and buff off the wax as soon as it starts to haze.
Type of Wax
Different types of car wax have different formulations, which affect their drying times.
- Carnauba Waxes: These natural waxes often contain more oils and solvents and can take a bit longer, typically anywhere from 10-20 minutes, sometimes more if conditions aren’t ideal.
- Synthetic Sealants: These often dry faster, especially spray sealants. Many synthetic products are designed for quick application and removal, sometimes drying in as little as 5-10 minutes, or even being a “on/off” product.
- Spray Waxes: These are usually the quickest, often designed to be applied and buffed off immediately, with a dry time of just 1-2 minutes while you move across the panel.
Always check the product label for specific drying time recommendations from the manufacturer.
How Long to Let Car Wax Dry: The General Rule
As a general guideline, especially for traditional paste or liquid waxes, you should aim to let the wax dry for:
5 to 15 minutes.
This timeframe is usually sufficient for the solvents to evaporate and leave a light, hazy film. However, remember to use this as a starting point and always observe the wax itself. The visual cue—the haze—is more important than the clock!
How to Tell When Your Car Wax is Dry Enough
This is the most crucial part! Forget the clock for a moment and focus on what you see and feel. The surest way to know if your wax is ready to be buffed off is by looking for a distinct change in its appearance.
The Hazy Test:
- When you first apply the wax, it will look wet and glossy on your paintwork.
- As the solvents evaporate, the wax will start to transform. It will lose its wet look and begin to appear duller, more like a light, matte haze. This is the “hazy” or “chalky” appearance that indicates the volatile solvents have evaporated.
- The Smear Test: Gently swipe your finger across a small, inconspicuous area of the waxed surface. If the wax wipes away cleanly with minimal streaking, leaving a clear paint surface, it’s ready. If it smears or feels oily/slippery, it needs more time.
It’s important to test this in a few different spots on your car, as areas exposed to more sun or less airflow might dry at different rates. Start buffing when the majority of what you’ve applied shows this hazy finish.
Step-by-Step Guide: Applying and Buffing Car Wax
Now that you know how long to wait, let’s walk through the entire process for the best results. This guide is for traditional liquid or paste waxes.
Step 1: Prepare Your Vehicle
Before you even think about wax, your car needs to be spotless.
- Wash Thoroughly: Use a pH-neutral car wash soap and plenty of water to remove all dirt, grime, and debris. Rinse completely.
- Decontaminate: For a truly smooth finish, consider using a detailing clay bar or a chemical decontamination spray to remove bonded contaminants like industrial fallout, tree sap residue, or tar. This step is crucial for a flawless wax job. You can find excellent guides on clay bar usage from resources like Meguiar’s.
- Dry Completely: Use clean, soft microfiber drying towels to dry the vehicle thoroughly. Any remaining water can interfere with wax adhesion.
- Work in the Shade: As mentioned, avoid direct sunlight. Find a shaded area or wait for a cloudy day.
Step 2: Apply the Wax
This is where patience and technique come in:
- Use the Right Applicator: Typically, a foam or microfiber applicator pad is provided with the wax or sold separately.
- Apply a Thin, Even Coat: This is perhaps the most critical application tip. Do NOT glob the wax on. A thin layer is all you need. Too much wax is harder to remove and doesn’t offer any additional protection.
- Work in Small Sections: Don’t try to wax the entire car at once. Work on one panel at a time (e.g., the hood, one door, a fender). This ensures you can apply, let it haze, and buff it off before it dries too hard.
- Application Motion: Most manufacturers recommend applying in overlapping, straight-line passes or light circular motions, depending on the product. Consistency is key.
Step 3: Let the Wax Dry (The Waiting Game)
Now, let the wax do its thing. As discussed, this is typically 5-15 minutes, but observe the hazy finish.
- Observe the Haze: Watch the applied section. It will transition from a wet sheen to a dull, matte haze.
- The Smear Test: Perform the light finger swipe test mentioned earlier. If it smears, wait a few more minutes and re-test.
Step 4: Buff Off the Wax
Time to reveal that shine!
- Use Clean Microfiber Towels: This is non-negotiable. Use high-quality, plush microfiber towels. Have several on hand, as you’ll want to switch to a clean side or a fresh towel frequently.
- Gentle Buffing Pressure: Start by gently wiping away the hazy residue. Use moderate pressure, but avoid scrubbing aggressively. The wax should come off relatively easily.
- Flip and Fold Your Towel: As you buff, the wax will start to load up your towel. Flip the towel to a clean side as it becomes saturated. Fold the towel into quarters to expose four clean surfaces.
- Detail with a Second Towel: After removing the bulk of the wax residue, use a second, clean, dry microfiber towel to do a final buff. This will remove any lingering dust or streaks and bring out the deep gloss.
Step 5: Repeat and Admire
Move on to the next section of your car and repeat steps 2 through 4 until the entire vehicle is waxed. Once completed, step back and admire your handiwork!
Tips for Different Wax Types
While the general principles apply, some wax types have specific nuances.
Paste Wax
Drying Time: Usually 10-20 minutes. Carnauba paste waxes often benefit from slightly longer drying times to fully cure.
Application: Apply thinly with a foam or microfiber applicator. Work in small sections.
Buffing: Can sometimes be a bit more stubborn than liquid. Ensure it’s properly hazed. Use firm, but not excessive, pressure with a plush microfiber. A second buffing towel is recommended.
Liquid Wax
Drying Time: Typically 5-15 minutes. Many synthetic liquid waxes are designed for quicker drying.
Application: Easy to spread. Apply thin coats.
Buffing: Generally easy to remove once hazed. It’s less likely to become rock-hard than some paste waxes. Good quality microfiber towels are essential for a streak-free finish.
Spray Wax
Drying Time: Often very quick, sometimes just 1-5 minutes, or as you move to the next section. Many are designed as “on and off” products.
Application: Spray a light mist onto one panel at a time. Work it in with a clean microfiber towel.
Buffing: This is integrated into the application. You usually wipe on and immediately wipe off with a separate clean towel. They are excellent for topping up existing protection or for quick detail jobs. For example, Chemical Guys offers various spray wax options designed for ease of use.
Common Mistakes to Avoid
Even with the best intentions, a few common missteps can hinder your waxing efforts. Here are some to watch out for:
| Mistake | Why It’s a Problem | How to Fix It |
|---|---|---|
| Applying Too Much Wax | Harder to buff off, can cause streaking, wax buildup, and doesn’t add more protection. | Apply the thinnest coat possible. If it looks “too thin” you’re probably doing it right! |
| Waxing in Direct Sunlight or Heat | Wax dries too quickly, making it difficult to apply and buff evenly, leading to streaks and spots. High surfaces get exceptionally hot. | Always work in the shade or on a cool, overcast day. If unavoidable, work in very small, manageable sections. |
| Not Letting Wax Dry Enough | Wax smears, leaving oily streaks and reducing the durability of the protection. | Wait for the distinct hazy, matte finish. Perform the smear test. |
| Using Dirty Towels or Applicators | Reintroduces dirt to the paint, causing scratches and swirl marks. | Use clean, high-quality microfiber towels and applicators. Fold towels to expose clean surfaces. |
| Buffing Too Aggressively | Can cause micro-marring or streaks if wax residue is still too wet or if the towel isn’t clean. | Use gentle pressure and let the clean microfiber do the work. |
| Confusing Wax and Sealant Drying Times | Applying and buffing sealants with the same rushed timeline as some spray waxes. | Read product instructions carefully. Sealants, while often faster than traditional waxes, may have slightly different optimal cure times. |
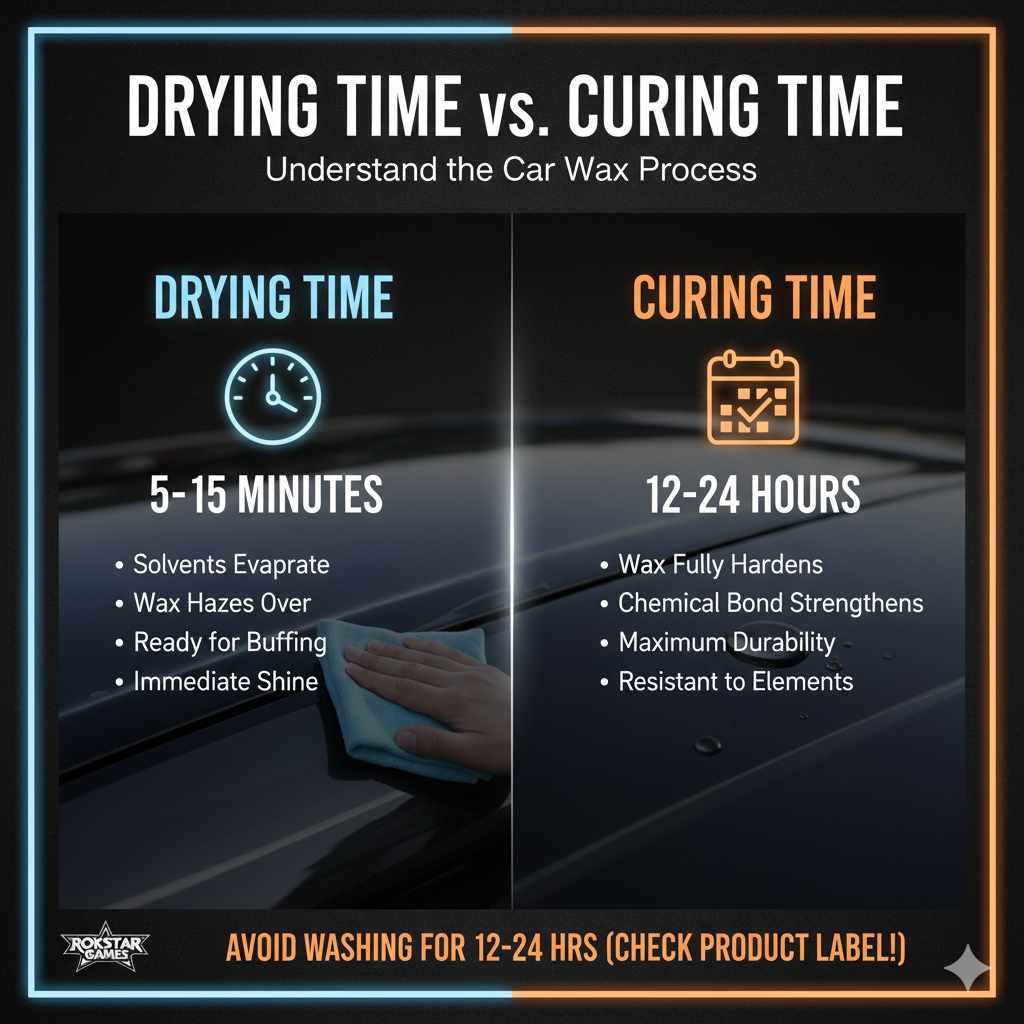
Drying Time vs. Curing Time
It’s important to distinguish between drying time and curing time. This guide has focused primarily on the drying time – the period needed for the solvents to evaporate enough so you can buff off the excess residue. This is the immediate step needed to see that initial shine.
Curing time, on the other hand, refers to the longer period (often 12-24 hours, sometimes longer for certain products) while the wax fully hardens and bonds chemically with your paintwork. During the curing time:
- The protective layer fully hardens.
- Maximum durability and protective properties are achieved.
- The wax becomes more resistant to environmental factors like rain, UV rays, and dirt.
While you can drive your car and it will be protected after buffing off the wax, avoiding washing the car or exposing it to harsh conditions for the first 12-24 hours after waxing is recommended to allow the wax to fully cure. Check the specific product’s instructions for its recommended curing period.
Frequently Asked Questions (FAQ)
Q1: Can I use spray wax immediately after applying it?
A1: Yes, most spray waxes are designed to be applied and buffed off almost immediately. They are typically “on and off” products that don’t require a significant drying or hazing period before removal.
Q2: What happens if I buff the wax off too early?
A2: If you buff too early, the wax will be wet and oily. This will lead to smearing, streaks, and a hazy, uneven finish. It also reduces the effectiveness and longevity of the wax layer. You’ll essentially just be wiping a wet film around.
Q3: What happens if I wait too long to buff the wax off?
A3: If the wax dries for too long, especially in hot or dry conditions, it can become very hard and difficult to remove. It might turn into a stubborn, dusty residue that’s tough to buff away, potentially leading to micro-scratches and a dull finish.
Q4: Does the color of my car affect how long the wax should dry?
A4: The color of the car itself doesn’t directly alter the drying time of the wax chemicals. However, darker cars are more prone to showing streaks and swirls from improper buffing or residue, so paying close attention to the finishing buff with clean towels is even more critical.