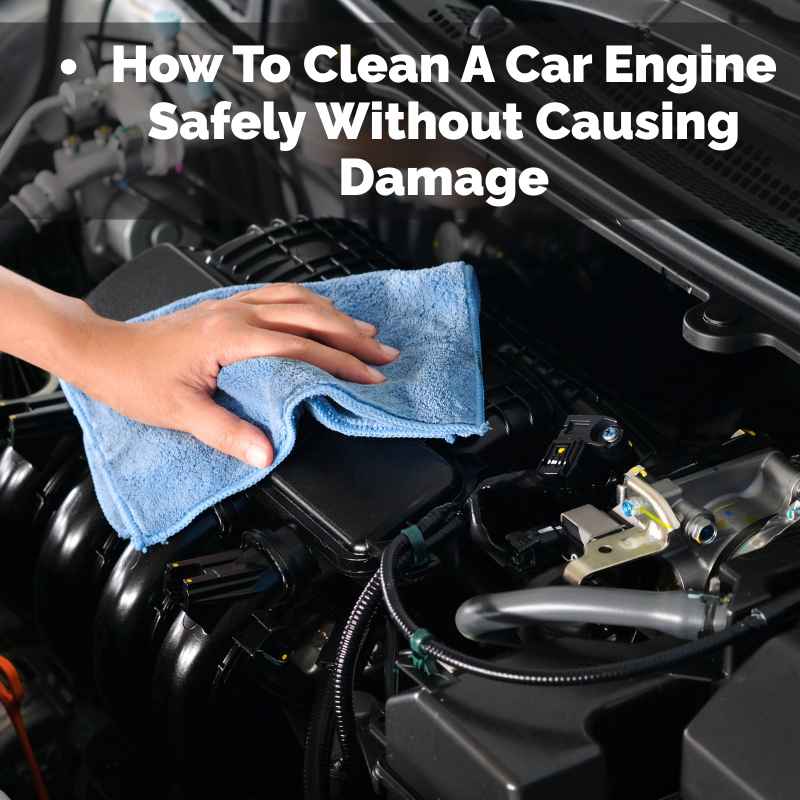
How To Clean A Car Engine Safely Without Causing Damage
Safely cleaning your car engine involves protecting sensitive parts, using the right cleaners, and gentle methods. This ensures your engine looks its best and runs smoothly without any harm. We’ll cover everything you need to know.
Understanding Your Car’s Engine Bay
Your car’s engine bay is a busy place. It’s packed with important components. Think of it as the heart of your car.
It needs to stay clean to work well. Dirt, oil, and grime build up over time. This buildup can cause problems.
It might hide leaks. It can also make parts run hotter than they should. Regular cleaning helps prevent these issues.
It also makes it easier to spot any developing problems.
Engines get hot. They also get wet. They have many electrical parts.
These parts do not like water or harsh chemicals. So, the key is careful cleaning. We need to clean effectively but also be gentle.
Knowing what parts to protect is the first step. This prevents costly mistakes. It also gives you peace of mind.
Why Cleaning Your Engine Matters
A clean engine bay does more than just look good. It’s about your car’s health. Dust and grime can insulate parts.
This can make them run hotter. Overheating can lead to serious engine damage. Oil leaks are easier to spot on a clean engine.
This means you can fix small problems before they become big ones. It’s like seeing a small cut before it gets infected. Early detection saves time and money.
When you sell your car, a clean engine bay helps. It shows you took good care of it. Buyers see a well-maintained vehicle.
This can increase its value. Also, when you work on your car yourself, it’s just nicer. You can see what you are doing.
You don’t have to dig through layers of dirt. It makes maintenance tasks much easier.
Gathering Your Cleaning Supplies
Before you start, get everything ready. This makes the job go smoothly. You don’t want to stop halfway through to find something.
For engine cleaning, you need specific items. Get a good quality degreaser made for engines. Some are water-based, and others are stronger.
Check the label to make sure it’s safe for car engines. You’ll also need various brushes. Soft brushes for general cleaning and stiffer ones for tough spots are useful.
Microfiber towels are a must. They absorb well and don’t leave lint. You’ll also need plastic bags or wrap.
And don’t forget safety glasses and gloves. Your hands and eyes need protection. A garden hose with a spray nozzle is also helpful.
Make sure it has a gentle setting.
Essential Engine Cleaning Kit
Engine Degreaser: Choose one that’s safe for your engine. Look for biodegradable options if possible.
Brushes: A set of detailing brushes works wonders. Include various sizes and stiffness.
Microfiber Towels: Plenty of them for drying and wiping.
Plastic Bags/Wrap: To cover sensitive electrical parts.
Safety Gear: Gloves and eye protection are non-negotiable.
Water Source: A hose with adjustable spray is ideal.
Preparing the Engine for Cleaning
This is the most important part. You must protect sensitive components. Water and electricity don’t mix.
Open the hood of your car. Let the engine cool down. A hot engine can be dangerous.
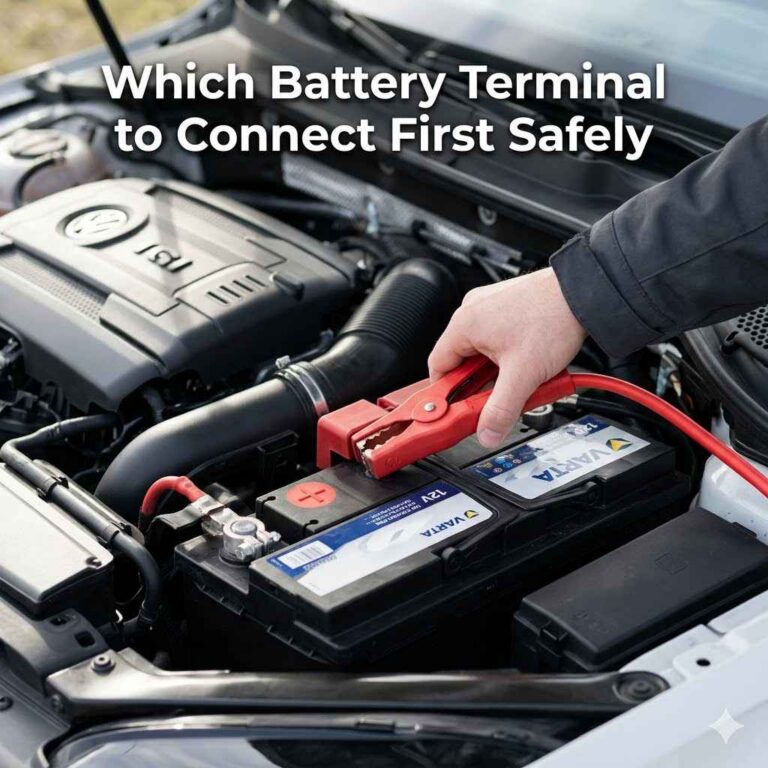
Also, some cleaners can bake onto hot surfaces. This creates stains. Once cool, locate the battery.
Disconnect the negative terminal. This prevents electrical shorts. Then, cover the alternator.
Also, protect the air intake. You can use plastic bags and tape for this. The fuse box is another area to cover.
Look for any exposed electrical connectors. Cover those too. The goal is to keep water out of these areas.
This prevents damage and ensures your car starts afterward.
Think about what you are covering. The alternator is vital for charging the battery. The air intake sucks air into the engine.
Water getting in there can cause major problems. Exposed wires and connectors are also vulnerable. Spend a good 10-15 minutes on this step.
It’s worth the time. If you are unsure about a part, cover it. It’s better to be safe than sorry.
The Cleaning Process: Step by Step
Once everything is protected, you can start cleaning. First, do a quick rinse. Use a gentle spray of water.
This removes loose dirt and dust. Don’t blast it with high pressure. Just a light wash to get the surface grime off.
Now, apply the engine degreaser. Spray it onto the dirty areas. Let it sit for a few minutes.
Follow the product’s instructions. Do not let it dry on the engine. Work in sections if your engine bay is large.
Use your brushes to agitate the grime. Gently scrub the tough spots. Be careful around wires and hoses.
After scrubbing, rinse the engine bay again. Use that gentle spray. Make sure to wash away all the degreaser.
Residue can cause problems later. Rinse thoroughly. Inspect your work.
If there are still dirty spots, repeat the degreaser and scrubbing steps.
This part requires patience. Don’t rush the rinsing. You want all the cleaner gone.
Some cleaners can be corrosive if left on. They can damage plastics and rubber over time. So, a good rinse is crucial.
Think of it like washing dishes. You need to get all the soap off. After rinsing, remove all the plastic bags and tape.
Make sure the engine is mostly dry before you start the next step. You can use compressed air to blow out water from crevices. This is a helpful trick.
If you don’t have it, just use your towels.
Drying and Protecting Your Engine
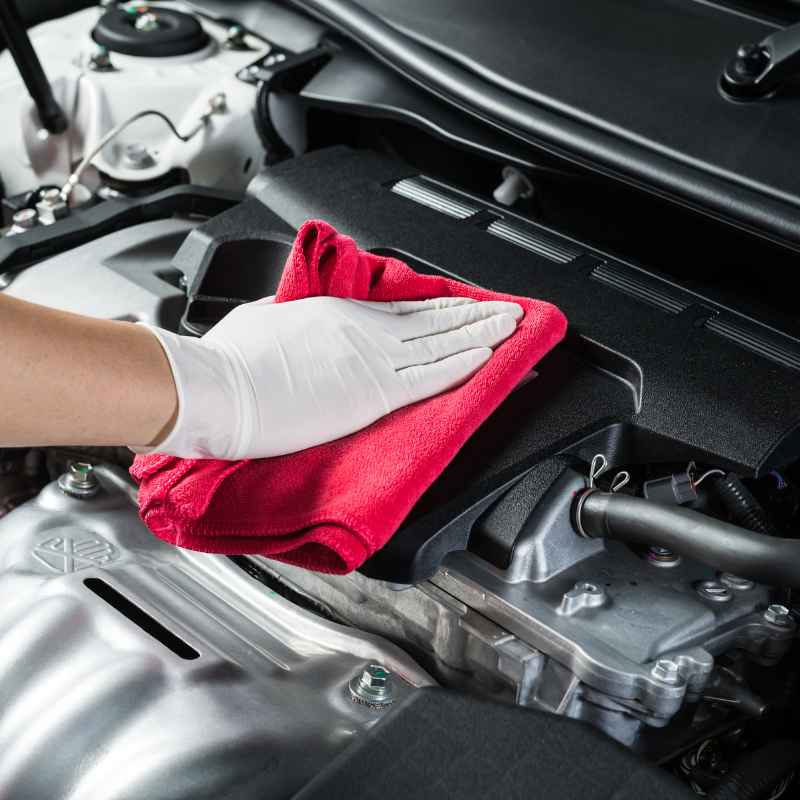
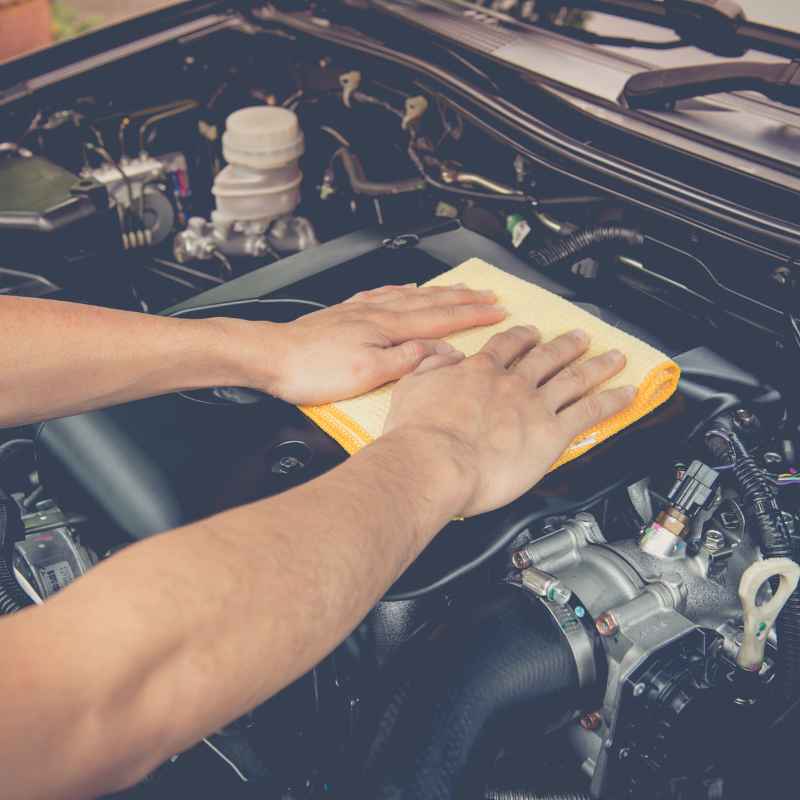
Drying is just as important as cleaning. Use your microfiber towels. Wipe down all accessible surfaces.
Get into nooks and crannies as much as possible. Pay attention to areas where water might collect. The more you dry now, the less chance of water spots or corrosion.
For areas you can’t reach, let the engine air dry. You can also run the engine for a few minutes. The heat helps evaporate remaining moisture.
Just make sure everything is connected properly first. Reconnect the battery terminal. Double-check all the protected areas you uncovered.
Start the engine. Let it run for about 5-10 minutes. This helps warm things up and dry out any hidden moisture.
After drying, you might want to protect the surfaces. Many car care shops sell engine protectants. These products add a shine.
They also help repel dirt and dust. They can make future cleanings easier. Spray them onto a cloth first.
Then wipe down plastic and rubber parts. Avoid spraying directly onto belts or pulleys. A clean, protected engine bay looks great.
It also helps maintain the longevity of engine components. You’ve put in the work, so enjoy the results!
Drying Tips for a Safe Engine
Towel Dry Thoroughly: Use absorbent microfiber towels. Get into all accessible spots.
Air Dry: Let the engine air dry for a while if possible.
Engine Heat: Run the engine for a short period (5-10 mins) to help evaporate moisture.
Compressed Air: If available, use it to blow water out of tight spots.
Protectants: Apply an engine protectant spray for shine and future dirt repellency.
Common Mistakes to Avoid
Many people make mistakes when cleaning their engines. One big one is using a high-pressure washer. This can force water into electrical connectors.
It can also damage delicate parts. Another mistake is cleaning a hot engine. This can cause damage and is a safety hazard.
Not protecting electrical components is also a common error. People forget about the alternator, fuse box, or air intake. Using harsh household cleaners is another no-no.
They can break down rubber and plastic. Always use products designed for automotive engines. Finally, not drying the engine properly is a problem.
This can lead to corrosion. It can also leave water spots. Be mindful of these pitfalls.
Your engine will thank you.
I remember a time I was in a hurry. I just grabbed my regular soap and a stiff brush. I didn’t cover the alternator well.
I also used the hose on a strong setting. My car wouldn’t start afterward. It was a stressful afternoon.
I had to get it towed. That was a costly lesson. Now, I take my time.
I use the right tools. I cover everything important. It takes longer, but it saves so much trouble.
What If You See a Problem After Cleaning?
Sometimes, even with care, things can go wrong. If your car doesn’t start, don’t panic. First, recheck the battery connections.
Make sure they are secure. Then, recheck all the electrical components you covered. Ensure no water is trapped inside.
If you find a wet connector, try to dry it carefully. Use a hairdryer on a low setting or compressed air. If the engine runs rough or makes strange noises, stop it immediately.
This could mean water got into something it shouldn’t have. For example, water in the air intake can damage the engine. In such cases, it’s best to consult a mechanic.
They can diagnose the issue professionally. Don’t try to fix complex engine problems yourself if you’re unsure. Safety and proper diagnosis are key.
It’s rare, but it can happen. I had a friend who cleaned his engine, and the check engine light came on. It turned out a sensor connector was still a bit damp.
A quick drying session fixed it. But if you hear odd sounds or see smoke, that’s different. That’s when you need an expert.
It’s always better to be safe.
Alternative Cleaning Methods
Not everyone wants to use water. Steam cleaning is an option. It uses less water and high heat.
The steam can lift grease and grime effectively. It also sanitizes. However, it still requires protecting electrical parts.
You also need specialized equipment for steam cleaning. Another method is dry cleaning. This uses special chemicals and brushes.
It’s a good choice for engines with very sensitive electronics. Some detailers use a combination of methods. They might use a minimal water rinse with strong degreasers.
Then they use brushes and towels extensively. For most DIYers, a careful water-based cleaning is the most practical. It balances effectiveness with safety.
Always research the method and products before you start.
I’ve seen people use a simple spray bottle with a cleaning solution and a lot of microfiber towels. This is a very gentle approach. It’s great for engines that aren’t extremely dirty.
It minimizes water usage. It’s perfect for regular maintenance washes. The key is to adapt the method to your car’s condition and your comfort level.
Real-World Scenarios for Engine Cleaning
Imagine you just bought a used car. The engine bay is covered in years of grime. You can’t even see the color of some parts.
This car definitely needs a deep clean. You’ll need a strong degreaser and more time. You’ll carefully protect everything.
You’ll scrub and rinse multiple times. This is a scenario where a thorough clean is vital. It helps you assess the engine’s true condition.
It also makes any future work much easier.
Now, think about your daily driver. You wash it regularly. The engine bay isn’t too bad.
Maybe just some dust and a few oil spots. A quick rinse and a light spray of degreaser might be enough. You’ll use fewer brushes.
You’ll dry it quickly. This is about maintenance. It keeps things from getting worse.
It prevents that deep layer of grime from building up again. It’s about preventing problems, not fixing major ones.
Consider someone who drives in a dusty or muddy environment. Their car collects dirt faster. They might need to clean their engine more often.
Even a light spray down every few months can make a big difference. It stops the dirt from hardening and becoming a permanent fixture. It’s about adapting to your driving conditions.
Engine Bay Condition Guide
Light Dust/Surface Grime: Rinse, light degreaser, towel dry. Quick and easy.
Moderate Dirt & Oil: Standard degreaser, moderate scrubbing, thorough rinse, careful drying.
Heavy Grime & Thick Grease: Strong degreaser, more agitation, multiple applications, extensive drying and protection.
Suspected Leaks: Clean to identify leak source. Seek professional advice if unsure.
What This Means for Your Car’s Longevity
A clean engine runs cooler. This reduces stress on engine parts. It can help extend the life of your engine.
Less heat means less wear and tear. Detecting leaks early prevents bigger issues. A small oil leak caught early is easy to fix.
If ignored, it can lead to the engine running low on oil. This can cause catastrophic failure. A clean engine bay also allows for better inspection of hoses and belts.
You can see cracks or wear before they cause a breakdown. It’s a proactive approach to car maintenance.
Think of it like taking care of your skin. Regular washing and moisturizing keep it healthy. Neglect can lead to problems.
Your car’s engine is the same. It has many complex parts that work hard. Keeping them clean and well-maintained pays off.
It means fewer unexpected repairs. It means your car is more reliable. It can even improve fuel efficiency slightly.
A cleaner engine often runs more smoothly.
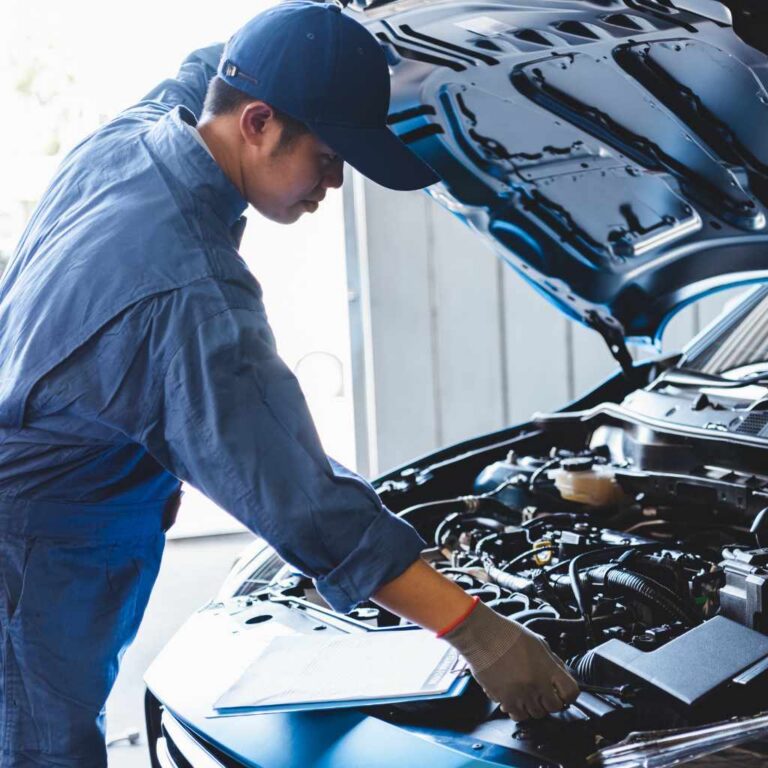
When to Call a Professional Detailer
Sometimes, the job is too much for a DIYer. If your engine is extremely greasy or has unknown substances on it, a professional is a good choice. They have specialized tools and chemicals.
They also have experience with different car makes and models. If you are nervous about damaging your car, let an expert handle it. Professional detailers offer engine bay cleaning as a service.
They know how to protect all the sensitive parts. They can get results that are hard to achieve at home. It’s an investment in your car’s health.
It gives you peace of mind. They can also spot potential problems you might miss. This is especially true for complex or older vehicles.
I once saw a detailer work on a classic car. The engine bay was a mess. They used steam and special solvents.
They spent hours on it. The result was stunning. It looked almost new.
For someone who doesn’t have the time or confidence, this is the best route. It ensures the job is done right.
Quick Tips for a Cleaner Engine Bay
Start small. If you’re new to this, try a quick wipe-down first. Use a damp cloth and some interior cleaner on plastic parts.
Then graduate to a light degreaser. Always read product labels. Make sure they are safe for automotive use.
Work in a well-ventilated area. Never spray cleaners into the air intake. Avoid spraying directly onto the radiator fins.
They are delicate. If you get any cleaner on paint, rinse it off quickly. Don’t let it sit.
After cleaning, consider a plastic and rubber protectant. This makes the engine bay look great and repels future dirt. A little effort goes a long way.
Regular light cleaning is easier than one massive deep clean.
It’s like cleaning your kitchen. Wiping down counters every day is easy. Letting grease build up for months makes it a huge chore.
The same applies to your engine. Small, regular cleanings are the secret. They keep things manageable.
They also help you notice any changes in your engine over time.
Frequently Asked Questions
Can I use a pressure washer to clean my car engine?
It’s generally not recommended to use a high-pressure washer on your engine. The strong water stream can force water into sensitive electrical components, potentially causing damage or shorts. A garden hose with a gentle spray setting is a much safer option.
How often should I clean my car’s engine?
This depends on your driving conditions. If you drive in dusty or muddy areas, you might clean it every few months. For most daily drivers, cleaning once or twice a year is sufficient.
Regular light cleaning is better than infrequent deep cleaning.
What if my engine won’t start after cleaning?
First, check battery connections. Then, ensure all electrical components you covered are properly uncovered and dry. If you suspect water got into critical systems like the air intake, it’s best to consult a mechanic immediately.
Don’t try to force the engine to start if it’s not running correctly.
Are engine degreasers harmful to the environment?
Some traditional degreasers can be harsh. Look for biodegradable or water-based engine degreasers. These are gentler on the environment.
Always follow product instructions and dispose of waste responsibly.
Can I clean my engine with just soap and water?
For very light dust, a simple rinse and wipe-down might work. However, for oil and grease, a dedicated engine degreaser is usually necessary. Regular dish soap is not designed for engine components and can sometimes leave residue or be too harsh.
What are the most important parts to protect before cleaning?
Key components to protect include the alternator, air intake, fuse box, exposed electrical connectors, and the ignition system. Use plastic bags and tape to create a barrier against water and cleaning solutions.
Final Thoughts on Engine Bay Care
Keeping your car’s engine clean is a great way to maintain its health. It helps you spot issues early. It can also improve performance and appearance.
The key is to be careful and use the right methods. Protecting sensitive parts is non-negotiable. Take your time, use appropriate cleaners, and dry thoroughly.
Your car will thank you with smoother running and a longer lifespan.