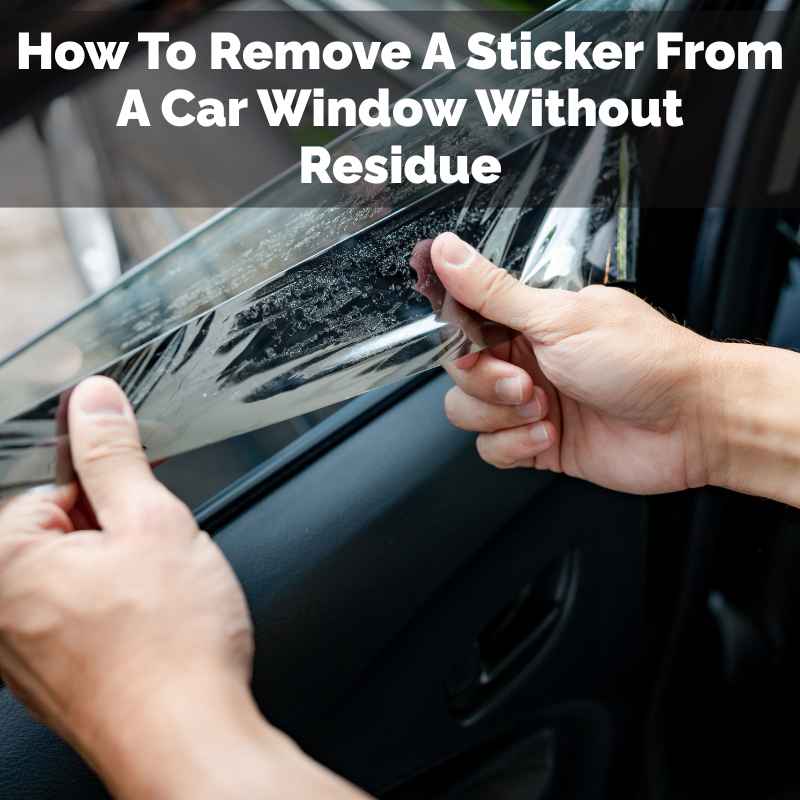
How To Remove A Sticker From A Car Window Without Residue
If you need to remove a sticker from a car window and want to avoid leaving any sticky residue, you can use a few simple methods. Heat from a hairdryer can soften the adhesive. Then, gently peel the sticker off. For any leftover glue, a glass cleaner or a specific adhesive remover works well. Always clean the window afterward.
Understanding Sticker Adhesives on Car Windows
Car window stickers use different kinds of glue. Some stick well but are hard to remove. Others are meant to peel off easily.
The type of adhesive really matters. It determines how much effort you’ll need. It also affects what cleaning agents will work best.
Understanding this helps you pick the right method. This prevents damage to your car’s glass.
Most stickers use acrylic-based adhesives. These are strong. They can stick for a long time.
They also hold up against weather changes. This makes them popular for car decals. The sun can also bake the adhesive onto the glass.
This makes it even harder to remove later on. So, patience is key here. Trying to rush can lead to more problems.
Some stickers, like parking permits or inspection stickers, are designed to be removed. They might have a special backing. This lets them peel off without much trouble.
However, even these can leave a little bit of glue behind. Especially if they’ve been on the window for a long time. Or if the weather has been very hot.
The goal is always to loosen the glue. Then, you can lift the sticker and any sticky bits away. We want to do this without scratching the glass.
We also don’t want to damage any tinting on the window. Tinting is a thin film. It can be sensitive to harsh chemicals or rough scraping.
My Own Sticker Removal Struggle: The Story of a Parking Pass
I remember one particularly stubborn parking pass. It was from an old job. I’d had it on my windshield for almost two years.
When I got a new job, I needed it gone. I figured it would be easy. Just a quick peel, right?
Oh, how wrong I was. I started to pull at a corner. The sticker just tore.
A tiny piece came off. The rest stayed stuck like super glue. Then came the sticky residue.
It was everywhere. It felt oily and gross. I tried using my fingernail.
That just made my finger sore. Then I grabbed a kitchen knife. Big mistake.
I scratched the glass a little. Panic set in. My windshield looked worse than before.
I felt so annoyed. It was late, and the sun was setting. I could just picture that sticky patch glaring at me every time I drove.
I spent way too long that evening just staring at it, feeling defeated.
The Best Way to Start: Gentle Heat and Patience
The first step for almost any sticker is heat. Heat makes the glue soft. It becomes more flexible.
This is true for many adhesives. It’s like warming up old chewing gum. It becomes easier to manage.
You can use a hairdryer for this. Just set it to a medium heat. Hold it about 4-6 inches from the sticker.
Move it back and forth. Do this for about 30-60 seconds. Don’t hold it in one spot for too long.
You don’t want to overheat the glass. Especially if it’s very cold outside. Sudden temperature changes can sometimes crack glass.
So, a little caution is good.
After heating, try to peel a corner. Use a plastic scraper or an old credit card. Metal scrapers can scratch.
Gently lift the edge of the sticker. If it starts to come off, keep going. Peel slowly and steadily.
Pull at an angle. Try to keep the sticker in one piece. If it tears, just heat the remaining part again.
Then try to lift another corner. Sometimes, the sticker will come off cleanly. If so, great!
You’re almost done. Now you just need to deal with any leftover glue.
This part takes patience. Don’t rush. If the sticker isn’t budging easily, heat it a little more.
Sometimes, letting it sit for a few minutes after heating helps. The warmth penetrates the adhesive. It loosens its grip.
This gentle approach is the safest for your car window. It avoids damage. It’s also very effective for most common car stickers.
Sticker Removal Toolkit Essentials
What You’ll Need:
- Hairdryer (medium heat setting)
- Plastic scraper (or old credit card/gift card)
- Microfiber cloths
- Glass cleaner (ammonia-free if tinted)
- Soapy water
- Optional: Rubbing alcohol, Goo Gone, or similar adhesive remover
Why These Work:
- Heat: Softens glue, making it easier to lift.
- Plastic Scraper: Lifts stickers without scratching glass.
- Microfiber Cloths: Absorb cleaner and wipe away residue gently.
- Glass Cleaner: Removes light residue and streaks.
- Adhesive Remover: Breaks down tough, stubborn glue.
Tackling the Stubborn Residue
So, the sticker is off. But there’s that sticky stuff left. This is where many people get stuck.
The residue can be hard to remove. It feels tacky and messy. For this, we have a few good options.
The best choice depends on how bad the residue is.
First, try warm, soapy water. Dip a microfiber cloth in it. Rub the residue.
Sometimes, simple soap and water are enough. Especially if the sticker was new. If that doesn’t work, move to rubbing alcohol.
Rubbing alcohol is a solvent. It can break down many adhesives. Dampen a clean cloth with rubbing alcohol.
Press it onto the residue. Let it sit for a minute or two. Then, gently rub in a circular motion.
The residue should start to ball up. It will come off onto the cloth.
If the residue is still tough, it’s time for a dedicated product. Products like Goo Gone or WD-40 are made for this. They are very effective.
They contain citrus oils or other solvents. These are designed to dissolve sticky stuff. Always test these products in an inconspicuous area first.
Especially if you have tinted windows. Some products can damage tint. Apply the remover to a cloth, not directly to the glass.
Rub the residue. Let it sit for the time recommended on the product. Then, wipe it away.
You might need to repeat this. After using these products, always clean the window again.
Make sure to use a clean part of the cloth. Or switch to a fresh one often. This way, you’re not just smearing the old residue around.
You’re lifting it off the glass. Small, circular motions often work best. Be patient.
Some glues are just very persistent. It might take a few tries.
Leftover Glue: Quick Fixes
Myth vs. Reality
| Myth | Reality |
|---|---|
| You need harsh chemicals to remove glue. | Gentle solvents like rubbing alcohol or citrus-based removers often work best. Harsh chemicals can damage tint or glass coatings. |
| Scraping with a razor blade is the fastest way. | Razor blades can easily scratch glass. A plastic scraper is much safer and usually just as effective with patience. |
| The residue will smear if you don’t clean it right away. | While it’s best to clean residue soon, it can usually be softened and removed later with the right tools and methods. |
Special Considerations for Tinted Windows
Tinted windows need extra care. The tint is a film. It’s applied to the inside of the glass.
Harsh chemicals can damage this film. They can make it peel or discolor. Always check your glass cleaner.
Make sure it’s ammonia-free. Ammonia can break down tint. When using adhesive removers, be extra careful.
Never use a metal razor blade on tinted windows. It will likely scratch or cut the film. Always use a plastic scraper.
When applying heat, be moderate. Don’t blast the window with extreme heat for too long. This can also affect the tint.
If you’re unsure about a product, test it on a tiny, hidden corner first.
For residue on tinted windows, stick to rubbing alcohol or specialized citrus-based removers. These are generally safer. Work slowly.
Use a soft cloth. Gently wipe away the residue. If a sticker is on the outside of a tinted window, you have more freedom.
But if it’s on the inside, treat the tint with respect.
The U.S. Environmental Protection Agency (EPA) doesn’t regulate window films directly. However, manufacturers of window films often provide care instructions.
These usually advise against ammonia-based cleaners. They also recommend avoiding abrasive materials. Always check the tint manufacturer’s guidelines if you have them.
When to Call a Professional
Sometimes, a sticker is just too much. Maybe it’s a very old, baked-on decal. Or maybe you’ve already tried removing it and made things worse.
In these cases, it might be best to get help. A professional auto detailer has the right tools and knowledge. They know how to handle delicate situations.
They can remove stickers without damaging your car.
They have access to stronger, professional-grade removers. They also have specialized scrapers. These are designed for automotive glass.
They can often remove stickers that would be impossible for the average person. If you’re worried about damaging your car, or if the sticker is very large or old, consider this option. The cost might be worth the peace of mind.
This is especially true for rare or classic cars. Or for vehicles with expensive custom paint jobs near the windows. A mistake could be very costly.
A professional will have insurance and experience. They know the risks. They can manage them effectively.
Think of it as an investment in your car’s appearance and value.
Alternative Sticker Removal Methods
There are a few other tricks people use. Some swear by vegetable oil or olive oil. You can apply oil to the sticker.
Let it sit for a while. The oil can help break down the adhesive. Then try to scrape or wipe it off.
This is a very gentle method. It’s safe for most surfaces.
Another method is using a magic eraser sponge. These are melamine foam sponges. They have a fine abrasive texture.
They can sometimes lift off residue. Use them with water. Rub gently.
Be cautious on tinted windows. They can be slightly abrasive. Test in a small spot first.
Always use the soft side if available.
Some people use dryer sheets. Soak a dryer sheet in water. Place it on the sticker for a few hours.
The chemicals in the dryer sheet can help soften the glue. Then try to peel and wipe it away. This is a less common method.
It might not work for very strong adhesives. But it’s a safe thing to try if you have dryer sheets handy.
Sticker Removal: Normal vs. Concerning
Normal Signs:
- The sticker peels off in layers.
- Some sticky residue remains.
- The glass looks clear after cleaning.
- It takes a bit of effort but is manageable.
Concerning Signs:
- The glass is scratched.
- The window tint is peeling or damaged.
- The residue is extremely hard to remove, even with specialized products.
- The sticker is integrated into the glass itself (very rare).
Preventing Future Sticker Problems
The best way to deal with sticker residue is to avoid it. When you get a new sticker, think about where you put it. Some locations are easier to clean than others.
Also, consider the type of sticker. Is it meant to be permanent?
If you know a sticker needs to come off later, like a temporary permit, try to remove it before it bakes on. Heat it up and peel it off regularly. This makes removal much easier.
If you get a new car, and there’s a dealer sticker you don’t like, remove it soon after purchase. Don’t wait months or years.
For any stickers you plan to remove, use the heating method from the start. Don’t let them sit for too long. Regular cleaning also helps.
Keeping your car windows clean can prevent dirt from getting under sticker edges. This can make them lift easier later on.
Think about the climate too. If you live in a very hot area, stickers will bake on faster. The sun’s UV rays are strong.
They degrade adhesives over time. If you’re in a cold climate, the sudden shifts in temperature can sometimes affect how the glue holds. Be mindful of these factors.
They can impact sticker removal success.
Frequently Asked Questions
Can I use nail polish remover to remove sticker residue?
Nail polish remover, especially acetone-based ones, can be very strong. They might work for residue. However, they can also damage car paint or plastic trim.
They can also damage window tint. It’s best to use gentler methods like rubbing alcohol or specialized adhesive removers first. If you try nail polish remover, test it on an inconspicuous spot first.
How long does it take to remove a sticker and residue?
This varies a lot. A simple sticker might take 5-10 minutes. A large, old sticker with stubborn residue could take 30 minutes to an hour.
It depends on the sticker’s age, the type of adhesive, and the tools you use. Patience is key. Rushing can lead to more work or damage.
Is it safe to use a razor blade on car windows?
Generally, it is not recommended, especially for DIY removal. A very sharp, new razor blade held at a low angle might work on plain glass. But it’s very easy to scratch the glass.
For tinted windows, it’s a definite no. Always use a plastic scraper first. If a professional uses a razor, they have special techniques and blades.
What is the best commercial product for sticker residue?
Popular and effective products include Goo Gone, Goof Off, and WD-40. Many automotive supply stores sell specific sticker removers. Look for products that are safe for glass.
Always check the label for warnings, especially if you have tinted windows.
Can I remove stickers from the inside of my car window?
Yes, you can. The methods are the same. However, be extra careful if your windows are tinted.
Tint is almost always on the inside. Aggressive cleaning or scraping can damage the tint film. Use gentle methods and products.
What if the sticker has paint on it?
If the sticker is painted onto the glass, it’s part of the glass. You cannot remove it without damaging the glass. Most stickers are applied with adhesive.
If you’re unsure, try a small test area with heat and gentle scraping. If it starts to damage the glass, stop immediately.
Final Thoughts on Clear Windows
Getting stickers off car windows doesn’t have to be a battle. With the right approach, you can achieve a clean, residue-free finish. Remember to start with heat.
Be patient. Use gentle tools like plastic scrapers. For residue, rubbing alcohol or a good adhesive remover are your friends.
Always protect tinted windows. And if you’re ever unsure, seek professional help. Clear windows make your car look so much better.
It’s a small detail that makes a big difference. You’ve got this!