How To Sand A Car For Primer The Right Way (No Mistakes)
So, you’re getting ready to paint your car, and the big step of sanding for primer is looming. It feels like a huge hurdle, right? You want that perfect, smooth finish, but you’re worried about making a mistake that will show up later. I totally get it. It’s a detailed job, and one wrong move can feel like a disaster. But breathe easy. This isn’t as scary as it seems. We’ll walk through it step-by-step, making sure you feel confident. You’ll learn exactly what to do and, just as importantly, what to avoid. Let’s get that surface prepped like a pro!
Getting your car ready for primer is key to a great paint job. It means making the surface smooth and clean. This helps the primer stick well. A good primer coat seals the metal and fills tiny flaws. It also gives the color coat something to grab onto. Skipping steps here leads to bumps, runs, or paint peeling later. Proper sanding ensures a professional, lasting look.
What is Car Sanding for Primer?
Sanding a car before primer is all about preparing the surface. Think of it like getting a wall ready for paint. You don’t just slap paint on a bumpy, dirty wall.
You smooth it out first. For cars, sanding removes old paint, rust, or body filler. It also creates a rough surface.
This rough surface is called “tooth.” It’s like tiny little scratches. The primer then has something to stick to. Without this tooth, the primer won’t bond well.
It might peel off later. So, sanding is not just about making it look smooth. It’s about making it stick.
We use different types of sandpaper. These are grits. Lower grit numbers mean rougher sandpaper.
Higher grit numbers mean smoother sandpaper. For primer prep, we start with a coarser grit. Then, we move to finer grits.
This gets rid of imperfections. It also leaves a uniform surface.
My First Time Sanding a Car (A Story Mode)
I remember my very first attempt to prep a car for paint. It was a beat-up old pickup truck. I’d watched a few YouTube videos.
I thought, “How hard can it be?” I bought some sandpaper and a sanding block. I started aggressively. I wanted to get all the old paint off fast.
The dust flew everywhere. It coated me, the garage, everything. I was so focused on removing the old paint.
I didn’t pay enough attention to how evenly I was sanding. I went too hard in some spots. I missed others.
My arms ached. By the end, the surface looked. patchy.
Some areas were bare metal. Others still had a bit of old paint. I felt a knot of dread in my stomach.
This was not the smooth, uniform surface I’d pictured. It looked like a bad measles rash. My confidence sank.
Was this whole project doomed from the start?
Grits Explained: A Quick Guide
Coarse Grit (e.g., 80-150): Used for heavy work. Removes old paint, rust, or filler. Leaves deeper scratches.
Medium Grit (e.g., 180-220): Smooths out the scratches from coarse grits. Starts creating a good surface for primer.
Fine Grit (e.g., 320-400): Used for final smoothing before primer. Removes any remaining imperfections. Leaves a silky finish.
Why is Proper Sanding So Important?
Think of your car’s paint job as a layered cake. The primer is the first layer. It’s the base.
If that base is uneven or weak, the whole cake falls apart. Proper sanding ensures that first layer sticks right. It makes the surface smooth.
This is vital for a good finish.
If you skip sanding, or do it poorly, primer won’t stick. You’ll get “fish eyes.” These are small, crater-like spots. They happen when primer can’t stick to a greasy or too-smooth area.
You’ll also see unevenness. Bumps and dips in the metal will show through the paint. This looks unprofessional.
It also means the paint won’t last as long.
Using the right grits is also key. Starting too fine means you won’t remove old paint well. Starting too coarse might create scratches that are too deep.
These deep scratches can show through the primer. They can even show through the final paint. It’s a balance.
You want to create a surface the primer loves.
A well-sanded surface helps the primer level out. It fills in tiny pores in the metal. It covers small imperfections you can’t even see.
This gives you a uniform canvas. This uniform canvas is what you need for a flawless paint job. It’s the foundation for everything that comes next.
Choosing the Right Sandpaper
Sandpaper is not all the same. It comes in different grits. Grits tell you how rough or smooth the paper is.
Higher numbers mean finer grit. Lower numbers mean coarser grit. For car sanding, we use a range.
You’ll typically start with a medium grit. This might be around 180 or 220 grit. This grit is good for removing old paint.
It also smooths out minor imperfections. It creates a good surface for the primer to grab onto.
Sometimes, if you have thicker old paint or some rough filler, you might start a bit coarser. Maybe 150 grit. But be careful not to go too rough.
You don’t want to leave deep scratches that are hard to remove later.
After the initial sanding, you move to a finer grit. Often, 320 or 400 grit is used. This finer grit smooths out the scratches from the coarser paper.
It creates a very smooth surface. This is the ideal surface for the primer. It ensures the primer goes on evenly.
Always use sandpaper designed for automotive use. It’s usually more durable. It also helps prevent loading up with dust too quickly.
You can get sandpaper in sheets or discs. Sheets are good for hand sanding or with sanding blocks. Discs are used with orbital sanders.
Sandpaper Grits for Primer Prep
Primary Sanding (Removal & Smoothing): 180-220 grit
Secondary Sanding (Finer Smoothing): 320-400 grit
Note: Adjust starting grit based on the condition of the old paint/surface.
Understanding Sanding Tools
You don’t always need fancy tools. But they can make the job easier. And they help you get a more even finish.
Here are some common ones.
Sanding Blocks: These are simple rubber or foam blocks. You wrap sandpaper around them. They help you keep the sanding pressure even.
This is super important. A flat block helps you sand flat areas without creating waves. Some blocks are flexible.
They can follow the curves of a car.
Orbital Sanders: These are power tools. They move the sandpaper in a circular motion. They make sanding much faster.
They are great for large, flat areas. There are random orbital sanders. These are the best for most car work.
They reduce the chance of swirl marks. Always use a medium-grit disc first. Then switch to a finer grit disc.
Detail Sanders: These are smaller sanders. They are good for tight spots. They can get into corners or around trim.
Some look like small irons. They use small sandpaper attachments.
Masking Tape & Paper: You need these to protect areas you don’t want to sand. Like windows, trim, or rubber seals. Use good quality automotive masking tape.
It stays on well. It also removes cleanly. Cover windows with paper or plastic sheeting.
When using power tools, always wear safety gear. This includes a respirator mask and safety glasses. The dust can be harmful.
And flying debris is dangerous. Power tools also require a light touch. Let the tool do the work.
Don’t press too hard.
Tool Spotlight: Random Orbital Sander
Benefit: Fast, efficient, reduces swirl marks.
Usage: Keep it moving. Don’t let it sit in one spot. Use appropriate grit discs.
Safety: Always wear a respirator and eye protection.
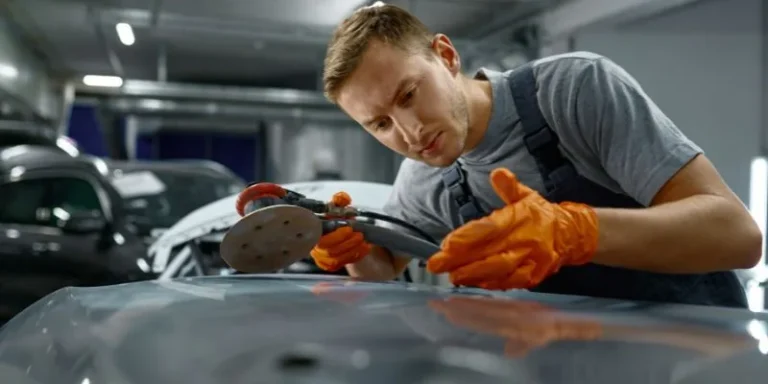
The Step-by-Step Process
Let’s break down how to do this right. Follow these steps for a smooth path to primer.
1. Clean the Car Thoroughly
This is crucial. Any dirt, grease, or wax will get ground into the paint. It will cause problems later.
Wash the car with soap and water. Use a degreaser. Make sure to get into all the nooks and crannies.
Rinse well. Dry the car completely with clean microfiber towels.
2. Mask Off Areas
Protect everything you don’t want to sand. This includes windows, door handles, lights, and trim. Use good quality automotive masking tape.
Press the edges down firmly. You don’t want sandpaper getting under the tape. Cover large areas like windows with paper or plastic sheeting.
3. Start Sanding (Medium Grit)
Begin with your 180 or 220 grit sandpaper. If you’re using a sanding block, wrap the paper around it. Sand in a consistent pattern.
Go back and forth, or in a circular motion. Overlap your strokes. This ensures you cover everything evenly.
Work in sections.
Don’t press too hard. Let the sandpaper do the work. If you’re using a random orbital sander, keep it moving.
Don’t let it dwell in one spot. Sand until the old paint is dulled. You don’t necessarily have to remove all the old paint.
The goal is a uniform surface for the primer.
Pay attention to edges and corners. These can be tricky. Use a flexible sanding block or a detail sander if needed.
Check your progress often. Run your hand over the surface (with a glove on) to feel for rough spots or missed areas.
Sanding Patterns: Keep it Consistent
Back and Forth: Good for large, flat panels.
Circular Motion: Effective with random orbital sanders. Overlap each pass.
Always: Overlap your strokes to ensure full coverage.
4. Clean Again
After the first round of sanding, dust will be everywhere. Wipe the car down with a clean, damp cloth. Use a tack cloth.
A tack cloth is sticky. It picks up fine dust particles. Don’t use a dry cloth.
It will just move the dust around.
5. Sand with Finer Grit
Now, switch to your 320 or 400 grit sandpaper. Repeat the sanding process. This step removes the deeper scratches left by the coarser grit.
You’re aiming for a very smooth surface. The goal is to have an even sheen across the entire panel.
Again, use consistent strokes. Overlap each pass. Make sure you cover all the areas you sanded before.
If you see any shiny spots left from the previous grit, keep sanding them until they are dulled. This ensures the primer will adhere everywhere.
6. Final Cleaning
This is the most important cleaning step. Wipe the car down again with a damp cloth. Then, use a tack cloth.
Go over the entire surface slowly. Ensure absolutely no dust or debris remains. Any speck of dust will show up under the primer.
It will be a tiny bump.
Inspect the surface carefully. Look at it from different angles. Feel it with your fingertips.
It should feel smooth. It should have a dull, even finish. No shiny spots.
No deep scratches. You’re now ready for primer.
Quick Scan: Surface Check
Feel: Smooth and uniform.
Look: Dull, no shiny spots.
Absence of: Grease, dirt, dust, deep scratches.
Common Mistakes to Avoid
Even with good intentions, mistakes happen. Here are some common ones people make. Knowing them helps you steer clear.
Mistake 1: Not Cleaning Enough
This is a big one. Grease, wax, or even just finger oils on the car’s surface can cause the primer to fail. It creates what we call “fisheyes.” The primer literally can’t stick to these oily spots.
It forms little craters. Always degrease and wash thoroughly. Use a tack cloth before priming.
Mistake 2: Using the Wrong Grit Sandpaper
Starting too fine means you won’t effectively remove old paint or imperfections. Starting too coarse can leave scratches that are too deep. These deep scratches might show through the primer or paint.
Stick to the recommended grits (180-220, then 320-400) unless you have a specific reason.
Mistake 3: Uneven Sanding
This often happens when sanding by hand without a block. You end up pressing harder in some areas than others. This creates low and high spots.
Using a sanding block or a random orbital sander helps greatly. Keep your sanding motion consistent.
Another cause of unevenness is rushing. Take your time. Work in sections.
Overlap your strokes. Run your hand over the panel to feel for high and low spots. Fix them before moving on.
Mistake 4: Not Masking Properly
Sanding dust gets everywhere. If you don’t mask off windows, trim, and other parts, you’ll have a huge mess. Worse, you might accidentally sand these parts.
This can damage rubber seals or chrome. Use good quality automotive tape and cover windows with paper.
Mistake 5: Over-Sanding or Too Much Pressure
While you need to sand enough to create tooth, you don’t want to oversand. Especially if you’re sanding down to bare metal on certain areas. Too much pressure can also create heat.
It can warp thin metal panels. Let the sandpaper do the work. Light to moderate pressure is usually enough.
Mistake 6: Not Cleaning Between Grits
After you finish with 220 grit, there’s a lot of dust and debris. If you immediately go over it with 320 grit, you’re just pushing that old grit around. Clean the surface thoroughly with a tack cloth.
This ensures you’re sanding on a clean surface with the finer grit. It prevents carrying coarser grit scratches forward.
Contrast: Normal Sanding vs. Problem Sanding
| Normal Sanding | Problem Sanding |
| Uniform, dull finish | Shiny spots, deep scratches |
| Smooth to the touch | Rough patches, uneven feel |
| Clean surface before primer | Dust or grease left behind |
| Even pressure with blocks/tools | Uneven pressure, waves in surface |
Real-World Context: Different Surfaces, Different Needs
Not all parts of a car are the same. The surface you’re sanding can change things. You need to adapt your approach.
Metal Panels
These are your main areas like doors, fenders, hoods, and roofs. They are usually straightforward. Use your sanding blocks or orbital sander here.
Start with 180-220 grit. Work your way up to 320-400 grit. The goal is a smooth, uniform surface ready for primer.
If there’s rust, you need to remove it all. Sand down to clean, bright metal. Then, use a rust converter or a direct-to-metal (DTM) primer.
If you have dents that were filled with body filler, sand the filler carefully. Make sure it’s flush with the surrounding metal. Body filler needs to be sanded smooth.
It sands easier than metal.
Plastic Parts
Bumpers and trim pieces are often made of plastic. These require a different approach. Plastic can melt or warp with too much heat from sanding.
You also can’t use the same harsh grits. For plastic, you’ll usually use finer grits. Often starting around 320 grit.
For some plastic parts, you might not need to sand down to bare plastic. If the original paint or coating is in good shape, you might just scuff it up. This means sanding enough to make it dull.
This gives primer something to adhere to. Avoid using aggressive coarse grits on plastic.
Existing Paint
If you’re not stripping the car down to bare metal, you’ll be sanding over existing paint. The goal here is to scuff the old paint. This creates a dull surface.
It also removes any contaminants. You want to make the old paint slightly rough. This helps the new primer stick.
Usually, 220-320 grit is sufficient for scuff-sanding existing paint.
Be careful not to sand through the old paint in areas. Especially on edges or body lines. If you sand through to the primer or metal underneath, you’ll need to address those spots.
You might need to prime them individually. Or sand them smooth with the surrounding area before applying primer to the whole car.
Surface Specifics: Key Differences
Bare Metal: Needs thorough rust removal, then sanding for adhesion. Can handle medium grits.
Body Filler: Sands easily, needs to be smooth and flush. Use grits appropriate for surrounding metal.
Plastic: Sensitive to heat. Use finer grits (320+). Scuff existing finishes.
Existing Paint: Scuff to create adhesion. Avoid sanding through to metal.
What This Means for You: When is it Good Enough?
Knowing when to stop sanding is crucial. You don’t want to overdo it. But you definitely don’t want to underdo it.
When is Sanding “Good Enough”?
The surface is ready for primer when it meets these conditions:
- Uniform Dullness: The entire surface should have a consistent, dull appearance. No shiny spots remain from previous sanding steps or the original finish.
- Smooth Feel: Run your clean, gloved hand over the surface. It should feel smooth. You shouldn’t feel any significant bumps, ridges, or deep scratches.
- No Visible Contaminants: The surface must be free of dirt, grease, oil, wax, or any other residue. A final wipe with a tack cloth ensures this.
- Scratches are Gone (or Finer): The scratches from your coarser grit sandpaper should be removed by your finer grit. The final surface should only have the very fine scratches left by your last sanding step (e.g., 320 or 400 grit).
- Primer Adhesion: The primary goal is to create “tooth.” The surface needs to be slightly abrasive. This allows the primer to chemically and mechanically bond to it.
When Should You Worry?
You should worry if:
- Deep Scratches Remain: If you can still feel or see deep gouges from the initial sanding, you need to go back. These will show through the primer.
- Fisheyes Appear After Priming: If you prime and see tiny crater-like spots, it means the surface wasn’t clean enough. You’ll have to strip that area and re-sand.
- Uneven Surface: If you notice waves or dips in the surface after sanding, you need to fix them. Use a sanding block to identify and level these areas.
- You Sanded Through to Bare Metal Accidentally: If you’ve sanded through existing paint or primer down to bare metal in an area you didn’t intend to, that spot needs special attention. It might need a specific primer (like epoxy primer) for bare metal.
Simple Checks to Do
Before you apply primer, do these quick checks:
- The Glove Test: Wear a clean nitrile glove. Gently slide your hand across the surface. Feel for any roughness, bumps, or ridges.
- The Light Test: Shine a bright light source (like an LED work light) across the surface at an angle. This will highlight any low spots or imperfections you might not feel.
- The Visual Scan: Step back and look at the car from a distance. Then look closely from various angles. Does it look uniform?
If all checks pass, you’re golden. If not, do a little more sanding on the problem areas. Then re-clean.
Quick Tips for a Better Finish
Here are some extra pointers to make your sanding job even better. These are things I’ve learned over time.
- Work in Good Light: Natural daylight is best. If you can’t get daylight, use bright, diffused artificial lights. Good lighting reveals imperfections.
- Keep it Cool: Sanding creates friction. Friction creates heat. Heat can warp metal and make sandpaper load up faster. If it’s hot out, work in the shade or early in the morning.
- Use Compressed Air: If you have access to an air compressor, use it to blow dust away as you sand. This helps you see your progress clearly. Just don’t blow dust onto areas you’ve already cleaned.
- Change Sandpaper Often: Sandpaper gets dull. When it’s dull, you have to press harder. This leads to uneven sanding. Replace your sandpaper when it starts to clog or feel less effective. It’s cheaper than fixing a bad paint job.
- Don’t Rush the Cleaning: The cleaning steps, especially with the tack cloth, are critical. Take your time. Make sure every speck of dust is gone.
- Practice on Scrap Metal: If you’re really nervous, get a piece of scrap sheet metal. Practice your sanding technique. Try different grits. See how they feel and look.
Quick Fixes: On the Fly
Sticky Trim? Use a flexible sanding sponge or a rolled-up piece of sandpaper.
Dull Sander? Time for a new sheet or disc.
Dust Everywhere? Use compressed air carefully, or keep wiping with tack cloths.
Feeling Unevenness? Use a long sanding block to bridge dips and high spots.
Frequently Asked Questions
Can I just use a DA sander for everything?
A Dual Action (DA) or random orbital sander is great for most large, flat, or gently curved areas. It speeds things up. However, for tight corners, edges, or very intricate areas, you’ll still need hand sanding with blocks or detail sanders.
So, it’s a tool, but not always the only tool.
How long does it take to sand a car for primer?
This varies a lot! A small car might take 4-8 hours. A larger truck or SUV could take 10-16 hours or more.
It depends on the size, complexity, and how much old paint or filler you need to remove. Patience is key. Don’t rush it.
Do I need to sand down to bare metal?
Not always. If the old paint is in good condition (no peeling, cracking, or major damage), you can usually just scuff it up with medium-grit sandpaper (like 220 grit). This creates adhesion for the primer.
You only need to go to bare metal if you’re removing rust, fixing deep damage, or if the old paint is failing.
What’s the difference between wet and dry sanding?
Dry sanding uses sandpaper on a dry surface. It’s faster but creates a lot of dust. Wet sanding uses sandpaper with water (or a mild soap solution).
This lubricates the surface, reduces dust, and can help prevent sandpaper from clogging. For primer prep, dry sanding is more common. But wet sanding can be used with finer grits for a super smooth finish.
Can I use an angle grinder with a sanding disc?
While an angle grinder is powerful, it’s generally too aggressive for car body sanding before primer. It can easily overheat and warp thin metal panels. It’s also very hard to control for an even finish.
Stick to random orbital sanders or hand sanding methods for this job.
What if I find a deep scratch after I’ve already primed?
Oh, that’s frustrating! If you find a deep scratch after priming, you’ll likely need to sand it out. If it’s a minor scratch, you might be able to wet sand it smooth with very fine grit sandpaper (like 1000 or 2000 grit).
If it’s deeper, you might need to spot prime that area after sanding it down. Always inspect thoroughly before applying primer to the whole car.
Conclusion: Your Smooth Path to a Great Paint Job
Taking the time to properly sand your car before primer is essential. It’s the invisible work that makes the visible work shine. By understanding the grits, using the right tools, and following a careful process, you create the perfect base.
Remember that attention to detail matters most. Avoiding common mistakes ensures your primer will adhere well. This sets you up for a professional-looking paint job that lasts.