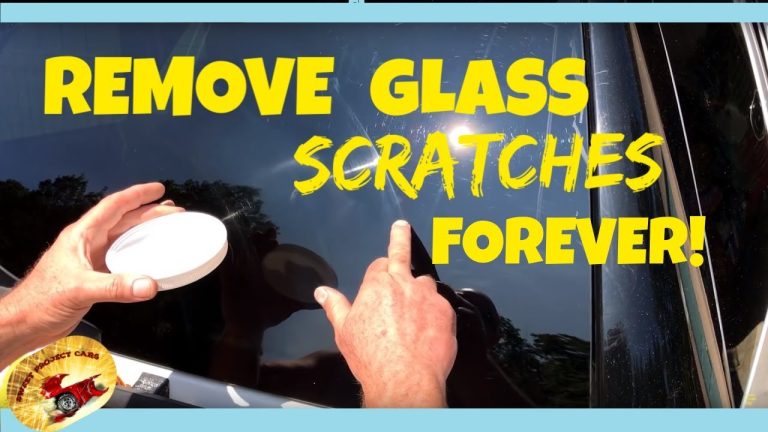
How to Clean Inside Car Windows Without Streaks
Cleaning the inside of your car windows can be tricky. You want them to be crystal clear for better driving, but it’s easy to end up with annoying streaks that just make things worse. Many people find it hard to get that perfectly clear finish. This guide will show you exactly how to How to Clean Inside Car Windows Without Streaks with simple steps everyone can follow. Get ready for a sparkling clean view.
The Challenge of Streak-Free Car Window Cleaning
Getting inside car windows truly clean without leaving any streaks is a common frustration for drivers. The angles are awkward, and it’s easy to miss spots or use the wrong products. This can lead to hazy windows that actually make it harder to see, especially when the sun hits them just right or at night with oncoming headlights. Many people resort to quick wipes with paper towels, which often just push the dirt around or leave behind lint. It’s a simple task that can quickly become annoying if you don’t have the right approach. We’ll break down the process so you can achieve a professional-looking shine every time.
Why Cleaning Inside Car Windows Matters
Clean windows are more than just about looks. They are essential for driving safety. Reduced visibility due to smudges, dirt, or streaks can be dangerous. This is especially true in adverse weather conditions like rain or fog, or when driving at night. Clear windows ensure you can see pedestrians, other vehicles, and road signs clearly. This directly impacts your reaction time and overall safety on the road. Keeping them clean helps prevent accidents.
Common Mistakes People Make
One of the biggest mistakes is using the wrong cleaning solution. Many household cleaners contain ammonia, which can damage window tint and leave streaks on automotive glass. Another common error is using dirty cloths or paper towels. These can spread dirt and lint, creating more streaks.
Using the wrong type of cleaner.
Many general household glass cleaners are too harsh for car windows. They can contain ammonia or other chemicals that leave residue or even damage window tint. Always opt for an automotive-specific glass cleaner or a gentle DIY solution. This ensures a clean finish without harming your car’s interior.
Using dirty cloths or paper towels.
Paper towels can leave behind lint, which is difficult to remove completely from glass. Old, dirty rags just spread the grime around. It’s best to use clean microfiber cloths, which are designed to absorb dirt and prevent streaking. Have at least two cloths ready: one for cleaning and one for drying.
Cleaning in direct sunlight.
When you clean your car windows in direct sunlight, the cleaner can dry too quickly. This leads to streaks and spots before you can even wipe them away. Always try to clean your windows in a shaded area or at a cooler time of day. This allows the cleaner to work effectively without evaporating too fast.
The Impact of Streaks on Visibility
Streaks on your car windows aren’t just unsightly. They create distorted light patterns. This can make it hard to judge distances or see obstacles clearly. When headlights hit a streaky window, they can scatter, causing glare. This glare can temporarily blind the driver, making it extremely dangerous, especially on highways or winding roads.
Gathering the Right Supplies for Clear Windows
To achieve that perfect, streak-free shine on your car’s interior windows, having the right tools is key. You don’t need fancy equipment, just a few simple items that work well together. Using the wrong products can actually make the problem worse, leading to more frustration and less visibility. Let’s make sure you have everything you need before you start.
Essential Cleaning Solutions
Choosing the right cleaner is crucial. For automotive glass, it’s best to avoid cleaners with ammonia. Ammonia can damage window tint film and leave a haze on the glass. Instead, opt for a dedicated automotive glass cleaner. These are formulated to clean effectively without leaving residue or damaging tint. If you prefer a DIY approach, a mixture of distilled water and white vinegar is a good alternative. The vinegar helps cut through grime and leaves a streak-free finish.
Automotive Glass Cleaner
These cleaners are specifically designed for car windows. They are tough on dirt, grease, and fingerprints but gentle on window tint and interior surfaces. Many automotive cleaners also contain agents that help repel water and dirt, keeping your windows cleaner for longer. Look for products that explicitly state “ammonia-free.”
Distilled Water and White Vinegar Solution
A common and effective DIY cleaner is a 1:1 mixture of distilled water and white vinegar. Distilled water is important because tap water contains minerals that can leave spots on your windows. Vinegar is a natural degreaser and disinfectant, helping to break down grime. This solution is cost-effective and readily available.
Rubbing Alcohol
Isopropyl alcohol, commonly known as rubbing alcohol, can also be a useful addition. It evaporates quickly and can help remove stubborn film and water spots. A small amount of rubbing alcohol mixed with your vinegar and water solution can boost its cleaning power.
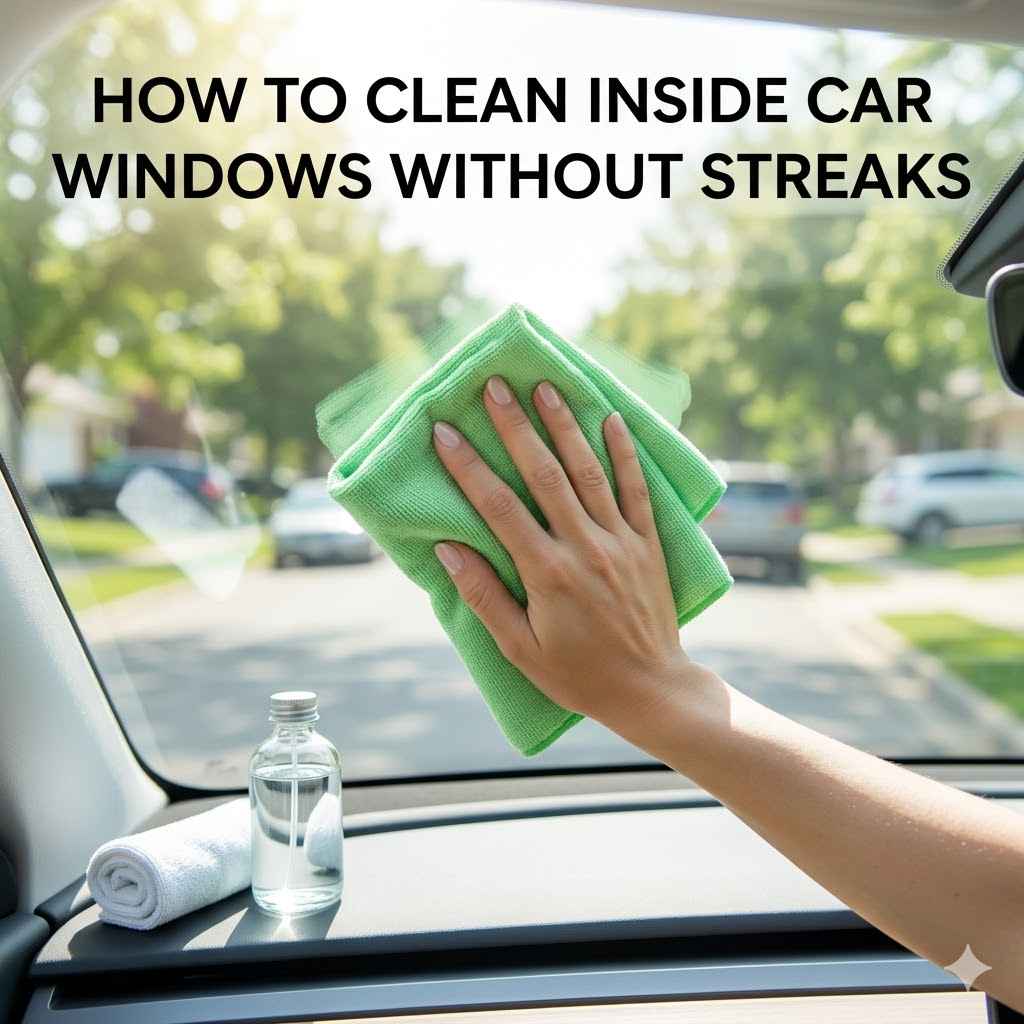
The Power of Microfiber Cloths
Microfiber cloths are a game-changer for cleaning glass. They are made of extremely fine fibers that are very effective at trapping dirt and absorbing liquids. Unlike paper towels, they don’t leave behind lint or streaks. For cleaning car windows, you’ll want at least two high-quality microfiber cloths.
Two-Cloth Method
This is the most effective way to use microfiber cloths for streak-free windows. Use one damp cloth to apply the cleaner and wipe away the dirt. Immediately follow with a second, dry microfiber cloth to buff the glass to a shine. This ensures no cleaner residue is left behind.
Why Microfiber is Superior
The tiny fibers in microfiber create a larger surface area, allowing them to pick up and hold more dirt and moisture. They are also non-abrasive, so they won’t scratch your glass. For best results, use cloths specifically designed for glass cleaning, as they are woven to be extra smooth.
Care for Your Microfiber Cloths
To maintain their effectiveness, wash microfiber cloths separately from other laundry. Use a mild detergent and avoid fabric softener, which can clog the fibers and reduce their absorbency and cleaning power. Air drying is often recommended.
Other Helpful Tools
Beyond the cleaner and cloths, a few other items can make the job easier. A squeegee can be helpful for larger windows, especially the windshield and rear window. Make sure it has a clean, sharp rubber blade. You might also need a soft-bristled brush or an old toothbrush to clean around edges and vents where dust accumulates.
Squeegee
A good quality squeegee with a flexible rubber blade is excellent for quickly removing excess water and cleaner. It’s especially useful for the large surfaces of the windshield and rear window. Ensure the blade is sharp and free of nicks to avoid leaving lines.
Detailing Brushes
Small detailing brushes or an old toothbrush are perfect for getting into tight spots. Think around the edges of the windows, in the crevices of door seals, and around any interior trim. These brushes help remove accumulated dust and grime that can otherwise get into your clean solution.
Step-By-Step Guide How to Clean Inside Car Windows Without Streaks
Now that you have all your supplies ready, it’s time to get down to business. This step-by-step guide will walk you through the process of cleaning your car’s interior windows, ensuring a crystal-clear, streak-free finish. Following these steps carefully will make a noticeable difference in your driving experience.
Preparation is Key
Before you start spraying any cleaner, take a moment to prepare. Remove any items from your dashboard and doors that might get in the way or be sprayed. This includes air fresheners, phone mounts, and loose change.
Clear the Interior Space
Remove any clutter from your dashboard, door pockets, and the center console. This includes air fresheners, charging cables, sunglasses, and any other items that could obstruct your cleaning path. A clear space makes it much easier to reach all areas of the window.
Protect Interior Surfaces
While automotive glass cleaners are generally safe, it’s a good idea to protect sensitive interior surfaces like leather or upholstery from overspray. You can use a clean towel to cover parts of the dashboard or seats if you’re concerned.
Applying the Cleaner
Spray your chosen cleaning solution directly onto your first microfiber cloth, not directly onto the window. This prevents overspray from hitting other parts of your car’s interior and allows for more controlled application.
Apply Cleaner to Cloth
Lightly spray your cleaning solution onto the first microfiber cloth. You want the cloth to be damp, not soaking wet. This prevents excess liquid from dripping and creating puddles on your dashboard or car seats.
Wipe the Window Surface
Using the damp cloth, wipe the inside of the car window in a consistent pattern. A good method is to wipe horizontally across the entire window. This helps to remove dirt and grime effectively without smearing it.
The Drying and Buffing Process
This is where the magic happens, and the second, dry microfiber cloth comes into play. This step is crucial for achieving that streak-free finish.
Use a Dry Microfiber Cloth
Immediately after wiping with the damp cloth, grab your second, completely dry microfiber cloth. This cloth will be used to dry and buff the glass to a shine.
Buff to a Streak-Free Shine
Wipe the window with the dry cloth using a different motion than you used for cleaning. For instance, if you wiped horizontally before, now wipe vertically. This cross-hatching pattern helps catch any remaining moisture or residue. Buff until the glass is completely dry and clear.
Check for Streaks
Turn on your interior lights or wait until it’s dark outside with headlights from another car to check your work. Look at the window from different angles. If you see any streaks or spots, simply buff them out with the dry cloth.
Handling Difficult Spots
Sometimes, you’ll encounter stubborn grime, like dried-on bugs or oily residue. For these, you might need a bit of extra attention.
Stubborn Grime
For tough spots, you can spray a little more cleaner onto your cloth and gently rub the area. For very sticky residues like sap or tar, you might need a specialized automotive tar and bug remover, applied carefully to the cloth first.
Corners and Edges
Use a detailing brush or the corner of your microfiber cloth to clean the edges and corners of the windows where dirt can accumulate. This ensures a complete clean all the way around.
Tips for Advanced Streak-Free Cleaning
Once you’ve mastered the basic steps, there are a few advanced techniques that can help you achieve an even more perfect finish. These tips focus on optimizing your technique and addressing common problem areas to ensure your car windows are as clear as can be.
The Cross-Hatch Buffing Technique
This technique is essential for eliminating any lingering streaks or haziness. It involves using different wiping directions for cleaning and drying.
Horizontal Wipe for Cleaning
When applying the cleaner and removing dirt, wipe the window in a horizontal motion from one side to the other. This ensures you cover the entire surface and lift the grime effectively.
Vertical Wipe for Drying
Immediately after cleaning, switch to a dry microfiber cloth. Now, wipe the window in a vertical motion. This combination of horizontal and vertical wipes ensures that any cleaner residue or moisture is caught and removed.
Final Polish
After the initial vertical buffing, you can do a final light polish with a clean section of the dry cloth in a circular motion if needed. This gives the glass an extra sparkle.
Dealing with Hard Water Spots
Hard water spots are caused by minerals left behind after water evaporates. They can be particularly stubborn.
Vinegar Power
A solution of equal parts white vinegar and distilled water is very effective against hard water spots. Apply it to a microfiber cloth and let it sit on the spot for a minute before wiping. The acidity of the vinegar helps dissolve the mineral deposits.
Lemon Juice Alternative
In a pinch, lemon juice can also help. Its natural acidity can break down mineral buildup. However, use it sparingly as it can be sticky if not rinsed thoroughly.
Preventative Measures
If possible, avoid letting water spots build up. Wipe down windows after washing your car, especially if you have hard water. Using distilled water for rinsing can also help.
Cleaning Tinted Windows Safely
Window tint adds a layer of complexity. It’s important to use products and techniques that won’t damage the tint film.
Ammonia-Free is Essential
As mentioned, ammonia is a major enemy of window tint. It can cause the tint to bubble, peel, or discolor over time. Always use an ammonia-free glass cleaner or your DIY vinegar solution.
Gentle Pressure
Avoid applying excessive pressure when cleaning tinted windows. You don’t want to risk scratching or peeling the tint. Use a soft microfiber cloth and gentle, consistent strokes.
Test in an Inconspicuous Area
If you’re unsure about a cleaner, test it on a small, hidden corner of the tinted window first. Wait a few hours to see if there are any adverse reactions before cleaning the entire window.
The Importance of Interior Lighting
Clever use of interior lighting can help you spot those annoying streaks you might otherwise miss.
Use Dashboard Lights
After you’ve cleaned and buffed a window, turn on your car’s interior lights. Shine them across the glass. Any remaining streaks or smudges will be much more visible under this direct light, allowing you to go back and buff them out.
Nighttime Inspection
Driving at night with oncoming headlights provides another excellent opportunity for inspection. If you notice glare or haziness, you know that spot needs another quick buff.
Maintaining Cleanliness Between Deep Cleans
Keeping your car windows clean doesn’t have to be a huge task. A little regular maintenance can go a long way in preventing the buildup of dirt and grime. This means fewer streaks and better visibility all the time.
Quick Wipe-Downs
For minor dust or smudges, a quick wipe can save you a lot of work later. Keep a small microfiber cloth in your glove compartment.
Daily Dust
Dust accumulates quickly on interior surfaces. A quick wipe with a dry microfiber cloth can remove this light dust before it has a chance to build up and become noticeable. This is especially useful after parking in a dusty area.
Fingerprint Patrol
Fingerprints are common, especially with passengers. A small, dedicated cleaning cloth in your car can help you quickly address these marks as soon as you notice them.
Dealing with Condensation
Condensation on the inside of windows is a common issue, especially in cold or humid weather. It can lead to streaks if not handled properly.
Use the Defroster
Your car’s defroster is designed to help clear condensation. Use it on both the front and rear windows. This will help evaporate the moisture quickly.
Wipe Gently
If condensation leaves water marks, wipe them away with a clean, dry microfiber cloth. Avoid rubbing hard, which can spread the moisture and leave streaks.
Seasonal Considerations
Different seasons bring different cleaning challenges. Being aware of these can help you maintain clear windows year-round.
Winter Grime
In winter, salt spray from roads and slush can create a film on your windows. Regular cleaning with a good automotive cleaner is essential. You might also need to tackle ice melt residue.
Summer Bugs and Tar
Summer brings bugs and tar, which can stick to your windows. A specialized automotive bug and tar remover, applied with a cloth, will be most effective.
Frequently Asked Questions
Question: What is the best cleaner for inside car windows
Answer: The best cleaner for inside car windows is an ammonia-free automotive glass cleaner. Alternatively, a mixture of equal parts distilled water and white vinegar is a highly effective and safe DIY option.
Question: Can I use Windex on car windows
Answer: Traditional Windex contains ammonia, which can damage car window tint and leave streaks. It’s best to avoid it and use an ammonia-free alternative specifically designed for automotive glass.
Question: How often should I clean my car’s interior windows
Answer: You should clean your car’s interior windows as needed, but a good rule of thumb is to do a thorough cleaning every 1-2 months. Quick wipe-downs for dust and fingerprints can be done more frequently.
Question: Why do my car windows still streak after cleaning
Answer: Streaks often happen due to using the wrong cleaner (like ammonia-based products), dirty cloths, cleaning in direct sunlight, or not drying the glass completely. Using two clean microfiber cloths and the cross-hatching technique helps prevent this.
Question: What is the best way to clean the inside of my windshield
Answer: To clean the inside of your windshield, use an ammonia-free cleaner on a microfiber cloth. Spray the cloth, not the glass. Wipe horizontally, then dry and buff with a second, clean microfiber cloth using vertical strokes.
Use a squeegee if needed.
Wrap Up
Achieving spotless, streak-free car windows is simple with the right approach. By using ammonia-free cleaners, high-quality microfiber cloths, and a consistent wiping technique, you can ensure clear visibility. Remember to prepare your space, clean with gentle motions, and buff dry thoroughly for a professional shine every time. Enjoy your crystal-clear view.