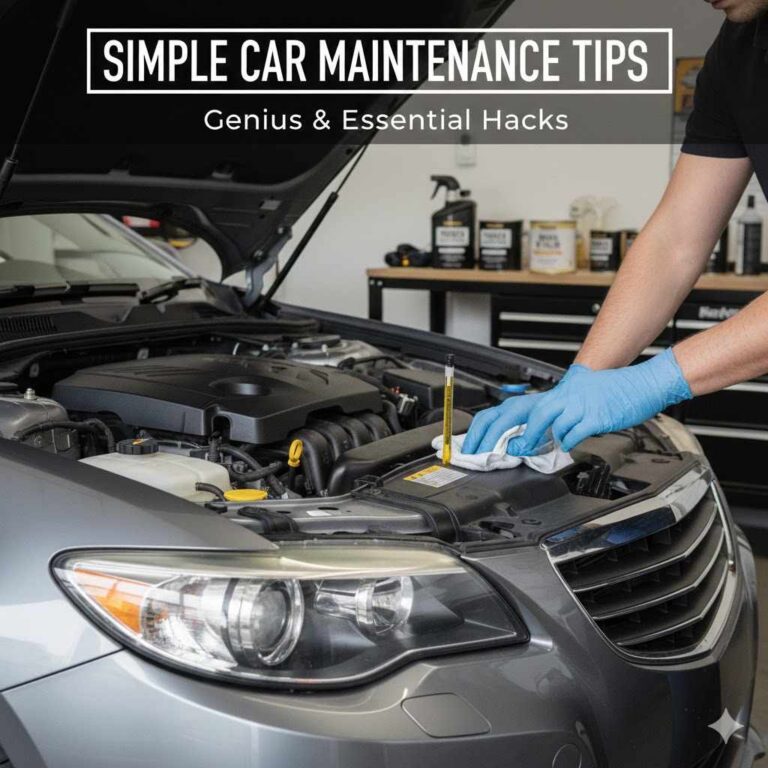
How To Get Scratches Out Of Interior Car Plastic Cheaply
It’s a common frustration for car owners. You’re cleaning your car’s interior, maybe just taking out some trash, and suddenly you see it: a tiny, yet infuriating, scratch on the plastic trim. It might be from a set of keys, a rogue shopping bag, or even just everyday wear and tear.
These little marks can make a car feel older and less cared for than it is. But don’t worry, you don’t need to spend a fortune or be a car detailing pro to fix them. There are many simple, cheap ways to make those scratches disappear or at least look much better.
This guide will walk you through how to get scratches out of interior car plastic without breaking the bank.
Getting scratches out of interior car plastic is possible with simple household items. Many minor scuffs and light scratches can be buffed out using gentle cleaners, heat, or specialized plastic polishes. The key is to start with the least abrasive method and work your way up.
Understanding Interior Car Plastic Scratches
Interior car plastic is everywhere. It’s on your dashboard, door panels, center console, and even small buttons. This plastic is usually tough, but it can scratch easily.
Think about the things that cause them. Keys are a big culprit. So are rings on fingers.
Even a rough cleaning cloth can leave marks over time. These scratches are often shallow. They mostly affect the top layer of the plastic.
Deeper scratches go all the way through this layer. They can be harder to fix. Knowing the type of scratch helps you pick the right fix.
Different plastics have different finishes. Some are matte. Others are shiny.
Some have a soft-touch coating. This coating can also get scratched. The type of plastic matters.
It also matters how the scratch looks. Is it a white scuff mark? Or is it a deep gouge?
Most common scratches are light. They look like a dull line on the shiny surface. Or they are scuffs that look like a grey smudge.
The goal is not always to make the scratch vanish completely. Sometimes, it’s about making it less noticeable. We want to restore the shine or matte finish.
We want to make the plastic look smooth again. This is very achievable with the right approach. We’ll focus on easy methods that most people can do at home.
These methods use items you might already have.

My Frustrating First Encounter with a Dashboard Scratch
I remember it vividly. I had just bought my first “new to me” car, a sleek silver sedan. I was so proud of it.
I loved that new car smell. One sunny afternoon, I was fumbling for my phone. It slipped from my hand and bounced right onto the dashboard.
When I picked it up, my heart sank. There it was, a thin, white line marring the dark, smooth plastic. Panic set in.
I thought I had ruined the whole dashboard. I spent hours online looking for professional repair services. The quotes I got were eye-watering.
I felt so defeated. It was just a small scratch, but it bothered me endlessly. I started avoiding looking at that part of the dash.
That’s when I knew I had to figure this out myself, cheaply.
I tried using just a damp cloth first. That didn’t do much. Then I grabbed some household cleaner.
It made the area shiny but the scratch was still very obvious. It felt like I was making it worse. I was so worried about damaging the plastic further.
I even considered buying a whole new dashboard piece, which was absurd. The thought of such a small mark causing such a big headache was so frustrating. This is why I am so passionate about finding simple, effective solutions for everyday car owners.
After a lot of research and some hesitant attempts, I found a few methods that actually worked. It wasn’t magic, but it was very effective. It showed me that you don’t need fancy tools or expensive products for many common car interior issues.
The relief I felt when the scratch became almost invisible was immense. It gave me confidence to tackle other small issues.
Quick Scratch Assessment: Light vs. Deep
Light Scratches (Surface Scuffs): These are often white or grey marks. They are only in the top clear coat or finish. You can usually feel them slightly with a fingernail, but it’s not a deep groove.
These are the easiest to fix.
Deep Scratches (Gouges): These look like actual cuts or grooves. You can easily feel them with your fingernail. They go through the plastic’s finish.
These are much harder to fix and might require filling or professional help for a perfect look.
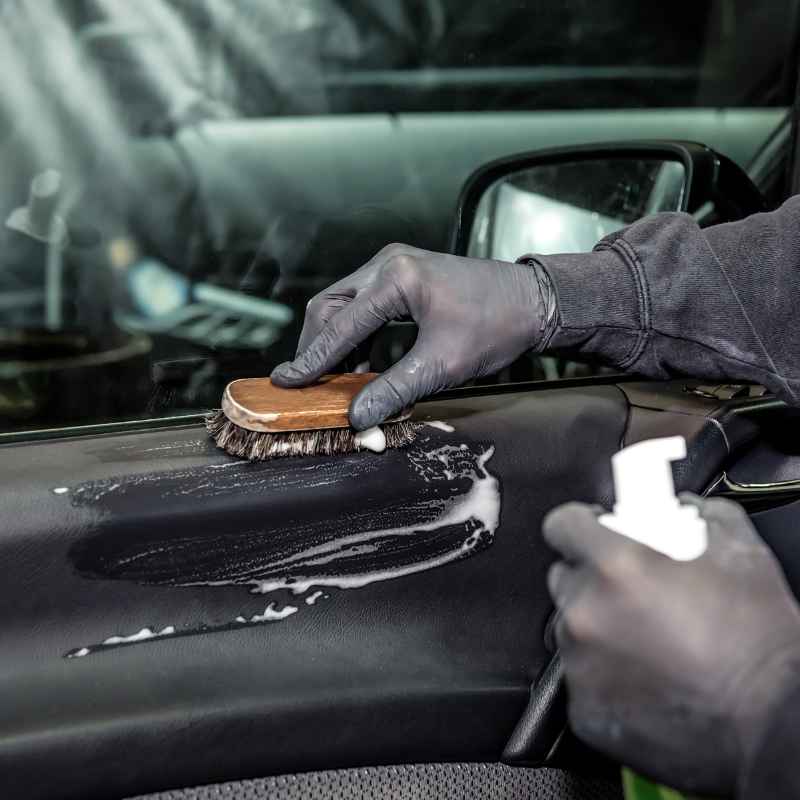
The Magic of Household Items: Gentle Cleaning and Buffing
Sometimes, the simplest solutions are hiding in your kitchen or bathroom. For very light scuffs and surface scratches on interior car plastic, gentle cleaning can make a big difference. What looks like a scratch might just be transferred material from something else.
Or it could be a scuff on the finish.
Start with a microfiber cloth. Make sure it’s clean and soft. Dampen it slightly with water.
Gently wipe the scratched area. See if the mark comes off. If not, try a tiny amount of mild soap mixed with water.
Again, use a clean microfiber cloth. Wipe gently in one direction. Then wipe with a dry part of the cloth.
This method is great for removing dirt that might be caught in the scratch.
Many interior plastics can be cleaned with specific interior cleaners. However, for scratches, you want something very mild. Avoid harsh chemicals.
These can actually damage the plastic or its finish. A cleaner specifically designed for car interiors is a safe bet. Apply it to your cloth, not directly to the dashboard.
This gives you more control. Gently rub the area. Then buff it dry with another clean cloth.
The key here is patience. Don’t scrub hard. You don’t want to create more scratches.
The goal is to lift any surface grime or transferred material. For many light scuffs, this might be all you need. It’s surprising how often a simple wipe-down can solve the problem.
This is the first step because it’s the least risky. It uses things you already have. It’s also very cheap.
Contrast Matrix: What to Use vs. What to Avoid
Use With Caution:
- Microfiber cloths (clean and soft)
- Mild dish soap diluted in water
- Car interior cleaner (pH-neutral)
- Rubbing alcohol (very sparingly on tough marks, test first)
Avoid:
- Abrasive cleaners (like scouring powders)
- Harsh chemicals (bleach, ammonia, strong solvents)
- Paper towels or rough cloths
- Steel wool or scrub brushes
The Power of Heat: Hairdryer Trick for Minor Scuffs
This next method sounds a little unusual, but it works wonders on many types of interior plastic, especially those with a slight sheen. It uses gentle heat. Heat can sometimes help to re-flow or soften the plastic surface.
This can make minor scratches and scuffs less visible. It’s particularly good for those white or light-colored scuffs.
You will need a hairdryer and a clean microfiber cloth. Set the hairdryer to a low or medium heat setting. Hold it about 6-8 inches away from the scratched plastic.
Move the hairdryer back and forth constantly. Don’t focus the heat on one spot for too long. You want to warm the area up, not melt it.
You should feel the plastic get slightly warm to the touch. It should not be hot.
As you warm the plastic, take your clean microfiber cloth. Gently buff the scratched area. Use small, circular motions.
The combination of gentle heat and buffing can help to blend the scratch into the surrounding plastic. It can make it far less noticeable. This works because the heat makes the plastic slightly pliable.
The buffing action smooths out the surface.
After buffing, let the area cool down. Then, clean it with a standard interior plastic cleaner and a microfiber cloth to restore the finish. This method is safe for most hard plastics.
Be cautious with very soft-touch or textured plastics. Always test in an inconspicuous area first. This is a fantastic way to tackle those frustrating white marks.
It’s a common fix that many detailers use.
I used this on a scratch on my gear shift surround. It was a light scuff from my watch band. It looked terrible.
I was skeptical about using heat. But I tried it. I moved the hairdryer around.
I buffed gently with a soft cloth. Slowly, the white mark faded. It blended right in.
It was one of the most satisfying fixes I’ve done. It took less than five minutes.
Observational Flow: Hairdryer Method in Action
Step 1: Clean the Area
Wipe the scratched plastic with a damp microfiber cloth. Dry it completely.
Step 2: Apply Gentle Heat
Hold a hairdryer on a low/medium setting about 6-8 inches away. Move it constantly over the scratched area for 30-60 seconds. The plastic should feel warm, not hot.
Step 3: Buff Gently
Use a clean, soft microfiber cloth. Buff the warmed area with light, circular motions. Focus on the scratch.
Step 4: Cool and Clean
Let the plastic cool. Clean with your usual interior cleaner and buff dry. Assess the result.
Beyond the Basics: Toothpaste and Baking Soda Paste
For slightly more stubborn light scratches, you can try a mild abrasive paste. Toothpaste and baking soda are common household items that can act as very fine abrasives. They are great for polishing out light imperfections.
This is a step up from simple cleaning and heat, so use it with care.
Toothpaste Method: Use a white, non-gel toothpaste. Avoid ones with harsh whitening crystals or colored stripes. Apply a small amount of toothpaste to a clean microfiber cloth or a cotton swab.
Gently rub the paste into the scratch using small circular motions. Work for about 30 seconds to a minute. Then, wipe away the toothpaste residue with a clean, damp cloth.
Follow up by cleaning the area with your interior plastic cleaner. Buff dry.
Baking Soda Paste Method: Mix a small amount of baking soda with water. You want to create a thick paste, like toothpaste. Apply this paste to a clean microfiber cloth.
Gently rub the paste into the scratch in a circular motion. Again, work for about 30 seconds to a minute. Rinse the area thoroughly with a damp cloth to remove all baking soda.
Dry and then clean with your interior cleaner. Buff dry.
These methods work by gently sanding down the edges of the scratch. This makes it less noticeable. They essentially re-surface the area very slightly.
It’s crucial to use minimal pressure. You don’t want to create new scratches. Always test in an inconspicuous spot first.
These are best for those light, superficial scratches that the other methods didn’t fully resolve. They are incredibly cheap and readily available.
I once had a scuff on my glove box. It was deeper than a simple scuff but not a full gouge. I tried the toothpaste method.
I used a plain white paste on a cotton swab. I gently worked it into the mark. I was amazed.
The scratch seemed to just melt away. It required a bit more effort than the hairdryer trick but it was so effective. It saved me from buying a whole new trim piece.
Stacked Micro-sections: Mild Abrasive Tips
Test Area First: Always try on an unseen spot before working on the main scratch.
Gentle Pressure: Never scrub hard. Let the paste do the work.
Clean Thoroughly: Ensure all paste residue is removed to avoid dulling.
Microfiber is Key: Use only soft microfiber cloths to prevent more damage.
Dedicated Plastic Scratch Removers: When to Consider Them
While household items are great, sometimes you might want a product specifically designed for plastic repair. There are many excellent plastic scratch removers and polishes available. These can be more effective for slightly deeper scratches or for achieving a more perfect finish.
They are still generally quite affordable.
These products often contain very fine polishing compounds. They work similarly to toothpaste or baking soda but are formulated for automotive plastics. They are designed to be safe for various plastic types found in cars.
Look for products labeled for “plastic polish,” “scratch remover for plastic,” or “automotive interior polish.”
When using these products, follow the instructions carefully. Typically, you apply a small amount to a microfiber applicator pad. You then rub it into the scratch.
You might use a back-and-forth or circular motion. Buff off the residue with a clean cloth. Some products may require multiple applications.
They are often very effective for restoring shine and clarity to dulled or scratched plastic.
Brands like Meguiar’s, Novus Plastic Polish, and Turtle Wax offer good options. They aren’t as cheap as toothpaste, but a bottle can last for many uses. It’s a worthwhile investment if you often deal with minor interior scratches or want professional-looking results.
They offer a controlled approach to abrasion. This makes them safer than guessing with household items.
In my experience, these dedicated products are excellent for harder plastics found on dashboards and door panels. They can remove hazing and fine scratches that dull the surface. I used one on the plastic screen cover for my infotainment system once.
It had picked up a lot of fine scratches from regular wiping. The plastic polish made it look almost brand new. It was a clear example of how the right tool can make a big difference.
Quick-Scan Table: Specialized Plastic Polish
| Product Type | Typical Use | Cost Range | Best For |
|---|---|---|---|
| Plastic Polish | Minor scratches, haze, dullness | $8 – $20 | Dashboard, door panels, console plastic |
| Plastic Scratch Remover | Slightly deeper scratches, scuffs | $10 – $25 | Harder interior plastics |
| Plastic Cleaner/Restorer | General cleaning and light scratch removal | $7 – $15 | All interior plastics |
Protecting Your Interior Plastic: Prevention is Key
Fixing scratches is great, but preventing them in the first place is even better. Once you’ve made your interior plastic look good again, you’ll want to keep it that way. Simple habits can make a huge difference.
Mind Your Keys: Try not to leave keys lying loose on the dashboard or center console. Use a designated spot or keep them in a pocket or bag. This is one of the most common causes of dashboard scratches.
Be Careful with Bags and Items: When placing shopping bags, gym bags, or other items in the car, be mindful of where they might rub against plastic trim. Use a seat protector or place them carefully.
Use Proper Cleaning Tools: Always use clean, soft microfiber cloths for cleaning. Avoid paper towels, rags, or abrasive sponges. These can create micro-scratches over time.
Avoid Harsh Cleaners: Stick to mild, pH-neutral interior cleaners. Strong chemicals can degrade the plastic or its protective coating, making it more prone to scratching.
Consider a Protectant: After cleaning, you can apply a quality interior protectant. These products often contain UV inhibitors. They can help prevent the plastic from fading or becoming brittle.
Some also add a subtle sheen and a layer of protection against minor scuffs. Look for ones that offer a matte or satin finish, as high-gloss finishes can sometimes highlight imperfections.
Be Aware of Clothing and Accessories: Zippers, snaps, and even rough denim can scratch plastic surfaces. Be mindful when leaning against door panels or the center console.
Taking these small steps can help maintain your car’s interior appearance for years to come. It saves you the frustration of dealing with scratches and the cost of repairs. Prevention is always the cheapest and easiest solution.
I’ve seen cars that are ten years old but look brand new inside. The owners were meticulous. They always used microfiber cloths.
They never piled things on the seats. They were careful with their keys. It makes a huge difference.
It’s not about being obsessive; it’s about being mindful of the materials and how they are used.
Card Grid: Simple Prevention Habits
Mind Your Keys
Keep keys in pockets or bags, not loose on surfaces.
Bag Awareness
Place items carefully to avoid rubbing against plastic.
Soft Cleaning
Always use clean microfiber cloths for cleaning.
Gentle Cleaners
Use mild, automotive-specific interior cleaners.
Protectant Use
Apply a quality interior protectant for UV and scuff defense.
What This Means for Your Car’s Interior
Understanding how to get scratches out of interior car plastic means you can save money. You can also keep your car looking its best. Most common interior scratches are not deep.
They are surface-level marks. These can be fixed with simple, inexpensive methods. You don’t need to be a professional detailer.
The key is to start with the gentlest method. Work your way up only if needed. Simple cleaning, gentle heat, and mild household abrasives can often do the trick.
If those don’t work, a dedicated plastic polish is a great next step. These products are designed for the job and are still very affordable.
What this means for you is empowerment. You can tackle minor cosmetic issues in your car yourself. You can restore that fresh, clean look.
It boosts your confidence in maintaining your vehicle. It also helps retain the car’s value. A well-maintained interior is a major selling point.
It also means being realistic. Deep gouges might be impossible to fix perfectly without filling or replacement. But for the vast majority of common scratches, you have effective, cheap solutions.
Don’t let a few marks make you feel like your car is old or damaged. Often, a little effort can make a big difference.
For example, the plastic around the cup holders can get scratched from cups with rough bottoms. Or the edges of the door panels can get scuffed by shoes. These are normal wear and tear areas.
Knowing how to address them means you don’t have to live with them looking bad. You can restore that smooth, clean surface.
When to Worry (and When Not To) About Plastic Scratches
It’s important to know what kind of scratch you’re dealing with. This helps you decide how much effort to put in and what to expect.
You Probably Don’t Need to Worry If:
- The scratch is a light white or grey scuff mark.
- You can barely feel the scratch with your fingernail.
- The scratch is on a relatively flat, hard plastic surface.
- You’ve tried gentle cleaning and it hasn’t worked.
These are usually superficial and can be improved or fixed using the methods described. The goal is to make them less visible.
You Might Need to Be More Cautious If:
- The scratch is a deep gouge that catches your fingernail easily.
- The scratch has gone through the color layer of the plastic.
- The plastic is very soft-touch or has a textured finish that might be easily damaged.
- You are unsure about the type of plastic or finish.
For deep gouges, sometimes the best you can do is minimize their appearance. Some repair kits involve filling the scratch, but this can be tricky to do well. If the plastic is very delicate, trying to buff it could actually make it worse.
In these cases, it might be best to accept the scratch or consult a professional detailer who specializes in interior repairs.
Always test any cleaning product or repair method in a hidden spot first. This is your best defense against causing more damage. For instance, test a heat method on the underside of the dashboard before trying it on the visible surface.
The same goes for any polish or paste.
Remember, most people are not looking for perfection in a used car’s interior. They are looking for a clean, well-maintained appearance. Making those minor scratches much less noticeable is usually a huge win.
It makes a big difference to your overall satisfaction with your car.
Quick Fixes & Tips for Speedy Scratch Reduction
Here are some extra tips to make the process even easier and more effective:
- Cleanliness is Crucial: Always start with a clean surface. Dirt and grit can cause more scratches during the repair process.
- Use Good Lighting: Work in bright light so you can clearly see the scratch and your progress. Natural daylight is best.
- Work in Sections: If you have a large area with many scratches, focus on one small section at a time. This prevents confusion and ensures consistent results.
- Don’t Over-Buff: Especially with polishes or mild abrasives, be careful not to buff for too long. Too much friction can generate heat and potentially damage the plastic.
- Follow Up with Protection: After successfully removing or reducing scratches, apply an interior protectant. This helps keep the plastic looking good and offers some future protection.
- Know When to Stop: If a method isn’t working after a reasonable attempt, don’t force it. Move on to another technique or accept that the scratch may be permanent.
These small actions can make the entire process smoother. They help you achieve the best possible outcome with minimal fuss and cost.
Frequently Asked Questions About Interior Car Plastic Scratches
Can I really get scratches out of my car’s interior plastic with toothpaste?
Yes, for very light, superficial scratches, a white, non-gel toothpaste can act as a mild abrasive to gently polish out the mark. Apply a small amount to a microfiber cloth and rub gently in a circular motion. Wipe clean and buff dry. Always test in an inconspicuous area first.
What’s the best way to remove white scuffs from black plastic trim?
White scuffs are often surface marks. Try cleaning with a microfiber cloth and mild soap and water. If that doesn’t work, the gentle heat from a hairdryer, followed by buffing with a clean microfiber cloth, is often very effective. This can help re-flow the plastic surface and blend the scuff away.
Is it safe to use a hair dryer on my car’s interior plastic?
Yes, when used correctly, it is generally safe. Set your hairdryer to a low or medium heat setting. Hold it about 6-8 inches away from the plastic, and keep it moving constantly. You want to warm the plastic, not melt it. Avoid concentrating heat on one spot for too long. Always test on a small, hidden area first.
How can I prevent scratches on my car’s interior plastic?
Prevention is key. Be mindful of where you place keys, bags, and other items that could scratch surfaces. Use only clean, soft microfiber cloths for cleaning. Avoid abrasive cleaners and harsh chemicals. Applying a quality interior protectant can also offer a layer of defense against minor marks and UV damage.
What if the scratch is deep and I can feel it with my fingernail?
Deep scratches that catch your fingernail are much harder to fix completely at home. While you can try dedicated plastic scratch removers, they might not fully eliminate the mark. For a perfect finish on deep gouges, you may need to consider plastic filler kits or professional repair services. Often, the goal becomes minimizing the appearance rather than making it disappear.
Should I use a special plastic polish for my car’s interior?
A dedicated plastic polish can be very effective, especially for restoring shine to dulled plastic or removing fine scratches that household items can’t handle. They are formulated to be safe for automotive plastics. While not as cheap as toothpaste, a bottle is affordable and lasts a long time, providing professional-looking results for light to moderate scratches.
Final Thoughts on Restoring Your Car’s Interior Shine
It’s incredibly satisfying to bring back the look of your car’s interior. You’ve learned that tackling scratches on plastic doesn’t require a big budget. Simple, everyday items and a bit of patience can work wonders.
Remember to start gentle and assess your progress. Most light scratches can be significantly improved or even erased. And by being mindful of how you use your car, you can prevent future marks.
Keep your interior looking its best, affordably and effectively.