How To Detail Cars Like A Pro From Start To Finish
The process of detailing a car involves a comprehensive cleaning and restoration approach. It goes beyond a simple wash. It aims to deeply clean, protect, and enhance the vehicle’s appearance, inside and out. This includes meticulous attention to paint, wheels, tires, interior surfaces, and glass. The goal is to return the car to its best possible condition.
What is Car Detailing?
Car detailing is a detailed cleaning and finishing process. It’s much more than just washing your car. It’s about making it look as good as it possibly can.
Pros go deep. They clean every single part. They also protect those parts.
This helps keep your car looking great for longer. It’s like giving your car a spa day. Everything gets cleaned and treated.
Think about all the parts of your car. There’s the outside paint. There are the tires and wheels.
The inside has seats, carpets, and a dashboard. Glass needs to be spotless. Detailing covers all of it.
It uses special tools and products. This gets rid of dirt that regular washing misses. It also fixes minor flaws you might see.

My First Attempt at Detailing: A Muddy Mess
I remember my very first time trying to detail my old pickup truck. It was a disaster. I’d seen YouTube videos.
They made it look so easy. My truck had seen better days. It had a thick layer of mud from a camping trip.
I thought, “How hard can this be?” I grabbed the nearest sponge and dish soap. That was mistake number one. I scrubbed away, creating swirl marks.
The mud came off, but the paint looked dull and scratched. Then I moved inside. I used a wet towel on the seats.
It left streaks. The whole thing felt worse than before. I was so frustrated.
It took me all day. I ended up with a half-clean truck that looked worse than when I started. That day taught me a lot.
I learned that the right tools and methods matter.
Essential Detailing Tools You’ll Need
For Washing:
- Two buckets (one for soap, one for rinse water)
- pH-neutral car wash soap
- Microfiber wash mitt
- Drying towels (large, plush microfiber)
For Wheels & Tires:
- Wheel cleaner (safe for your wheel type)
- Wheel brush
- Tire dressing
For Interior:
- Vacuum cleaner with attachments
- Interior cleaner (all-purpose or specific)
- Microfiber cloths (separate for different tasks)
- Glass cleaner
- Leather conditioner (if applicable)
For Paint Correction & Protection:
- Clay bar and lubricant
- Polisher (dual-action is beginner-friendly)
- Polishing compounds and swirl removers
- Wax or sealant
The Car Detailing Process Step-by-Step
Detailing involves a specific order of operations. This ensures the best results. It also prevents you from re-contaminating clean areas.
We start from the top and work down. This lets gravity help us. Dirt and grime fall away.
We don’t want to clean the bottom. Then have soap run down from the top. That would undo our hard work.
So, a methodical approach is key.
The first big phase is the wash. This is crucial. It removes loose dirt.
It preps the car for deeper cleaning. Next comes the decontamination. This gets rid of bonded contaminants.
Then we focus on correction. This means fixing paint issues. Finally, we protect everything.
This locks in the shine and makes it last.
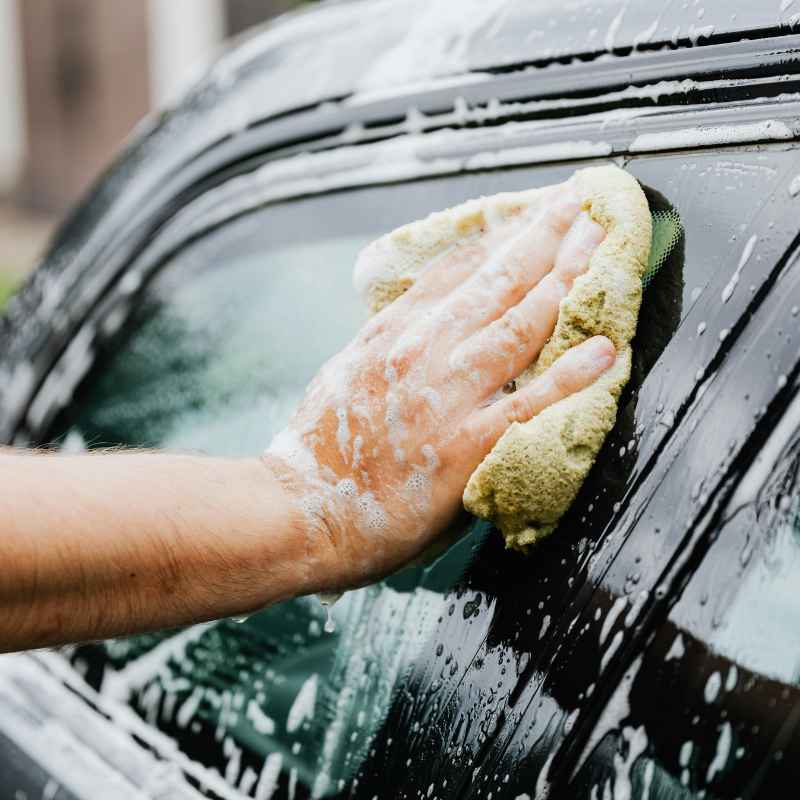
Phase 1: The Wash – Getting the Loose Stuff Off
This is where we start. A good wash removes the surface dirt. It’s the foundation for everything else.
Using the two-bucket method is super important here. One bucket has your car wash soap. The other has clean rinse water.
You dip your wash mitt in the soap. You wash a section of the car. Then, you rinse the mitt in the clean water bucket.
This keeps the dirt from going back onto the paint. It stops scratches.
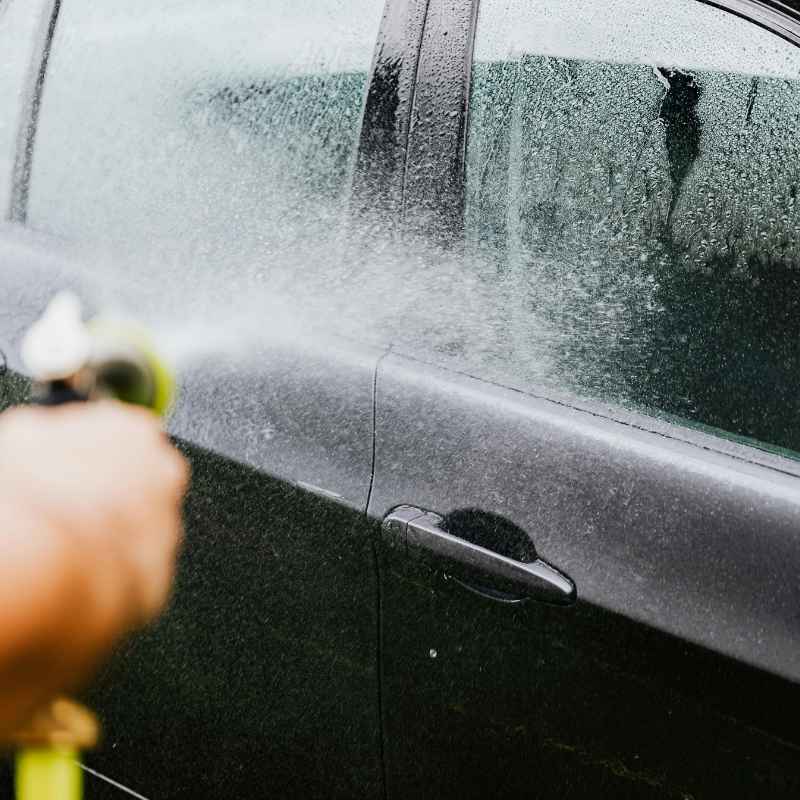
Always start from the top of the car. Work your way down. The roof gets washed first.
Then the hood and trunk. Followed by the sides. The lower panels and bumpers are last.
These areas usually have the most dirt. They are the dirtiest. Rinse the soap off thoroughly.
Don’t let it dry on the paint. Especially on a warm day. Soap left to dry can leave spots.
Quick Wash Tips
Bucket 1: Soap Suds
Use a good quality, pH-neutral car soap. Too much soap is not good. Follow the instructions on the bottle.
About two capfuls is usually enough.
Bucket 2: Rinse Water
This bucket stays clean. It’s for rinsing your wash mitt. Dunk the mitt here after each panel.
This removes trapped grit.
Washing Technique
Use straight-line motions. Don’t scrub in circles. This helps prevent swirl marks.
Wash one section at a time. Then rinse that section before moving on.
Phase 2: Wheels and Tires – Often the Dirtiest
Wheels and tires collect a lot of brake dust. They also get road grime. They usually need a separate cleaning.
You want to do this before washing the paint. Why? Because wheel cleaners can be harsh.
They might stain paint if they drip. So, tackle wheels first.
Spray your wheel cleaner. Use a brush for the tough spots. Get into all the nooks and crannies.
Rinse the wheels and tires well. Then, clean the tires. You can use a dedicated tire cleaner.
Some people use a degreaser. Make sure it’s safe for tires. Scrub them with a brush.
Rinse again.
Phase 3: Decontamination – Removing Bonded Grime
After washing, your car’s paint might still feel rough. This is because of bonded contaminants. Think of tar, bug splatter, tree sap.
Or even industrial fallout. These stick to the paint surface. They can’t be washed off easily.
This is where a clay bar comes in. A clay bar is a special type of synthetic clay. It grabs these contaminants.
You need a lubricant for the clay bar. This is usually a spray product. It lets the clay glide over the paint.
Spray a section of the car with the lubricant. Then, gently rub the clay bar back and forth. You’ll feel the roughness disappear.
The clay will pick up the grime. It will get dirty. Fold the clay as it collects dirt.
This exposes a clean surface. Work in small sections. Rinse the car again after claying.
This step is crucial for a smooth finish.
Clay Bar Myths vs. Reality
Myth: Claying will scratch my paint.
Reality: If done correctly with proper lubrication, claying is safe. It actually removes particles that cause scratches later.
Myth: I only need to clay if my car looks dirty.
Reality: You can’t always see or feel bonded contaminants. Claying is beneficial for most cars, even newer ones.
Phase 4: Paint Correction – Bringing Back the Shine
This is where the magic happens. Your car’s paint can get swirls. It can have light scratches.
It might look dull. Paint correction fixes these issues. It makes the paint smooth and glossy.
The most common way is polishing. Polishing uses very fine abrasive compounds.
You can polish by hand. But a machine polisher is much faster. A dual-action (DA) polisher is best for beginners.
It’s less likely to damage paint. You’ll use different grades of polish. Coarse polishes remove deeper scratches.
Finer polishes refine the finish. You work in small sections. Apply a small amount of polish to a pad.
Buff the section. Wipe off the residue. Inspect your work.
Repeat as needed.
This step requires patience. It can be time-consuming. But the results are amazing.
You’ll see a depth in your paint you didn’t know was there. It’s like taking years off your car’s paint. You can feel how smooth it is.
This is a key part of pro detailing. It’s what makes the difference.
Phase 5: Protection – Sealing in the Shine
Once the paint is corrected, you need to protect it. This is like putting a shield on your car. It keeps it looking good.
It also makes future cleaning easier. You have a few options here. Wax is a traditional choice.
Sealants are synthetic. Ceramic coatings offer the longest protection. For DIY detailers, good quality waxes and sealants are excellent.
Apply your chosen product. Follow the manufacturer’s instructions. Usually, you apply a thin, even coat.
Let it haze over. Then, buff it off with a clean microfiber towel. This leaves a glossy, protected layer.
This layer repels water and dirt. It makes washing your car much simpler. It also adds that final deep shine.
Make sure to protect all painted surfaces. This includes door jams.
Wax vs. Sealant vs. Ceramic Coating
Wax:
- Pros: Easy to apply, adds natural depth and warmth to paint.
- Cons: Durability is shorter (weeks to a few months).
- Best For: Enthusiasts who enjoy frequent waxing, classic car owners.
Sealant:
- Pros: More durable than wax (months), synthetic polymers offer strong protection.
- Cons: Can sometimes look less “warm” than natural waxes.
- Best For: Those wanting longer-lasting protection without extreme cost or complexity.
Ceramic Coating:
- Pros: Extremely durable (years), superior chemical and UV resistance, incredible hydrophobic properties.
- Cons: More expensive, requires meticulous prep and application, sometimes professional application is recommended.
- Best For: Long-term investment in paint protection, enthusiasts seeking ultimate durability.
Interior Detailing: A Clean Cabin Experience
The inside of your car is just as important. A clean interior makes driving more enjoyable. It also feels more professional.
We start by removing all trash. Then, we vacuum everything thoroughly. Get into all the nooks.
Use different attachments. Floors, seats, carpets, and mats all need vacuuming.
Next, we clean the surfaces. Use an interior cleaner. Spray it onto a microfiber cloth.
Wipe down the dashboard, door panels, and center console. Use a separate cloth for glass. For fabric seats or carpets, you might need an upholstery cleaner.
For leather, use a dedicated leather cleaner and then a conditioner. This keeps the leather soft and prevents cracking.
Interior Cleaning Flow
1. Declutter: Remove all personal items, trash, and floor mats.
2. Vacuum: Thoroughly vacuum all surfaces – seats, floors, carpets, crevices.
3. Wipe Down Surfaces: Use an interior cleaner on a microfiber cloth for dash, doors, console.
4. Clean Glass: Use automotive glass cleaner for windows, mirrors, and screens.
5. Address Upholstery: Spot clean or deep clean fabric seats/carpets as needed.
6. Condition Leather: Clean and condition leather seats to keep them supple.
7. Clean Floor Mats: Clean rubber mats separately. Shampoo carpet mats if needed.
8. Final Touches: Apply air freshener if desired. Reinstall mats.
Glass Cleaning: Crystal Clear Vision
Clean glass is vital for safety. It also makes the car look finished. Use a dedicated automotive glass cleaner.
Avoid household cleaners. They can streak or damage tint. Spray the cleaner onto a microfiber cloth.
Not directly onto the glass. This stops overspray onto other surfaces.
Wipe the glass in a side-to-side motion. Then, use a second, dry microfiber cloth. Wipe in a top-to-bottom motion.
This helps you see any missed spots. Clean the inside and outside of all windows. Don’t forget the mirrors.
And the sunroof if your car has one. Streak-free glass makes a big difference.
Dressing and Protecting Tires
Tires are the last part of the exterior to get attention. After washing and drying, you can apply tire dressing. This product enhances the look of the tires.
It gives them a deep black finish. It can be matte or glossy. Choose what you like.
Always apply it to the rubber. Avoid getting it on the wheel’s metal finish.
Use an applicator pad. Apply a thin, even coat. Wipe off any excess product.
Too much dressing can sling onto the car’s paint. This can cause spots. Tire dressing also adds a layer of protection.
It helps prevent drying and cracking. It makes your tires look newer. And it completes the finished look of the car.
Choosing Your Tire Shine
Glossy Finish: For that classic “wet look.” Be careful not to over-apply.
Satin/Matte Finish: For a more natural, factory look. Often preferred for a subtle enhancement.
Water-Based Dressings: Generally preferred as they are less likely to cause tire discoloration or damage over time compared to silicone-based ones.
Application Method: Use foam applicator pads for even coverage. Avoid spraying directly onto the tire from a distance.
What’s the Difference Between a Wash and a Detail?
A car wash is a quick clean. It focuses on removing surface dirt. It might involve a spray and rinse.
Or a quick scrub at an automated car wash. It’s functional. It gets the main road grime off.
It takes maybe 10-30 minutes. It’s good for maintenance between details.
A detail is a deep clean. It’s meticulous. It involves many steps.
Each part of the car is cleaned, restored, and protected. It takes hours. Or even days for a full concours detail.
It aims to bring the car back to its peak condition. It’s about restoration and preservation. It’s not just about clean.
It’s about perfect.
Real-World Scenarios: When to Detail
Life happens to cars. There are many reasons you might need to detail. Consider the environment where you live.
If you live in a sunny area, UV rays can fade paint. Regular waxing or sealing helps. If you’re near the coast, salt air can cause corrosion.
Detailed cleaning helps remove salt residue.
Your habits also play a role. Do you eat in your car? Do you carry pets?
Do you often drive on dusty roads? These things add wear and tear. Regular detailing can combat these issues.
For example, a spill needs quick attention. But a deep interior clean can remove old stains. It can also neutralize odors.
Protective coatings on paint help with bug splatter.
What This Means For You
Understanding the detailing process helps you care for your car. You can choose what level of detail you need. A full detail might be for a special occasion.
Or when you first buy a car. Or before selling it. Regular washing is maintenance.
But periodic deep cleaning is also important.
You don’t always need a professional. Many of these steps are doable at home. With the right tools and knowledge.
It saves you money. It also gives you a sense of accomplishment. Knowing you made your car look its best.
Pay attention to your car. Notice its condition. Does the paint look dull?
Is the interior messy? These are signs it’s time for a detail.
Quick Fixes and Tips for Maintenance
Detailing doesn’t have to be an all-day event every time. You can do quick maintenance tasks. Keep a microfiber towel in your car.
Wipe up small spills immediately. Carry a small detailer spray. You can use this to quickly clean dusty dashboards.
Or remove smudges from windows.
Wash your car regularly. Use the two-bucket method. This is key to preventing scratches.
Dry your car with a plush microfiber towel. This avoids water spots. Always use automotive-specific cleaning products.
They are formulated to be safe. And effective on car surfaces. Avoid dish soap.
It strips wax.
Frequent Questions About Car Detailing
How often should I detail my car?
For most people, a full detail every 6-12 months is good. This includes paint correction and protection. Regular washing should happen more often, perhaps every 2-4 weeks, depending on conditions.
Can I detail my car in direct sunlight?
It’s best to avoid direct sunlight. Especially for washing, polishing, and waxing. Sun can dry products too quickly.
This leads to streaks and spots. Work in the shade or on a cloudy day. Or wait until the sun goes down.
What is the most important part of detailing?
Many pros would say proper washing is the most important. If you don’t wash correctly, you can easily scratch the paint. This creates swirl marks.
Starting with a clean surface is key for all subsequent steps.
Is ceramic coating worth the money?
For long-term protection and ease of maintenance, yes. Ceramic coatings offer superior durability and hydrophobic properties. They can last for years.
But they require careful application and are more expensive upfront.
How do I remove water spots from my car?
For fresh spots, a quick detailer spray and microfiber towel can work. For dried-on mineral deposits, you might need a dedicated water spot remover. Or even a mild clay bar treatment.
For tough, etched-in spots, paint correction may be needed.
What is the difference between polishing and waxing?
Polishing uses abrasives to remove imperfections like swirls and scratches, smoothing the paint surface. Waxing or sealing applies a protective layer over the paint, adding gloss and shielding it from the elements.
Conclusion
Detailing your car is a rewarding process. It takes time and effort. But the results are worth it.
You’ll have a car that looks amazing. It will be protected. And you’ll feel proud of your work.
Start with the basics. Learn the steps. Use the right tools.
Enjoy the shine. Your car will thank you for it.