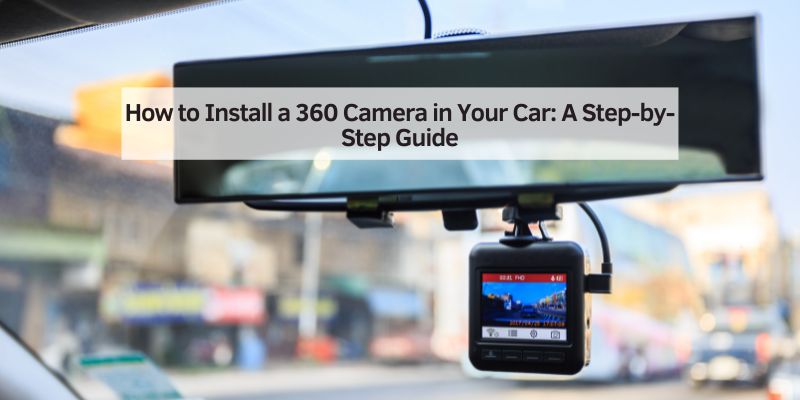
How to Install a 360 Camera in Your Car: A Step-by-Step Guide
Let me start by sharing why I got hooked on the idea of a 360-degree camera. A few years ago, I was driving my SUV through a crowded parking lot in downtown Chicago. I thought I had checked all my mirrors, but I still clipped a pole while trying to park. That little scrape cost me a fortune to fix, and I knew there had to be a better way. That’s when I discovered 360-degree camera systems. These systems use multiple cameras to create a seamless, top-down view of your car’s surroundings. It’s like you’re hovering above your vehicle, seeing everything—front, back, and sides.
For me, the biggest draw was safety. No more blind spots! Whether I’m backing up, parallel parking, or driving through a narrow street, the 360-degree view helps me spot pedestrians, cyclists, or sneaky curbs. Plus, it’s a lifesaver in tight spots, like when I’m trying to park in a packed mall lot. If you’re someone who drives in busy areas or just wants extra peace of mind, this upgrade is worth every penny.
Understanding How a 360-Degree Camera System Works
Before we get to the installation, let’s talk about what a 360-degree camera system actually does. It’s not just one camera—it’s a team of four (sometimes more) wide-angle cameras placed around your car. Typically, you’ve got one on the front grille, one on the rear bumper, and one under each side mirror. These cameras capture video from all angles, and a central processing unit (CPU) stitches the footage together into a single, real-time image. This image shows up on your car’s infotainment screen, giving you a bird’s-eye view of your vehicle and everything around it.
The magic happens with the software. It corrects distortions, aligns the images, and creates a smooth, panoramic view. Some systems even let you switch between views—like zooming in on the front or rear—or add gridlines to help with parking. Cool, right? Knowing how it works helped me appreciate the tech and pick the right system for my car.
Choosing the Right 360 Camera System for Your Car
When I started shopping for a 360-degree camera, I was overwhelmed by the options. There are tons of aftermarket kits out there, and not all are created equal. Here’s what I learned about picking the perfect system:
- Compatibility: Make sure the kit works with your car’s make, model, and infotainment system. Some systems need a separate monitor, while others connect to your existing screen.
- Image Quality: Look for high-resolution cameras, ideally 1080p or better. Clear footage is crucial, especially in low-light conditions.
- Night Vision: If you drive at night, get a system with strong night vision capabilities. Trust me, it makes a huge difference in dark parking garages.
- Waterproofing: Cameras are exposed to rain, snow, and dust, so choose ones with an IP68 rating for durability.
- Ease of Installation: Some kits are plug-and-play, while others require wiring and calibration. If you’re not handy, look for simpler setups or plan for professional help.
- Features: Extras like parking guidelines, proximity alerts, or 3D views can make the system more user-friendly.
I ended up choosing a kit from a reputable brand with good reviews on Amazon. It came with four 1080p cameras, a control box, and clear instructions. The price was around $300, which felt reasonable for the features. Pro tip: Check if your car already has a backup camera. Some kits can integrate with existing cameras, but most require their own dedicated ones for the best results.
Here’s a quick comparison table of popular 360-degree camera systems I considered:
| Brand | Resolution | Night Vision | Waterproof Rating | Price Range | Key Feature |
|---|---|---|---|---|---|
| Weivision | 1080p | Yes | IP68 | $150–$250 | Easy plug-and-play setup |
| AUTO-VOX | 1080p | Yes | IP68 | $200–$350 | Wireless option |
| Insta360 X4 | 8K | Yes | IP68 | $400–$600 | High-resolution, creative modes |
| Kocchi’s | 1080p | Yes | IP68 | $250–$400 | Universal compatibility |
Tools and Materials You’ll Need
Before you start, gather everything you’ll need. I learned the hard way that missing a tool can stall your project for hours. Here’s what I used:
- 360 Camera Kit: Includes cameras, control box, cables, and mounting hardware.
- Screwdrivers: Phillips and flathead for removing panels and securing cameras.
- Drill and Bits: For mounting cameras, especially if you need to make holes.
- Wire Strippers and Crimpers: For connecting wires cleanly.
- Electrical Tape and Zip Ties: To secure wiring and keep things tidy.
- Multimeter: To check electrical connections (optional but helpful).
- Cleaning Supplies: Alcohol wipes and a cloth to clean mounting surfaces.
- Car Manual: To locate your car’s wiring and infotainment system.
- Trim Removal Tools: Plastic tools to avoid scratching your car’s interior.
I also kept a notebook handy to jot down steps and wire connections. Trust me, it’s easy to forget what goes where when you’re in the middle of the job!
Step-by-Step Installation Process
Now, let’s get to the fun part—installing the 360 camera system! I’ll break it down into manageable steps based on my experience. If you’re not comfortable with car electronics, you might want to hire a professional, but I found it doable with some patience.
Step 1: Plan Your Camera Placement
The first thing I did was figure out where to put the cameras. Most kits use four cameras: one in the front grille, one on the rear bumper, and one under each side mirror. Check your car’s design to find spots with clear, unobstructed views. For example, I tucked the front camera into my grille to keep it discreet. Make sure the cameras are positioned to capture a wide angle—usually 180 degrees each—so they overlap slightly for seamless stitching.
Step 2: Mount the Cameras
Once I had my spots picked out, I mounted the cameras. Most kits come with adhesive pads or brackets. I used adhesive for the side mirror cameras to avoid drilling, but I had to drill a small hole for the front and rear cameras. Clean the mounting surfaces with alcohol wipes to ensure a strong bond. Secure the cameras tightly, but don’t overtighten screws, as that can damage the housing. Double-check that each camera is angled correctly to cover its intended area.
Step 3: Run the Wiring
This was the trickiest part for me. You need to connect each camera to the control box, which then connects to your car’s infotainment screen or a separate monitor. I ran the wires through the car’s interior, tucking them behind panels and under carpets to keep things neat. Use zip ties to secure loose wires and prevent them from rattling. If your kit includes a power cable, connect it to your car’s battery or fuse box. I used my multimeter to make sure everything was wired correctly before moving on.
Step 4: Connect to the Infotainment System
Next, I hooked up the control box to my car’s infotainment screen. My kit had an RCA output that plugged into my car’s auxiliary input. Some systems require a separate monitor, which you’ll need to mount on your dashboard. Follow the kit’s instructions to connect the cables properly. If your car has Android Auto or a similar system, check if the kit is compatible. I had to update my car’s firmware to make everything work smoothly.
Step 5: Calibrate the System
Calibration is where the magic happens. After connecting everything, I turned on the system to see the initial feed. The image was a bit wonky at first, with some misalignment. Most kits come with calibration software or a guide. I followed the instructions to adjust the camera angles and fine-tune the stitching. This step took about 30 minutes, but it was worth it to get a seamless bird’s-eye view. Some systems require you to place calibration mats around the car to help the software align the images.
Step 6: Test and Adjust
With everything hooked up, I took my car for a test drive in an empty parking lot. I checked the feed in different lighting conditions and tested the parking guidelines. I noticed the rear camera was slightly off, so I tweaked its angle and recalibrated. Keep testing until you’re happy with the view. It’s also a good idea to check the system at night to ensure the night vision works well.
Tips for a Successful Installation
Here are some extra tips I picked up along the way:
- Read the Manual: Every kit is different, so don’t skip the instructions. They’ll save you time and headaches.
- Work in a Clean Space: A garage or covered area keeps dust and debris off your cameras.
- Take Your Time: Rushing can lead to mistakes, like misaligned cameras or loose wires.
- Check Your Warranty: Some aftermarket mods can void your car’s warranty, so check with your dealer first.
- Get Help if Needed: If wiring or calibration feels overwhelming, a professional installer can handle it for $300–$500.
Benefits of a 360 Camera System
After installing my system, I couldn’t imagine driving without it. Here’s why it’s been such a game-changer:
- Enhanced Safety: The full view eliminates blind spots, making it easier to spot kids, pets, or obstacles.
- Easier Parking: Parallel parking in tight spots is a breeze with the bird’s-eye view and guidelines.
- Better Maneuvering: Narrow streets and crowded lots are less stressful when you can see everything.
- Evidence in Accidents: The cameras record footage, which can be helpful for insurance claims.
- Peace of Mind: Knowing you’ve got a clear view of your surroundings is priceless.
Challenges and How to Overcome Them
I hit a few bumps along the way, and you might too. Here’s how I tackled them:
- Wiring Mess: Running wires through the car was tedious. I used trim removal tools to avoid damaging panels and kept everything organized with zip ties.
- Calibration Issues: My first attempt at calibration was off because one camera was misaligned. I double-checked each camera’s angle and followed the kit’s guide closely.
- Compatibility Problems: My car’s infotainment system needed a firmware update to work with the kit. Check your car’s manual or contact the kit manufacturer if you run into issues.
- Cost Concerns: Quality kits aren’t cheap, but I found that spending a bit more upfront saved me from low-quality footage or frequent repairs.
Maintaining Your 360 Camera System
To keep your system in top shape, a little maintenance goes a long way. I clean my cameras monthly with a soft cloth and lens cleaner to remove dirt and smudges. Check the wiring periodically to make sure nothing’s come loose. If you live in a rainy or snowy area, ensure the cameras’ waterproof seals are intact. Most importantly, test the system regularly to catch any issues early.
Conclusion
Installing a 360-degree camera system in my car was one of the best upgrades I’ve ever made. It’s not just about the cool tech—it’s about feeling confident behind the wheel, whether I’m parking in a tight spot or navigating a busy street. The process took some effort, but seeing that crystal-clear bird’s-eye view on my screen made it all worthwhile. If you’re thinking about adding a 360 camera to your car, go for it! With the right kit, a bit of patience, and maybe a helping hand, you’ll wonder how you ever drove without it. So, grab your tools, pick a quality system, and get ready to transform your driving experience. Safe travels, and happy parking!
Frequently Asked Questions
What is a 360-degree camera system?
A 360-degree camera system uses four or more cameras around your car to create a real-time, top-down view of your surroundings. It helps eliminate blind spots and makes parking and maneuvering easier.
Can I install a 360 camera system myself?
Yes, if you’re comfortable with basic car electronics and have the right tools, you can install it yourself. However, professional installation is recommended if you’re unsure about wiring or calibration.
How much does a 360 camera system cost?
Aftermarket kits typically cost $150–$600, depending on the brand and features. Professional installation can add $300–$500 to the total cost.
Will a 360 camera system work with my car’s infotainment screen?
Many kits are designed to connect to your car’s existing screen, especially if it supports Android Auto or has an auxiliary input. Check the kit’s compatibility before buying.
Are aftermarket 360 cameras as good as factory-installed ones?
Aftermarket systems can be very effective, but factory-installed cameras are often better integrated and calibrated. Choose a high-quality aftermarket kit for the best results.
How do I maintain my 360 camera system?
Clean the cameras regularly with a soft cloth and lens cleaner. Check wiring and seals for damage, and test the system periodically to ensure it’s working properly.
Can a 360 camera system record footage?
Many systems can record footage, which can be useful for insurance claims or reviewing your driving. Check if your kit includes a recording feature or requires a separate DVR.