How To Paint An RC Car Body For A Professional Finish
Painting an RC car body for a professional finish involves careful preparation, understanding paint types, mastering application techniques, and applying protective clear coats. It requires patience and attention to detail to achieve smooth, durable results that mimic showroom quality.
Understanding Your RC Car Body and Paint
Your RC car body is usually made of polycarbonate. This plastic is flexible and strong. It needs special paint.
Regular spray paint won’t stick well. It will also crack when the car flexes or hits things. The best paints for RC bodies are flexible.
They are also designed to bond with polycarbonate. Brands like Tamiya, Pactra, and Spaz Stix are popular. They offer a wide range of colors.
They also have special effect paints. Knowing your body material is the first big step.
The type of paint you choose matters a lot. Polycarbonate-specific paints are key. They are often called “flexible paints” or “polycarbonate paints.” These come in spray cans or airbrush bottles.
Spray cans are great for beginners. They are easy to use and widely available. Airbrushes give more control for advanced users.
They allow for finer detail and smoother coats. Think about the finish you want. Do you want glossy?
Matte? Metallic? There are paints for all these looks.
Always check the label to make sure it’s for polycarbonate.
Many RC paints are solvent-based. This means they can melt into the plastic slightly. This helps them stick very well.
It also makes them tough. Water-based paints are an option too. They are less harsh.
But they might not be as durable. For a pro finish, solvent-based paints are often preferred. They give a deeper gloss and better adhesion.
Always work in a well-ventilated area when using these. This is for your safety and to avoid fumes. Safety first is always the best policy here.
Gathering Your Supplies
Before you start painting, you need the right tools. Think of it like getting ready for a big art project. Having everything handy makes the process smooth.
You don’t want to stop mid-spray to find something. It can ruin your paint job. So, let’s make a list.
This list will help you get organized. It ensures you have all the essentials before you begin.
First, you’ll need your RC car body. Make sure it’s clean. Then, get your chosen paints.
You’ll likely want a few colors. Don’t forget a clear coat. This is crucial for protection and shine.
You also need masking tape. Use a good quality, low-tack masking tape. This prevents paint bleed.
Masking tape is your best friend for clean lines. You’ll also need masking film or paper. This covers larger areas you don’t want to paint.
Sharp hobby knives or scissors are needed for cutting tape.
Don’t forget safety gear. Gloves are a must. They keep paint off your hands.
They also stop oils from your skin from getting on the body. This can affect paint adhesion. Safety glasses are also important.
Paint can spray unexpectedly. A respirator mask is highly recommended. Especially when using solvent-based paints.
Work in a well-ventilated space. Good lighting is also a big help. You want to see what you’re doing clearly.
Lastly, have some lint-free cloths or paper towels ready for cleaning.
Essential Painting Supplies Checklist
- Polycarbonate RC car body
- RC-specific spray paints (colors, clear coat)
- Low-tack masking tape
- Masking film or paper
- Hobby knife or sharp scissors
- Disposable gloves
- Safety glasses
- Respirator mask
- Lint-free cloths
- Rubbing alcohol or degreaser
- Optional: Sanding sticks (fine grit)
Preparation is Key: The Foundation of a Great Finish
This is the most important part. If you skip prep, your paint job will suffer. Even the best paint can fail on a dirty or greasy surface.
Think of it like building a house. A strong foundation makes everything else better. For RC car bodies, this means cleaning and scuffing.
It also means masking carefully.
First, wash the body. Use mild soap and warm water. Gently scrub the inside.
This is where the paint goes. You want it free of any oils, dust, or mold release agents. Mold release agents are often used when the body is made.
They can really mess with paint adhesion. Rinse it thoroughly. Let it air dry completely.
Do not touch the inside with your bare hands after cleaning. Oils from your skin are bad for paint. Wear gloves from this point on.
Next, you might need to lightly scuff the inside surface. This is especially true if the body is brand new and shiny. A fine-grit sanding sponge or block works well.
Something like 600-grit or higher. Gently go over the entire inside. You’re not trying to remove plastic.
You’re just creating tiny scratches. These scratches give the paint something to grip onto. This greatly improves adhesion.
Wipe away any dust with a clean, lint-free cloth. You can also use a bit of rubbing alcohol on the cloth for a final clean. Ensure it’s fully dry before proceeding.
Masking is another huge part of prep. You need sharp, clean lines between colors. Or to protect areas you don’t want painted.
Use your hobby knife to carefully cut out windows and other openings. Apply masking tape firmly. Press down all edges.
This stops paint from seeping under. Take your time here. Sloppy masking leads to sloppy paint.
For complex shapes, it helps to use tape in small sections. Overlap them slightly. For large areas, masking film is useful.
It drapes over the body easily. Just cut out the areas you need to paint.
Masking Tips for Sharp Lines
- Use high-quality, low-tack masking tape.
- Press tape edges down firmly to prevent bleed.
- Cut tape precisely for clean window edges.
- Apply tape in small sections for curves.
- Use masking film for large, open areas.
- Allow paint layers to dry completely before masking new areas.
The Painting Process: Layer by Layer
Now for the fun part: applying the paint! This requires patience. You can’t rush it.
Applying paint too thick is a common mistake. It leads to runs and drips. And it makes the paint too brittle.
Thin, even coats are the secret. Like building up layers of glaze on a cake. Each coat builds on the last.
Start with your base coat. If you’re doing multiple colors, think about the order. Often, lighter colors go down first.
This prevents darker colors from showing through. Shake your spray can well. Hold it about 6-8 inches from the body.
Spray in smooth, even strokes. Move your hand back and forth. Don’t just spray in one spot.
Overlap each pass slightly. Don’t try to cover the whole area in one go. Just put down a light mist.
Let each light coat dry for a few minutes. The paint should look dull, not wet. Then, apply another light coat.
Repeat this process. Build up the color gradually. You’ll see the coverage improve with each layer.
This takes time. It might be 5-10 light coats for good coverage. It’s better to do ten light coats than three heavy ones.
This ensures a flexible and durable finish. Don’t rush the drying time between coats. This is where many people go wrong.
If you’re doing multiple colors, you’ll need to mask off the first color. Let it dry completely. Then mask the edges.
Make sure the tape seals well. Then spray the next color. Again, use light, even coats.
Build up the color gradually. For intricate designs, you might mask between every color application. This takes time but gives the best results.
My first RC paint job was a disaster. I was eager to get it done. I sprayed thick coats.
I didn’t let them dry properly. The result was a streaky mess. It looked like a cheap toy.
I was so disappointed. But I learned from it. I realized patience was key.
Now, I take my time. I do many thin coats. It makes all the difference.
Seeing the smooth, even color appear layer by layer is so satisfying. It’s worth the wait.
Spray Can Technique
- Shake well: For 1-2 minutes before and during use.
- Distance: Hold can 6-8 inches from the surface.
- Motion: Use smooth, even, overlapping strokes.
- Coats: Apply light, thin coats. Wait for them to become dull before the next.
- Coverage: Build color gradually over many light coats.
Special Effects and Advanced Techniques
Once you master the basics, you can explore special effects. This is where RC car bodies really stand out. There are many ways to add flair.
Think about metallic flakes. Or candy colors. Or even chrome.
These can make your car look unique.
Metallic paints often have fine metal flakes in them. They create a shimmering effect. Apply them like any other color.
But they can look different under varying light. For a deeper effect, use a dark base coat. Black is common for metallics.
Candy colors are translucent. They are often sprayed over a metallic or silver base. This makes them look very bright and deep.
They are like stained glass for your car.
Chrome paints are popular. They give a mirror-like finish. These often require a specific black gloss base coat.
Follow the paint manufacturer’s instructions closely. Chrome paint can be tricky. It needs a perfectly smooth surface to look its best.
Any imperfections will show up a lot. Airbrushing can help achieve a more even chrome finish.
Another fun technique is fades. This is where two colors blend into each other. It’s easier with an airbrush.
But you can do it with spray cans. Spray the first color. Before it dries completely, spray the second color.
Overlap the edge where they meet. Lightly mist both colors in that area. It takes practice.
You can also use a soft cloth to gently blend the wet edges slightly. This is an advanced trick.
For detailed graphics, you can use stencils. You can buy them or make your own. Cut designs from masking tape or stencil film.
Apply them carefully. Spray the color over the stencil. Then remove the stencil while the paint is still a bit wet for cleaner edges.
Or wait for it to dry. If you wait, use a sharp knife to gently lift the edge of the paint around the stencil. This prevents the paint from peeling off with the stencil.
Popular Paint Effects
- Metallic: Contains fine flakes for a shimmer.
- Candy Colors: Translucent, bright colors over a base coat.
- Chrome: Achieves a mirror-like finish.
- Fades: Smooth transitions between two colors.
- Stencils: For sharp graphic designs.
The Crucial Clear Coat: Protection and Shine
You’ve painted your amazing design. It looks fantastic! But it’s not finished yet.
The clear coat is vital. It protects your paint job. It also gives that glossy, professional shine.
Without it, your paint can scratch easily. It can also fade faster. It’s the final layer of defense.
Make sure your color coats are fully dry. This means they are no longer tacky. They should feel hard to the touch.
If you put clear coat over wet paint, it can react badly. It might cause the colors to soften or bleed. Or it might just not adhere well.
Give it at least an hour or two. Sometimes, overnight is better. This depends on the paint and the humidity.
Apply the clear coat just like your color coats. Shake the can well. Hold it at the same distance.
Spray in light, even coats. Overlap your strokes. Build up the gloss gradually.
You’ll probably need 2-4 light coats of clear. This provides good protection. The first coat might look a bit dull.
Don’t worry. Subsequent coats will build the shine. Ensure even coverage everywhere.
The clear coat also helps hide minor imperfections. Like tiny bits of dust or very slight orange peel. Multiple thin coats will smooth everything out.
Some people like a super-high gloss finish. They might apply extra coats. Or use a polishing compound after the clear coat has cured.
Curing means the paint has fully hardened. This can take 24 hours or even a few days.
I once rushed the clear coat. I thought it was dry enough. But it wasn’t.
The solvent in the clear coat attacked the base colors. It made them all cloudy. It looked awful.
I had to strip the whole body and start over. It taught me a valuable lesson about waiting. Waiting for paint to truly cure is worth it.
It saves a lot of frustration later.
Clear Coat Application Basics
- Ensure base colors are fully dry and hard.
- Apply clear coat in light, even passes.
- Hold the can 6-8 inches away.
- Overlap each stroke for full coverage.
- Apply 2-4 thin coats for protection and gloss.
- Allow ample drying and curing time.
Curing and Finishing Touches
After the last coat of clear, the painting part is mostly done. But don’t peel off all the masking tape just yet! Let the clear coat cure.
Curing is different from drying. Drying means the surface is no longer wet. Curing means the paint has hardened all the way through.
This chemical process takes time. It can take 24 hours or even up to a week for some paints.
Leaving the masking tape on for a while longer helps protect the edges. It also gives the paint a chance to fully set. If you peel the tape off too soon, you risk lifting the paint.
Especially at the edges. Carefully remove the tape and masking film once the paint has hardened. You might need to use your hobby knife to score along the tape line first.
This breaks any paint seal.
Now, you can add decals. Many RC bodies come with decal sheets. Apply them to the outside of the body.
This is the side that people see. They stick best to a clean, smooth surface. You can use a little soapy water to help position them.
Then squeegee out the water. Be careful not to scratch the paint when applying them.
For an even more professional look, some people polish the paint. After the clear coat has fully cured, you can use a plastic polish or rubbing compound. Use a soft cloth.
Gently rub the surface. This removes any minor imperfections. It can bring out a deeper shine.
Always test this on a scrap piece first. Or in an inconspicuous area. Some polishes can be too abrasive for certain clear coats.
The final result should be smooth and shiny. It should look like it came from the factory. Or even better!
Take pride in your work. You’ve created something special. This professional finish will make your RC car look amazing.
It will also be more durable. Ready to hit the track or the backyard!
Post-Painting Steps
- Curing: Allow paint to cure fully (24 hours to a week).
- De-masking: Carefully remove tape and film. Score edges if needed.
- Decals: Apply decals to the exterior for decoration.
- Optional Polishing: Use plastic polish for extra shine after full cure.
- Final Check: Ensure all edges are clean and paint is smooth.
Troubleshooting Common Painting Problems
Even with the best intentions, things can go wrong. Don’t get discouraged. Most painting problems are fixable.
Or at least manageable. Knowing what to look for helps. It also helps you avoid them next time.
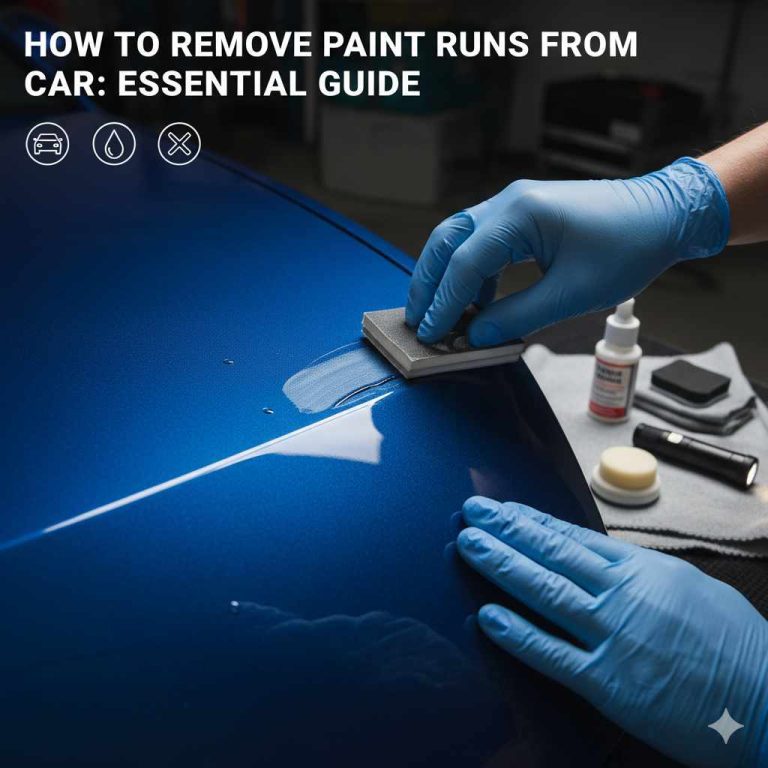
Runs and Drips: This happens when paint is applied too thickly. Or when the can is held too close. Or if the body is tilted during spraying.
If you catch it wet, you can often smooth it out with a light pass of the spray can. If it dries, you might have to carefully sand it down. Then re-paint that area.
Or even repaint the whole section.
Uneven Coverage/Streaking: This is usually due to not shaking the can enough. Or not applying enough light coats. Or spraying too far away.
Or not overlapping strokes. The fix is often more light coats. Building up the color slowly.
Make sure each coat is even.
Paint Bleeding Under Masking: This means the tape wasn’t sealed down properly. Or the paint was sprayed too heavily near the edge. Press tape down firmly.
Use a hobby knife to create a clean edge for the tape. If it happens, you might need to carefully scrape away the bled paint with a sharp blade. Or re-mask and re-spray the area.
Paint Peeling or Flaking: This is usually a surface prep issue. The surface wasn’t clean enough. Or it wasn’t scuffed properly.
Or the wrong type of paint was used. If it’s minor, you might be able to sand it down. Then re-prime and re-paint.
For major peeling, you may need to strip the entire body.
Orange Peel: This is a rough texture that looks like the skin of an orange. It can happen if the paint is drying too fast. Or if the temperature is too hot.
Or if the paint is applied too far away. Light coats and proper distance usually prevent this. Sometimes, wet sanding and polishing can fix it.
Quick Fixes for Common Issues
- Runs/Drips: Sand smooth when dry, then re-paint.
- Uneven Color: Apply more light, even coats.
- Bleed Under Tape: Carefully scrape or re-mask and spray.
- Peeling Paint: Check prep; may require stripping and re-painting.
- Orange Peel: Sand lightly when dry, then polish.
Real-World Scenarios and Considerations
When you paint an RC car body, think about its intended use. Is it for a shelf queen? Or for intense racing?
This affects your choices.
Shelf Queens: If the car will mostly sit on a shelf, you can be more creative. You might use more delicate finishes. Or complex airbrush designs.
Durability is less of a concern. The focus is on visual appeal and detail. You can spend more time on polishing.
And achieving that perfect, flawless finish.
Racers: For racing, durability is king. You need paint that can withstand crashes. And scrapes.
And impacts. A good quality clear coat is essential. Using flexible paints is a must.
Avoid overly complex paint jobs that might chip easily. Often, simpler, bold designs work best. They are easier to touch up if needed.
And they look great even after a few hard hits.
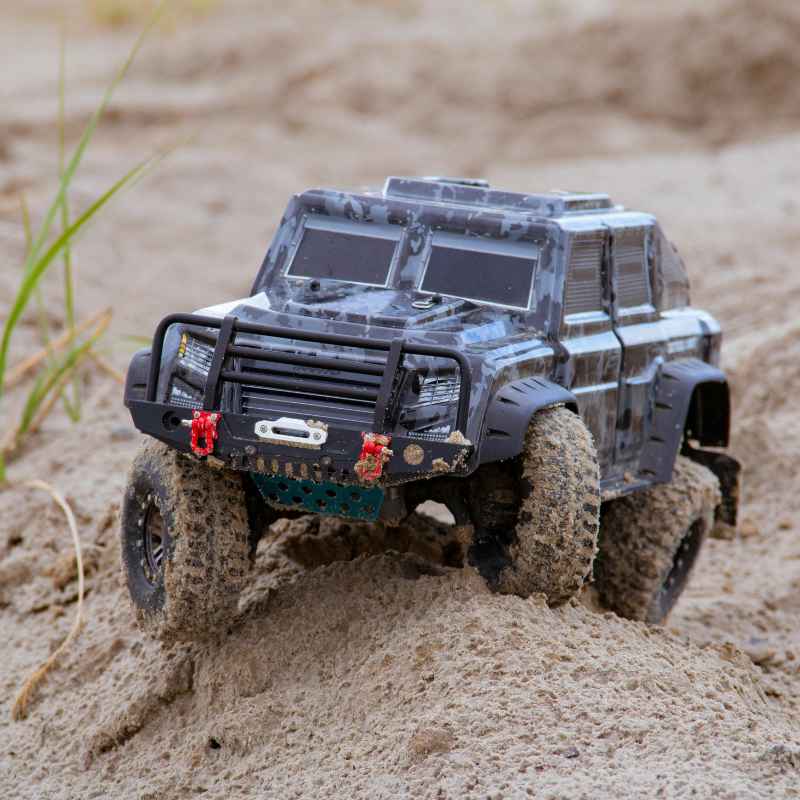
Off-Road vs. On-Road: Off-road RC cars are more likely to hit dirt, rocks, and branches. The paint needs to be tough.
On-road cars might see less extreme damage, but still risk scuffs from track walls. Consider the environment your RC car will be used in. This helps you choose the right materials and techniques.
Indoor vs. Outdoor Painting: Always try to paint indoors. Or in a very sheltered area.
Dust is the enemy of a good paint job. Wind can blow debris onto wet paint. Temperature and humidity also play a role.
Ideal conditions are mild and still. This helps the paint dry evenly.
What This Means for Your RC Car
A professional paint job isn’t just about looks. It’s also about performance and longevity. A well-painted body can protect the RC car’s chassis.
It can also make your car stand out. This is great for racing. It helps judges spot you.
Or helps your friends find your car easily.
When it’s Normal: Seeing a few minor imperfections is normal for DIY jobs. Especially on your first few tries. Small dust specks, slight inconsistencies in coverage, or a tiny run are common.
The key is how you handle them. And how much they affect the overall look.
When to Worry: Major issues like paint peeling off in large patches. Or deep cracks. Or severe runs that can’t be fixed.
These often point to a fundamental problem. Usually with surface prep or paint choice. Don’t ignore these.
They will get worse.
Simple Checks: Before you peel off all the masking, gently flex the body. Does the paint crack or peel? If so, it might not be fully cured.
Or there might be an adhesion issue. Check all edges for sharp lines. Ensure there are no obvious drips.
Run your gloved finger over the surface. Does it feel smooth?
Quick Tips for a Stunning Finish
Here are some quick tips to remember:
- Cleanliness is paramount. Always start with a spotless body.
- Gloves are non-negotiable. Protect your paint from skin oils.
- Light coats are your best friend. Patience pays off.
- Shake, shake, shake! Good paint mixing is crucial.
- Ventilation is key for safety. And for avoiding fumes.
- Let it dry. Then let it cure. Don’t rush the process.
- Practice makes perfect. Don’t be afraid to try again.
- Have fun with it! It’s a creative process.
Frequent Questions About Painting RC Car Bodies
What kind of paint should I use for an RC car body?
You should use paints specifically made for polycarbonate RC car bodies. These are flexible and designed to stick well to the material. Brands like Tamiya, Pactra, and Spaz Stix offer excellent options in spray cans or for airbrushes.
How do I prepare the RC car body before painting?
First, wash the inside of the body with mild soap and water. Rinse and let it dry completely. Then, gently scuff the inside surface with fine-grit sandpaper (600-grit or higher) to create adhesion.
Wipe away dust with a lint-free cloth or rubbing alcohol. Wear gloves from this point on.
How many coats of paint do I need?
It varies, but typically 5-10 very light coats of each color are needed for good coverage. Building up the color with many thin coats is much better than applying a few thick ones. This ensures a durable and flexible finish.
What is the purpose of a clear coat?
A clear coat protects your paint job from scratches, scuffs, and UV fading. It also gives the body a high-gloss, professional finish. Apply several light coats after your color coats have dried.
How long does it take for the paint to cure?
Drying time (when the paint is no longer tacky) is usually a few minutes between coats. However, full curing takes much longer, often 24 hours to a week, depending on the paint and environmental conditions. Allowing it to cure fully makes the paint much more durable.
Can I paint the outside of an RC car body?
No, RC car bodies are typically painted from the inside. This protects the paint from scratches during use. The paint adheres better to the inside surface of the polycarbonate.
You will then see the colors and designs from the outside.
What if I get a run or drip in my paint?
If caught while wet, you can try to smooth it with a light pass of the spray can. If it dries, you’ll likely need to let it harden, then carefully sand down the imperfection with fine-grit sandpaper. Re-mask and re-spray the affected area.
For minor issues, a good clear coat can sometimes hide small imperfections.
Conclusion
Painting an RC car body for a professional finish is a rewarding process. It takes patience and attention to detail. But the results are well worth the effort.
By following these steps—from proper preparation to careful application and protective clear coating—you can achieve stunning looks. Your RC car will turn heads wherever it goes. Happy painting!
Products related to this article
Sponsored / affiliate links. As an Amazon Associate I earn from qualifying purchases. I may earn additional commission from eligible campaigns.