How To Fix A Refrigerant Leak In Your Car (Step-By-Step)
A refrigerant leak in your car’s air conditioning system can turn summer drives into uncomfortable journeys. When your AC stops blowing cold air, or you notice strange noises or smells, a refrigerant leak is often the culprit. This issue is more common than you might think, and fixing it yourself is possible if you have the right tools, patience, and knowledge.
In this guide, you’ll learn how to identify, locate, and repair a refrigerant leak step by step. Whether you’re a car owner wanting to save money or just curious about car maintenance, this article will help you understand the process and avoid common mistakes.
Understanding Refrigerant Leaks In Cars
A car’s air conditioning system relies on refrigerant to cool the air. When refrigerant escapes, it affects cooling performance and can even damage other parts. Leaks can happen in hoses, fittings, the compressor, condenser, evaporator, or O-rings. Unlike engine oil leaks, refrigerant leaks can be harder to spot because the fluid evaporates quickly.
Why Refrigerant Leaks Matter
A leaking AC system not only affects comfort but can also cause:
- System damage: Low refrigerant can make the compressor run hot, leading to expensive repairs. If the compressor runs without enough refrigerant, it lacks proper lubrication and cooling, which causes internal parts to wear out faster. This can lead to a complete compressor failure, often costing hundreds of dollars to fix.
- Environmental harm: Refrigerants like R-134a and newer R-1234yf are harmful to the environment if released. R-134a is a greenhouse gas, and even small leaks can contribute to global warming. R-1234yf is safer but still needs careful handling.
- Legal issues: Handling refrigerants incorrectly can violate environmental laws. Many countries have strict rules about how refrigerant is handled, recovered, and disposed of. If you ignore these rules, fines or penalties may apply.
Common Signs Of A Refrigerant Leak
- Weak or warm air from the AC vents. Even if the fan is blowing strongly, the air will not feel cool if refrigerant is low.
- Hissing sounds when the AC is off. This is often caused by pressure escaping through a small crack or damaged seal.
- Oil stains near AC components (refrigerant carries oil). These stains are usually on hoses or fittings and can look wet or greasy.
- Visible leaks under UV light if dye is present. A special UV dye added to the system can help you spot leaks that are otherwise invisible.
- Unpleasant odor inside the cabin. Sometimes, refrigerant leaks mix with cabin air, creating a musty or chemical smell.
Many car owners miss early warning signs, thinking it’s just “low freon. ” In reality, topping up refrigerant without fixing the leak is only a temporary fix. If you keep adding refrigerant, you may eventually damage the system and hurt the environment.
Another sign often missed is frost or ice forming on AC lines or the evaporator. This can happen when refrigerant is low and the system struggles to cool. If you see ice or frost inside the engine bay, inspect the AC components closely.
Safety Precautions Before You Start
Fixing a refrigerant leak involves working with chemicals under pressure. Always put safety first.
- Wear gloves and goggles to protect your skin and eyes from harmful chemicals.
- Work in a well-ventilated area. Refrigerant fumes can be dangerous if inhaled in a closed space.
- Avoid open flames or sparks. Refrigerant can be flammable, especially newer types like R-1234yf.
- Never inhale refrigerant fumes. They can cause dizziness, headaches, or breathing trouble.
- Use proper tools for handling pressurized systems. Never use tools not designed for AC work.
Some refrigerants can cause frostbite or breathing issues. If you’re unsure, consult a certified technician. When working near the compressor or other moving parts, keep loose clothing and jewelry away to avoid accidents.
Always check your local laws about refrigerant handling. In many places, only certified individuals can buy or handle certain refrigerants. If you’re not certified, ask a professional for help with recovery and recharging.
Tools And Materials Needed
Before starting, gather everything you need. Missing a tool can delay your repair or make it unsafe.
Essential Tools
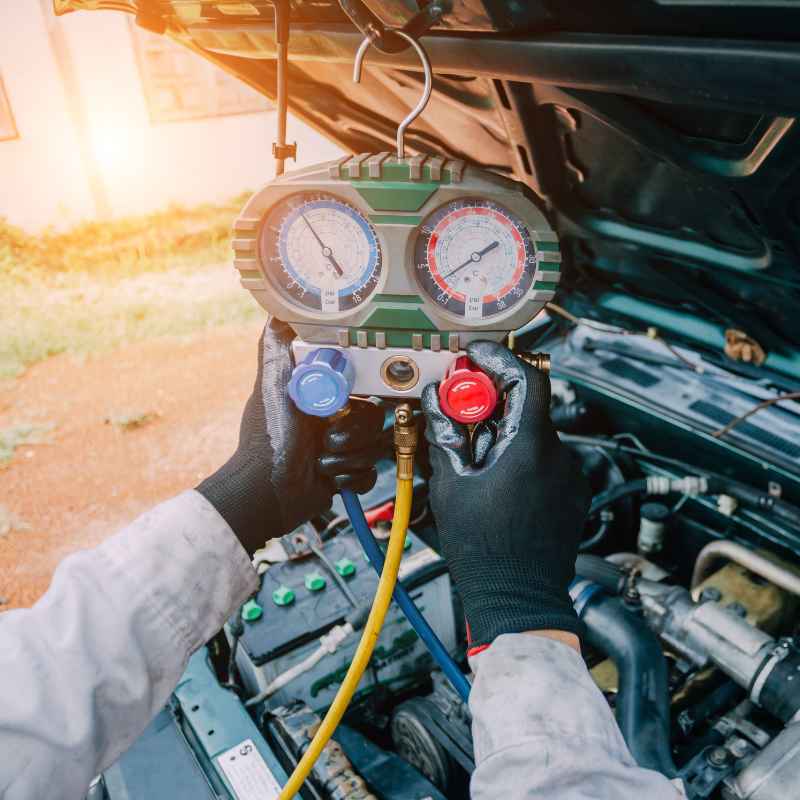
- Manifold gauge set: This is used to check system pressure and add refrigerant. Make sure it matches the type of refrigerant your car uses.
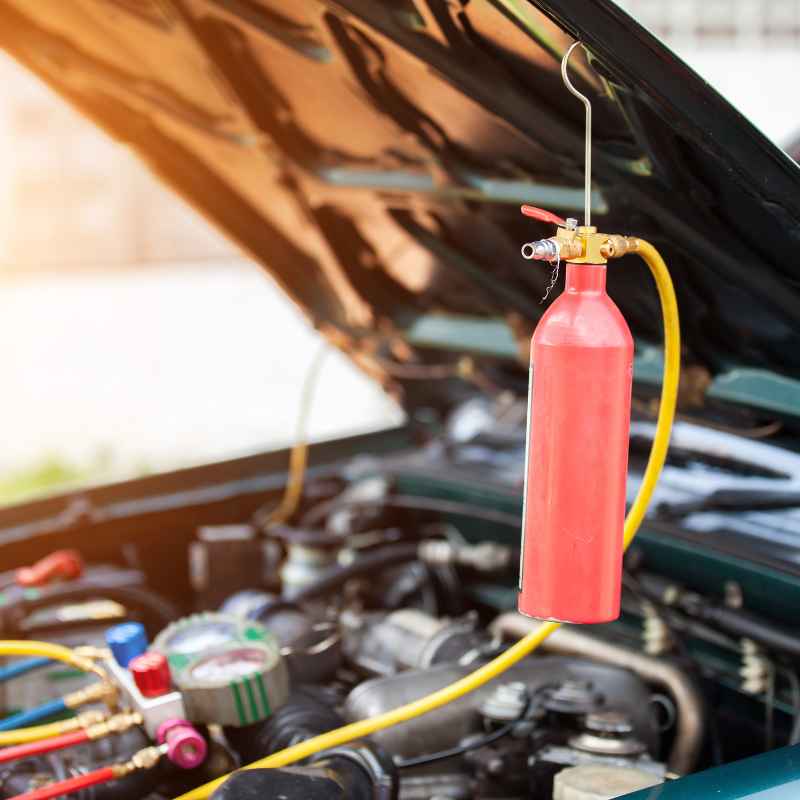
- UV leak detection kit (UV light and dye): Helps find invisible leaks by making them glow under UV light.
- Refrigerant recovery machine (optional, for safe removal): Safely removes refrigerant from the system. Some shops rent this equipment.
- Vacuum pump: Removes air and moisture after the repair, which is critical for proper AC function — see our guide on vacuuming a car AC system for the correct refrigerant rules and vacuum time.
- Replacement refrigerant (R-134a or R-1234yf): Always use the exact type recommended for your car. Mixing types can cause damage.
- AC O-ring kit: Contains various sizes of O-rings used in AC fittings.
- Wrenches and screwdrivers: Needed for removing and tightening parts.
- AC sealant (optional, for small leaks): Only use as a last resort for tiny leaks.
- Safety gear (gloves, goggles): Protects you while working.
Parts That May Need Replacement
- O-rings: Small rubber seals at joints and fittings.
- Hoses: Carry refrigerant between AC parts.
- Compressor seals: Keep refrigerant inside the compressor.
- Condenser or evaporator: Large parts that can corrode or crack.
- Expansion valve: Regulates refrigerant flow; sometimes leaks at its connections.
Some leaks require replacing entire components. Always check compatibility with your car’s make and model. For example, a Honda Civic hose may not fit a Toyota Corolla.
If you plan to do repairs often, consider investing in a good digital leak detector. These devices can spot even tiny leaks and save time.
Step-by-step Guide: Fixing A Refrigerant Leak
Follow these steps carefully to diagnose and repair your car’s AC leak. Each step plays a crucial role in the process.
Step 1: Confirm The Leak
First, make sure your AC problem is caused by a refrigerant leak. Many people assume low cooling means a leak, but other issues can cause similar symptoms.
- Run the AC and note the air temperature. If the air is not cold, check both front and rear vents if your car has them.
- Check for visible oil stains or residue around AC lines. Look closely at connections and corners where hoses meet metal parts.
- Listen for hissing sounds after turning off the engine. Sometimes, you’ll need to get close to the compressor or condenser.
- Use a manifold gauge set to measure refrigerant pressure. If it’s below recommended levels (usually 25-45 psi on the low side for R-134a), a leak is likely.
Common Mistake
Some beginners skip pressure testing, leading to misdiagnosis. Always check pressure before proceeding. Sometimes the problem is electrical (like a bad relay) or mechanical (broken fan), not a leak.
Another mistake is ignoring the AC clutch. If the clutch doesn’t engage, it can look like a leak when it’s actually an electrical problem.
Step 2: Locate The Leak
Finding the exact spot of the leak is critical. There are several methods:
Visual Inspection
- Look for oil stains or residue on hoses, fittings, and connections. Sometimes, leaks leave a greasy film.
- Inspect the compressor, condenser, and evaporator for moisture. Check around corners and joints.
Uv Dye Method
- Add a small amount of UV dye to the system (follow manufacturer instructions).
- Run the AC for 15-30 minutes. This gives the dye time to circulate.
- Use a UV flashlight to check all AC components. Leaks will glow bright yellow or green. Look at both sides of hoses, inside the engine bay, and under the car.
Electronic Leak Detector
- Use an electronic sniffer to detect refrigerant vapor. This tool is sensitive and can find leaks even in hidden spots. Move it slowly around suspected areas.
Soap Solution
- Mix water and dish soap; apply to suspected areas. Bubbles indicate a leak. This method works well for larger leaks but can miss tiny ones.
Many leaks occur at O-rings and fittings, which are often overlooked by beginners. Don’t just check hoses—look at every joint where metal meets rubber.
Extra tip: Sometimes, leaks only happen when the AC is running and the system is under pressure. Repeat the inspection with the engine and AC on.
Step 3: Recover Remaining Refrigerant
Before repairing, remove all refrigerant from the system. This step is required by law in many places and protects the environment.
- Connect a refrigerant recovery machine to the AC service ports.
- Follow the machine’s instructions to safely remove refrigerant.
If you don’t have a recovery machine, take your car to a shop for this step. Never vent refrigerant into the atmosphere. This is illegal and harmful.
Some shops offer recovery for a small fee. It’s worth it for safety and legality. If your system is empty already, you can skip this step, but always double-check.
Step 4: Repair The Leak
Different leaks require different solutions. Here’s what you can do:
Replacing O-rings And Seals
- Remove the affected component (hose, fitting, compressor, etc. ).
- Replace old O-rings with new ones from an AC O-ring kit. Lubricate with AC oil before installing. This helps them seal better and last longer.
- Reassemble and tighten fittings to the manufacturer’s torque specs. Over-tightening can damage threads or crush the O-ring.
Repairing Hoses
- If a hose is cracked, replace it entirely. Cut hoses are rarely repairable.
- For minor pinholes, some use AC sealant, but this is only a temporary fix. It may help you reach a shop for proper repair.
Component Replacement
- If the leak is in the condenser or evaporator, replace the entire unit. These parts are often behind the radiator or under the dashboard.
- For compressor leaks, replace seals or the compressor if damage is severe. Compressors are expensive, so check if only the seal needs changing.
Using Ac Sealant (optional)
- Some products seal small leaks internally. Only use if the leak is minor and you can’t access the faulty part. Never use sealant for large leaks or multiple leaks.
Data Table: Leak Location Vs. Repair Method
Here’s a quick comparison of common leak locations and their best repair options:
| Leak Location | Best Repair Method | Estimated Cost |
|---|---|---|
| O-ring/Fitting | Replace O-ring | $5 – $30 |
| Hose | Replace hose | $50 – $150 |
| Compressor | Replace seals or compressor | $200 – $800 |
| Condenser | Replace condenser | $100 – $400 |
| Evaporator | Replace evaporator | $150 – $600 |
Extra tip: Always clean the area after repair and before reassembly. Dirt can cause new leaks or block the system.
Step 5: Evacuate The System
After the repair, the system must be evacuated to remove air and moisture.
- Connect a vacuum pump to the AC service ports.
- Run the pump for at least 30-45 minutes. Some technicians recommend up to an hour for larger systems.
- Check for leaks by watching if the vacuum holds steady. If the pressure rises, a leak is still present.
Air and moisture can damage the AC system and reduce cooling efficiency. Moisture reacts with refrigerant to form acids, which corrode parts and cause new leaks.
Beginners often skip this step or do it too quickly. Take your time—proper evacuation is key to long-lasting repairs.
Step 6: Recharge With Refrigerant
Now, refill the system with the correct type and amount of refrigerant.
- Use a manifold gauge set for accurate filling. This helps avoid overcharging or undercharging.
- Check your vehicle’s label (usually under the hood) for the recommended amount (e.g., 450g for a compact car).
- Add refrigerant slowly, monitoring pressure. Stop and check regularly.
- Avoid overcharging; too much refrigerant can damage the compressor.
Data Table: Refrigerant Types And Amounts
Different cars use different refrigerants. Here’s a quick reference:
| Car Model | Refrigerant Type | Typical Amount |
|---|---|---|
| Toyota Corolla (2015) | R-134a | 450g |
| Honda Civic (2018) | R-134a | 520g |
| Ford F-150 (2026) | R-1234yf | 600g |
| Chevrolet Malibu (2020) | R-1234yf | 650g |
Extra tip: Always use a scale if possible to measure refrigerant. Gauges alone can be inaccurate.
Step 7: Test The System
After charging, test the AC to ensure it’s working and the leak is fixed.
- Run the AC for 20-30 minutes. Check all modes and settings.
- Check for cold air from vents. Measure with a thermometer if possible.
- Inspect for new leaks using UV light or leak detector. Repeat at different engine speeds.
- Monitor pressure with the manifold gauge.
Sometimes, leaks reappear if O-rings are not seated properly. Always double-check your work. If you notice unusual noises, check for loose parts or air bubbles in the system.
Troubleshooting Common Problems
Even careful repairs can run into issues. Here’s how to handle them.
Ac Not Cooling After Repair
- Check for overcharging or undercharging refrigerant. Too much or too little will affect cooling.
- Make sure all connections are tight and O-rings are correctly installed. A loose fitting can cause new leaks.
- Inspect for new leaks. Sometimes, a repair can reveal another weak spot.
If the AC still doesn’t cool, check the cabin air filter and blower motor. These are often overlooked but affect airflow.
Persistent Leaks
- Recheck repaired areas with UV dye. Sometimes leaks are hard to spot the first time.
- Consider replacing entire hoses or components if leaks persist. Old parts may have multiple small cracks.
A common beginner mistake is not cleaning parts before installing new O-rings. Dirt prevents a good seal and causes repeat leaks.
Compressor Failure
- If the compressor is noisy or won’t engage, it may need replacement. Check for power at the compressor clutch first.
- Check electrical connections and relay before replacing. Sometimes, a simple relay or fuse fix restores the system.
Example: Repairing A Leak In A Honda Civic
A 2018 Honda Civic owner noticed weak cooling and a slight hissing noise. After using UV dye, a leak was found at the compressor’s O-ring. The O-ring was replaced, the system was evacuated, and recharged with 520g of R-134a. The AC worked perfectly after the repair.
Another example: A Toyota Corolla had poor cooling and oil stains on the condenser. Replacing the condenser and evacuating the system restored cooling. Both cases show that careful diagnosis and the right parts make repairs successful.
Tips For Beginners And Non-experts
Fixing an AC leak is possible for DIYers, but a few insights can help:
- Always use the right tools. Improvising can cause damage. Cheap tools often break or give false readings.
- Never mix different refrigerants. It can ruin the system. Mixing R-134a and R-1234yf creates harmful acids.
- Label AC service ports after repair for future reference. This helps with later maintenance.
- Record the amount of refrigerant used for accurate troubleshooting. If you need to check for leaks again, this data helps.
- Practice on an old or spare car part if possible before working on your main vehicle.
Many beginners forget to evacuate the system, causing poor cooling and moisture issues later. Take your time with each step.
If you’re new to car repairs, watch video tutorials or read your car’s service manual. These resources often explain tricky steps with pictures.
When To Seek Professional Help
Some repairs are complex or risky, especially compressor or evaporator replacements. If you’re unsure:
- Consult a certified AC technician
- Don’t attempt repairs beyond your skill level
- Always follow local laws regarding refrigerant handling
Professional repairs can cost more but often include warranties and guarantees. If you don’t have access to recovery or vacuum equipment, a shop can do these steps safely.
Preventing Future Refrigerant Leaks
After fixing a leak, you can take steps to avoid repeat issues.
- Inspect AC hoses and fittings every 6-12 months. Look for cracks or loose connections.
- Run the AC regularly, even in winter, to keep seals lubricated. This prevents drying and cracking.
- Keep the condenser clean and free of debris. Dirt can block airflow and cause parts to overheat.
- Check for strange noises or smells early. Early detection prevents bigger problems.
- Avoid using AC sealants as a permanent solution. They can clog the system and cause more trouble later.
Data Table: Diy Vs. Professional Ac Leak Repair
Wondering if you should fix it yourself or call a pro? Here’s a quick comparison:
| Aspect | DIY Repair | Professional Repair |
|---|---|---|
| Cost | $50–$300 | $200–$1000 |
| Time | 2–6 hours | 1–3 hours |
| Warranty | No | Yes (usually) |
| Skill Needed | Intermediate | Expert |
| Tools Required | Basic/Intermediate | Advanced |
Extra tip: If you do DIY repairs, keep receipts and records. This can help if you need professional help later.
Environmental And Legal Considerations
Handling refrigerant is regulated in many countries, including the US. Always follow legal guidelines:
- Use EPA-approved recovery and recycling equipment
- Never vent refrigerant into the atmosphere
- Dispose of old parts and refrigerant properly
For detailed regulations, visit the EPA’s Section 608 overview.
If you’re unsure about local regulations, ask your local auto parts store or mechanic. They often know the rules and can help with safe disposal.
Frequently Asked Questions
What Is Refrigerant And Why Does It Leak?
Refrigerant is the fluid in your car’s AC system that absorbs heat and cools air. It leaks due to worn O-rings, damaged hoses, corrosion, or loose fittings. Over time, vibration and age cause small cracks or gaps.
Can I Use Ac Sealant For All Leaks?
AC sealant works for tiny leaks in hoses or O-rings, but it’s not a permanent solution. Larger leaks or leaks in major components need proper repair or replacement. Sealant can also clog the system if overused.
How Do I Know Which Refrigerant My Car Uses?
Check the sticker under your car’s hood or in the owner’s manual. Most cars after 1995 use R-134a. Newer models (since 2015) may use R-1234yf. Using the wrong type can damage the system.
Is It Safe To Fix A Refrigerant Leak Myself?
Yes, if you follow safety guidelines and use the right tools. Always wear gloves and goggles, work in a ventilated area, and avoid direct contact with refrigerant. For complex repairs, consult a professional.
What Happens If I Overfill The Ac System?
Overfilling increases pressure, which can damage the compressor, hoses, and other parts. It also reduces cooling efficiency. Always use a manifold gauge set and follow your car’s recommended refrigerant amount.
Car air conditioning problems can feel intimidating at first, but fixing a refrigerant leak is within reach for most car owners willing to learn and follow each step carefully. From diagnosing the issue to replacing faulty parts and recharging the system, you now have a clear roadmap to restore cool comfort to your vehicle.
Remember, proper tools, patience, and attention to detail are your best allies. If you ever feel uncertain, don’t hesitate to seek expert help—sometimes a professional touch is the safest route. Regular maintenance and careful handling of refrigerant will keep your AC running smoothly for years to come.
Products related to this article
Sponsored / affiliate links. As an Amazon Associate I earn from qualifying purchases. I may earn additional commission from eligible campaigns.