How to Polish Car Headlights: Sanding, Compound & Sealant Steps
Have you noticed your car headlights looking a bit cloudy or yellow? You might be surprised at how much this can affect your visibility and the overall appearance of your vehicle.
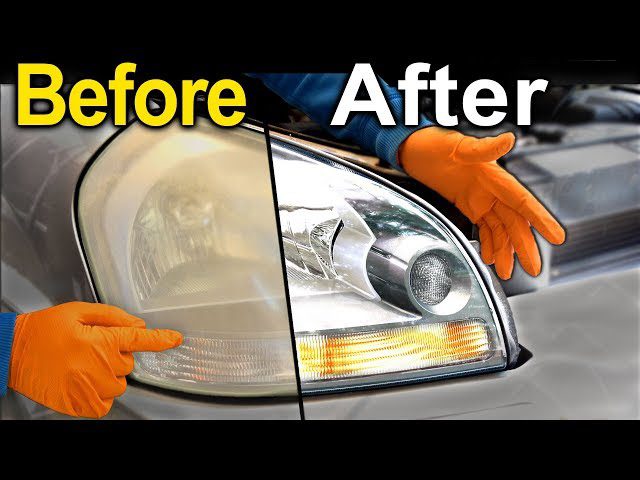
But don’t worry; polishing your car headlights can be a simple and satisfying task that you can do yourself. Imagine driving at night with crystal-clear headlights, confidently seeing every corner and bump in the road. Not only does it improve your safety, but it also gives your car a fresh, clean look.
In this guide, we’ll walk you through the step-by-step process of polishing your car headlights, using tools and materials you probably already have at home. Get ready to transform your driving experience and restore that showroom shine to your headlights.
Quick Answer
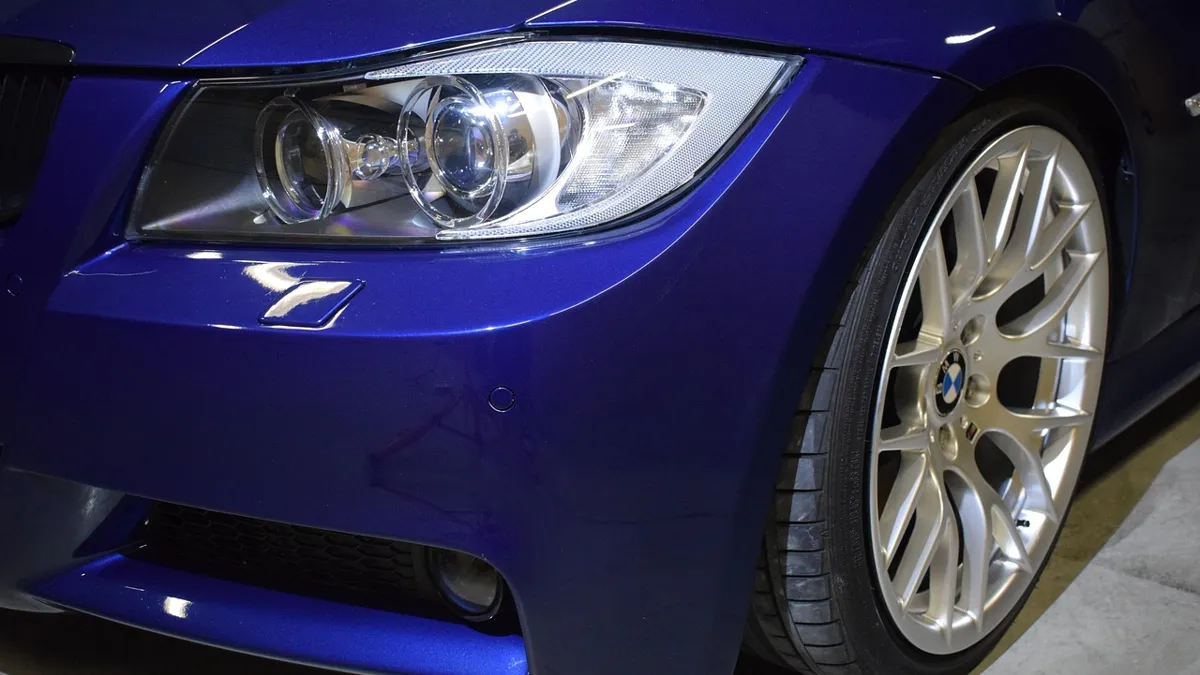
Yes — you can polish cloudy or yellowed car headlights at home. Wash the lens, wet-sand it with 800- then 2000-grit sandpaper to remove the oxidized layer, apply a plastic polishing compound, and finish with a UV sealant. Regular car wax or body polish won’t fix oxidized plastic on its own — it can only mask haze temporarily.
Tools And Materials Needed
Cleaning car headlights can be simple. Gather the right tools first. Soap and water are essential. Use a sponge for scrubbing. Sandpaper helps remove rough spots. Choose 800-grit and 2000-grit sandpaper. Masking tape protects the car’s paint. Plastic polish brings back shine. A clean cloth is useful for wiping. Don’t forget gloves to protect your hands. Buckets hold water and soap mix. A spray bottle is optional for rinsing.
A drill with a polishing pad can save time. Rubbing compound is optional but effective. Use it for deep cleaning. A microfiber towel finishes the job. Keep all items nearby. This makes polishing easier. Always work in a bright area. Safety is key. Handle tools with care.
Recommended Headlight Polishing Kit
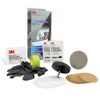
3M Ultra Headlight Restoration Kit
Best for: A complete sand-polish-seal job without buying each item separately.
Why we picked it: Includes masking tape, graduated-grit sanding discs, polish, and applicator pads in one kit — matches every step in this guide.
Main drawback: Works best with a drill; hand-only application takes noticeably longer.
View Our Pick on Amazon
 Meguiar’s PlastX Polish Check on Amazon → |
 Drill Buffing Pad Kit Check on Amazon → |
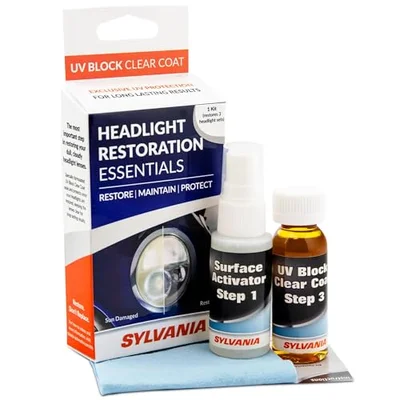 SYLVANIA UV Clear Coat Kit Check on Amazon → |
Safety Precautions
Always work in a well-ventilated area. Wear gloves to protect your hands. Use safety goggles for your eyes. This stops dust or chemicals. Keep children and pets away. Turn off the car before polishing.
Read labels carefully. Follow instructions step by step. Store chemicals out of reach of kids. Do not mix products. Mixing can be dangerous. Dispose of used materials responsibly. Keep water nearby in case of spills.
Check if headlights are clear. Test the lights to ensure they work. Clean up your area. Wash your hands thoroughly. Dispose of waste properly. Store all tools safely. Keep your car keys in a safe place.
Cleaning The Headlights
Removing dirt and debris from car headlights is important. Use a soft cloth for this. It helps to gently remove particles. Avoid scratching the surface. A clean cloth works best. Be gentle.
Next, wash with soap and water. Fill a bucket with warm water. Add a little soap. Mix it well. Use a sponge to clean the headlights. Rub softly to remove dirt. Rinse with clean water. Dry with a towel. Make sure no water is left. This keeps headlights shiny and bright.
Sanding Process
Picking the correct sandpaper is very important. Sandpaper comes in different grits. Start with a lower grit. This helps remove scratches. Move to a higher grit for smoothness. Grit numbers tell how rough or smooth the sandpaper is. A higher number means smoother paper. Use a gentle touch while sanding. This keeps the headlights safe.
Wet sanding makes things smoother. Use water while sanding. Water helps the sandpaper glide better. Keep the sandpaper wet all the time. This avoids scratching the surface. Move the sandpaper in small circles. It makes sanding even. Check if the surface feels smooth. If not, sand a little more.
Polishing Methods
First, clean the headlights with soap and water. Let them dry. Next, apply a small amount of polishing compound to a soft cloth. Rub the compound onto the headlights in small circles. Use firm, even pressure. This helps remove scratches and dirt. Keep rubbing until the headlights look clear. Wipe away excess compound with a clean cloth.
After polishing, use a buffing pad. Attach it to a drill if possible. Buff the headlights in a slow, steady motion. This step makes them shine bright. Check the headlights often. Do not let the pad stay in one spot too long. It can cause damage. Finally, wipe the headlights with a microfiber cloth. This removes any leftover dust.
Can You Use Regular Car Polish or Wax on Headlights?
Not by itself. Regular car body polish and wax are formulated for painted clear coat, not the oxidized polycarbonate plastic that makes up a headlight lens. Body polish can put a temporary shine on a hazy lens, but it doesn’t remove the actual UV-damaged material sitting on the surface — the cloudiness typically returns within days or weeks. That’s why the sanding step above matters: it physically strips away the oxidized layer before any polish is applied. Once you’ve sanded and polished with a plastic-specific compound, a coat of car wax or a dedicated UV sealant on top is fine, and even helps protect the finish.
Sealing And Protecting
Applying a UV sealant is important for car headlights. The sealant keeps them shiny. It stops damage from the sun. Cleaning headlights is easy. First, remove any dirt. Next, apply the sealant carefully. Use a clean cloth. Spread it evenly. Let it dry for a few minutes. This forms a strong layer. Your headlights stay protected longer. Repeat every few months. This keeps them safe and bright.
Maintaining Clarity
Headlights need regular care. Dirt makes them dull. Clean them often. Use gentle cleaners. Avoid harsh chemicals. Soft cloths work best. Wipe gently. This keeps them clear. Check for scratches. Fix them early. Scratches can grow bigger. They make headlights less bright. Keep them clean and clear. Your car will look better.
Troubleshooting Common Issues
Polishing car headlights can be tricky. Cloudy or yellowed lights affect visibility and appearance. Start with a clean surface. Use a gentle, circular motion with a polishing compound. Rinse and dry thoroughly. Protect with a UV sealant. Regular maintenance prevents future issues.
Addressing Cloudiness
Cloudy headlights make driving harder. Dirt builds up on the surface. Cleaning them can be easy. Use a mixture of baking soda and water. Rub it on the headlights with a soft cloth. Rinse and dry the headlights well. Vinegar can also help remove cloudiness. Mix vinegar with water and spray it on the headlights. Wipe them with a clean cloth. Repeat the process if needed for clearer lights.
Dealing With Scratches
Scratches can affect headlight brightness. Toothpaste is a simple fix. Squeeze some toothpaste on a soft cloth. Rub it gently on the scratched area. Rinse with water and dry completely. For deeper scratches, sandpaper can help. Start with wet sandpaper. Rub the scratches lightly. Follow up with a polishing compound. Finish by wiping clean with a microfiber cloth. This can improve headlight appearance.
Expert Tips For Longevity
Keeping headlights clean is very important. Use a soft, damp cloth for cleaning. Dust and dirt can scratch the surface. Always clean with gentle strokes. Use soap and water for stubborn spots. Dry the headlights with a clean cloth. This prevents water spots.
Regular checks are necessary. Look for fading or cloudiness. These are signs of wear. Apply a UV protectant to shield from sun damage. This keeps them clear and bright. Simple care helps them last longer.
Be careful in car washes. Some brushes are too rough. They can scratch the lights. Hand washing is safer. Use soft materials always. Avoid harsh chemicals. They can harm the plastic. Choose gentle cleaners instead.
Protect headlights from bumps. Parking accidents can crack them. Drive carefully. Keep a safe distance in traffic. This prevents sudden stops and damage. Simple caution saves your headlights.
Frequently Asked Questions
How Do I Polish Car Headlights Myself?
Polishing your car headlights can be done at home. Start by cleaning the headlights with soap and water. Use sandpaper to remove oxidation, then apply a polishing compound. Finish by sealing with a UV protectant. This process restores clarity and improves visibility while driving.
What Materials Are Needed For Headlight Polishing?
For headlight polishing, you’ll need soap, water, sandpaper, and polishing compound. A UV protectant is also recommended. These materials help restore the clarity of your headlights. Having a clean microfiber cloth for application can ensure a smooth finish. Gather these before starting for a seamless process.
How Often Should I Polish Headlights?
Headlights should be polished every six months. Regular polishing helps maintain clarity and functionality. This prevents oxidation and yellowing, keeping headlights effective. If you notice reduced brightness or yellowing, it might be time to polish them. Polishing ensures your safety and maintains your car’s appearance.
Can Toothpaste Be Used To Polish Headlights?
Yes, toothpaste can be used to polish headlights. It acts as a mild abrasive to remove oxidation. Apply it with a microfiber cloth, then rinse. This method is cost-effective and can improve clarity. However, professional products offer better results and longer-lasting effects for headlight restoration.
Conclusion
Polishing car headlights can improve your vehicle’s appearance. It’s a simple task. Anyone can do it at home with basic tools. Clean headlights ensure better visibility at night. This enhances safety on the road. Regular maintenance prevents foggy lenses. It saves money on replacements.
Make headlight care a routine. Enjoy clearer, brighter lights with little effort. Keep your vehicle looking sharp and driving safely. Happy polishing! (If you want a side-by-side comparison of toothpaste, sandpaper, and all-in-one restoration kits, see our companion guide: How to Clean Cloudy Car Headlights: 3 Easy Methods.)
Products related to this article
Sponsored / affiliate links. As an Amazon Associate I earn from qualifying purchases. I may earn additional commission from eligible campaigns.