How to Put Chicco Car Seat Cover Back On: Effortless Guide
Putting your Chicco car seat cover back on is a straightforward process involving aligning the fabric with the seat’s frame, tucking edges, and securing buckles or snaps. With a little patience and these simple steps, you’ll have your car seat looking neat and tidy in no time, ensuring your child’s comfort and safety.
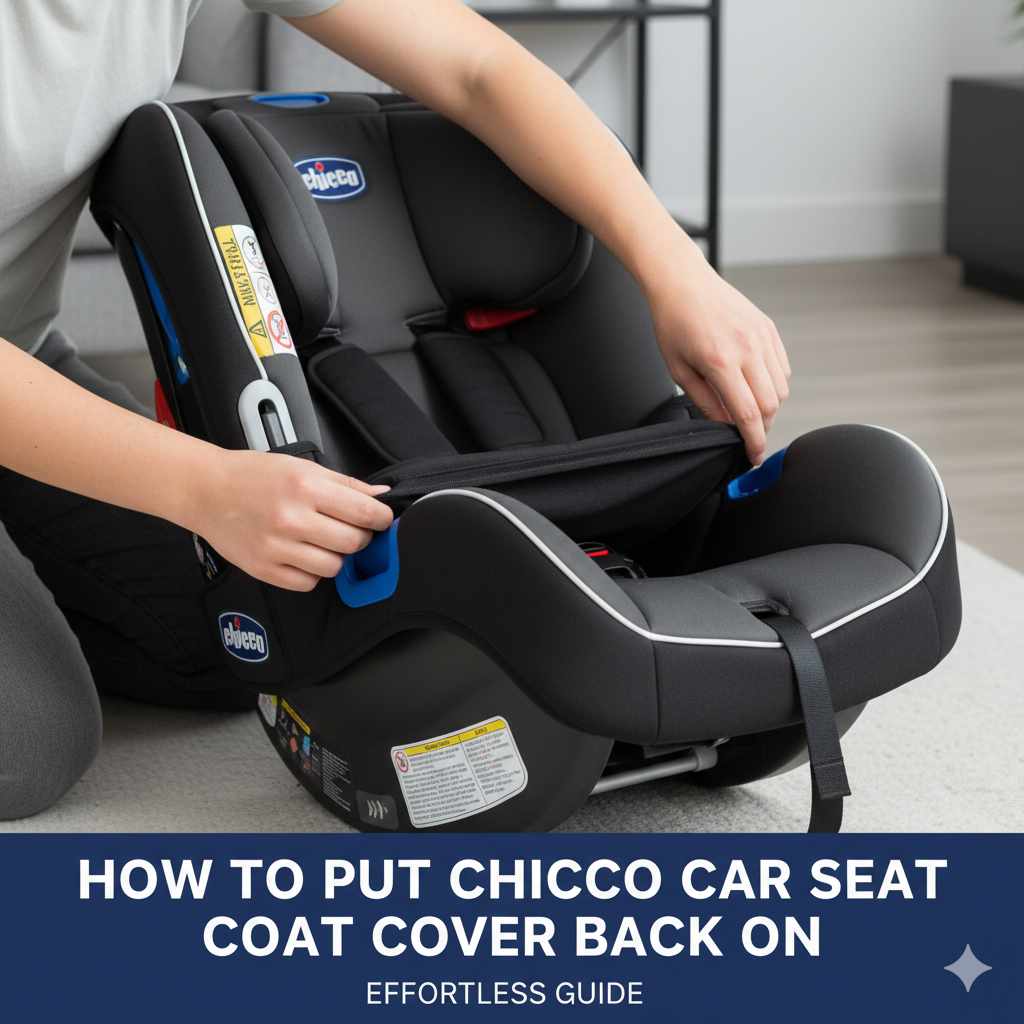
Is your Chicco car seat cover off for a wash, or did it somehow come loose? Don’t worry, getting it back on properly is easier than you might think! Many parents find themselves a bit stumped when it’s time to reassemble. It can feel like a puzzle, especially when you want to make sure everything is snug and safe for your little one. This guide is here to walk you through every step, making the process simple and stress-free. We’ll help you get that cover back on securely, so you can get back to your busy day with confidence.
Why It’s Important to Properly Reattach Your Chicco Car Seat Cover
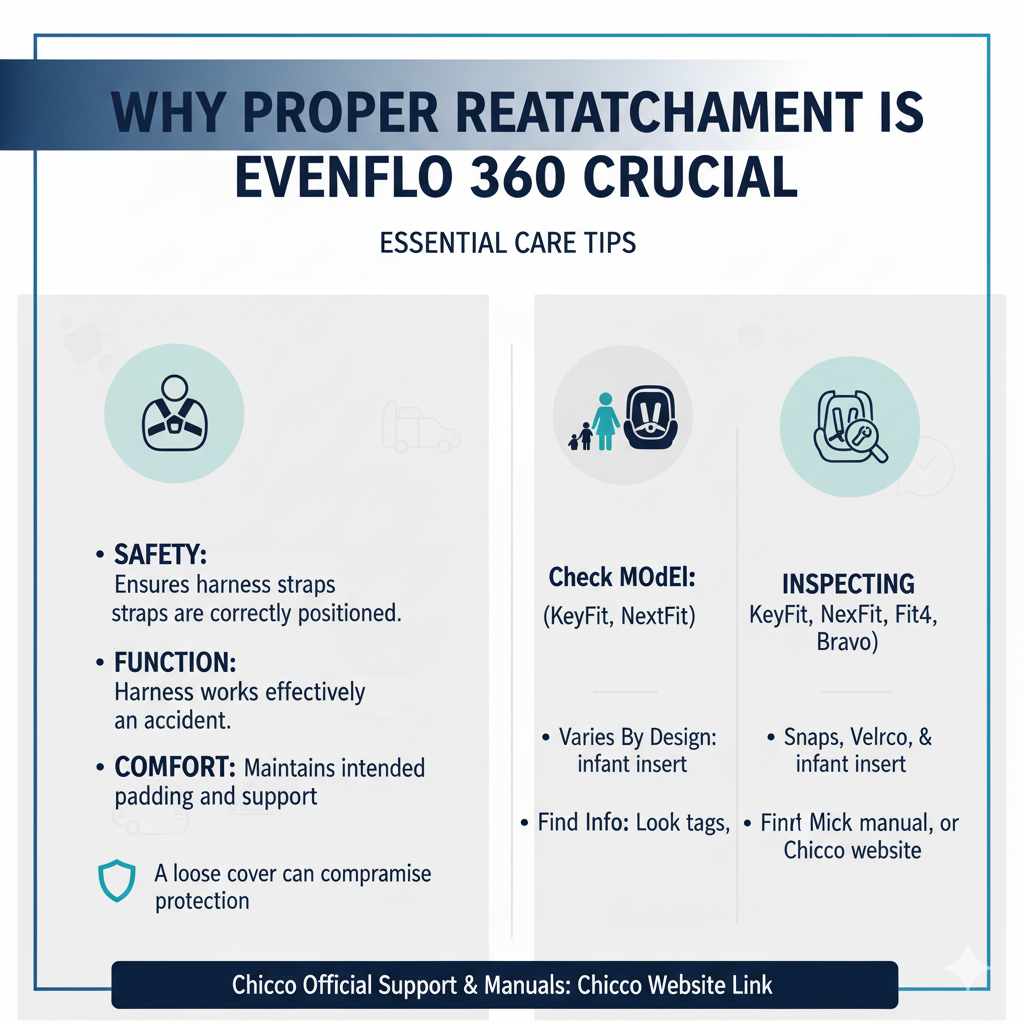
A clean car seat cover isn’t just about looks; it’s crucial for your child’s safety and comfort. When a car seat cover is fitted correctly, it ensures the harness straps remain positioned correctly. This means they can perform their job effectively in the event of a sudden stop or accident. A loose cover could potentially interfere with the harness’s function, compromising your child’s protection. Also, a well-fitted cover helps maintain the car seat’s intended padding and support, providing the best possible comfort for your little passenger on every journey.
Understanding Your Chicco Car Seat Model
Chicco offers a variety of car seat models, each with slightly different designs and attachment points for their covers. Before you start, it’s helpful to know which model you have. Common Chicco car seat lines include KeyFit, NextFit, Fit4, and Bravo. While the general principles for reattaching the cover are similar across most models, specific details like the number of snaps, the location of Velcro strips, or how the infant insert attaches can vary. If you’re unsure, a quick look at the tag on the car seat or the model name printed on its base can help identify it. You can also usually find this information in your car seat’s original manual.
For detailed information specific to your car seat model, it’s always a good idea to consult Chicco’s official website. They often have PDF versions of manuals available for download. For instance, you can find support and manuals for many Chicco products here: Chicco Official Support & Manuals.
Gathering Your Tools and Supplies
Before you begin, it’s good practice to have a few things ready. While you often won’t need much, a little preparation can make the process smoother. The primary “tool” you’ll need is patience, especially if this is your first time. However, having these items handy can be beneficial:
- A clean, flat surface to work on.
- A damp cloth or wipes for cleaning any parts of the car seat frame or cover before reattaching.
- Your Chicco car seat’s instruction manual (if you have it readily available).
- Good lighting so you can see the attachment points clearly.
Step-by-Step Guide: How to Put Chicco Car Seat Cover Back On
Reattaching your Chicco car seat cover involves a few key stages. Let’s break them down so you can tackle it with confidence.
Step 1: Identify Attachment Points
Car seat covers are designed to attach securely to the car seat’s frame. Look closely at the car seat itself. You’ll typically find:
- Slots for Harness Straps: The cover will have openings or slits that the car seat’s harness straps must pass through.
- Buckle and Clasp Openings: There will be specific holes for the chest buckle and the crotch buckle to poke through.
- Velcro Strips: Many Chicco covers use Velcro to attach to the seat’s plastic frame. Look for corresponding Velcro strips on the seat and the underside of the cover.
- Snaps or Clips: Some parts of the cover might secure with small snaps or clips, especially around the base or headrest area.
- Elastic Edges: The edges of the cover are often elasticized, allowing you to stretch and tuck them around the seat’s contours.
- Seat Insert/Padding Attachment: If you have an infant insert or extra padding, note how it attaches to the main seat and cover.
Take a moment to orient yourself with these points on both the seat and the cover. Laying the cover flat near the seat can help you visualize where everything should go.
Step 2: Align the Main Seat Cover
Start with the largest section of the cover, which usually drapes over the main seat area. Carefully align the openings in the fabric with the corresponding slots on the car seat for the harness and buckles. This is where having good lighting really helps. Gently guide the harness straps through their designated openings in the cover. You might need to unthread them from the seat’s plastic guides if they are still threaded through those.
- Work from the back of the seat forward, or vice versa, depending on what feels most natural for your specific model.
- Ensure the cover sits smoothly without bunching or pulling.
Step 3: Secure Harness and Buckle Openings
This is a critical step for safety. Make sure the car seat’s harness straps are properly routed through the cover’s openings. Then, ensure the crotch buckle and chest buckle also pass through their respective holes in the fabric. This ensures direct contact between the harness and your child, which is essential for proper restraint.
If your car seat has a separate headrest cover or side wings, you might attach these before or after the main cover, depending on the model’s design. Refer to your manual if unsure.
Step 4: Fasten Padding and Inserts
Many Chicco car seats, especially for infants, come with extra padding or inserts for comfort and fit. If you removed these, now is the time to put them back in place. Look for:
- Infant Inserts: These often tuck into the main seat cover or have their own Velcro or snap attachments. They are designed to provide a snugger fit for newborns.
- Head Support Pillows: These usually attach with snaps or Velcro to the sides of the seat or the top of the cover.
- Shoulder Strap Covers: These typically slip over the existing harness straps.
Make sure all padding is secured and lies flat, without obstructing the harness or buckles.
Step 5: Secure Velcro, Snaps, and Elastic Edges
Once the main sections are aligned and the straps are through, it’s time to fasten everything securely. This is where the elastic, Velcro, and snaps come into play:
- Velcro: Press down firmly on the Velcro strips to ensure a strong bond between the cover and the car seat frame. Work your way around the seat, making sure the cover is snug everywhere.
- Snaps/Clips: Fasten any snaps or clips as indicated by the design of your seat.
- Elastic Edges: Stretch and tuck the elastic edges of the cover around the contours of the car seat’s plastic shell. The goal is a snug, wrinkle-free fit. You want the cover to be taut, like a fitted sheet on a mattress.
Step 6: Final Check for Fit and Safety
Before you consider the job done, give everything a thorough once-over. This final check is crucial for your child’s safety:
- Smoothness: Is the cover smooth and free of major wrinkles, especially around the harness path?
- Harness Fit: Does the harness sit correctly in its intended slots? Can you easily adjust the harness straps without obstruction?
- Buckle Access: Are the buckles easily accessible and not covered by fabric loops?
- Padding Security: Is all the extra padding securely in place and comfortable?
- Snugness: Does the cover feel firmly attached all around, with no loose parts?
If anything feels loose or not quite right, go back to the relevant step and adjust. A little extra effort here ensures maximum safety and comfort for your child.
Common Chicco Car Seat Cover Reassembly Scenarios & Tips
Different Chicco models might present unique challenges. Here are a few common scenarios and tips to help:
| Scenario | Tips for Reattachment |
|---|---|
| Chicco KeyFit/KeyFit 30 (Infant Seat) | Focus on aligning the infant inserts carefully. The base cover often tucks under the plastic frame, and the back pad usually secures with Velcro. Ensure harness straps go through the lowest slots first. |
| Chicco NextFit Series (Convertible Seat) | These seats often have more extensive padding and multiple recline positions. Pay close attention to the Velcro strips along the sides and bottom. The headrest adjustment mechanism should be clear of fabric. |
| Chicco Fit4 4-in-1 (Convertible with Stages) | This seat has distinct stages that may involve different cover configurations. Ensure you’re using the correct cover parts for the stage your seat is currently in. Stage 1 (infant) will have more padding and specific insert attachments than later stages. Aligning the harness around the insert for Stage 1 is key. |
| Chicco Bravo (Travel System Carrier) | Similar to other infant carriers, but ensure the canopy attachment points are clear and the base cover is tucked securely. The harness should be easily accessible for adjustment. |
| Cover is Slightly Stretched or Sagging | Ensure all Velcro is firmly attached, and the elastic edges are tucked snugly. If it still sags significantly, it might be time to consider replacing the cover if it’s quite old or worn. |
| Harness Straps Won’t Lin Up | Double-check that you have the cover oriented correctly. Sometimes, flipping it can solve the issue. Ensure the seat is in its most upright position, as this can make aligning straps easier. |
| Difficult Buckle Openings | Gently push the buckle through the hole. If there’s resistance, ensure the fabric isn’t caught on any plastic edges. Sometimes a slight wiggle or pressing the fabric around the opening can help. |
Remember, the goal is for the cover to fit snugly without impeding any of the car seat’s safety features. If you encounter persistent difficulties, don’t hesitate to consult your car seat’s manual or Chicco’s customer support.
Tips for Easier Reassembly
- Work in Good Light: Being able to see all the attachment points makes a huge difference.
- Lay Everything Out: Before you start, lay the cover components out and match them to the car seat parts.
- Take a Break: If you get frustrated, step away for a few minutes. Coming back with fresh eyes can help.
- Watch a Video: For some models, finding a “how-to” video on YouTube can be incredibly helpful. Search for your specific Chicco car seat model and “install cover.
- Clean Before Reassembly: It’s much easier to get the cover on when the car seat frame and the cover itself are clean.
When to Consider Replacing Your Chicco Car Seat Cover
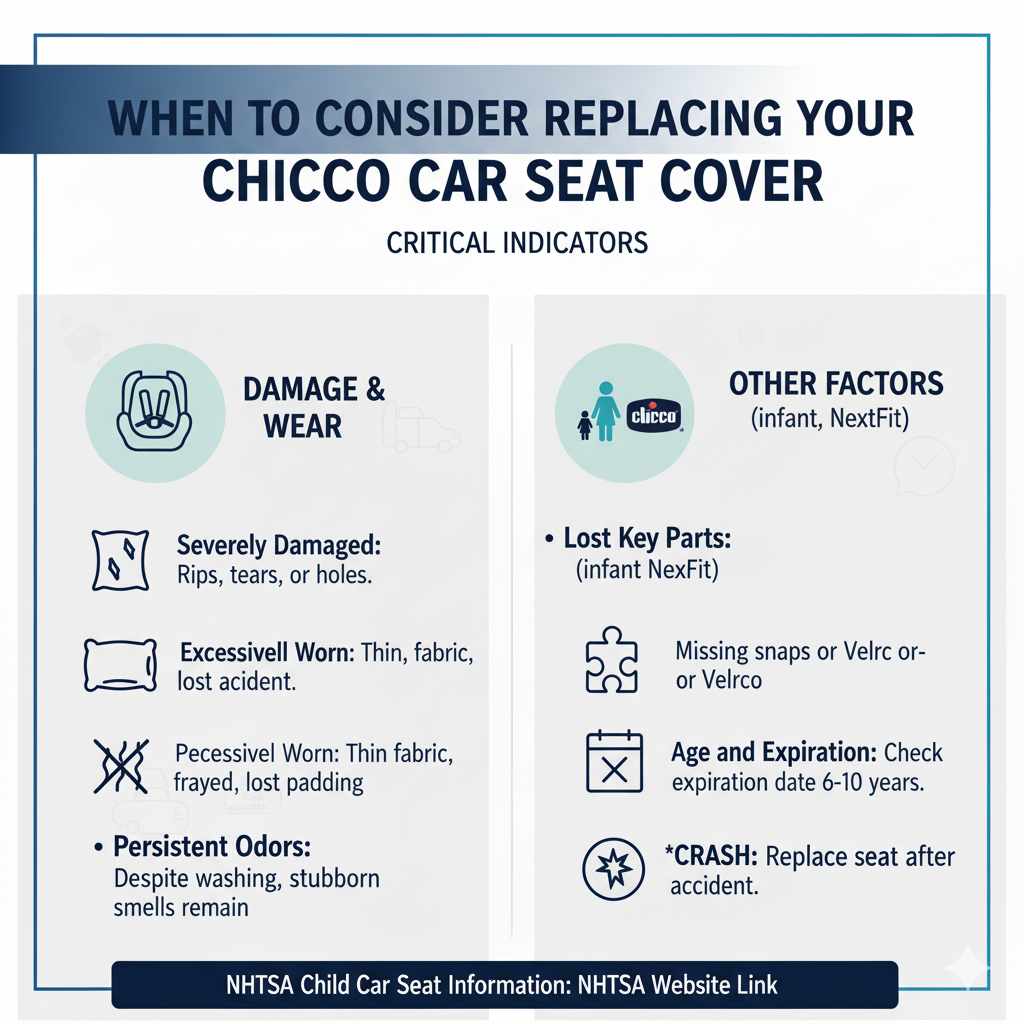
While most cleaning and reattachment scenarios are manageable, there are times when a cover might be beyond repair or reattachment. Consider replacing your Chicco car seat cover if:
- It’s Severely Damaged: Rips, tears, or holes that compromise the integrity of the fabric or expose sharp plastic should be a red flag.
- It’s Excessively Worn: If the fabric is thin, frayed, or the padding has lost all its loft, it might not offer the intended comfort or support.
- It Smells Persistent: Despite washing, if the cover retains stubborn odors (like mildew or strong pet smells), it might be best to replace it for hygiene.
- You’ve Lost Key Parts: If you’ve lost crucial fasteners like snaps or Velcro strips that are integral to its secure attachment, it’s safer to get a replacement.
- Age and Expiration: Car seats, including their covers, have a limited lifespan due to material degradation from sun exposure and use. Check your car seat’s expiration date, and if it’s nearing that, consider replacement regardless of the cover’s condition. According to the National Highway Traffic Safety Administration (NHTSA), car seats have an expiration date, typically ranging from 6 to 10 years from the date of manufacture, after which materials can degrade. NHTSA Child Car Seat Information.
You can often purchase replacement covers directly from Chicco or authorized retailers. Ensure you get the correct cover for your specific car seat model to maintain safety and fit standards.
Frequently Asked Questions (FAQ)
Frequently Asked Questions
Q1: How often should I wash my Chicco car seat cover?
A1: It’s recommended to wash your car seat cover about once a month, or more frequently if there are spills or accidents. Always check your car seat manual for specific washing instructions and detergent recommendations, as improper washing can damage the fabric or safety elements.
Q2: Can I use bleach or harsh chemicals to clean the Chicco car seat cover?
A2: No, you should avoid using bleach or harsh chemicals. These can degrade the fabric and potentially damage flame-retardant materials in the seat, compromising its safety. Mild soap and water or a gentle detergent are typically recommended. Refer to your manual for precise care instructions.
Q3: My Chicco car seat cover feels too tight after washing. What should I do?
A3: Some fabrics can shrink slightly after washing and drying. If the cover is very tight, try reattaching it while it’s still slightly damp (but not wet). Gently stretch and tuck it around the seat frame. Avoid high heat in the dryer, as this can cause further shrinkage. Air-drying is often the safest bet for car seat covers.
Q4: What if I can’t remember how the cover came off?
A4: Don’t worry! Start by locating where the harness straps and buckles poke through the fabric. This is usually the best starting point. Then, look for any Velcro tabs or snaps. Take your time, and if possible, look for photos or videos of your specific car seat model online. You can often find helpful diagrams in the instruction manual.
Q5: Is it okay if the cover is a little loose in some spots?
A5: For safety reasons, the car seat cover should fit snugly. Loose fabric, especially around the harness or where the child sits, can be a safety concern. Ensure all Velcro, snaps, and elastic edges are properly secured, and the fabric is smooth and taut across the seat. If it remains loose, it might not be attached correctly.
Q6: Where can I buy a replacement Chicco car seat cover?
A6: Replacement covers can usually be purchased directly from the Chicco website or through authorized retailers. It’s crucial to buy a cover specifically designed for your car seat model to ensure proper fit and safety compliance. Always verify the model compatibility before purchasing.
Q7: My car seat has an infant insert. Does that come off with the main cover?
A7: Yes, the infant insert is typically attached to the main seat cover or directly to the car seat frame. When removing the cover for washing, you’ll likely need to detach the insert as well. Reattach it securely according to the instructions for your specific model, as it’s vital for proper positioning of newborns.
Conclusion
Putting the cover back on your Chicco car seat might seem daunting at first, but by following these step-by-step instructions and paying attention to the specific design of your model, you can achieve a secure and proper fit. Remember, a correctly fitted cover is not just about aesthetics; it’s an integral part of your child’s safety system. Take your time, work methodically, and always conduct a final safety check. With these tips, you can confidently handle this common car seat maintenance task, ensuring your little one remains safe and comfortable on every drive. Happy travels!