How To Remove Car Seats For Cleaning Like A Pro
Sometimes, life gets messy. Think spills from juice boxes, crumbs from snacks, or maybe something a bit… mysterious. Your car seat, a crucial part of keeping your little ones safe, can quickly become a landing zone for all sorts of things. It feels overwhelming, doesn’t it? You want your car clean, but you also need to make sure the car seat is put back correctly and safely. It’s a common struggle for parents and caregivers, and finding clear, simple steps can feel like a treasure hunt. But don’t worry, we’re going to walk through this together, step by simple step.
Removing car seats for thorough cleaning involves understanding your specific seat’s manual, disengaging the LATCH or seatbelt system carefully, and then lifting the seat out. Always re-install following manufacturer guidelines and crash-test safety standards for your vehicle.
Understanding Your Car Seat’s Design
Every car seat is a bit different. This is the first thing to know. They are designed with safety as the top priority. This means how they attach to your car can vary. Some use the LATCH system. Others use the car’s seat belt. Some seats have special bases. Others are all-in-one units.
Before you even think about tugging or pulling, grab your car seat’s instruction manual. This little book is your best friend. It will show you exactly how your seat is meant to be installed and, just as importantly, how to remove it. Think of it as the blueprint for your car seat’s safety system.
The Crucial First Step: The Manual is Key
I remember the first time I had to really deep clean my toddler’s car seat. It was a sticky situation, literally. A whole sippy cup of milk had somehow ended up under the padding. I felt a rush of panic. How do I get this apart without messing up the safety features? My first move was exactly what we’re talking about now: find the manual.
Mine had a clear section on removal and reinstallation. It showed me where the release levers were. It also warned against pulling too hard in the wrong places. This step saved me a lot of frustration. It also gave me peace of mind that I wasn’t doing anything that would compromise safety.
Disengaging the Seatbelt or LATCH System
Now, let’s talk about getting it out of the car. This is where knowing your attachment system is vital. If your seat uses the LATCH system, you’ll find anchors in your car’s back seat. These are usually little metal rings. Your car seat has connectors that clip onto these rings.
On the car seat’s LATCH straps, there are usually release buttons or clips. You’ll need to push these firmly to unhook the connectors from the car’s anchors. Make sure you hear or feel a distinct click or release. If it feels stuck, double-check the manual. Sometimes, there’s a secondary lock you need to disengage.
If your seat uses the car’s seat belt, the process is slightly different. You’ll need to unbuckle the seat belt like you would for a passenger. Then, you have to thread the seat belt back out of the seat’s belt path. This path is usually marked with colored stickers or labels.
The manual is again your guide here. It will show you exactly where the seat belt goes through the car seat. You’ll need to feed the unbuckled belt back the way it came. Sometimes, car seats have a locking clip that needs to be released first. This helps keep the seat belt tight during installation.
Quick Check Before Removal
- Consult Manual: Always check your car seat and vehicle manuals.
- Release Tension: Loosen the LATCH or seat belt straps completely.
- Unbuckle Seat Belt: If using a seat belt, unbuckle it.
- Clear Belt Path: Ensure the seat belt is free from the seat’s belt path.
- Unhook LATCH: Press the release buttons on LATCH connectors.
Removing the Seat from the Vehicle
Once everything is unhooked and unbuckled, it’s time to lift. Car seats can be heavier than they look. They have a lot of padding and safety structures inside. It’s a good idea to have a helper if possible, especially for heavier infant car seat bases or convertible seats.
Grip the car seat firmly. Lift it straight up and away from the vehicle seat. Avoid twisting or forcing it. If it feels like it’s catching on something, stop. Re-check the manual and the connection points. You don’t want to bend or break any part of the seat or your car’s interior.
I learned this the hard way with my first child’s carrier. I was trying to get it out quickly before a store closed. I yanked it, and it snagged on the car seat buckle. The strap made a horrible tearing sound. Thankfully, it was just the strap cover, but it scared me. It taught me patience is key.
For infant car seat carriers, removal is usually straightforward. You lift the carrier out of its base. The base stays attached to the car. For convertible or all-in-one seats, the entire unit comes out of the vehicle.
Seat Types & Removal
- Infant Carrier: Lift carrier from its base. Base stays in car.
- Convertible Seat: Remove the entire seat.
- All-in-One Seat: Remove the entire seat.
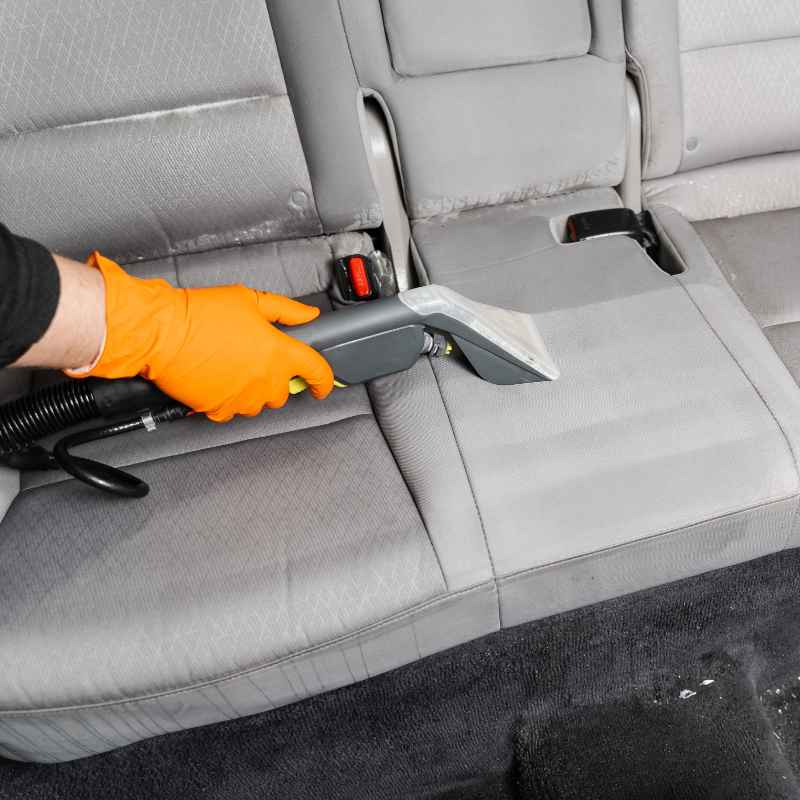
Cleaning the Car Seat Components
Once the seat is out, you can start cleaning. Many car seats have parts that come off. This includes the fabric covers, harness pads, and sometimes even the infant inserts. Again, consult your manual to see which parts are removable and how to take them off.
The fabric parts can usually be washed. Most manufacturers recommend gentle machine washing. Use a mild detergent. Wash on a delicate cycle with cold water. Then, air dry the parts completely. Never put them in a machine dryer, as the heat can damage the fabric or any flame-retardant treatments.
For the plastic or metal parts of the seat, a damp cloth is usually best. You can use a mild soap and water solution. Wipe them down. Make sure to dry them thoroughly. Avoid using harsh chemicals, bleach, or abrasive cleaners. These can weaken the seat’s materials.
Don’t forget the harness straps themselves. These often get sticky or dirty. Many manufacturers suggest spot cleaning them with a damp cloth and mild soap. Again, never immerse the harness straps in water. And never machine wash them. The webbing is specially designed for safety, and washing can affect its strength.
Cleaning Best Practices
- Fabric Covers: Machine wash cold, gentle cycle. Air dry.
- Harness Pads: Spot clean with mild soap and water. Air dry.
- Harness Straps: Spot clean ONLY. Do not immerse or machine wash.
- Plastic/Metal Parts: Wipe with damp cloth and mild soap. Air dry.
- Avoid: Bleach, harsh chemicals, abrasive cleaners, machine dryers.
The Reinstallation: Safety First, Always
This is the most critical part. Putting the car seat back in the car needs to be perfect. Even a slight mistake can reduce its ability to protect your child in a crash. Refer back to your manual. The installation section is just as important as the removal section.
If you used LATCH, reconnect the connectors to the car’s anchors. Make sure they click securely. Then, you need to tighten the straps. Pull them firmly to remove all slack. You should not be able to move the car seat more than one inch side-to-side or front-to-back at the belt path.
If you’re using the seat belt, thread it back through the correct belt path. Buckle the seat belt tightly. Again, you’ll use your body weight to press down on the seat. Pull the seat belt tight to remove all slack. Test for that one-inch movement rule.
Some car seats have built-in tensioning systems or lock-offs. These can help make installation easier and more secure. Your manual will explain how to use them. Always follow these instructions precisely.
I can’t stress this enough: If you are unsure about your installation, get it checked. Many fire departments and police stations offer free car seat safety checks. They have certified technicians who can ensure your seat is installed correctly. It’s a service worth using, especially after a deep clean where everything was taken apart.
Installation Checkpoints
- Refer to Manual: Follow step-by-step instructions precisely.
- Secure LATCH: Connectors must click; straps must be tight.
- Secure Seat Belt: Belt must be buckled and pulled very tight.
- The 1-Inch Test: Seat should not move more than 1 inch at the belt path.
- Harness Height: Ensure harness straps are at the correct height for your child.
- Professional Check: If in doubt, seek certified technician help.
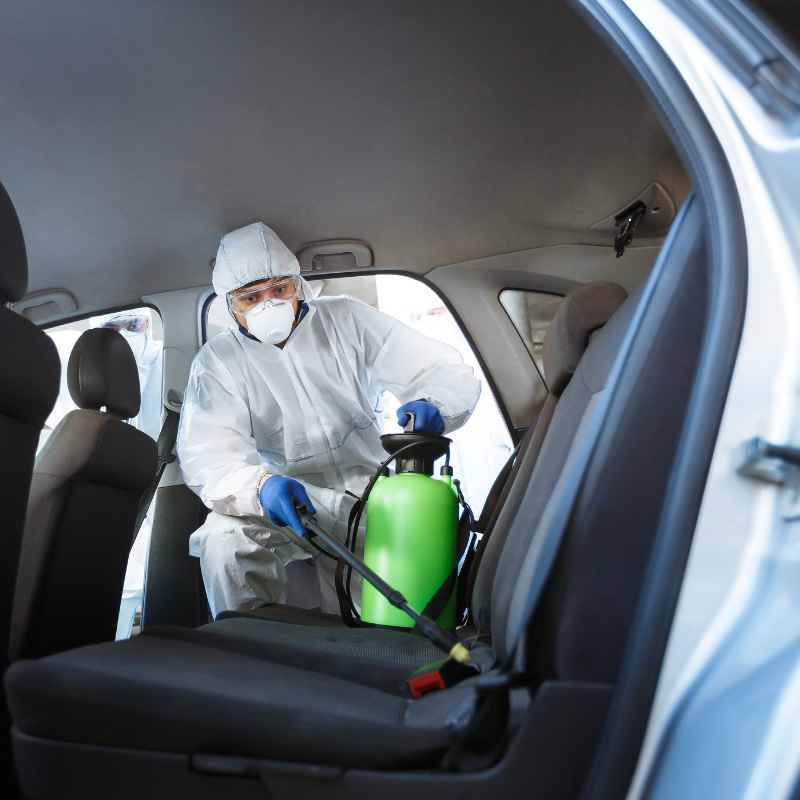
When Is a Deep Clean Necessary?
You don’t need to remove your car seat for every little spill. A quick wipe-down is often enough. But some situations call for a full removal and deep clean. Vomit is a big one. If something has soaked into the padding, it needs a thorough wash.
Food spills that aren’t cleaned up right away can attract pests or develop mold. That’s a health hazard. Heavy grime, mud, or anything that smells bad also warrants a deep clean. Think about it like cleaning your own bedding. If it’s too soiled, it needs a proper wash.
Most manufacturers recommend a deep clean at least once or twice a year. This helps keep the seat hygienic. It also helps to keep the materials in good condition. Regular spot cleaning is important between these deep cleans. It prevents minor messes from becoming major problems.
Signs Your Seat Needs Deep Cleaning
- Major liquid spills (milk, juice, water) that soaked in.
- Vomit or other bodily fluids.
- Mud, dirt, or unknown sticky substances.
- Persistent unpleasant odors.
- Visible mold or mildew growth.
Common Car Seat Cleaning Mistakes to Avoid
We’ve touched on some of these, but it’s worth repeating. The biggest mistake people make is using harsh chemicals. Things like bleach or ammonia-based cleaners can damage the plastic. They can also degrade the fabric. This could compromise safety features.
Another common error is putting parts in the dryer. Heat is the enemy of car seat materials. It can warp plastic and shrink or damage fabric. Always air dry everything. This takes longer, but it’s essential for maintaining the seat’s integrity.
Forgetting to re-read the installation instructions is a huge mistake. You might think you remember how to do it. But after taking it apart and putting it back together, one small step might be missed. This can lead to an unsafe installation. Safety checks are non-negotiable.
Lastly, try not to lose small parts. If your harness pads or buckle covers fall off, keep them safe. They are important for comfort and safety. Put them in a sealed bag while cleaning. This way, they won’t get misplaced.
Common Mistakes
| Mistake | Why it’s Bad |
|---|---|
| Using harsh chemicals (bleach, ammonia) | Can weaken materials, damage safety features. |
| Machine drying parts | Heat can warp plastic, shrink/damage fabric. |
| Skipping reinstallation check | May lead to improper fit and reduced safety. |
| Losing small parts | Parts are needed for proper function and comfort. |
When Not to Remove Your Car Seat
Not every little crumb or dried spot needs a full removal. If it’s a minor spill that you can reach with a damp cloth, go for that. You can often clean the harness straps and buckle area without taking the entire seat out.
Also, if your car seat manual specifically states certain parts are NOT removable, leave them be. Some seats have integrated harnesses or non-removable padding for safety. Trying to force these off could damage the seat.
If your car seat has been in a moderate to severe car accident, it should be replaced, not cleaned. Even if it looks fine, internal damage could have occurred. Consult the manufacturer’s guidelines on accident replacement. This is a critical safety point.
Finally, if you are ever in doubt about the integrity of your car seat after cleaning or if it’s been through something significant, it is always best to err on the side of caution. Contacting the manufacturer or a certified car seat technician is the safest bet.
Travel Tips for Keeping Car Seats Cleaner
Prevention is always easier than cure. Keep a small bag of cleaning wipes in your car. These are great for quick clean-ups on the go. A small trash bag can also be handy for wrappers and wrappers.
Consider using car seat liners or covers. These are often easier to remove and wash than the entire car seat fabric. They add an extra layer of protection. Just be sure any liner you choose is approved by the car seat manufacturer. Aftermarket products can sometimes interfere with safety.
When feeding children in the car, use trays or bibs. Encourage them to eat neatly. Explain that the car is not a dining room. This can go a long way in reducing spills and crumbs.
And for those inevitable moments, keep a small spray bottle of diluted white vinegar or a child-safe upholstery cleaner in your car. A small microfiber cloth can help tackle messes before they set in.
Car Seat Maintenance Tips
- Wipes Handy: Keep baby wipes or cleaning wipes in your car.
- Liners/Covers: Use washable liners for added protection.
- Neat Eating: Encourage careful eating and use trays/bibs.
- Small Kit: Carry a small cleaning spray and cloths.
- Immediate Action: Address spills as soon as possible.
Understanding LATCH System Specifics
The LATCH (Lower Anchors and Tethers for Children) system is a standard in many vehicles made after 2002. It’s designed to make car seat installation easier and more reliable. It uses built-in anchors in the car’s seat and connectors on the car seat.
There are weight limits for using the LATCH system. These limits apply to the combined weight of the car seat and the child. Once the child and seat reach this limit, you must switch to using the vehicle’s seat belt for installation. Your car seat manual will specify this weight limit.
The tether strap, used with forward-facing car seats, is also part of the LATCH system (or can be used with a seat belt). It connects to a top tether anchor in your vehicle. This helps reduce the forward movement of the child’s head in a crash. Always use the top tether when available and recommended.
When removing the seat, ensure the LATCH connectors are fully disengaged from the lower anchors. Sometimes, the release button can be tricky. Applying a bit of pressure while pulling the strap can help. Don’t force it, but give it a firm, steady pull.
The Role of the Seatbelt in Installation
For many car seats, especially infant carriers with a base or when exceeding LATCH weight limits, the vehicle’s seat belt is the primary installation method. It’s a robust system when used correctly.
The key to seat belt installation is securing the belt tightly and ensuring it doesn’t twist. You need to route the belt through the designated belt path on the car seat. Then, buckle it. The trick is to apply significant pressure to the car seat while pulling the seat belt as tight as possible.
Many car seats have built-in lock-offs. These are devices that help keep the seat belt locked in its tightest position. Without these, you might need to use the vehicle’s locking clip or vehicle seat belt’s locking mechanism. Your manual will explain which method is best for your seat.
When removing a seat installed with a seat belt, you simply unbuckle it. Then, carefully feed the belt back through the belt path. Make sure it comes out the same way it went in. Avoid letting the belt snap back into the retractor; guide it smoothly.
What to Do with the Harness and Buckle
The harness system is what directly secures your child. It needs to be clean and in perfect working order. When cleaning, the harness straps themselves should ideally be spot cleaned. Never submerge them in water or put them in a washing machine.
The buckle is another part that can get food and sticky residue. For most buckles, a damp cloth and a soft brush (like an old toothbrush) can help get into the crevices. You can use a little mild soap. Ensure you rinse it thoroughly with a clean damp cloth.
It’s also a good idea to periodically test the buckle mechanism. Make sure it clicks in and releases smoothly. If it feels stiff or sticky after cleaning, a tiny bit of silicone lubricant might help, but check your manual first. Never use oil-based lubricants on the buckle.
Remember that the chest clip, if your seat has one, is also part of the harness system. Clean it the same way as the buckle. Ensure it functions correctly before every use.
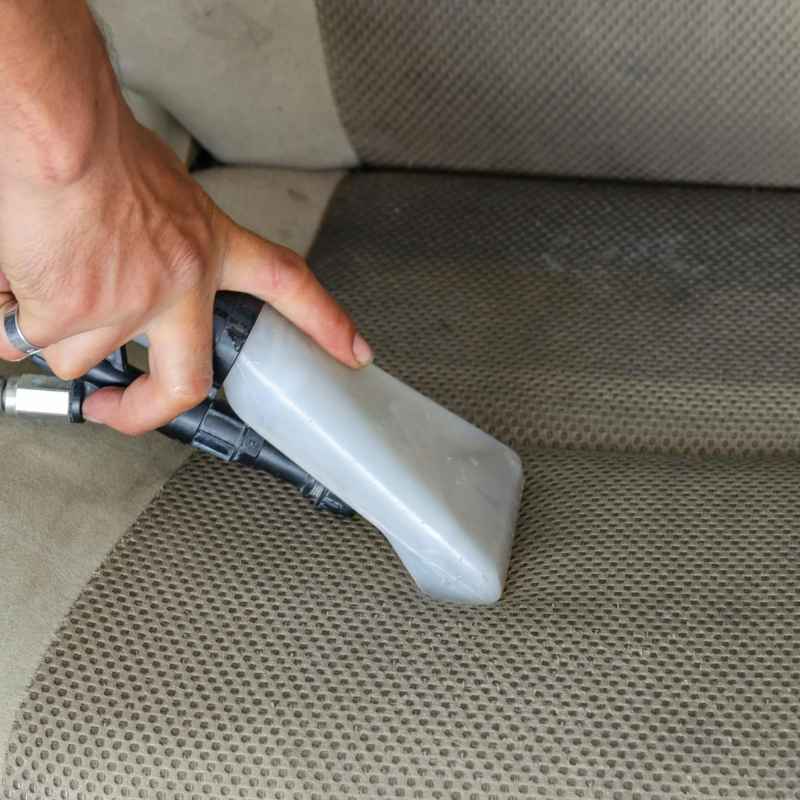
Cleaning Upholstery: Fabric vs. Leather
Most car seats have fabric upholstery. As we discussed, this is typically washable on a gentle cycle. Always air dry. The key is mild detergent and cold water. This preserves the fabric’s integrity and any safety treatments.
Some premium car seats might have leather or faux leather components. For these, you’ll need specific leather cleaners and conditioners. Always test them on an inconspicuous area first. Wipe with a damp cloth and a specialized leather cleaner. Then, apply a leather conditioner to keep the material supple and prevent cracking.
Avoid using household cleaners on any car seat material. They are not formulated for the specific needs of car seat upholstery and can cause damage. Stick to the manufacturer’s recommendations to keep your seat safe and looking good.
When to Seek Professional Help
If your car seat has been involved in a crash, do not attempt to clean it for reuse. It needs to be replaced. Contact the car seat manufacturer for advice. They will guide you on their replacement program policies.
If you find any damage to the car seat after cleaning, such as rips in the fabric that expose padding, cracks in the plastic, or frayed harness straps, do not use the seat. Again, contact the manufacturer. They can tell you if parts are replaceable or if the entire seat needs to be retired.
As mentioned before, if you are ever unsure about how to install or remove your car seat correctly, seek help. Certified Child Passenger Safety Technicians are available across the country. You can find one near you through resources like Safe Kids Worldwide.
Final Thoughts on Car Seat Care
Keeping your child’s car seat clean is an important part of its maintenance. Removing it for cleaning allows for a deeper clean than spot treatments. Always prioritize safety. Follow your manual’s instructions. If you have any doubts, get professional advice. A clean car seat is a safer car seat.
Frequently Asked Questions
Can I remove the entire car seat cover for washing?
Most car seats have removable covers that can be washed. Always check your car seat’s manual to confirm which parts are washable and the correct washing instructions (usually cold water, gentle cycle, air dry). Never machine dry car seat fabrics.
What if my car seat manual is lost?
If you’ve lost your manual, you can usually find a digital copy on the car seat manufacturer’s website. Search for your specific car seat model. If you cannot find it, contact the manufacturer’s customer service directly. They can often provide installation and removal instructions.
How do I clean the harness straps if they get dirty?
Harness straps should generally be spot cleaned only. Use a damp cloth with a small amount of mild soap. Wipe the straps down, then wipe again with a clean damp cloth. Let them air dry completely. Never submerge the harness straps in water or machine wash them, as this can affect their strength.
Is it safe to use aftermarket products on my car seat?
It’s generally recommended to avoid aftermarket products like head supports, strap covers, or seat liners that were not made by your car seat manufacturer. These can interfere with the car seat’s safety system. Always check your car seat manual or the manufacturer’s website to see if a product is approved.
My car seat smells musty after cleaning. What should I do?
Ensure all parts of the car seat are completely dry before reassembling and reinstalling it. If the smell persists, it may indicate a deeper issue or moisture trapped within the seat’s structure. Ensure good ventilation in your car and consider a professional inspection if the odor is strong.
How often should I deep clean my car seat?
Most manufacturers recommend a deep clean at least once or twice a year. However, this can vary depending on usage. If there are major spills, accidents, or your child has allergies, you might need to clean it more often. Regular spot cleaning is recommended after every minor mess.