How to Remove Decal Residue from Car Like a Pro
My first attempt at removing a decal from my old pickup truck was a disaster. I peeled off a faded bumper sticker, only to be left with a sticky mess that seemed to laugh at my efforts with soap and water. Sound familiar? If you’re staring at stubborn decal residue on your car, don’t worry—this guide will show you how to remove decal residue from a car easily and safely. I’ll walk you through simple steps, share tools you need, and toss in some tips from my own trial-and-error moments. Whether you’re a beginner or a car enthusiast, you’ll find clear, practical advice to make your car sparkle again. Let’s dive in!
What Is Decal Residue and Why Does It Matter?
Decal residue is the sticky glue left behind after you peel off a sticker, vinyl decal, or car wrap. It’s a pain because it attracts dirt, looks ugly, and can damage your car’s paint if left too long. Old decals, baked by the sun, often leave tougher adhesive residue. Removing it properly keeps your car’s finish shiny and protects its value, especially if you’re selling or just want it looking sharp.
Why Decal Residue Is Tricky
Decals stick to cars with strong adhesives, like acrylic or solvent-based glues. These can harden over time, especially after years of sun and rain. If you don’t remove the residue carefully, you might scratch the paint or leave a ghostly outline. But with the right tools and steps, it’s no sweat!
Tools You’ll Need to Get Started
Before you start, grab these simple tools. Most are household items or easy to find at an auto store.
- Hair dryer or heat gun: Loosens adhesive with heat.
- Plastic scraper or old credit card: Safely lifts decals without scratches.
- Adhesive remover (like Goo Gone): Dissolves sticky residue.
- Microfiber cloths: Wipes away residue without scratching.
- Soapy water: Cleans the area before and after.
- Car wax: Restores shine and protects paint.
- Rubbing alcohol or WD-40: Great for stubborn glue.
Table 1: Tool Comparison for Decal Residue Removal
| Tool | Cost | Best For | Safety Note |
|---|---|---|---|
| Hair Dryer | $10–$30 | Softening adhesive | Keep moving to avoid overheating |
| Plastic Scraper | $1–$5 | Peeling decals | Use gently to avoid scratches |
| Goo Gone | $5–$10 | Dissolving residue | Test on small area first |
| Rubbing Alcohol | $2–$5 | Tough adhesive on glass | Avoid overuse on paint |
Caption: Compare tools to pick the best for your decal removal project.
Step-by-Step Guide to Remove Decal Residue
Here’s a simple, beginner-friendly guide to remove decal residue from your car. Follow these steps, and you’ll have a clean surface in no time.
Step 1: Clean the Area
Start by washing the decal and surrounding area with soapy water. This removes dirt that could scratch your car’s paint when you start peeling. Use a sponge or cloth and dry it with a microfiber towel.
Step 2: Apply Heat to Loosen the Decal
Grab a hair dryer and set it to high heat. Hold it about 6 inches from the decal and move it in circles for 2–3 minutes. The heat softens the adhesive, making it easier to peel. Don’t stay in one spot too long to avoid damaging the paint.
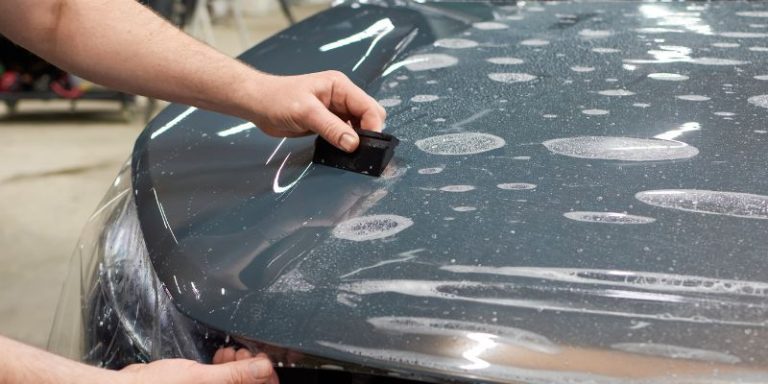
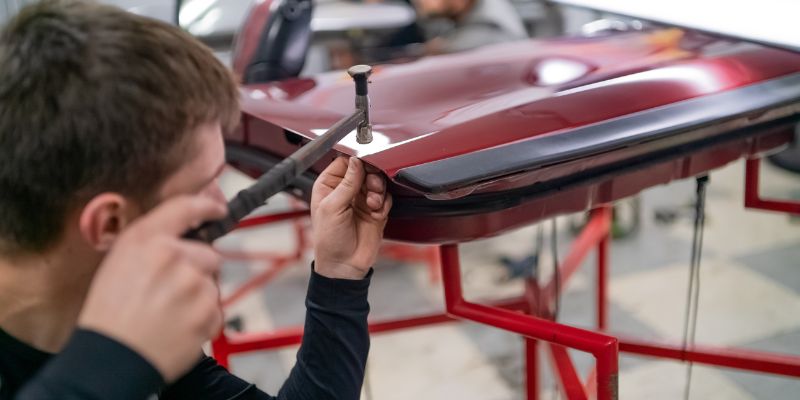
Step 3: Peel Off the Decal
Use a plastic scraper or an old credit card to gently lift one corner of the decal. Pull slowly at a 45-degree angle to avoid tearing. If it resists, apply more heat. Be patient—this step is key to avoiding extra residue.
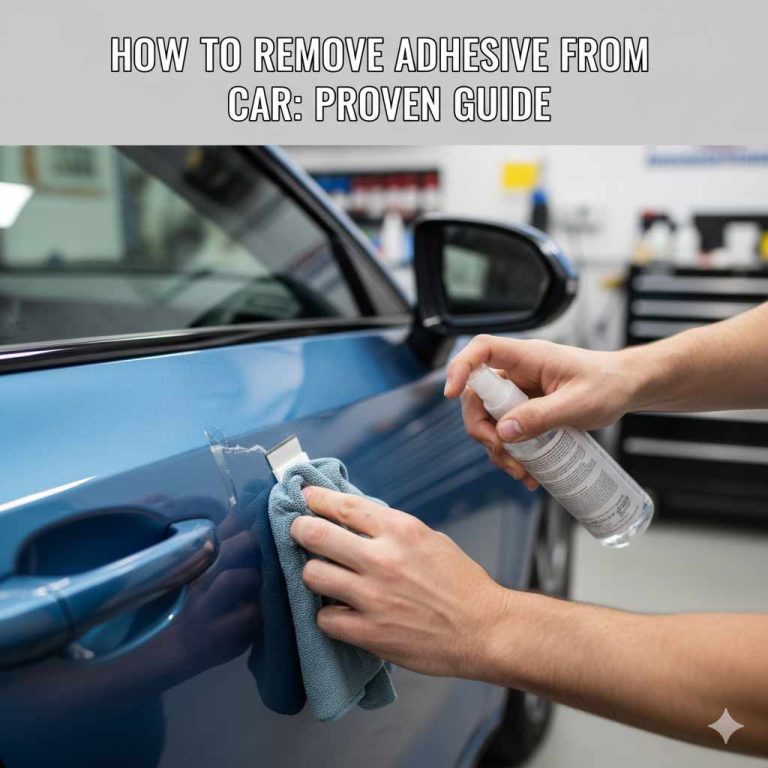
Step 4: Tackle the Sticky Residue
Once the decal is off, you’ll likely see sticky glue left behind. Apply an adhesive remover like Goo Gone to a microfiber cloth and rub gently. Let it sit for a minute to break down the glue, then wipe it away. For tougher spots, try rubbing alcohol or WD-40, but test on a hidden area first.
Step 5: Clean and Polish
Wash the area again with soapy water to remove any remover residue. Dry with a microfiber cloth. Finish with a coat of car wax to protect the paint and restore shine. Your car will look as good as new!
Visual Idea: A diagram showing the 45-degree angle for peeling decals, with arrows indicating heat application and scraper movement.

Benefits of Removing Decal Residue Properly
- Paint Protection: Avoid scratches or faded spots.
- Better Look: A clean car looks sharp and professional.
- Higher Resale Value: Buyers prefer a decal-free vehicle.
Drawbacks and Things to Watch Out For
- Risk of Scratches: Metal tools or rough scrubbing can harm paint.
- Ghosting: Old decals may leave a faint outline if the paint faded around them.
- Chemical Damage: Some removers, like acetone, can strip paint if overused.
Pro Tip: Always test adhesive removers on a small, hidden spot, like under the bumper, to ensure they’re safe for your car’s finish.
Alternative Methods for Tough Decals
If heat and adhesive removers don’t work, try these options:
- White Vinegar: Soak a cloth in vinegar, apply it to the residue, and let it sit for 5 minutes. Wipe clean.
- Eraser Wheel: A drill attachment that removes decals fast. Use low RPM to avoid heat damage.
- Clay Bar: Gently rubs away residue without harming paint. Great for finishing touches.
Table 2: Alternative Methods Comparison
| Method | Cost | Speed | Best For |
|---|---|---|---|
| White Vinegar | $1–$3 | Slow | Small, stubborn residue |
| Eraser Wheel | $15–$30 | Fast | Large, old decals |
| Clay Bar | $10–$20 | Medium | Polishing final residue |
Caption: Choose an alternative method based on your decal’s size and age.
Common Mistakes to Avoid
- Using Metal Scrapers: They scratch paint easily. Stick to plastic.
- Skipping the Clean: Dirt can cause scratches during peeling.
- Overheating: Too much heat can damage paint or crack glass.
- Rushing the Process: Take your time to avoid tearing or residue.
Visual Idea: A side-by-side image comparing a scratched surface (from metal scraper) to a clean one (using plastic).
My Personal Tips from Experience
After years of tinkering with cars, I’ve learned a few tricks. First, work in the shade—sunlight makes adhesive tacky and harder to remove. Second, keep a spray bottle of soapy water handy to clean as you go. Finally, if you’re dealing with window decals, rubbing alcohol is your best friend—it’s cheap and works fast on glass. My biggest flop? Using gasoline once (don’t try it—it’s risky and smells awful!).

Frequently Asked Questions
What Is the Best Product to Remove Decal Residue?
Goo Gone is my go-to because it’s safe for car paint and works fast. Apply it to a cloth, rub gently, and wash off with soapy water.
Can I Use a Razor Blade to Remove Decals?
Only use a plastic razor blade or credit card on paint to avoid scratches. Metal blades are okay for glass but use them at a shallow angle.
How Do I Remove Decal Residue from Glass?
Use rubbing alcohol or a glass-safe adhesive remover. Apply with a cloth, let it sit, then wipe clean. Finish with glass cleaner for a streak-free shine.
Will Decal Removal Damage My Car’s Paint?
Not if you’re careful! Use plastic tools, test removers, and avoid overheating. Waxing afterward protects the paint.
How Long Does It Take to Remove Decal Residue?
It takes 30–60 minutes per decal, depending on size and age. Heat and proper tools speed things up.
Can I Use Household Items for Decal Removal?
Yes! White vinegar or WD-40 work well. Soak a cloth, apply to residue, and wipe after a few minutes.
What If the Decal Leaves a Ghost Outline?
Ghosting happens if paint fades around the decal. Use a clay bar or light polish to blend the area, then wax for protection.
Conclusion
Removing decal residue from your car is easier than it looks with the right tools and steps. Start with a clean surface, use heat to loosen the decal, and wipe away residue with a safe remover like Goo Gone. Avoid common mistakes like using metal scrapers or rushing the job. With a little patience, your car will shine like new. Try it out this weekend, and share your results with friends! Got a stubborn decal story? Let me know—I’d love to hear it!