How to Remove Door Dings From Car: A Genius, Essential Fix
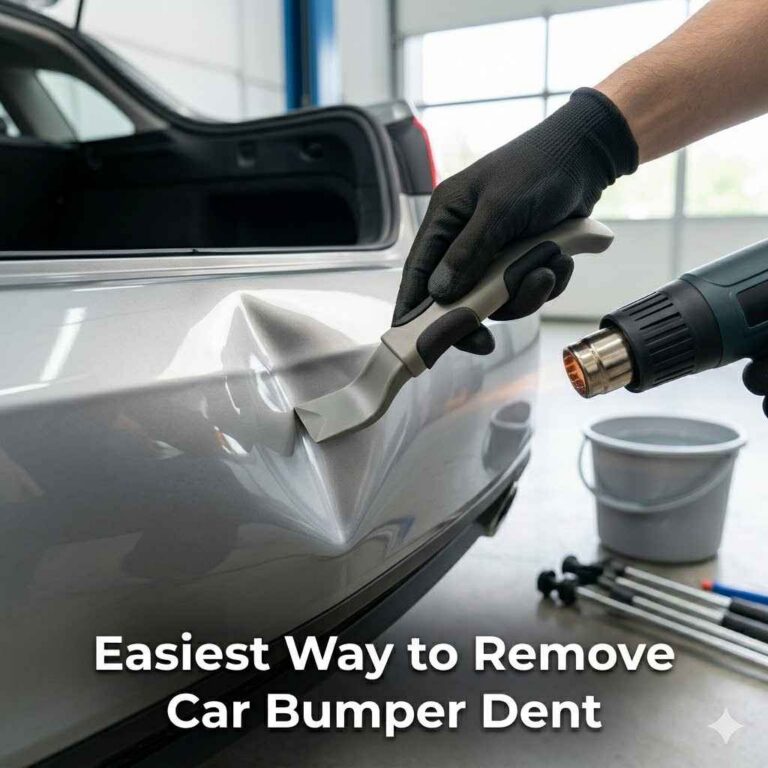
To remove minor door dings from a car, first clean the area thoroughly. For shallow dings on a flat panel, use a specialized car dent suction cup puller. For smaller dings, a hot glue dent puller kit offers more precision. A popular but riskier method involves heating the ding with a hair dryer and then rapidly cooling it with compressed air to pop the metal back into place.
It’s a sound every car owner dreads: the soft but sickening “thump” of another car door hitting yours in a crowded parking lot. You get out, and there it is—a small, frustrating door ding. It’s a tiny imperfection, but it can feel like a giant flaw on your otherwise pristine car. Don’t worry, though. This is one of the most common car-related annoyances, and you’re not alone.
Fixing a door ding might sound like a job for an expensive body shop, but you’d be surprised at what you can accomplish right in your own garage. Forget confusing jargon and complicated tools. I’m here to walk you through a few genius, beginner-friendly methods to make that ding disappear. Let’s get your car looking great again, one simple step at a time.
First, Let’s Understand That Pesky Door Ding
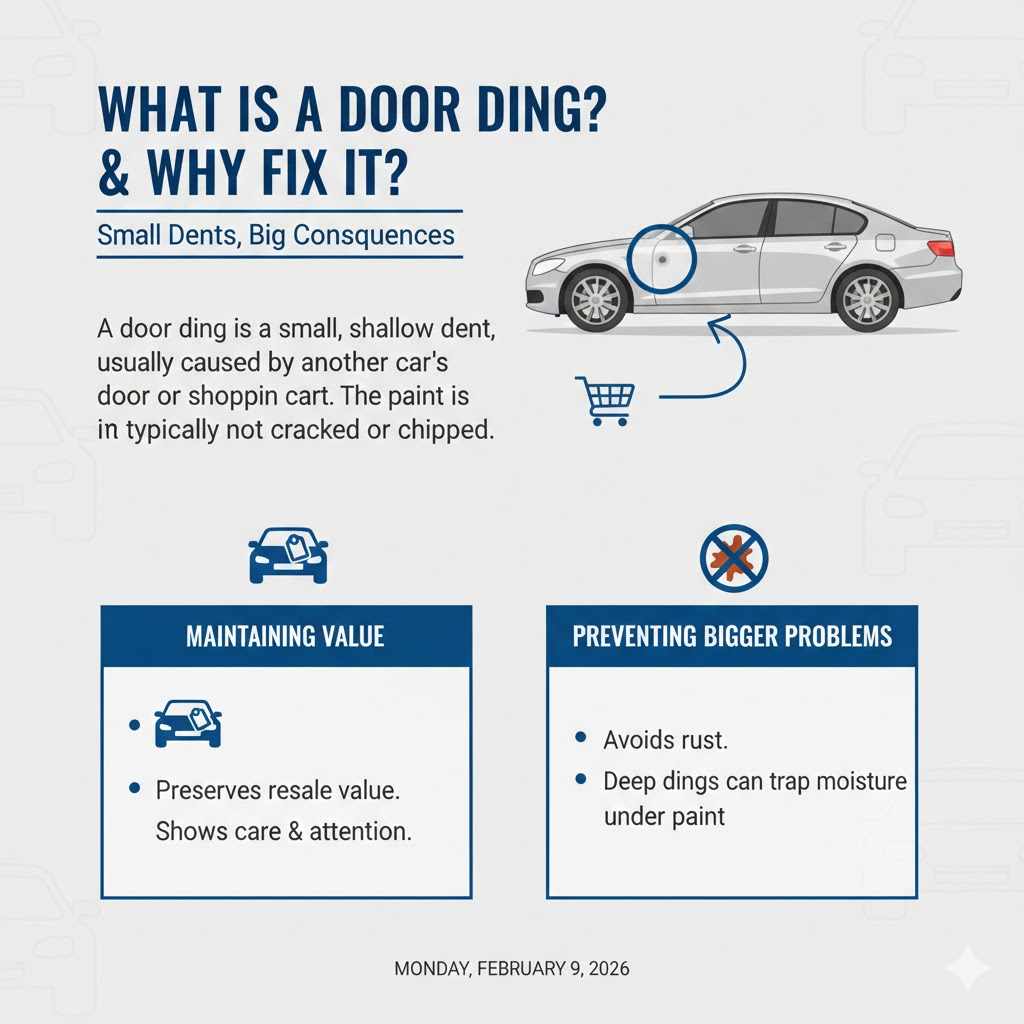
Before we jump into fixing it, let’s quickly talk about what a door ding actually is. A door ding is a small dent, usually the size of a quarter or smaller, typically caused by another car’s door, a runaway shopping cart, or even a stray hailstone. The key feature of a simple ding is that the paint is usually still intact. There are no chips, cracks, or deep scratches in the finish.
Why bother fixing such a small thing? Two main reasons:
- Maintaining Value: Even small blemishes can lower the resale value of your vehicle. A clean, ding-free car shows that it’s been well-cared for.
- Preventing Bigger Problems: While most dings don’t break the paint, a deeper one might create a tiny, invisible crack. Over time, moisture can get under the paint through this crack and lead to rust, which is a much bigger and more expensive problem to fix.
Should You Fix It Yourself? A Quick Assessment
Most minor door dings are perfect for a DIY fix. However, some dents need a professional touch. How do you know the difference? Take a moment to look closely at the ding and ask yourself a few questions. This quick check will save you time and help you decide the best course of action.
Use this table to see if your door ding is a good candidate for a home repair.
| Characteristic | Good for DIY Fix | Better to Call a Pro |
|---|---|---|
| Size | Smaller than a golf ball. | Large, widespread dents or creases. |
| Depth | Shallow, smooth depression. | Deep, sharp, or has a pointed center. |
| Location | On a flat, flexible panel like the middle of a door or fender. | On a sharp body line, curve, or edge of a panel. |
| Paint Condition | Paint is perfectly intact, with no scratches or cracks. | Paint is chipped, cracked, or deeply scratched. |
| Panel Material | Standard steel panel. | Aluminum or high-strength steel (often found on newer luxury cars). |
If your ding checks all the boxes in the “Good for DIY Fix” column, you’re ready to roll up your sleeves and get started! If it falls into the “Better to Call a Pro” category, don’t worry. A professional technique called Paintless Dent Repair (PDR) is often very affordable and effective.
Gathering Your Tools: What You’ll Need for the Job
You don’t need a professional mechanic’s toolbox for this job. The tools you need will depend on which method you choose. But before you start any repair, you’ll need some basic cleaning supplies to prepare the surface.
Universal Cleaning Supplies:
- Car Wash Soap and Water: To remove loose dirt and grime.
- Isopropyl (Rubbing) Alcohol: To remove any wax, oil, or residue for a perfectly clean surface.
- Microfiber Towels: One for washing and one for drying and polishing.
For the Suction Cup Method
This method is best for larger, shallow dings on flat surfaces. It’s the simplest and often the quickest approach.
- Dent Puller Suction Cup: Make sure to buy one designed for auto body work, not a glass-lifting cup. They provide a much stronger and safer grip.
For the Hot Glue Puller Method
This is the most versatile and precise DIY method, great for smaller, more defined dings.
-
Dent Puller Kit: These kits are widely available online or at auto parts stores. A good kit will include:
- A mini hot glue gun and specialized glue sticks.
- A variety of plastic pulling tabs in different shapes and sizes.
- A pulling bridge or slide hammer tool.
- A plastic scraper for removing glue.
- A small spray bottle for rubbing alcohol.
For the Hair Dryer & Compressed Air Method
This method relies on rapid temperature change to pop the metal back into shape. It can be effective but also carries a risk of paint damage if not done carefully.
- Hair Dryer or Heat Gun: A standard hair dryer is often sufficient and safer for the paint.
- Can of Compressed Air: The kind you use to clean keyboards. You’ll be using it upside down to spray the super-cold liquid propellant.
- Safety Gloves and Goggles: The liquid from the compressed air can is extremely cold and can cause frostbite on contact with skin. Safety is always first!
How to Remove Door Dings From Car: 3 Genius DIY Methods
Alright, you’ve assessed the ding and gathered your tools. It’s time for the main event! Always start by thoroughly cleaning and drying the dented area with car soap, then wipe it down with rubbing alcohol to ensure perfect adhesion for your tools. Work in a well-lit area, like your garage or a shady spot outside, so you can clearly see the dent.
Method 1: The Simple Suction Cup Puller
This is your go-to for larger, shallow dings that don’t have any sharp creases. Think of it as a mini-plunger for your car’s body panels.
- Clean the Area: Make sure the surface of the ding and the suction cup are perfectly clean and dry. Any dirt or moisture will weaken the seal.
- Position the Cup: Press the suction cup firmly over the center of the ding. Ensure it creates a complete seal all the way around the cup’s edge.
- Create Suction: Engage the suction mechanism. On most dent pullers, this involves clamping the handles together. You should feel it grip the panel tightly.
- Pull Gently and Firmly: Pull the handle straight back with a steady, even motion. Avoid yanking or pulling at an angle. You may hear a “pop” as the metal flexes back into place.
- Check and Repeat: Release the suction and inspect your work. The ding may not come out completely on the first try. You might need to repeat the process a few times to get it just right.
Method 2: The Hot Glue Dent Puller Kit
This method offers much more control and is perfect for smaller dings. The variety of tab sizes in the kit allows you to match the tool perfectly to the dent.
- Select a Pulling Tab: Choose a plastic tab that is slightly smaller than the diameter of the ding. The shape should roughly match the shape of the dent.
- Apply Hot Glue: Heat up your glue gun. Apply a generous dab of the specialized auto body glue to the face of the pulling tab.
- Place the Tab: Quickly and firmly press the glue-covered tab onto the exact center of the ding. Don’t wiggle it. Hold it in place for a few seconds to get a good bond.
- Let the Glue Cool: This is a crucial step! Allow the glue to cool and harden for at least 5-10 minutes. It needs to be completely solid to have enough strength to pull the dent.
- Attach the Pulling Tool: Slide your pulling bridge over the tab. Thread the pulling knob or squeeze the handle of the tool. This will begin to apply steady outward pressure.
- Pull the Dent: Turn the knob or squeeze the handle slowly. You will see the metal begin to rise. Continue with slow, steady pressure until you hear a pop. Often, the tab will pop off on its own once the dent is released.
- Remove the Glue: Spray a small amount of rubbing alcohol around the edges of the remaining glue. Let it sit for a minute to dissolve the bond. Use the plastic scraper from your kit to gently peel off the glue. It should come off easily without harming your paint.
- Polish the Area: Once all the glue is gone, wipe the area with a clean microfiber cloth to restore its shine.
Method 3: The Temperature Trick (Hair Dryer & Compressed Air)
This method sounds like a science experiment, and in a way, it is. It uses the principle of thermal expansion and contraction. A word of caution: this method carries a higher risk of damaging your paint if you overheat the panel. Proceed with care and at your own risk.
- Put on Safety Gear: Before you start, put on your safety gloves and goggles. The propellant from the compressed air can is extremely cold. For guidance on product safety, you can refer to resources like the U.S. Consumer Product Safety Commission.
- Heat the Ding: Hold a hair dryer about 5-7 inches away from the ding. Move it in a constant circular motion to heat the area evenly. Heat the panel for about 60-90 seconds. It should be hot to the touch, but not so hot that it discolors or damages the paint.
- Apply the Cold Shock: Immediately after heating, grab your can of compressed air. Turn it upside down and spray the center of the ding for 10-15 seconds. The can will spray a very cold liquid propellant.
- Listen for the Pop: The rapid change in temperature should cause the heated metal to contract quickly, forcing the ding to pop back into its original shape. It can be quite sudden!
- Clean and Inspect: Once the panel returns to room temperature, wipe it down with a microfiber cloth and inspect your work.
Comparing Your DIY Options
Not sure which method is right for you? This table breaks down the pros and cons of each approach to help you decide.
| Method | Cost | Difficulty | Best For | Risk Level |
|---|---|---|---|---|
| Suction Cup Puller | Low ($10 – $25) | Very Easy | Larger, shallow, round dings on flat surfaces. | Low |
| Hot Glue Puller Kit | Moderate ($25 – $60) | Easy to Moderate | Small to medium-sized dings, even with a slight crease. | Low |
| Hair Dryer & Compressed Air | Low (if you own the items) | Moderate | Shallow dings on flexible panels. | Moderate to High (risk of paint damage from improper heating/cooling). |
What If the Paint Is Scratched or Chipped?
If you’ve assessed your ding and noticed that the paint is cracked, chipped, or scratched, the dent removal is only step one. Leaving exposed metal is an open invitation for rust to form. Repairing the paint is just as important as fixing the dent itself.
After you’ve pulled the dent using one of the methods above, you’ll need to apply touch-up paint. You can usually buy a small bottle of paint that perfectly matches your car’s color from your dealership or an auto parts store. You’ll need your car’s paint code, which is usually found on a sticker inside the driver’s side door jamb.
The process is simple: clean the chipped area, apply a thin layer of primer if the scratch is deep, and then carefully dab on the touch-up paint. This seals the metal from moisture and makes the repair nearly invisible. Proper vehicle maintenance, including addressing paint chips, is key to longevity, a point often emphasized by organizations like the National Highway Traffic Safety Administration (NHTSA) in their car care guides.
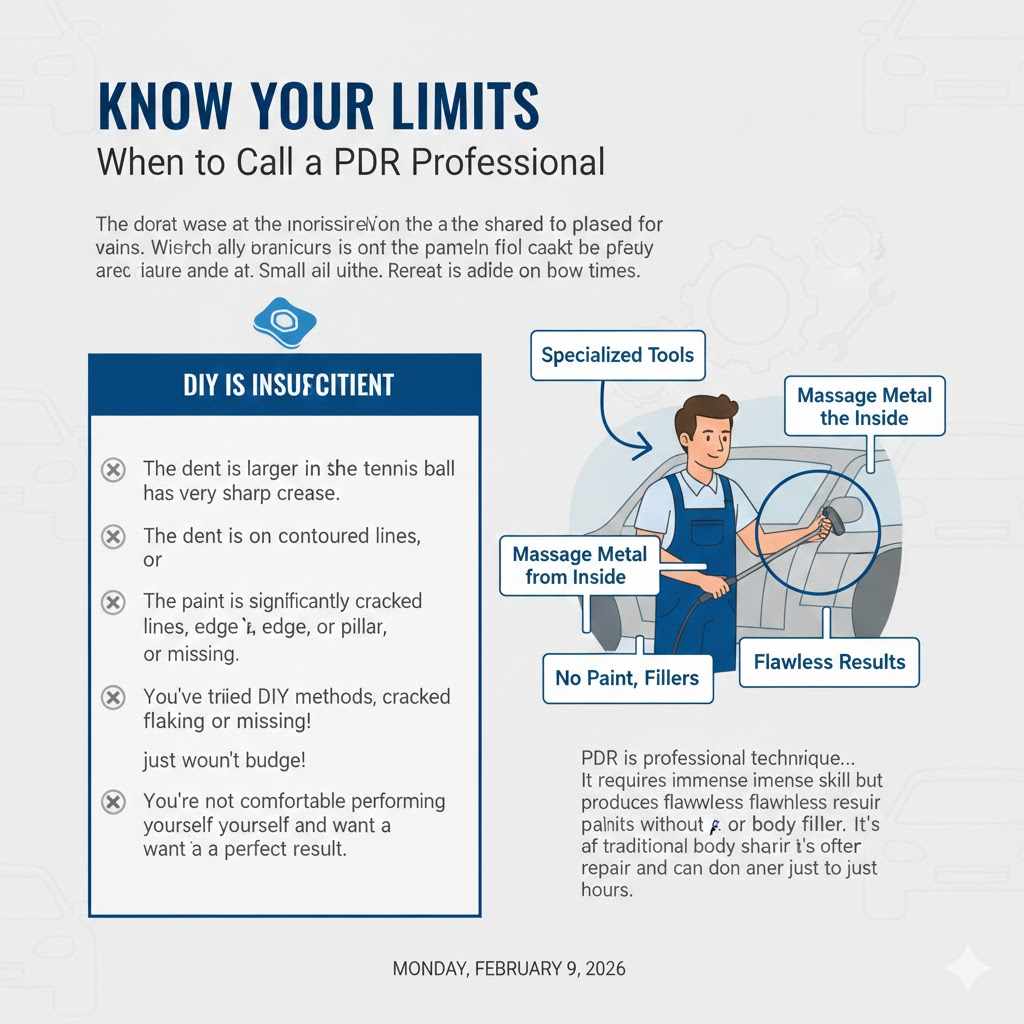
Know Your Limits: When to Call a Professional PDR Technician
DIY fixes are fantastic for saving money and giving you a sense of accomplishment. But it’s also important to know when a job is best left to a professional. If you try a DIY method and aren’t getting results, or if the ding falls into one of these categories, it’s time to call an expert.
- The dent is larger than a tennis ball or has a very sharp crease.
- The dent is on a contoured body line, an edge of a panel, or a pillar.
- The paint is significantly cracked, flaking, or missing.
- You’ve tried the DIY methods, and the dent just won’t budge.
- You’re not comfortable performing the repair yourself and want a perfect result.
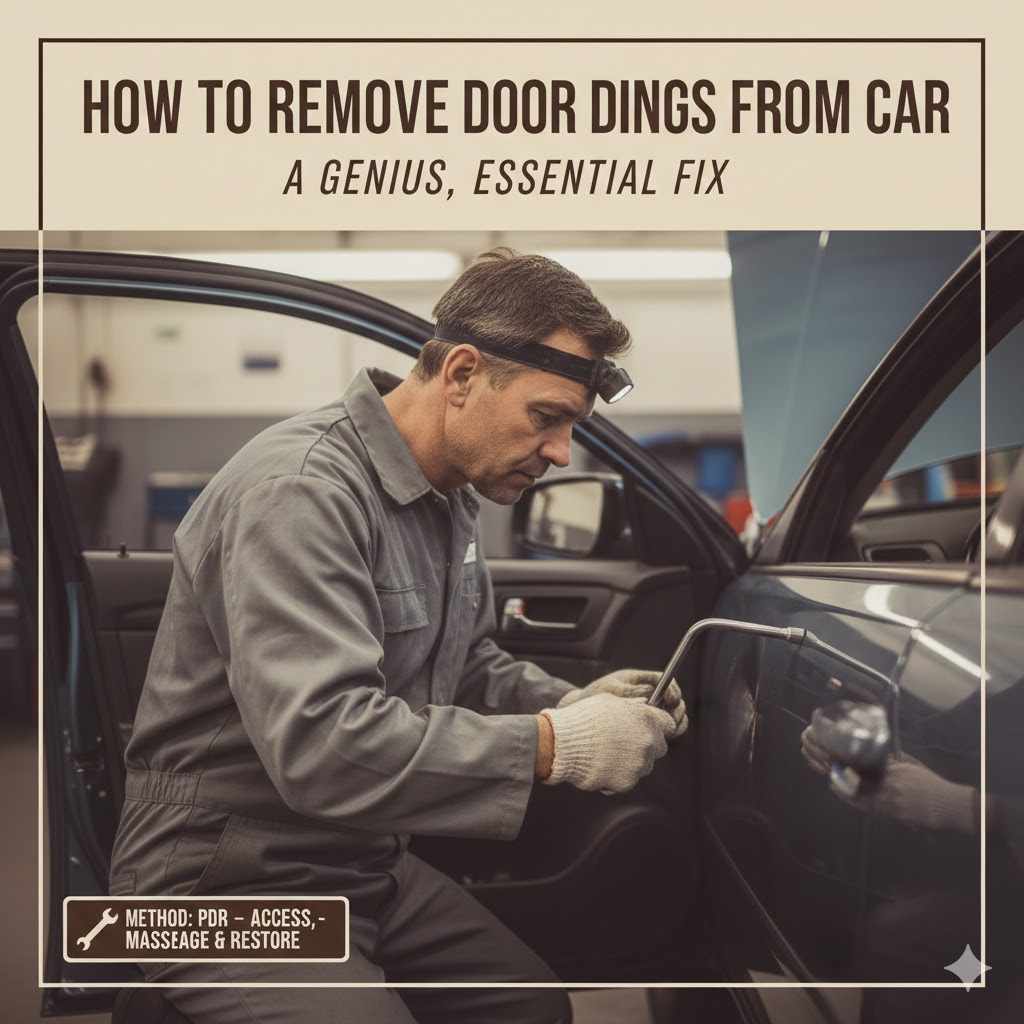
In these cases, you’ll want to look for a technician who specializes in Paintless Dent Repair (PDR). PDR is a professional technique where technicians use specialized tools to get behind the panel and gently massage the metal back into its original shape from the inside out. It requires immense skill but produces flawless results without needing any paint or body filler. It’s often more affordable than a traditional body shop repair and can be done in just a few hours.
Frequently Asked Questions (FAQ)
Can I really fix a door ding myself?
Absolutely! For small, shallow dings where the paint isn’t broken, DIY methods like suction cup or glue puller kits are very effective and beginner-friendly. The key is to properly assess the damage first and choose the right tool for the job.
Will these methods damage my car’s paint?
When done correctly, the suction cup and hot glue puller methods are very safe for your car’s factory finish. The hair dryer and compressed air method carries a higher risk; if you overheat the panel or cool it too quickly, you could potentially cause the paint to crack or bubble. Always proceed with caution.
How much does professional door ding repair cost?
The cost for professional Paintless Dent Repair (PDR) typically ranges from $75 to $150 for a single, simple door ding. The price can increase depending on the size, depth, and location of the dent.
What’s the difference between a ding and a dent?
Generally, a “ding” is a small imperfection, usually less than half an inch in diameter, with no paint damage. A “dent” is typically larger and may involve more complex damage like creases or paint scratches.
Does a household plunger work for car dings?
While it might seem like a good idea, using a household plunger is not recommended. The rubber is often too stiff, and the shape is not designed for car panels, which can lead to a poor seal or even cause more damage. It’s always better to use a suction cup designed specifically for auto body work.
Can I use a heat gun instead of a hair dryer?
You can, but you must be extremely careful. A heat gun gets much hotter than a hair dryer and can easily burn or blister your car’s paint in seconds. If you choose to use one, keep it on the lowest setting and hold it much farther away from the panel.
How do I prevent door dings in the first place?
Prevention is the best cure! Try to park in end spots, farther away from other cars. When possible, park next to well-maintained vehicles. You can also install clear, protective door edge guards to absorb minor impacts.
Your Next Step: A Ding-Free Door and a Proud Owner
There you have it—a complete guide to taking care of those annoying door dings yourself. What started as a frustrating blemish on your car can now be a project you can tackle with confidence. Whether you choose the simple suction cup, the precise glue puller, or the clever temperature trick, you have the knowledge to get the job done right.
Remember, the goal is progress, not perfection. Sometimes a ding won’t come out 100%, but even an 80% or 90% improvement can make a huge difference. Taking the time to care for your car, even in small ways, is incredibly rewarding. So go ahead, give it a try. You’ll save money, learn a new skill, and feel that amazing sense of pride every time you look at your smooth, ding-free door.