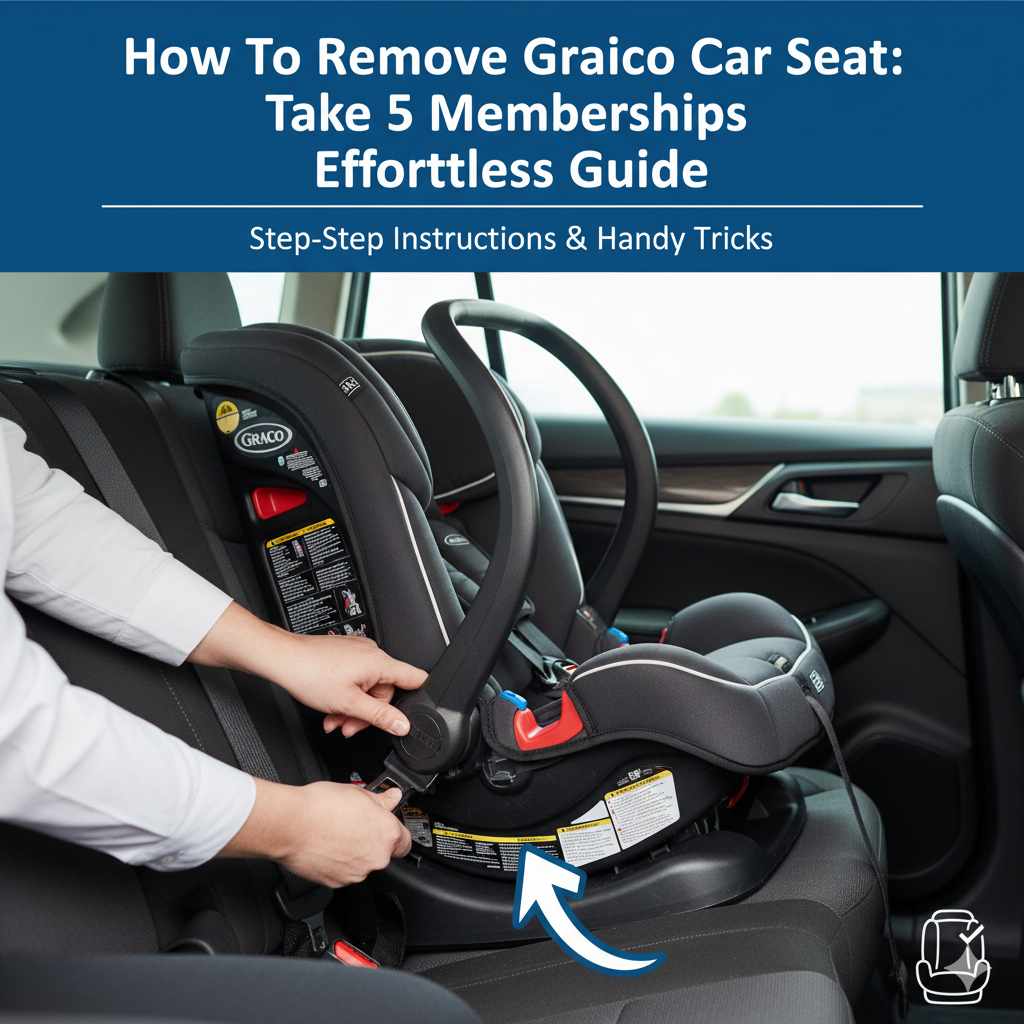
How To Remove Graco Car Seat: Effortless Guide
Removing your Graco car seat is a straightforward process. This guide provides simple, step-by-step instructions to help you detach it from your vehicle effortlessly, ensuring safety and ease for every parent.
As a parent, you’ll often need to move your Graco car seat. Maybe you’re switching cars, cleaning your vehicle, or it’s time to uninstall it completely. Whatever the reason, the thought of wrestling with a car seat can feel a bit daunting. But don’t worry! I’m here to make this task easy and stress-free. We’ll go through each step together, using plain language. By the end of this guide, you’ll feel confident knowing exactly how to remove your Graco car seat like a pro.
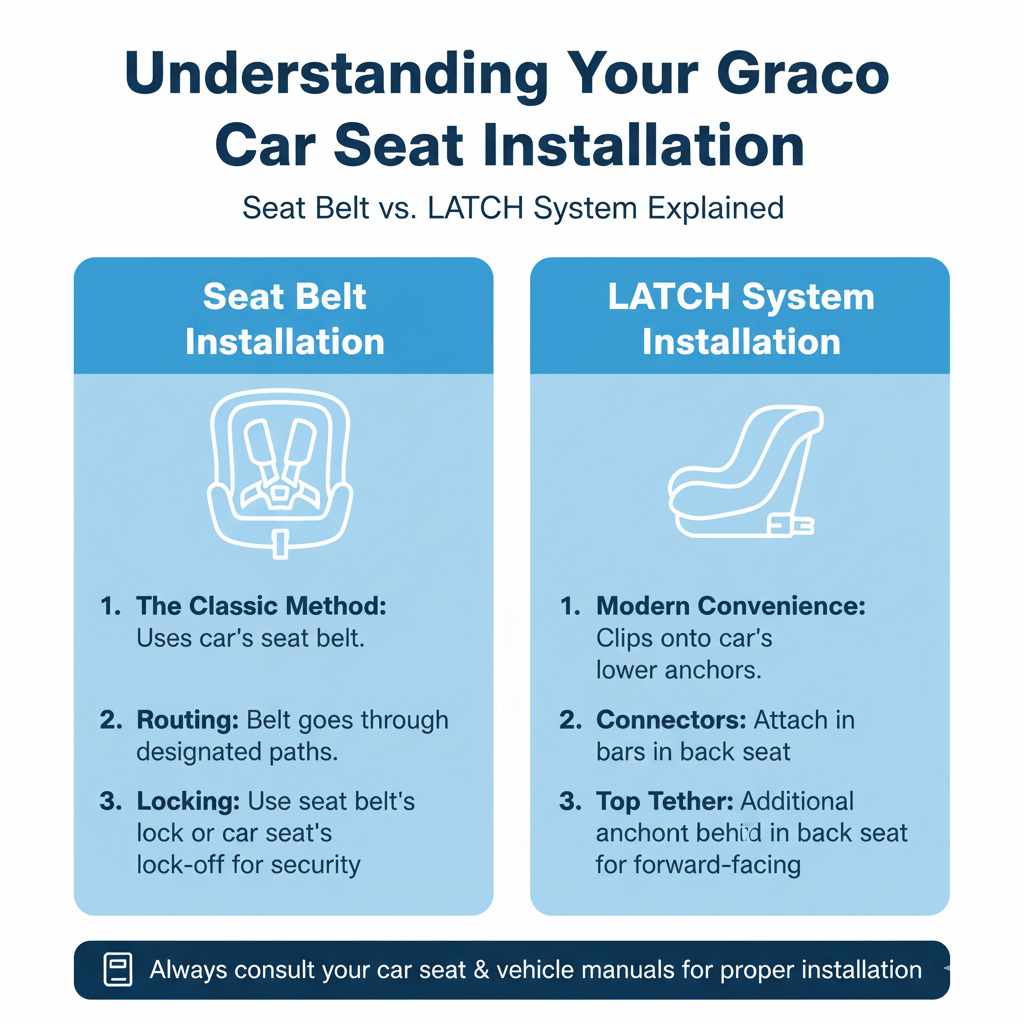
Understanding Your Graco Car Seat Installation
Before we dive into removal, it’s helpful to understand how Graco car seats are typically installed. Most Graco car seats use either the vehicle’s seat belt or the LATCH (Lower Anchors and Tethers for CHildren) system. Knowing which method you used for installation will make removal much quicker. If you’re unsure, take a peek at your car seat manual or look for the LATCH anchors in your car’s back seat.
Seat Belt Installation: The Classic Method
Many Graco seats can be secured using your car’s existing seat belt. This involves routing the seat belt through specific belt paths on the car seat and then buckling it. For a secure installation, the seat belt is often locked, either using the seat belt’s built-in locking mechanism or a lock-off device on the car seat itself. This ensures the seat doesn’t wiggle loose, a crucial safety feature.
LATCH System Installation: Modern Convenience
The LATCH system provides an alternative to the seat belt. It uses special lower anchor bars found in your vehicle’s back seat, and connectors on the car seat that clip onto these bars. Many LATCH systems also have a top tether, which connects to an anchor point behind the seat for added stability, especially for forward-facing seats. This system can sometimes feel easier to connect and disconnect than a seat belt.
What You’ll Need: Simple Tools for Removal
The good news is that you usually don’t need any special tools to remove a Graco car seat. Most of the time, your hands are all you need! However, having a small tool like a flathead screwdriver or a butter knife can sometimes be helpful for tricky situations, especially if a seat belt lock-off is being stubborn. Here’s a quick rundown:
- Your hands!
- (Optional but helpful) Flathead screwdriver or butter knife for stubborn lock-offs.
- Your Graco car seat manual (always a good reference!).
- Your vehicle’s owner manual (for LATCH anchor locations).
Step-by-Step Guide: Removing Your Graco Car Seat
Let’s get this done! We’ll break it down into two main scenarios: removing a seat belt installed seat and removing a LATCH installed seat. Your car seat might use one or both methods depending on its type and how you installed it.
Scenario 1: Removing a Graco Car Seat Installed with a Seat Belt
If you installed your Graco car seat using your vehicle’s seat belt, follow these steps. It’s like undoing a buckle, but with a few extra checks.
- Loosen the Seat Belt: First, find the seat belt buckle and unbuckle it. Now, pull the seat belt webbing all the way out from the retractor (the part that normally winds the belt back up).
- Engage the Seat Belt Lock-off (If applicable): Many Graco car seats have a “lock-off” device that holds the seat belt tight. You’ll need to release this. This might be a clip on the car seat itself that you squeeze, or sometimes you might need to gently lift a flap to free the belt. Check your Graco car seat manual for the exact location and operation of its lock-off. If your seat belt has a built-in locking mechanism (sometimes you pull the belt all the way out and hear it click and retract slowly), you might need to hold the buckle down while releasing the tension from the car seat.
- Release Tension and Remove Belt: Once the lock-off is released, you can begin to pull the car seat away from the vehicle seat. As you do this, guide the seat belt out of the belt path on the car seat. You may need to gently push down on the car seat to release tension on the belt before you can pull it free.
- Completely Remove the Seat Belt: Ensure the seat belt is fully detached from the car seat’s belt path. Route it back into its original position in your vehicle.
- Lift the Car Seat Out: With the seat belt completely free, you can now lift the Graco car seat straight out of the vehicle seat.
Scenario 2: Removing a Graco Car Seat Installed with the LATCH System
If you used the LATCH system for installation, the process is usually quite simple. Here’s how to do it:
- Locate LATCH Connectors: Find where the car seat’s LATCH connectors attach to your vehicle’s lower anchors. These are typically red or blue metal hooks on the car seat straps.
- Release the LATCH Connectors: Most Graco LATCH connectors have a release button or lever. You might need to push a button on the connector itself or squeeze a lever to disengage it from the vehicle’s anchor. Sometimes, you may need to pull the strap taut while pressing the release button to help it unclip.
- Disconnect Both Lower Anchors: Repeat the process for the other side. Ensure both lower anchors are fully detached from the vehicle’s LATCH system.
- Disconnect the Top Tether (If applicable): If your car seat is forward-facing and you used the top tether, find the tether strap and its anchor point. Most Graco top tethers have a buckle or hook that simply unclips. Some may have a release mechanism similar to the lower anchors. Disconnect it from your vehicle’s anchor point. You can typically find these anchor points on the back shelf of your car, the rear of the car seat, or even the ceiling.
- Lift the Car Seat Out: Once all LATCH connectors and the top tether (if used) are disconnected, you can lift the Graco car seat straight out of your vehicle.
Scenario 3: Removing a Graco Car Seat Using Both Seat Belt and LATCH
Some installations might use both the seat belt and the LATCH system for extra security. In this case, you’ll essentially combine the steps above. It’s generally recommended to remove the LATCH system first, then the seat belt, as releasing the LATCH can sometimes loosen the seat belt enough to make it easier to remove.
- Disconnect LATCH System: Follow the steps for removing a LATCH-installed seat (Scenario 2). Make sure to disconnect both lower anchors and the top tether (if used).
- Release Seat Belt Installation: Now that the LATCH system is disconnected, you can proceed with removing the seat belt as described in Scenario 1. The seat belt should be much looser now, making it easier to release from the lock-off and belt path of the car seat.
- Lift the Car Seat Out: With both systems completely detached, lift the car seat out of your vehicle.
Important Safety Considerations When Removing Your Car Seat
Safety is always the top priority. Even when removing the seat, a few things are worth keeping in mind.
- Check the Manual: Every Graco car seat model is a little different. Your car seat’s manual is the ultimate guide. It will show you specific belt paths, lock-off mechanisms, and LATCH connector locations for your exact model. If you don’t have it, you can usually download a PDF version from the Graco website.
- Never Force Anything: If something feels stuck, don’t force it. Forcing components can damage the car seat or your vehicle, or even cause injury. Double-check that you’ve properly released any lock-offs or LATCH connectors.
- Proper Storage: Once removed, store your car seat in a safe place, away from direct sunlight and extreme temperatures, until you need it again.
- Check for Damage: Before reinstalling the car seat in another vehicle or using it again, inspect it for any cracks, broken parts, or damage. If it’s been in an accident, it may need to be replaced, even if visually undamaged. The National Highway Traffic Safety Administration (NHTSA) provides guidelines on when car seats need to be replaced after a crash. NHTSA recommends consulting your car seat manufacturer, but generally, a minor car crash means replacement.
Dealing with Tricky Situations: Stubborn Lock-Offs and Connectors
Sometimes, you might encounter a car seat or LATCH connector that just won’t budge. Here are a few tips:
- Readjust Tension: Try pushing down firmly on the car seat while attempting to release the lock-off or LATCH connector. This can sometimes relieve the pressure and make it easier to disconnect.
- Gentle Wiggling: A little bit of gentle wiggling can help free things up. Don’t yank or pull too hard.
- Use a Helper Tool (Carefully!): For stubborn seat belt lock-offs where you can’t get your fingers in, a flathead screwdriver or a butter knife can be slid gently under the edge of the lock-off mechanism to help lift it. Be very careful not to scratch or damage the car seat or yourself. Refer to your manual to ensure you’re not forcing anything in the wrong place.
- Check for Obstructions: Ensure there’s no debris or fabric caught in the lock-off mechanism or LATCH connector.
Graco Car Seat Removal: A Comparison Table
To quickly recap, here’s a comparison of the removal methods:
| Installation Method | Ease of Removal | Common Tools Needed | Key Steps |
|---|---|---|---|
| Seat Belt | Moderate (requires releasing lock-off) | Hands, possibly flathead screwdriver | Unbuckle, release lock-off, pull belt from path, remove seat. |
| LATCH System | Easy (press release button/lever) | Hands | Locate connectors, press release, disconnect anchors, remove seat. |
| Both Seat Belt & LATCH | Moderate (combines both) | Hands, possibly flathead screwdriver | Disconnect LATCH first, then release seat belt lock-off and path, remove seat. |
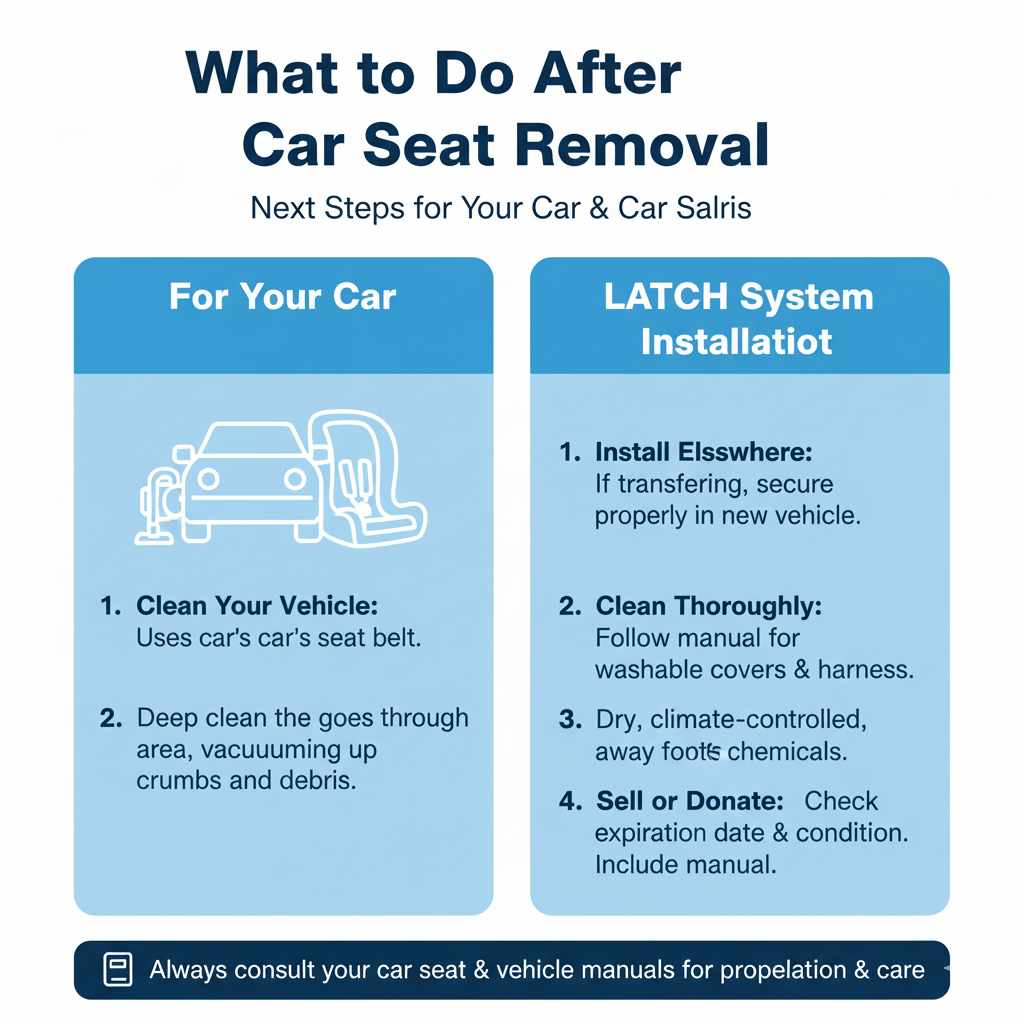
What to Do After Removal
Once your Graco car seat is successfully removed from your vehicle, you have a few options:
- Install in Another Vehicle: If you’re transferring the car seat, now is the perfect time to properly install it in the new vehicle. Always refer to both the car seat manual and your vehicle’s manual for the best installation practices.
- Clean Your Vehicle: With the car seat out, it’s an excellent opportunity to deep clean your car’s interior, especially the area around where the car seat was installed. You might be surprised what you find hiding underneath!
- Clean the Car Seat: If the car seat needs a refresh, follow the manufacturer’s instructions for cleaning. Many covers are machine washable.
- Store Safely: If you won’t be using the car seat for a while, store it in a dry, climate-controlled environment. Avoid extreme heat or cold, and keep it away from corrosive materials.
- Sell or Donate: If the car seat is still in good condition and hasn’t expired (check the expiration date – usually molded into the plastic), you can consider selling or donating it. Ensure you provide a copy of the manual if possible.
Frequently Asked Questions (FAQ)
Q1: How do I know if my Graco car seat is installed with a seat belt or LATCH?
Look at your car seat. If you used straps with visible metal connectors that attach to bars in your car’s seat, it’s LATCH. If the car’s seat belt goes through specific slots on the car seat and is buckled, it’s a seat belt installation. Some seats can use either method.
Q2: Can I remove my Graco car seat if my car is running?
No, it’s crucial to remove your car seat when the vehicle engine is off and to ensure the parking brake is engaged. This prevents any accidental movement of the vehicle.
Q3: My Graco car seat is really stuck. What should I do?
First, ensure you’ve fully released any seat belt lock-offs or LATCH connectors. Sometimes, gently pushing down on the car seat while releasing helps. If it’s a seat belt lock-off, a butter knife or flathead screwdriver used carefully can sometimes help lift the mechanism, but never force it. Always refer to your manual for specific instructions.
Q4: Do I need to uninstall the LATCH system and the seat belt if both were used?
Yes, if both were used, you need to disconnect both systems. It’s generally easiest to disconnect the LATCH anchors first, then release the seat belt.
Q5: How do I find the LATCH anchors in my car?
Your car’s LATCH anchors are usually metal bars located in the crease between the back and seat cushions of the rear seat. They often have small labels or indentations indicating their location. Your vehicle’s owner’s manual will show you their exact positions.
Q6: My Graco car seat has an expiration date. Can I remove and reinstall it after it expires?
A car seat’s expiration date is for safety reasons, as the materials can degrade over time. While you can physically remove and reinstall an expired seat, it is not recommended to use it for transporting children as its safety performance may be compromised. Always check the expiration date before reinstalling.
Conclusion
Taking out your Graco car seat doesn’t have to be a struggle. By following these clear, step-by-step instructions, you can confidently remove it from your vehicle. Whether you used the seat belt or the LATCH system, understanding the basic principles makes the process manageable. Remember to always consult your specific Graco car seat manual and your vehicle’s owner’s manual for any model-specific nuances. With a little patience and a clear understanding of the steps, you’ll be a pro at removing your Graco car seat in no time. Happy travels, and stay safe!