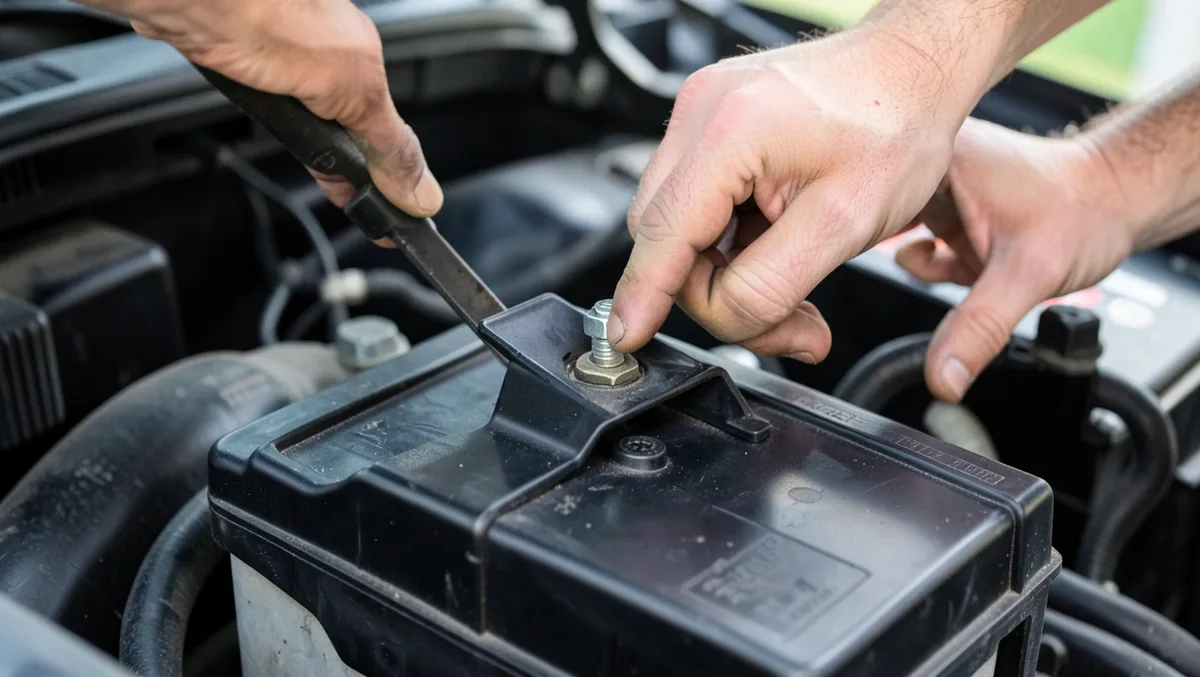
How to Secure a Car Battery: Hold-Down Brackets & Cable Care
A battery hold-down bracket, clamp, or strap is what actually keeps a car battery in place—not duct tape, bungee cords, or a block of wood wedged underneath it. Left loose, a battery can vibrate against its tray, crack the case, or shake a cable connection loose while you drive, and any of those can trigger electrical faults or a dead short. This guide covers checking your existing hold-down, cleaning and reconnecting the terminals, and installing a replacement bracket if yours is missing, damaged, or the wrong size for your battery’s group size.
Why Securing Your Car Battery Matters
BEST FOR UNIVERSAL BATTERY HOLD-DOWN REPLACEMENT
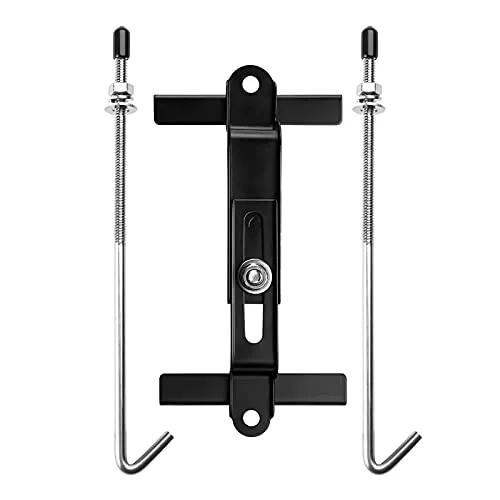 |
ARONOVA Adjustable Battery Hold-Down J-Hook Kit – $8.92 This adjustable stainless J-hook bracket is the same style of universal hold-down hardware described in the alternative-methods section below, and it fits most standard battery trays without drilling.
|
A battery that is free to move around under the hood does more damage than most drivers expect. Constant vibration wears at the terminal connections, which can loosen a cable just enough to cause intermittent starting problems or dashboard warning lights. In a worse case, the battery case itself can crack against the tray or a nearby bracket, which risks leaking electrolyte onto the engine bay or exposing the internal plates to a short circuit.
Securing the battery properly also protects the rest of the vehicle. A battery that shifts even an inch can pull on the cables hard enough to strain the terminal clamps, and repeated flexing eventually cracks the lead posts or the plastic housing around them. None of this is expensive to prevent—a correctly fitted hold-down bracket and a few minutes of attention usually cost less than a single tow.
What You’ll Need to Secure Your Battery
Gather these tools before you start. Most of them are inexpensive and many people already have them in the garage:
| Item | Purpose | Where to Find It |
|---|---|---|
| Socket wrench set | Tightens bolts on battery hold-down | Auto stores, hardware stores |
| Ratchet and socket (10mm or 13mm) | Common sizes for battery clamps | Auto stores, hardware stores |
| Screwdriver (flathead or Phillips) | Adjusts some battery brackets or trays | Hardware stores, home |
| Gloves | Protects hands from dirt or acid | Hardware stores, supermarkets |
| Safety glasses | Shields your eyes from sparks or debris | Hardware stores, auto stores |
| Wire brush | Cleans corrosion from terminals | Auto stores, hardware stores |
| Battery terminal cleaner | Removes grime from battery posts | Auto stores, online |
| Anti-corrosion spray | Prevents future corrosion on terminals | Auto stores, online |
| Flashlight | Helps see in tight engine compartments | Home, hardware stores |
If you do not already own these, auto parts stores like AutoZone or Advance Auto Parts carry all of them. Wear gloves and safety glasses whenever you work near the terminals—battery acid can burn skin or eyes on contact, and a spark near the posts is always a possibility.
Step 1: Check the Battery’s Condition
Before securing the battery, give it a quick once-over. A damaged or leaking battery needs to be replaced, not just tightened down. Pop the hood and check for cracks in the case, bulging sides, or any signs of leaking electrolyte around the base.
Next, look at the terminals—the metal posts where the cables connect. White, powdery buildup is corrosion, and it is common; it gets cleaned off in the next step. Make sure the battery is sitting flat in its tray. If it is tilted, propped up on anything, or wobbles when nudged, it is not properly secured and needs attention before you go any further.
Step 2: Clean the Battery and Terminals
A clean battery is easier to work with and makes better electrical contact. Corrosion on the terminals is one of the most common causes of intermittent starting problems, so it is worth clearing before you touch the hold-down. If you see white, crusty buildup, a wire brush and a battery terminal cleaner will take care of it. A mix of baking soda and water in a spray bottle works as a DIY alternative, since baking soda neutralizes the acidic corrosion.
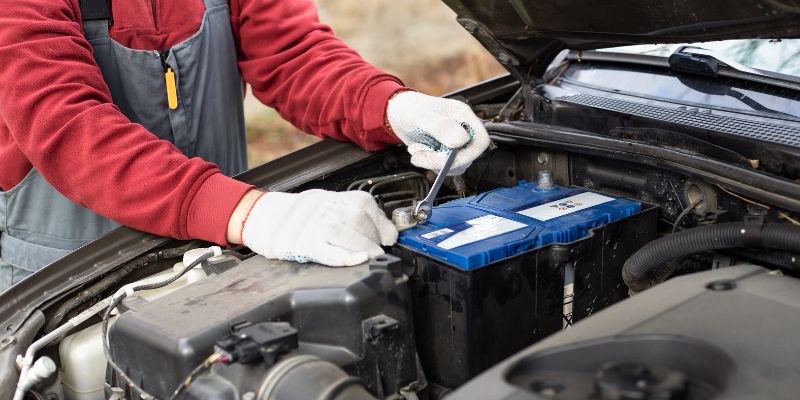
Disconnect the cables starting with the negative (black) terminal first, to avoid the risk of a spark if a wrench happens to touch metal while the positive side is still live. Loosen the bolt on the terminal clamp with a wrench and wiggle the clamp off, then disconnect the positive (red) cable the same way. Spray both terminals with cleaner and scrub with the wire brush until the metal is bright, and use a terminal cleaning brush—a small tool shaped to fit over the post—to get into the grooves.
Rinse off any cleaner with a small amount of water, being careful not to let water get inside the battery vents, then dry everything with a clean rag. Poor terminal contact from leftover corrosion is a common reason a car cranks slowly or struggles to start, so this step is worth the five to ten minutes it takes.
Step 3: Inspect the Battery Tray and Hold-Down
With the battery clean, check the tray and hold-down system. The tray is the platform the battery sits on, and the hold-down is the clamp, bracket, or strap that keeps it from shifting. Most vehicles use a metal or plastic bar that bolts down over the top of the battery, or a strap that hooks into the tray on either side.
Look for rust or damage on the tray itself. A rusty tray can be scrubbed with a wire brush and treated with anti-corrosion spray; a cracked or badly corroded tray should be replaced, since a damaged tray makes it difficult to secure the battery correctly no matter how good the hold-down is.
Check the hold-down itself for loose bolts, stripped threads, or worn hardware. Some vehicles use a wedge-style clamp, others use a strap or bar across the top—either way, it needs to be the right size for your battery. A hold-down built for the wrong Group Size battery will not seat correctly even if it is tightened all the way, so confirm your battery’s group size against your owner’s manual before buying a replacement bracket.
Step 4: Secure the Battery
Now it is time to lock the battery in place. If you disconnected it, set it back in the tray so it sits flat and square—many trays have raised edges or grooves that guide the battery into the correct position.
For a clamp-style hold-down, position it over the battery’s lip and tighten the bolts evenly with a socket wrench, alternating sides so the clamp pulls down flat instead of tilting. Snug is the goal, not crushing—overtightening is the single most common way people crack a battery case or strip the tray’s mounting threads.
For a strap or bar-style hold-down, hook it into place and tighten the bolts or screws evenly. Once it is tightened, grip the top of the case (not the terminals) and give it a firm push in a few directions. If it rocks or shifts at all, tighten it a bit more. This step usually takes under ten minutes but it is the part of the job that actually matters.
How Tight Should the Hold-Down and Terminal Clamps Be?
Most hold-down bolts do not need much torque—snug by hand, then a partial turn with a wrench, is usually enough. Automakers typically spec somewhere in the neighborhood of 45 to 90 inch-pounds for the hold-down bolt, with the terminal clamp nut usually needing less, though the exact figure varies by vehicle, so check your owner’s manual if you have a torque wrench on hand. If you do not, the practical test still works: grip the top of the battery case and try to rock it. If it does not move and the cable clamps do not wiggle on the posts, it is tight enough. Overtightening does more harm than good—it is how a case gets cracked or a hold-down bolt gets stripped in the tray.
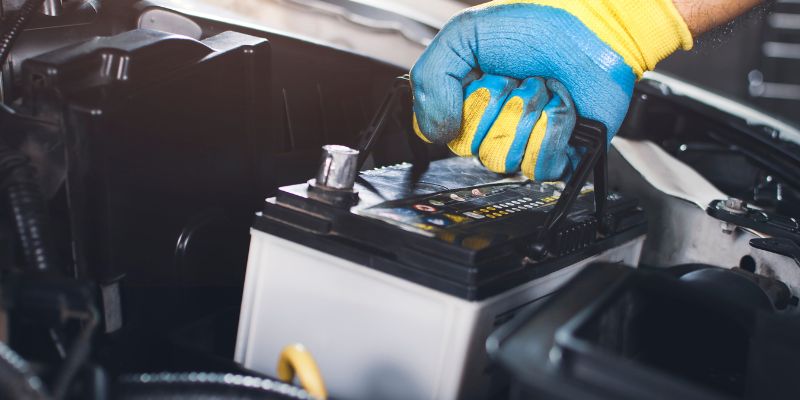
If your battery has a molded plastic carry handle, do not run the hold-down strap or clamp through it. A carry handle is rated to lift and carry the battery for a few seconds during installation, not to anchor it against months of constant road vibration. A proper hold-down should always engage the battery’s base lip, side ledges, or a dedicated hold-down ridge molded into the case—never the handle. Clamping down on a handle can crack or tear it loose over time, which defeats the point of securing the battery in the first place.
Step 5: Reconnect the Battery Cables
With the battery secure, reconnect the cables starting with the positive (red) cable. Slide the clamp onto the positive post and tighten it with a wrench until it is firm, then connect the negative (black) cable the same way. A wobbly connection at either terminal can cause electrical gremlins that are hard to trace back to the real cause, so make sure both clamps are snug before moving on.
After connecting both cables, tug lightly on each one to confirm it is seated, then apply a thin layer of anti-corrosion spray or dielectric grease to the terminals. This slows corrosion significantly, especially in humid or coastal climates where salt air accelerates it.
Is It Safe to Bundle the Positive and Negative Cables Together?
No. It is tempting to zip-tie the positive and negative cables into one neat bundle, but route them with some separation, or through separate factory looms, whenever the engine bay layout allows it. If both cables are pressed together at a tight spot near a bracket or a sharp edge, ordinary vibration can wear through both cables’ insulation at the same point over time. When that happens, the two cables end up touching each other directly—a dead short across the whole battery, not just a wire touching bare metal. That kind of short can happen fast, without a fuse in the circuit to catch it, and it can generate enough heat to melt insulation or start a fire. If you have to route them close together for space reasons, wrap each cable in its own split-loom conduit first, so a single worn spot cannot expose both conductors at once.
Step 6: Test the Battery and Connections
Before closing the hood, test everything. Turn the key to the “on” position without starting the engine and check that the dashboard lights come on normally, then start the car. If it starts smoothly, the job is done. If it cranks slowly or does not start, double-check both cable connections and make sure the clamps are fully tight against the posts.
Watch for warning lights on the dash, especially a battery icon or check-engine light. Either one appearing right after this kind of work usually points back to a loose connection rather than a new, unrelated problem, so recheck the clamps before assuming something else is wrong.
Alternative Methods to Secure a Battery
Not every vehicle uses the same factory hold-down design. If yours is missing or damaged and a direct replacement is not available, universal battery straps or tie-down kits from auto parts stores are a reliable stand-in—they are adjustable and fit most common battery group sizes without drilling into the tray.
Heavy-duty automotive-rated Velcro straps can work as a short-term fix if a proper clamp is not available right away, but they are not a long-term solution and should be swapped for real hardware as soon as possible. Whatever you use, make sure it is actually rated for automotive underhood use—standard bungee cords, rope, or zip ties are not designed for sustained engine-bay heat and vibration, and can stretch, melt, or snap.
If the tray itself is damaged and cannot be replaced right away, shimming the battery with automotive-rated rubber pads can add stability as a temporary measure until a proper tray is installed.
Maintenance Tips to Keep Your Battery Secure
Once the battery is secure, a little regular maintenance keeps it that way:
- Check monthly: Pop the hood and give the battery a firm push to confirm it is still snug in the tray.
- Clean terminals regularly: Every 3-6 months, clean the terminals to prevent corrosion buildup.
- Inspect the hold-down: Look for loose bolts or rust whenever you check the oil.
- Drive regularly: A battery can loosen if a car sits parked for weeks, since normal driving vibration also helps keep hardware snug over time.
- Use anti-corrosion products: A quick spray on the terminals every few months keeps the connections clean.
Keeping a small socket wrench set in the car makes it easy to snug up a hold-down bolt on the road if a rough patch of highway ever shakes something loose.
Common Mistakes to Avoid
Do not overtighten the hold-down bolts—it is one of the most common ways a battery case or tray ends up cracked. Do not skip cleaning the terminals either, since corrosion can build up quietly and cause starting issues weeks later.
Always disconnect the negative cable first and reconnect it last. This order prevents accidental sparks that could damage sensitive onboard electronics or, in rare cases, cause a small fire. And never rely on makeshift hold-downs like duct tape—it cannot handle the heat and vibration of the engine bay over time, and it will fail exactly when you need it not to.
Why It’s Worth the Effort
Securing a car battery might seem like a minor task, but it prevents a real chain of problems. A stable battery means fewer electrical gremlins, longer battery life, and one less thing to worry about on a road trip. It is a quick job—usually under 30 minutes start to finish—but it heads off headaches like a dead battery, damaged terminals, or corroded wiring down the road.
It is also a job that does not require a mechanic. With a basic socket wrench, a wire brush, and about half an hour, most drivers can handle checking, cleaning, and re-securing a battery themselves and save the cost of a shop visit.
Conclusion
Securing a car battery is one of those simple fixes that makes a real difference. From checking the battery’s condition to tightening the hold-down and protecting the terminals, each step is straightforward and worth doing right the first time. Grab your tools, set aside half an hour, and give the battery the attention it deserves—a battery that cannot move is a battery that lasts longer and causes fewer problems.
FAQs
What is used to secure a car battery and extend its life?
A battery hold-down bracket, clamp, or strap is what secures a car battery and extends its life—not bungee cords, terminal insulators, or a block of wood. The hold-down keeps the battery from vibrating against its tray, which prevents case cracks, terminal damage, and premature failure.
Why does my car battery keep getting loose?
Vibration from driving or a worn-out hold-down clamp are the usual causes. Check the clamp or strap regularly and tighten it as needed.
Can a loose battery damage my car?
Yes. A loose battery can damage the terminals, cause electrical issues, or short-circuit against nearby metal. Securing it properly prevents all three.
How tight should the battery hold-down be?
Snug, but not crushing. The battery should not rock or shift when pushed, but the bolts should not be so tight that they risk cracking the case or the tray.
Do I need to disconnect the battery to secure it?
Not always, but it is safer to disconnect the cables first, especially if you are also cleaning or adjusting the terminals while the hold-down is off.
Can I use household tools to secure my battery?
A basic wrench or screwdriver usually works, as long as it fits the bolt size correctly and does not strip the head.
Is it OK to bundle the positive and negative battery cables together?
No. Bundling them together increases the risk that vibration wears through both cables’ insulation at the same spot, which can cause a direct short between the two. Route them with some separation, or in separate looms, whenever possible.
How often should I check my battery’s hold-down?
About once a month, or whenever you check your oil. It only takes a few seconds and catches loosening hardware early.
Products related to this article
Sponsored / affiliate links. As an Amazon Associate I earn from qualifying purchases. I may earn additional commission from eligible campaigns.