How to Tell If Your Car Speaker Is Blown: A Simple Guide for Everyone
I love cruising with music blasting. A few years ago, my car’s speakers started sounding weird, like a buzzing mess. I didn’t know if they were broken or just old. That’s when I learned how to tell if a car speaker is blown. This article will guide you through easy steps to check your speakers. I’ll share tips, tricks, and mistakes to avoid, so you can enjoy your tunes again. Whether you’re new to car audio or a pro, this is for you!
What Does a Blown Car Speaker Mean?
A blown speaker is one that’s damaged. It can’t play sound clearly anymore. This happens from too much power, old age, or physical damage. You might hear buzzing, no sound, or muffled music. Knowing this helps you fix the problem fast.
Why Should You Care About Blown Speakers?
Blown speakers ruin your music. They make driving less fun. Fixing them can save money compared to buying new ones. Plus, clear sound makes every trip better. Let’s learn how to check if your car speaker is blown.
Signs Your Car Speaker Might Be Blown
Listen closely to your speakers. Here are common signs they’re blown:
- Buzzing or rattling sounds: The speaker shakes or crackles.
- Muffled music: Songs sound dull or unclear.
- No sound at all: The speaker is silent.
- Missing bass or treble: Low or high notes don’t play.
I once played my favorite song and heard only crackles. That was my first clue.
Step-by-Step Guide to Check Your Car Speaker
You don’t need fancy tools to check your speakers. Follow these easy steps to tell if your car speaker is blown. I’ll keep it simple, like explaining to a kid.
Step 1: Listen Carefully to the Sound
Park your car in a quiet spot. Turn on the radio without starting the engine. Play a song you know well. Listen for buzzing, crackling, or muffled sound. If the music sounds off, your speaker might be blown. Try different songs to be sure.
Step 2: Adjust Your Audio Settings
Check your car’s audio settings. Someone might have messed with the balance or fade controls. These settings move sound between left, right, front, or back speakers. Set them to the middle (12 o’clock position). This ensures all speakers get equal sound. If one still sounds bad, it’s likely blown.
Step 3: Isolate Each Speaker
Use the fade and balance controls to focus sound on one speaker. For example, move sound to the front left speaker. Play music and listen. If it’s silent or buzzes, that speaker might be the problem. Repeat for each speaker. This helped me find my bad speaker fast.
Step 4: Feel for Vibrations
Turn up the volume a bit. Gently touch the speaker grille. A working speaker vibrates as it plays. If you feel nothing, the speaker might not be getting power or is blown. This works best for bigger speakers, like woofers. I tried this and found one speaker was dead.
Step 5: Use a Multimeter (Optional)
A multimeter tests if the speaker works electrically. Set it to ohms (resistance). Touch the probes to the speaker’s terminals. A reading of 1-4 ohms means it’s okay. Infinite ohms means it’s blown. If you don’t have a multimeter, skip this step. It’s a bit advanced but super helpful.
Step 6: Check the Wiring
Loose wires can mimic a blown speaker. Look at the speaker’s connections behind the door panel or dashboard. Make sure wires are secure. I once found a loose wire that fixed my sound without replacing anything. Be careful not to break anything while checking.
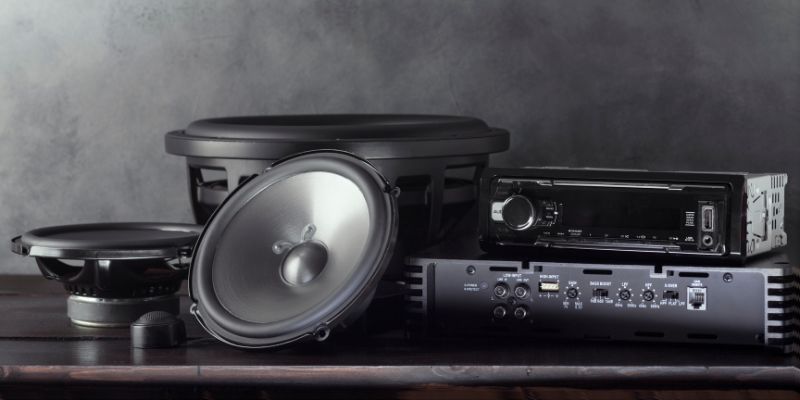
Tools You Need to Check Your Speakers
You don’t need much to diagnose a blown speaker. Here’s a simple list:
- Screwdriver: To remove speaker grilles or panels.
- Multimeter (optional): To test electrical resistance.
- A familiar song: To hear sound issues clearly.
These tools are cheap and easy to find. A basic multimeter costs about $10 at stores like Harbor Freight.
Visual Ideas for Better Understanding
Imagine these visuals to help you:
- A diagram showing a car’s speaker layout (front, rear, left, right).
- A picture of a multimeter testing a speaker’s terminals.
- A simple chart of good vs. bad speaker sounds (buzzing, clear, silent).
These would make the steps even clearer.
Common Mistakes to Avoid
Don’t make these errors when checking your speakers:
- Cranking the volume too high: This can damage good speakers.
- Ignoring wiring issues: Loose wires can trick you into thinking a speaker is blown.
- Skipping the audio settings check: Wrong settings can mimic a blown speaker.
I once blasted my radio too loud and made things worse. Be gentle!
Comparing Blown vs. Working Speakers
This table shows the differences between blown and working speakers:
| Feature | Working Speaker | Blown Speaker |
|---|---|---|
| Sound Quality | Clear, full range | Buzzing, muffled, or silent |
| Vibration | Vibrates when playing | No vibration or weak |
| Multimeter Reading | 1-4 ohms | Infinite ohms |
Table 1: Blown vs. Working Speaker Comparison
Benefits of Checking Your Speakers
Checking your speakers saves money. You might fix a loose wire instead of buying new speakers. It also keeps your music sounding great. Plus, you’ll feel proud solving the problem yourself. I saved $100 by finding a loose wire once!
Drawbacks of Ignoring Blown Speakers
Ignoring a blown speaker can hurt your car’s audio system. It might strain the amplifier, causing more damage. Your music will sound bad, and driving won’t be as fun. Fix it early to avoid bigger problems.
Other Ways to Test Your Speakers
If the steps above don’t work, try these:
- Swap speakers: Test a suspect speaker in another car slot. If it’s still bad, it’s blown.
- Use a 9-volt battery: Connect speaker wires to a battery briefly. A working speaker pops or moves. A blown one doesn’t. Be careful—this isn’t for beginners.
- Visit a pro: Take your car to a shop like Best Buy for expert help.
These methods helped me confirm my speaker was toast.
Cost-Saving Tips for Fixing Speakers
Fixing speakers doesn’t have to be expensive. Here are my tips:
- Check wires before replacing speakers to save money.
- Buy used speakers from trusted sellers like Crutchfield.
- Watch YouTube tutorials for DIY repairs to avoid shop fees.
I saved $50 by fixing a speaker myself with a $5 wire.
Costs of Replacing vs. Repairing Speakers
This table compares replacing and repairing speakers:
| Option | Cost | Time | Difficulty |
|---|---|---|---|
| Repair (DIY) | $5-$20 (wires, tools) | 1-2 hours | Medium |
| Replace (DIY) | $30-$100 per speaker | 2-4 hours | Medium |
| Professional Fix | $50-$200 | 1-2 days | Easy |
Table 2: Repair vs. Replace Cost Comparison
Personal Insights from My Experience
I’ve dealt with blown speakers a few times. Once, I thought my whole system was broken, but it was just one bad speaker. Testing each one saved me from buying a new system. Always start with simple checks like settings and wires. It’s easier than you think, and you’ll learn a lot.
Safety Advice for Checking Speakers
Be safe when checking your speakers:
- Turn off the car before touching wires to avoid shocks.
- Don’t force speaker grilles off; use a screwdriver gently.
- Avoid high volumes during tests to protect your ears.
Safety first makes the process worry-free.
When to Replace Your Speakers
If your speaker is blown, decide whether to repair or replace it. Minor damage, like a loose wire, can be fixed. Major damage, like a melted voice coil, means replacement. I replaced my front speakers for $60, and the sound was amazing again. Check Rockford Fosgate for quality replacements.
Speaker Replacement Options
This table shows speaker replacement choices:
| Type | Cost | Sound Quality | Durability |
|---|---|---|---|
| OEM (Original) | $30-$80 | Good | Medium |
| Aftermarket | $50-$150 | Great | High |
| Used | $20-$50 | Varies | Low |
Table 3: Speaker Replacement Options
Conclusion
Checking if your car speaker is blown is easy with the right steps. Listen for bad sounds, check settings, and feel for vibrations. Use a multimeter if you have one. Fixing or replacing speakers can save money and make your drives fun again. Try testing your speakers this weekend. Share your results with friends or ask a pro for help. Keep your music loud and clear!
Frequently Asked Questions
How do I know if my car speaker is blown?
Listen for buzzing, crackling, or no sound. If music sounds muffled or lacks bass, your speaker might be blown. Check settings and wires first. Use a multimeter for a precise test. A blown speaker often reads infinite ohms.
Can a blown speaker be fixed?
Sometimes, yes. Loose wires or minor damage can be repaired with tools like a screwdriver. Major damage, like a broken voice coil, means replacement. DIY fixes cost $5-$20, but pros charge $50-$200. Check before replacing.
What causes a car speaker to blow?
Too much power, old age, or physical damage can blow a speaker. Playing bass-heavy music too loud is a common cause. Mismatched amplifiers also hurt speakers. Always match your amp and speakers properly.
How much does it cost to replace a car speaker?
Replacing a speaker costs $30-$150, depending on the type. OEM speakers are cheaper but basic. Aftermarket ones sound better but cost more. DIY saves money, while pros charge $50-$200 for installation.
Can I test a speaker without tools?
Yes! Play a song and listen for buzzing or silence. Use your car’s fade and balance controls to isolate each speaker. Feel for vibrations on the speaker grille. These simple checks work without fancy equipment.
Is it worth repairing a blown speaker?
It depends. Minor fixes like wiring are cheap and easy ($5-$20). If the voice coil is melted, replacement is better. Compare costs and effort. I fixed a speaker for $10 once, but sometimes new ones are worth it.
How do I prevent blowing my car speakers?
Keep volume at safe levels, especially with bass-heavy music. Match your amplifier to your speakers’ power rating. Check settings to avoid distortion. Regular checks catch issues early, saving your speakers.