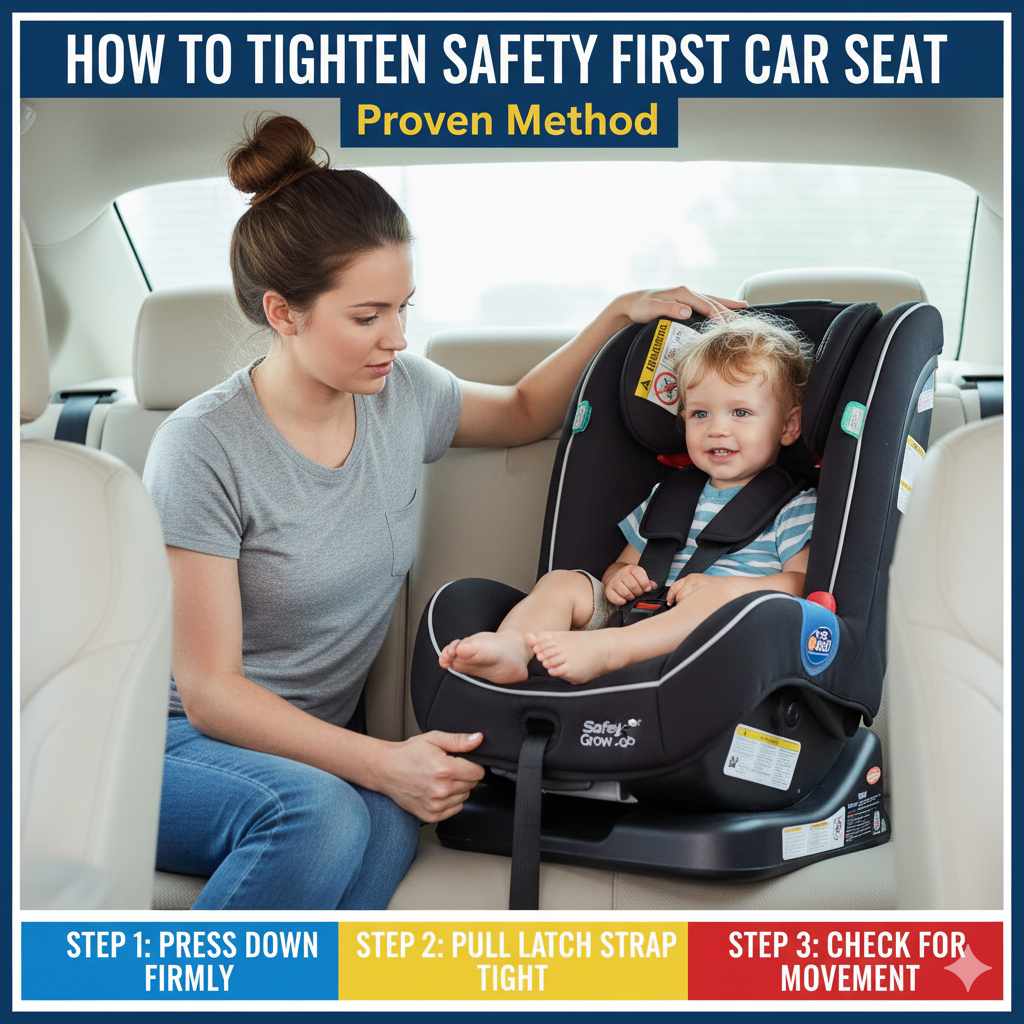
How To Tighten Safety First Car Seat: Proven Method
To tighten your Safety First car seat, ensure the harness straps are snug against your child’s shoulders, with no slack. The chest clip should be at armpit level. Always use the vehicle’s seat belt or LATCH system correctly, and double-check for any looseness, ensuring a firm, secure installation every time.
Hey there, fellow drivers! Md Meraj here, your go-to guide for making car stuff simple and safe. We all want our little ones to be as protected as possible when they’re in the car. That’s why knowing how to properly install and tighten your car seat is super important. Sometimes, car seat instructions can seem a bit confusing, and that’s perfectly normal! Don’t worry, I’m here to break it down for you. In this guide, we’ll walk through a proven method to make sure your Safety First car seat is tightly and safely secured. You’ll feel more confident knowing your precious cargo is snug and secure for every journey.
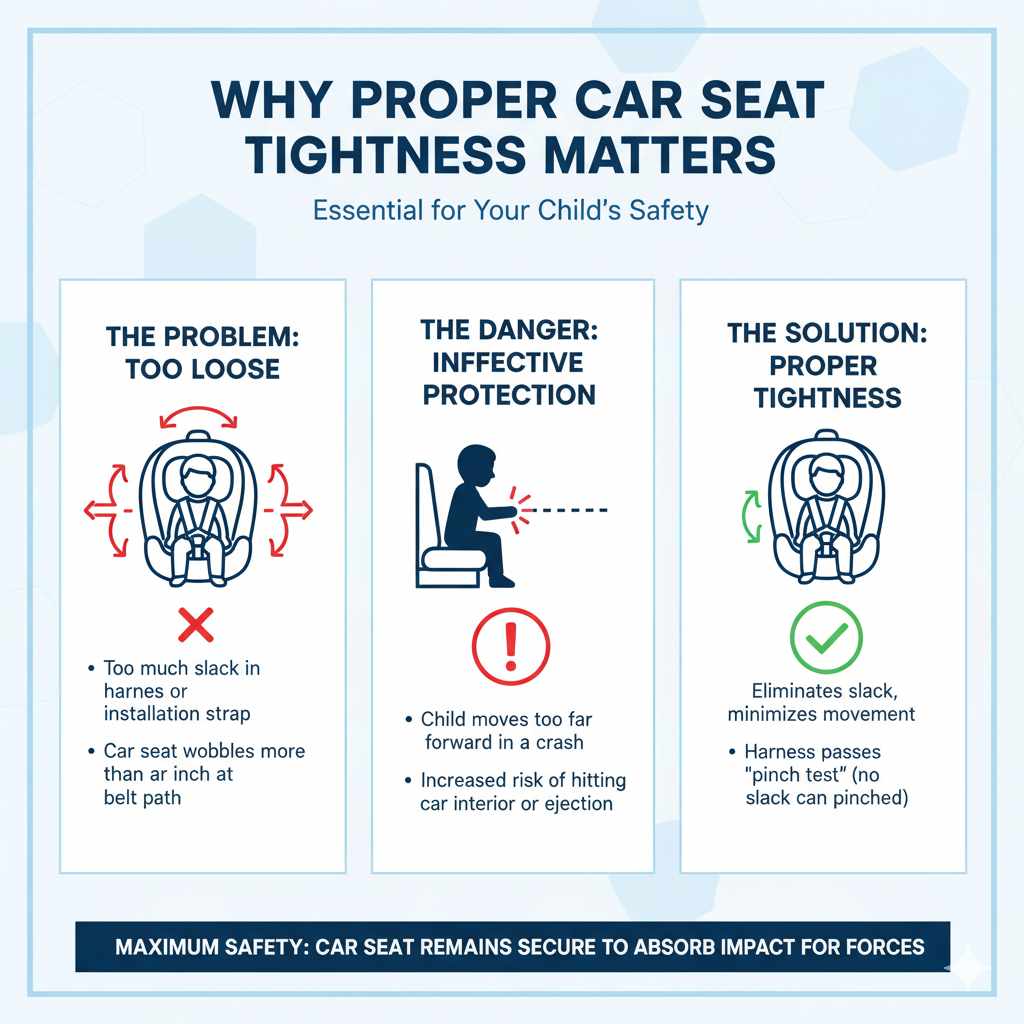
Why Proper Car Seat Tightness Matters
Car seats are a lifesaver for children, but only if they’re used correctly. A car seat that isn’t tight enough can have too much give during a sudden stop or crash. This extra movement means your child could move too far forward, making the seat less effective at protecting them. Think of it like a seatbelt for adults – if it’s loose, it doesn’t do its job as well. The goal is to minimize any slack so that the car seat can do its best to absorb impact and keep your child safe.
One common issue is a car seat that “wobbles” from side to side more than an inch when you check it at the belt path. This tells us there’s too much give, and it needs to be tightened. Similarly, a harness that’s too loose can allow a child to slip out or not be positioned correctly within the protective shell of the seat during an impact.
This guide will focus specifically on tightening the harness straps and ensuring the overall car seat installation is secure. We’ll cover the common features of Safety First car seats and give you clear, actionable steps to achieve that perfect, safe fit. Let’s get started and give you that peace of mind!
Understanding Your Safety First Car Seat
Safety First is a brand known for offering accessible and reliable car seats. While models can vary, most Safety First car seats share common components and tightening mechanisms. Knowing these parts will help you understand the process better:
- Harness Straps: These are the straps that go over your child’s shoulders and buckle between their legs. They are the primary way to secure your child in the seat.
- Chest Clip (or Harness Buckle): This clip fastens the two shoulder straps together over your child’s chest.
- Harness Adjustment System: This is what allows you to loosen or tighten the harness straps. It might be a front-pull adjuster, or it might require you to re-thread the straps through different slots in the seat back (depending on the model and whether it’s a no-rethread harness).
- Seat Belt Lock-Off Clip or Built-in Lockers: If you’re using the vehicle’s seat belt to install the seat, this feature helps keep the belt tight.
- LATCH Connectors: These are typically straps with metal hooks that attach to the LATCH anchors in your vehicle.
It’s always a good idea to have your specific Safety First car seat manual handy. You can usually find digital copies on the Graco Children’s Products website, as Graco is the parent company of Safety First and often shares resources.
Step-by-Step: How to Tighten the Harness Straps on Your Safety First Car Seat
This is the most crucial part for your child’s immediate safety within the seat itself. A properly tightened harness ensures your child is held securely in the best position during a crash.
Step 1: Prepare the Seat and Harness
Begin by placing the car seat on your vehicle’s seat. If you’re installing it forward-facing, make sure the seat is reclined according to your manual’s instructions. If it’s rear-facing, ensure it’s at the correct recline angle for an infant or baby.
Before you put your child in, loosen the harness straps completely. Most Safety First car seats have a harness release button or slot at the front of the seat. You’ll typically press this button (often a metal piece under the cover) and pull the harness straps outward to create plenty of slack. If your seat has a no-rethread harness, you’ll usually find adjustment points on the back of the seat itself to loosen the straps.
Step 2: Position Your Child Correctly
Have your child sit fully in the car seat, ensuring their back is flat against the seat’s back. For rear-facing, their legs will naturally bend at the knees. For forward-facing, they should be sitting upright.
Step 3: Adjust the Harness Height
The height of the harness straps is critical. Safety rules depend on the direction the seat is facing:
- For Rear-Facing Seats: The harness straps should come FROM the slots that are at or slightly below your child’s shoulders.
- For Forward-Facing Seats: The harness straps should come FROM the slots that are at or slightly above your child’s shoulders.
If your harness isn’t at the right height, you may need to re-thread it. Consult your manual for how to do this. Some newer Safety First seats have a “no-rethread” feature where you can adjust the strap height by simply moving a lever on the back of the seat.
Step 4: Buckle the Harness
Bring the two harness straps over your child’s shoulders and buckle them into the buckle mechanism at the front between their legs. Ensure you hear a click for each side. Then, attach the chest clip.
Step 5: Tighten the Harness
This is the core of “tightening.” Locate the harness adjuster strap, usually a single strap dangling from the front of the seat between your child’s legs. Pull this strap firmly and smoothly until the harness is snug.
How to tell if it’s snug enough:
- You should NOT be able to pinch any of the harness webbing between your thumb and forefinger. If you can pinch slack, it’s too loose.
- The straps should lie flat on your child’s body, without twisting.
Give the straps a gentle tug to ensure they don’t loosen up. The goal is a snug fit that prevents the child from slouching or being able to slip out.
Step 6: Position the Chest Clip
Slide the chest clip up the harness straps until it is positioned directly over your child’s armpits. This is a critical safety feature. It keeps the shoulder straps in the correct position. If the chest clip is too low (near the belly), the straps can slide off the shoulders in a crash. If it’s too high (near the neck), it can cause discomfort or be a choking hazard.
Quick Test for the Chest Clip: Gently push on your child’s chest. If they can’t move forward more than an inch, the harness is likely snug enough.
Ensuring a Tight Installation of the Car Seat Itself
Once your child is securely harnessed, the car seat needs to be tightly installed in your vehicle. This means the seat itself shouldn’t move excessively.
Method 1: Using the Vehicle’s Seat Belt (Belt-in-Seat Method)
Most Safety First car seats can be installed using your vehicle’s seat belt. This method is often preferred if your vehicle’s LATCH system is difficult to access or has weight limitations.
Step 1: Route the Seat Belt
Check your car seat manual and your vehicle manual for the correct belt path. For rear-facing, the belt path is usually in the body of the seat, often indicated by blue labels. For forward-facing, it’s typically in the back of the seat, with red labels.
Lay the seat belt across the car seat, following the indicated path. Buckle the seat belt click.
Step 2: Tighten the Seat Belt
Close the seat belt buckle, but don’t tuck the loose end back into the retractor yet. Use your knee or body weight to push the car seat down into the vehicle seat cushion. While applying this firm pressure, pull the shoulder belt portion of your vehicle’s seat belt to remove all slack.
Locking the Seat Belt: This is crucial for maintaining tightness. Many vehicles have locking retractors on the shoulder belts that will lock when pulled out fully. Others require you to use a locking clip (often provided with the car seat or available separately from reputable sources like Safe Kids Worldwide). Your car seat might also have a built-in lock-off device. Consult your car seat manual for specific instructions on how to engage its locking mechanism. If using a built-in lock-off, thread the seat belt as instructed and then engage the lock-off.
Step 3: Check for Looseness
Once you believe it’s tight, release the pressure you were applying. Grab the car seat at the belt path where it’s secured. Try to move the car seat from side to side and front to back. It should not move more than one inch in any direction. Re-tighten if necessary.
Method 2: Using the LATCH System
If your vehicle is equipped with lower anchors and tethers for children (LATCH), you can use this system. It often makes installation simpler, but be aware of weight limits. Both the child and the car seat have weight limits for LATCH use. Your car seat manual will specify these, and your vehicle manual will detail how to find your LATCH anchors.
Step 1: Locate and Attach LATCH Connectors
Find the lower anchor bars in your vehicle’s back seat (usually found in the crease between the seat back and cushion). Attach the LATCH connectors on your Safety First car seat to these anchors. Most Safety First seats have push-on connectors, which are easier to use than older hook-style connectors. Ensure they securely click or hook onto the anchors.
If your car seat and vehicle allow, also attach the top tether strap to the designated tether anchor point in your vehicle (this is especially important for forward-facing seats). Most Safety First forward-facing seats will have a top tether strap.
Step 2: Tighten the LATCH Strap
With the LATCH connectors attached, push down firmly on the car seat with your body weight, pushing it down into the vehicle’s seat. While maintaining pressure, pull the LATCH adjustment strap to remove all slack from the LATCH system.
Step 3: Check for Looseness
Release the pressure. Grab the car seat at the LATCH belt path (where the lower anchors connect). Try to move the seat from side to side and front to back. It should not move more than one inch in any direction. If it does, repeat the tightening process, ensuring you’re applying enough downward pressure while pulling the strap taut.
Top Tether Importance for Forward-Facing: If using LATCH for a forward-facing seat, always use the top tether. This significantly reduces forward head movement in a crash. Tighten the top tether strap until it is snug.
Tightening with Different Safety First Seat Types
Safety First offers various types of car seats, from infant seats to convertible and booster seats. The principles of tightening remain the same, but the specific mechanisms might differ slightly.
Infant Car Seats: Typically rear-facing only. The focus is on achieving the correct recline angle and a snug fit using the vehicle seat belt or LATCH. The harness tightening is as described above, with straps coming from below the child’s shoulders.
Convertible Car Seats: Can be used rear-facing and forward-facing. When converting, remember to adjust the harness height (straps from below shoulders for rear-facing, from above for forward-facing) and re-route the vehicle seat belt or LATCH strap to the correct belt path for the direction of travel. The tightening procedure for both the harness and the seat installation remains the same.
Booster Seats: While booster seats primarily use the vehicle’s seat belt to restrain the child, there are still elements of “tightening” to consider:
- Seat Belt Fit: Ensure the lap belt lies snugly across the upper thighs and hips (not the stomach). The shoulder belt should go across the middle of the chest and shoulder, not cutting into the neck or sliding off the shoulder. The vehicle seat belt should not be twisted.
- LATCH (if applicable): Some high-back boosters have LATCH connectors. These are NOT for restraining the child but for securing the booster seat when the child is not in it, preventing it from becoming a projectile. Tighten these LATCH straps so the booster doesn’t move more than an inch when the child is not seated.
Common Mistakes to Avoid
Even with the best intentions, some common mistakes can compromise safety. Be mindful of these:
- Not checking the harness tightness: The “pinch test” for the harness is reliable. If you can pinch webbing, it’s too loose.
- Incorrect chest clip position: Always armpit level.
- Loose installation: The one-inch rule for seat movement is a firm guideline.
- Twisted straps: Twisted harness straps or seat belt webbing reduce their effectiveness and can create sharp edges.
- Using the wrong belt path: Always refer to your manual for rear-facing vs. forward-facing paths.
- Over-tightening: While snugness is key, excessively straining the harness can damage the webbing or stitching. The aim is snug, not stretched to its absolute limit in a way that looks strained.
- Forgetting the top tether (forward-facing): This is a common and dangerous omission for forward-facing seats installed with either LATCH or the vehicle seat belt.
When to Seek Professional Help
Car seat installation can be tricky! If you’ve followed these steps and are still unsure, or if you’re experiencing difficulties specific to your vehicle or car seat model, don’t hesitate to seek help:
- Certified Child Passenger Safety Technicians (CPSTs): These are amazing resources! You can find a local technician through resources like Safe Kids Worldwide. They can check your installation or teach you how to do it correctly. This is often a free service.
- Your Car Seat Manufacturer: Customer service lines for Safety First/Graco can provide specific advice for your model.
- Vehicle Owner’s Manual: It often contains specific instructions for car seat installation in your particular car model.

Frequently Asked Questions (FAQ)
Q1: How tight should the car seat harness be?
A1: The harness should be snug enough that you cannot pinch any webbing between your thumb and forefinger. It should lie flat against your child’s body without twisting, and the chest clip should be at armpit level.
Q2: My Safety First car seat moves more than an inch when I check it. What should I do?
A2: If your car seat moves more than one inch at the belt path (where it’s secured by the seat belt or LATCH), it’s too loose. You need to re-tighten it. Make sure you are pushing down firmly on the seat with your weight while pulling the harness or LATCH strap as tight as possible. Check your vehicle’s seat belt locking mechanism or the car seat’s lock-off device.
Q3: When should I use the top tether?
A3: You should always use the top tether for forward-facing car seats, regardless of whether you are using the vehicle’s seat belt or the LATCH system for installation. It significantly improves head protection in a crash.
Q4: How do I know if my child has outgrown their car seat?
A4: Children outgrow car seats in one of three ways: by weight limit, by height limit, or when the top of their head is within an inch of the top of the car seat shell (for rear-facing seats) or when their eyes are above the back of the seat (for forward-facing seats). Always check your car seat manual for specific limits.