How to Transport a Bike in a Car (No Rack Needed)
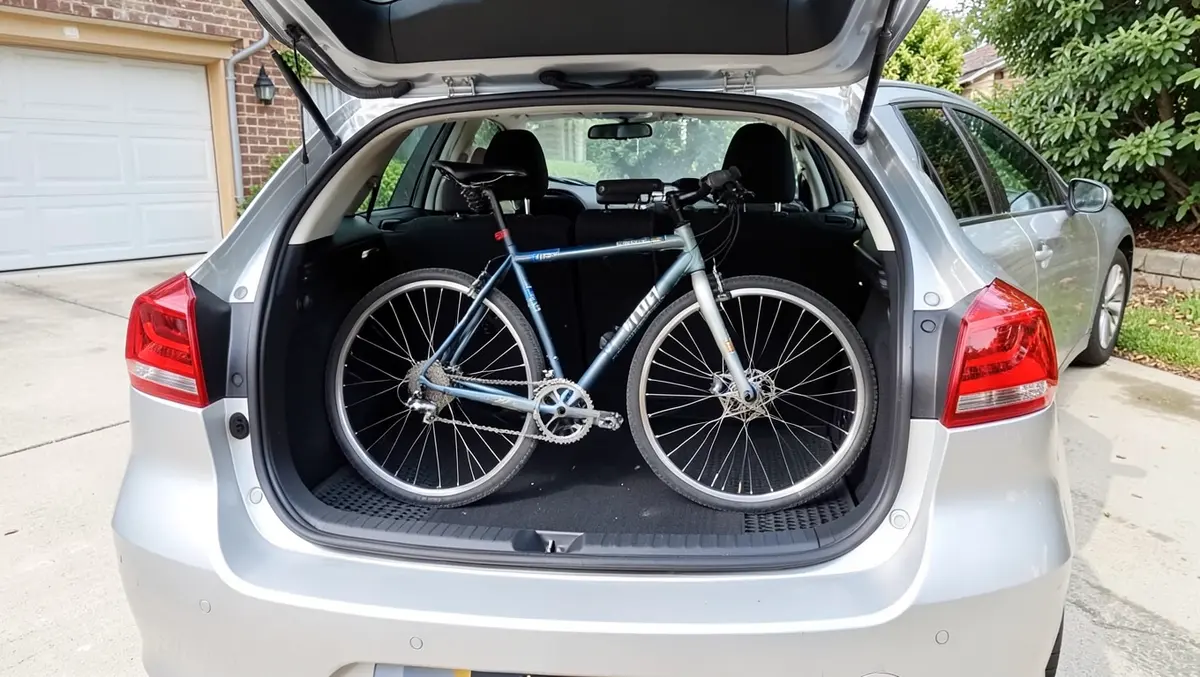
The cheapest way to transport a bike in a car is to fold the rear seats flat, remove the front wheel, lay down a blanket or cargo mat, and strap the bike in place with bungee cords or rope. No rack, no hitch, and no roof rails are required for most hatchbacks, SUVs, and even many sedans. If your car is too small for that or you need to carry more than one bike, a trunk-mounted, hitch-mounted, or roof-mounted rack is the next step up.
Why You’d Want to Transport a Bike
BEST FOR PROTECTING YOUR CARGO AREA
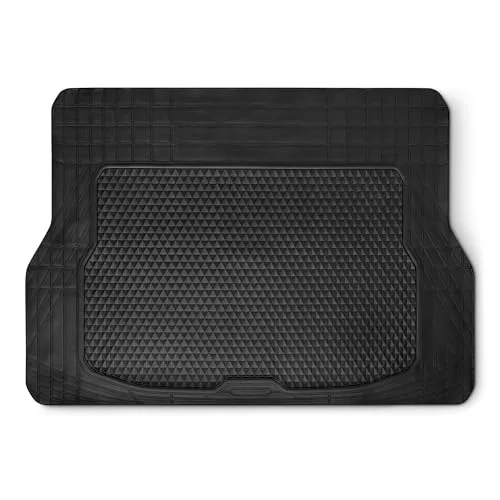 |
Amazon Basics Cargo Liner Floor Mat – $23.96 A trimmable rubber mat like this is the cheapest way to keep chain grease, mud, and tire rubber off your trunk carpet when you load a bike inside without a rack.
|
Driving a bike to a trailhead, a group ride, a race, or a repair shop saves you from riding there first and arriving tired. It also matters if you are moving, selling a bike, or picking one up from someone else’s house. The only real challenge is fitting the bike in without damaging the frame, the paint, or your car’s interior.
Grease from the chain and drivetrain, dirt from the tires, and a metal frame rubbing against upholstery are the three most common causes of damage. A few minutes of prep and the right loading method prevent almost all of it.
Know Your Car and Bike
Start by comparing your bike’s dimensions to your car’s cargo space. Most adult bikes are roughly 68 to 70 inches long with both wheels on, and the handlebars typically sit around 38 to 40 inches off the ground. Hatchbacks and SUVs usually have enough length and height once the rear seats fold flat; sedans can still work, but the trunk opening and the angle between the trunk and the back seat make it tighter.
Open the trunk or hatch and fold the seats down before you commit to a method. That single check tells you whether the bike will fit whole, whether you need to remove the front wheel, or whether an external rack is the more realistic option.
Bike type matters too. Road bikes are narrow and light and usually go in with minimal fuss. Mountain bikes, cruisers, and e-bikes are bulkier and, in the case of e-bikes, considerably heavier — often 40 to 70 lbs once you include the motor and battery, which changes how you lift and secure it.
Getting Your Bike Ready for Transport
Prepping the bike takes about 10 to 15 minutes and prevents most of the scratches, grease marks, and lost parts that happen when a bike goes in unprepared.
- Clean it up: wipe down the frame, tires, and chain with a damp cloth so dirt and chain grease do not transfer to your seats or carpet.
- Remove accessories: take off water bottles, bike computers, lights, and saddlebags so they do not fall off or get lost during loading.
- Take off the front wheel: most bikes use a quick-release skewer or a 15mm thru-axle, so this is usually a 30-second job that makes the bike noticeably narrower.
- Turn the handlebar and align the pedals: rotate the handlebar as close to parallel with the frame as your stem allows, and turn the crank so the pedals line up vertically instead of sticking out sideways. This alone can shave several inches off the width the bike needs.
- Lower the saddle: dropping the seat post with an Allen wrench reduces overall height, which matters most for low-roof hatchbacks.
- Protect the frame: wrap the frame and any contact points in an old towel, moving blanket, or foam pipe insulation to prevent scratches against seatbacks or door trim.
If you have never removed a wheel before, practice once at home in good light rather than for the first time in a parking lot — a rushed removal is the most common way to bend a rim or scratch a hub.
Transporting a Bike Inside Your Car
Loading the bike inside the car is the cheapest option and works for most hatchbacks, SUVs, and minivans, plus many sedans once the front wheel is off.
- Fold down the rear seats: check your owner’s manual for the release levers so the seatbacks lie fully flat and create one continuous cargo area.
- Lay down protection: spread an old blanket, moving pad, or a trimmable cargo mat across the floor and seatbacks to catch dirt and stop chain grease from reaching the upholstery.
- Remove the front wheel: this is what makes most bikes narrow enough to fit through a hatch or trunk opening; strap the loose wheel to the frame with a bungee cord or set it beside the bike.
- Load the bike chain-side up: sliding it in diagonally with the drivetrain facing up, away from fabric, keeps grease off your seats. Loading the rear wheel in first often keeps the greasy drivetrain further from the door opening.
- Secure it: run a bungee cord or soft strap from the frame to a cargo hook, headrest post, or tie-down point so the bike cannot slide or tip during braking.
This works well for short trips and single bikes, and with careful angling, two bikes can often fit in a mid-size hatchback. Just double-check that the bike does not block your rearview mirror before you drive.
Using a Trunk-Mounted Bike Rack
If your car is too small to fit a bike inside, or you would rather keep the interior free, a trunk-mounted rack is the next step. These racks strap onto the trunk lid or rear hatch with adjustable straps and typically hold one to three bikes. Basic models start around $50 to $70.
- Pick a compatible rack: check the manufacturer’s fit list for your specific car body style before buying, since trunk-lid shape varies a lot between sedans, hatchbacks, and SUVs.
- Install it securely: follow the included manual and tighten every strap; a loose strap is the single most common cause of a rack shifting in transit.
- Load the bike: hang it on the rack’s arms by the frame, then secure it with the rack’s own straps plus a spare bungee cord for extra hold.
- Do a stability test: gently shake the loaded bike, then drive a short distance and check again before getting on the highway.
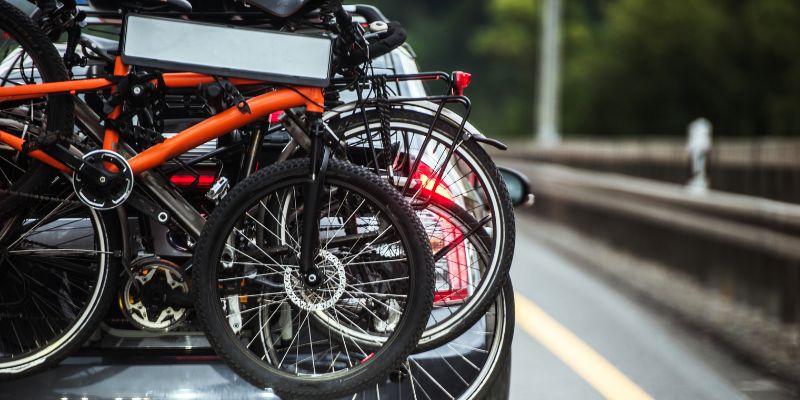
Trunk racks fold flat for storage when not in use, which is their biggest advantage. The downside is that they can block your license plate or taillights, so check your state’s rules on plate visibility before a long trip, and remove the rack when it is not in use to avoid scratching the paint underneath the straps.
Trying a Hitch-Mounted Bike Rack
Hitch-mounted racks cost more but are far sturdier than trunk racks, and they are the standard choice for e-bikes or carrying more than one bike regularly. They require a hitch receiver on your car, which typically costs $100 to $200 to have installed if your car does not already have one. See our full roundup of SUV bike racks if you are comparing models.
- Choose a rack type: platform racks (like those from Kuat, Thule, or Yakima) hold the bike by its wheels rather than the top tube, and they are easier to load than hanging-style racks, especially for heavy e-bikes.
- Attach the rack: slide the shank into the hitch receiver and lock it with the supplied pin so it cannot rattle loose.
- Load the bikes: set each bike on the platform and secure the wheels and frame with the built-in ratchet straps.
- Do a stability test: drive a short distance and check for wobble before heading onto the highway. A rack that feels loose at 10 mph will only get worse at 65 mph.
Hitch racks generally run $200 to $600 before installation, plus the hitch itself if your car needs one. They are bulky to store, so most owners keep them in a garage rather than the trunk. If you transport bikes often or carry an e-bike, the extra stability is worth the cost.
Considering a Roof-Mounted Bike Rack
Roof racks attach to roof rails or cross bars and hold the bike upright above the car. If your car does not already have roof rails, you will need to add crossbars first — see our guide on installing a roof rack for the full process.
- Get a rack that fits: confirm compatibility with both your car’s roof system and your bike’s frame or fork style before buying.
- Install it: secure the rack to the rails or crossbars and check that the locking mechanism is fully engaged before loading.
- Lift the bike: this is the hardest part physically, since you are lifting the full weight of the bike overhead; removing the front wheel first makes it noticeably lighter and easier to control.
- Secure it: clamp the frame or fork to the rack’s mount and add a strap for extra security.
Roof racks keep the trunk and cargo area completely free, which is their main advantage over trunk or hitch racks. The trade-offs are real, though: they are harder to load if you are not tall or strong, they reduce fuel economy at highway speed because of wind resistance, and the added height can clip low-clearance areas like parking garages or drive-thrus if you forget it is there.
Securing Your Bike Properly
No matter which method you use, a bike that shifts in transit can scratch your car’s paint or interior in seconds. A few habits prevent that:
- Use straps or cords: bungee cords, ratchet straps, or rope keep the bike from sliding, whether it is inside the car or on an external rack.
- Check for movement: shake the loaded bike before you pull out of the driveway.
- Protect contact surfaces: foam padding or a towel between the frame and anything it touches prevents both scratched paint and torn upholstery.
- Lock external racks: a cable lock or integrated rack lock deters theft any time the bike is riding outside the car, especially during rest stops.
A quick recheck after the first few miles catches anything that loosened up once the car started moving and vibrating.
Driving Safely with a Bike
A loaded bike changes how your car handles, especially with an external rack:
- Drive smoothly: avoid sudden stops and sharp turns, which put the most stress on straps and mounts.
- Mind your clearance: a roof-mounted bike adds height, so avoid low bridges, parking garages, and drive-thrus.
- Check periodically: glance in your mirrors, and stop after the first 10 to 15 minutes to confirm everything is still tight.
- Respect the rack’s speed rating: most racks specify a maximum speed, commonly around 70 mph; treat that as an upper limit, not a target.
A hard bump taken too fast is enough to shift even a well-strapped bike, so slow down over potholes and speed bumps more than you normally would.
Legal Stuff You Need to Know
Most US states have rules about visibility that apply once a bike or rack is mounted on the back of your car:
- License plate visibility: most states require the rear plate to stay visible, so use a rack with a plate-holder extension or temporarily relocate the plate.
- Taillight and brake-light visibility: your taillights and brake lights need to remain visible to traffic behind you; light-extender kits solve this for racks that block them.
- State-specific rules: exact requirements vary by state, so check your state DMV’s website before a long trip if you are using an external rack for the first time.
A quick call to your local DMV clears up any doubt and is a lot cheaper than a citation.
Costs of Transporting a Bike
Cost scales with how much convenience and capacity you need:
| Method | Estimated Cost | Notes |
|---|---|---|
| Inside the car | $0-$25 | Blankets, a cargo mat, and bungee cords are usually all you need |
| Trunk-mounted rack | $50-$200 | No hitch required, but check plate and taillight visibility |
| Hitch-mounted rack | $200-$600 | Add $100-$200 for hitch installation if your car does not have one |
| Roof-mounted rack | $150-$500 | Add roughly $100 for crossbars if your car has no roof rails |
Starting with the in-car method costs almost nothing, and it is common to upgrade to a rack once you are transporting bikes regularly enough that the convenience pays for itself.
Mistakes to Avoid
A handful of mistakes cause almost all bike-transport damage and headaches. Skipping the cleaning step lets mud and grit rub into your seats or carpet the moment the bike shifts even slightly. Failing to secure the bike is the next most common issue — an unstrapped bike can slide the full length of a trunk under hard braking.
Overloading a rack beyond its stated weight or bike-count limit puts real strain on the mount and the straps, and it is a common cause of rack failure on the highway. With roof racks specifically, forgetting the added height is a frequent way to clip a garage ceiling or a low parking structure. And leaving accessories like lights, computers, or bags on the bike is the easiest way to lose or break them during loading.
Picking the Best Method for You
The in-car method is the right call for occasional, short trips because it costs nothing and needs no installed hardware. A trunk rack suits longer or more frequent trips where you would rather keep the interior clean. Hitch racks are the best fit for heavy e-bikes or for regularly carrying more than one bike, especially on an SUV or truck. Roof racks make sense mainly when you need the trunk free for other cargo and do not mind lifting the bike overhead.
Think about how often you actually transport a bike before spending money on a rack. Starting with the free in-car method and upgrading only once you feel the need is a reasonable way to avoid buying more rack than you use.
The Freedom of Taking Your Bike Anywhere
Once you have a transport method that works for your car and bike, taking a bike to a trailhead, a race, or a friend’s neighborhood across town stops being a hassle and becomes routine.
Conclusion
Transporting a bike in a car comes down to three things: prep the bike, pick the method that fits your car, and secure everything before you drive. For most cars and most trips, folding the seats, removing the front wheel, and strapping the bike down with a protective mat underneath is enough — no rack required. If your car is too small or you are hauling more than one bike regularly, a trunk, hitch, or roof rack is the next logical step.
FAQs
Can I fit a bike in a small sedan?
Yes, in most cases. Removing the front wheel and folding down the rear seats is usually enough to fit a standard adult bike in a compact sedan; a blanket or cargo mat underneath protects the seats from dirt and grease.
Do I need a bike rack to transport my bike?
No. Loading the bike directly inside the car works for most single-bike trips and costs nothing. Racks become worthwhile mainly for long trips, multiple bikes, or heavy e-bikes.
How much does a bike rack cost?
Trunk-mounted racks typically run $50 to $200. Hitch-mounted racks run $200 to $600, plus $100 to $200 for hitch installation if needed. Roof racks run $150 to $500, plus roughly $100 for crossbars if your car lacks roof rails.
Is it okay if my bike rack covers my license plate?
Not in most states. Most states require the rear plate to stay visible, so use a rack with a plate-holder extension or temporarily relocate the plate to stay compliant.
Can I transport a heavy e-bike in my car?
Yes, but a hitch-mounted platform rack is the more practical choice given an e-bike’s extra weight, often 40 to 70 lbs. Fitting one inside the car works too if you remove the battery to cut the weight and have enough cargo space.
Products related to this article
Sponsored / affiliate links. As an Amazon Associate I earn from qualifying purchases. I may earn additional commission from eligible campaigns.