How To Wash A Wrapped Car: Essential Guide
Washing a wrapped car is simple if you use the right techniques and products. Use a gentle soap, plenty of water, and soft materials to avoid damaging the vinyl wrap. Avoid abrasive cleaners, high-pressure washers, and direct sunlight for the best results.
Keeping your car looking its best is a priority for any owner, and a vinyl wrap can be a fantastic way to refresh its appearance or protect the original paint. But when it’s time for a wash, you might wonder if the process is different for a wrapped vehicle. The good news is, with a few key precautions, washing a wrapped car is quite straightforward.
Many car owners worry about damaging the delicate vinyl wrap during a wash. You might have heard that washing a wrapped car requires special, expensive products or complex techniques. This simply isn’t true for most situations! With this guide, you’ll learn how to safely and effectively clean your wrapped car, ensuring its vibrant look lasts for years to come.
We’ll walk you through everything, from the basic supplies you’ll need to the best washing and drying methods. You’ll gain the confidence to tackle this task yourself, saving money and keeping your car in showroom condition. So, let’s get your wrapped car sparkling clean!
Why Washing a Wrapped Car Matters
Just like the original paint on your car, the vinyl wrap needs regular cleaning to maintain its appearance and longevity. Dirt, grime, bird droppings, tree sap, and road salt can all accumulate on the wrap, dulling its finish and potentially causing damage if left untreated. Regular washing helps prevent these contaminants from bonding to the vinyl, making them easier to remove and reducing the risk of staining or etching.
A clean wrap not only looks better but also helps protect the underlying paintwork. Think of the wrap as a shield; keeping that shield clean ensures it can do its job effectively. Furthermore, proper washing habits prevent microscopic scratches and swirls that can build up over time, especially if abrasive cleaning methods are used.
Essential Supplies for Washing a Wrapped Car
Gathering the right tools is the first step to a successful wash. You don’t need a garage full of specialized items; most of what you need is likely already in your car care arsenal, with a few wrap-specific considerations.
What You’ll Need:
- Two buckets (one for soapy water, one for rinsing)
- pH-neutral car wash soap (specifically designed for automotive use)
- Wash mitts (made of microfiber or sheepskin)
- Microfiber drying towels (plush and highly absorbent)
- Hose with a spray nozzle (adjustable flow is helpful)
- Optional: Wheel cleaner (automotive-grade, safe for wraps)
- Optional: Soft-bristle brushes for wheels and tires
- Optional: Squeegee (with a soft rubber blade, used carefully)
Using the two-bucket method is highly recommended. One bucket contains your car wash soap solution, and the other contains clean rinse water for your wash mitt. This prevents you from reintroducing dirt and grit back onto the car’s surface, significantly reducing the chance of scratching the wrap.
Choosing the Right Soap
The type of soap you use is crucial. Always opt for a pH-neutral car wash soap. Harsh detergents, dish soaps, or all-purpose cleaners can strip the protective top layer of the vinyl wrap, leading to premature fading, cracking, or dullness. Look for products specifically labeled as safe for automotive finishes or car wraps.
Some manufacturers recommend specific products for their wraps. If you know the brand of your vinyl wrap, it’s worth checking their website or documentation for any special cleaning instructions or recommended products. Reputable brands often have detailed care guides available.
The Two-Bucket Washing Method: Step-by-Step
This is the gold standard for washing any vehicle, especially one with a delicate finish like a vinyl wrap. It’s a simple technique that makes a big difference in preventing scratches.
- Prepare Your Buckets: Fill one bucket with clean, cool water. Fill the second bucket with water according to your car wash soap’s instructions, creating a good lather.
- Rinse the Car: Start by thoroughly rinsing the entire car with your hose, working from the top down. This removes loose dirt and debris that could scratch the wrap during washing.
- Wash a Section: Dip your clean wash mitt into the soapy water bucket. Gently wash one section of the car at a time, using straight-line motions rather than circular ones.
- Rinse the Mitt: Before returning to the soap bucket, rinse your wash mitt thoroughly in the bucket of clean rinse water. This removes any dirt picked up from the car.
- Repeat the Process: Dip the clean mitt back into the soapy water and move to the next section of the car. Continue working from top to bottom.
- Rinse the Car Again: Once you’ve washed the entire vehicle, rinse it thoroughly from top to bottom to remove all soap residue. Ensure no suds are left behind, especially in crevices.
Always wash your car in the shade or on a cooler day. Washing in direct sunlight can cause the soap and water to dry too quickly on the surface, leaving water spots and potentially etching the vinyl. If you must wash in the sun, work in smaller sections and rinse them off immediately after washing.
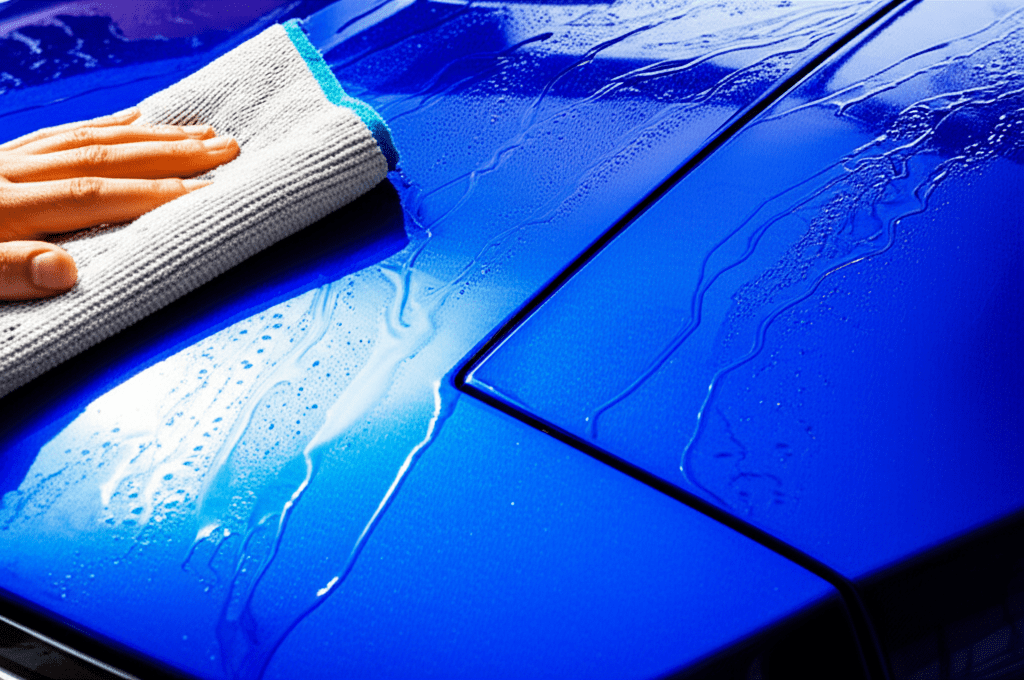
Drying Your Wrapped Car Safely
Drying is just as important as washing. Improper drying can lead to water spots and micro-scratches, detracting from your car’s pristine look. Microfiber towels are your best friends here.
- Use Plush Microfiber Towels: These towels are highly absorbent and soft, designed to lift water and dirt away from the surface without scratching.
- Blot or Gently Wipe: Lay a clean, dry microfiber towel onto the wet surface and gently blot the water. You can also use a light wiping motion, but avoid pressing too hard.
- Work Top to Bottom: Just like washing, start drying from the roof and work your way down.
- Use Multiple Towels: Have several drying towels ready. Once a towel becomes damp, switch to a dry one to ensure you’re effectively removing moisture.
- Consider an Air Blower: For stubborn water spots in tight areas (like around mirrors, door handles, or panel gaps), a dedicated car drying blower or even a powerful leaf blower can be very effective at blasting water away.
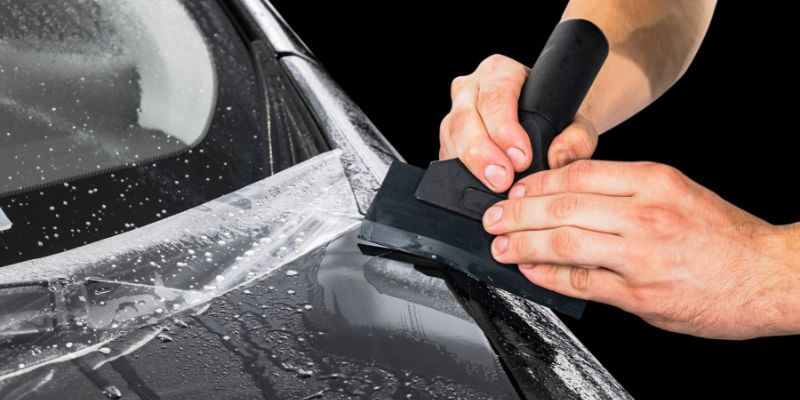
A squeegee can be used carefully for large, flat surfaces like the roof or doors, but ensure the blade is soft and clean. If you notice any grit on the squeegee, stop immediately and clean it. Some prefer to avoid squeegees altogether to prevent any risk of scratching.
Dealing with Stubborn Contaminants
Sometimes, regular washing isn’t enough. Bird droppings, tree sap, and bug splatter can bake onto a wrap if not removed promptly. Here’s how to tackle them.
Bug & Tar Removal
For fresh bug splatter or tar, a quick detailer spray and a microfiber towel can often do the trick. For tougher, dried-on messes:
- Saturate the area with a dedicated bug and tar remover specifically designed for automotive use.
- Let it dwell for the time recommended on the product label.
- Gently wipe the area with a clean microfiber towel.
- If residue remains, you might need a second application or a very gentle clay bar treatment (see below).
Bird Droppings & Tree Sap
These can be acidic and etch into the vinyl if left too long. The key is to soften them before attempting removal.
- For fresh messes, rinse immediately with water.
- If dried on, soak the area with warm water or a quick detailer spray.
- Gently try to lift the mess with a soft microfiber towel or a plastic razor blade (used with extreme caution and minimal pressure, at a very low angle).
- For persistent sap, a specialized vinyl-safe sap remover or isopropyl alcohol (diluted 50/50 with water) can be used test in an inconspicuous area first.
Clay Bar Treatment (Advanced)
If your wrap feels rough or has bonded contaminants that washing won’t remove, a clay bar treatment can restore smoothness. Crucially, only use a clay lubricant specifically designed for automotive clay bars and ensure it’s safe for vinyl wraps.
- Always use plenty of clay lubricant.
- Work in small sections.
- Gently glide the clay bar over the surface.
- If you drop the clay bar, discard it immediately as it will have picked up grit.
- Follow up with a thorough rinse and dry.
If you’re unsure about using a clay bar, it’s best to consult with professionals or watch detailed tutorials from reputable automotive detailers. A mistake here can cause more damage than the contaminants.
What to AVOID When Washing a Wrapped Car
Just as important as knowing what to do is knowing what not to do. Here are common mistakes that can damage your vinyl wrap:
- High-Pressure Washers: While useful for many things, high-pressure washers can lift the edges of the vinyl wrap, especially in areas where it’s been stretched or adhered around curves, leading to peeling. Keep the nozzle at least 1-2 feet away from the surface, if you must use one.
- Abrasive Cleaners & Tools: Avoid scrub brushes, steel wool, abrasive pads, and gritty cleaners. These will scratch and dull the wrap’s finish.
- Washing in Direct Sunlight: As mentioned, this causes rapid drying, leading to water spots and potential etching.
- Strong Solvents or Degreasers: Never use harsh chemicals like acetone, lacquer thinner, or most degreasers not specifically formulated for automotive vinyl. These can dissolve or damage the vinyl and adhesive.
- Automatic Car Washes: Many automatic car washes use abrasive brushes and harsh chemicals that can snag, scratch, or peel vinyl wraps. It’s generally best to avoid them entirely.
- Wax or Polish: Traditional car waxes and polishes are designed for painted surfaces. They don’t bond well to vinyl and can create a sticky residue or alter the finish of the wrap. Some vinyl-specific sealants or ceramic coatings can be used, but always check compatibility.
The key is gentleness. Treat your wrapped car’s finish with the same care, if not more, than you would a freshly painted vehicle.
Cleaning Wheels and Tires on a Wrapped Car
Your wheels and tires also need attention, but you need to be mindful of overspray onto the wrap.
Wheel Cleaning Steps:
- Rinse Wheels: Start by rinsing the wheels and tires thoroughly.
- Apply Wheel Cleaner: Use an automotive-grade wheel cleaner that is safe for your specific wheel finish (e.g., painted, chrome, alloy). Some cleaners are also formulated to be safe for vinyl wraps, but always check the label.
- Agitate with Brushes: Use soft-bristle brushes to agitate the cleaner and remove brake dust and grime from the wheel faces, barrels, and lug nuts.
- Rinse Wheels: Rinse the wheels and tires thoroughly.
- Beware of Overspray: Try to avoid spraying wheel cleaner directly onto the vinyl wrap. If overspray occurs, rinse it off the wrap immediately.
Tires can be cleaned with the same wheel cleaner or with a dedicated tire cleaner. A tire dressing can be applied afterward to give them a clean, black look.
Maintenance and Protection Tips
To keep your wrapped car looking its best between washes, consider these tips:
- Protectant Sprays: There are specialized vinyl wrap protectants and conditioners available. These can add UV protection, enhance gloss, and make future cleaning easier. Always ensure the product is specifically designed for vinyl wraps. For example, products like 3M’s vinyl wrap care products are often recommended by wrap manufacturers.
- Quick Detailing: Keep a bottle of automotive quick detailer and a few microfiber towels in your car. For light dust or fingerprints, a quick spray and wipe can keep your car looking fresh.
- Parking: Whenever possible, park your car out of direct sunlight and away from trees that drop sap or attract birds.
- Environmental Factors: Avoid parking in areas where you might encounter overspray from construction sites, industrial areas, or areas prone to heavy pollution.
Regular maintenance is key. The more consistent you are with gentle cleaning and preventative measures, the longer your wrap will maintain its aesthetic appeal and protective qualities.
When to Seek Professional Help
While most washing can be done at home, there are times when professional help is a good idea:
- Deep Contamination: If your wrap has been heavily contaminated with industrial fallout, stubborn stains, or deep etching that you can’t safely remove yourself.
- Edge Lifting or Bubbling: If you notice any lifting at the edges of the wrap or significant bubbling, a professional installer or detailer can often repair or re-adhere these areas.
- Adhesion Issues: If parts of the wrap start to bubble or peel, it might indicate a problem with the installation or the wrap material itself, requiring professional assessment.
- Complex Wraps/Exotic Materials: For highly textured wraps (like carbon fiber or brushed finishes) or wraps made from exotic materials, professionals have the specialized knowledge and products to maintain them.
A professional detailer specializing in vinyl wraps can provide deep cleaning, specialized polishing (if the wrap is compatible), and protective coatings that can significantly extend the life and beauty of your wrap.
Frequently Asked Questions (FAQs)
Q1: Can I use a pressure washer on my wrapped car?
A1: It’s generally best to avoid high-pressure washers. If you must use one, keep the nozzle at a safe distance (at least 1-2 feet) and use a wide fan spray, focusing on lower pressure settings. Avoid spraying directly at the edges of the wrap.
Q2: Is it okay to use car wax or polish on a vinyl wrap?
A2: Traditional car waxes and polishes are not recommended for vinyl wraps. They are designed for paint and can leave a residue or dull the wrap’s finish. Look for specific vinyl wrap protectants or sealants if you want to add protection or shine.
Q3: How often should I wash my wrapped car?
A3: It’s recommended to wash your wrapped car every 1-2 weeks, or more often if it gets particularly dirty from environmental factors like bird droppings, tree sap, or heavy road grime. Regular cleaning prevents contaminants from bonding to the vinyl.
Q4: Can I take my wrapped car through an automatic car wash?
A4: It is strongly advised to avoid automatic car washes. The brushes, harsh chemicals, and high-pressure water jets can easily damage and peel vinyl wraps.
Q5: What’s the best way to remove stubborn bug splatter from my wrapped car?
A5: For dried-on bugs, soak the area with a bug and tar remover specifically designed for automotive use or a quick detailer spray. Let it sit to soften the debris, then gently wipe with a microfiber towel. You can also use a diluted isopropyl alcohol solution (50/50 with water) for tougher spots, after testing in an inconspicuous area first.
Q6: My wrapped car feels rough. Can I use a clay bar?
A6: Yes, you can use a clay bar, but you MUST use it with a clay lubricant specifically designed for automotive use and safe for vinyl. Always work gently, use plenty of lubricant, and ensure the clay bar is clean to avoid scratching the wrap.
Conclusion
Caring for your wrapped car doesn’t have to be a daunting task. By sticking to gentle, vehicle-specific methods and avoiding abrasive materials or harsh chemicals, you can keep your wrap looking fantastic for years to come. Remember the two-bucket method, use pH-neutral soaps, and dry with soft microfiber towels.
Taking these simple steps will not only preserve the stunning appearance of your vinyl wrap but also protect the underlying paintwork. With a little attention and the right tools, your wrapped car will continue to turn heads, and you’ll feel confident in your ability to maintain its beauty.