How To Wax Your Car The Right Way (Step-By-Step Guide)
Learning to properly wax your car gives it a lasting shine and protects the paint from the elements. Follow these steps for a professional-looking finish at home, enhancing your vehicle’s appearance and resale value by creating a protective barrier.
Understanding Car Wax
What is car wax, really? It’s not just for making your car shiny. Wax is a protective coating.
It sits on top of your car’s clear coat. Think of it like sunscreen for your paint. It shields your car’s finish from harsh things.
Things like the sun’s UV rays can cause fading. Rain can leave water spots. Dirt and road grime can scratch the paint.
Even bird droppings can damage the clear coat. Wax creates a barrier. This barrier repels water and dirt.
It also blocks some of the sun’s harmful rays.
There are different types of waxes. Some are made from natural carnauba. This comes from a Brazilian palm tree.
It gives a deep, warm shine. Others are synthetic sealants. These often last longer.
Some products are blends. They aim to give both shine and durability.
The goal of waxing is twofold. First, to make your car look amazing. A good wax job brings out the paint’s depth and gloss.
Second, and just as important, is protection. A protected car stays looking good for longer. It also resists damage better.
This can help maintain its value.
My First Car Waxing Adventure
I remember my first car, a little red sedan. I was so proud of it. I’d seen guys at car shows with these incredibly shiny cars.
I thought, “I can do that!” So, I bought a big tub of wax. It was bright blue and smelled strongly of chemicals. I just slapped it on.
I didn’t wash the car properly. I didn’t even know about clay bars. I just grabbed a sponge and went to town.
Then I used a dirty old towel to buff it off. The result? Streaks.
So many streaks. And it didn’t look shiny at all. It looked dull and smudged.
I felt so defeated. It turns out, there’s a bit more to it than just spreading goo. That day taught me a valuable lesson: preparation is key.
And the right tools make a huge difference. I was so annoyed with myself. But it pushed me to learn the proper way.
Car Waxing Myths vs. Reality
Myth: Waxing once a year is enough.
Reality: For best protection and shine, most cars need waxing every 2-4 months. This depends on climate and storage.
Myth: You need a powerful buffer to get a good shine.
Reality: A good hand application can yield excellent results, especially with modern waxes.
Myth: All waxes are the same.
Reality: Natural waxes, synthetic sealants, and hybrids offer different looks and durability levels.
Preparing Your Car for Wax
This is the most crucial part. If you skip this, your wax job will look bad. It might even scratch your paint.
So, let’s get it right.
Washing Your Car
First, you need a clean car. Wash your car thoroughly. Use a good quality car wash soap.
Never use dish soap. Dish soap strips wax and can dry out your paint. Use two buckets.
One for soapy water. One for rinsing your wash mitt. This stops you from putting dirt back onto the car.
Wash from top to bottom. Rinse your mitt often. Make sure to rinse all the soap off the car.
Drying Your Car
Dry your car immediately. Use soft, clean microfiber towels. These are super absorbent.
They won’t scratch your paint. Pat or gently wipe the water off. Get into all the door jams and trim.
Any water left behind can leave spots. Or it can drip down later and ruin your wax. A clean, dry surface is vital.
Decontamination (The Hidden Step)
Most people skip this. This is where you remove invisible gunk. Over time, your paint collects tar, bugs, tree sap, and industrial fallout.
These are stuck on the paint surface. They won’t come off with just washing. You need a clay bar or clay mitt.
A clay bar is a putty-like substance. You use it with a spray lubricant. Spray the lubricant on a small section.
Gently glide the clay bar over the wet surface. You will feel it grab and pull. This is the contamination coming off.
Wipe the area dry with a microfiber towel. You will be amazed at how much dirt comes off. This step makes your paint feel perfectly smooth.
It’s like glass.
If your paint doesn’t feel smooth after washing, it needs claying. It’s a game-changer for a good wax job. It ensures the wax bonds directly to clean paint.
Inspection
Look over your car. Check for any remaining tar spots or heavy contaminants. You might need a specific tar remover.
Also, inspect for scratches or swirl marks. If you have many, you might need to polish. Polishing removes imperfections.
It’s a deeper clean than just washing and claying. For this guide, we assume your paint is in decent shape. But if it’s rough, claying is your essential next step.
Quick Wash & Dry Checklist
- Use dedicated car wash soap.
- Two-bucket method for washing.
- Wash from top to bottom.
- Rinse mitt often.
- Dry with clean microfiber towels.
- Get into all crevices.
Choosing the Right Wax
This can feel overwhelming. There are so many choices! Let’s simplify it.
For beginners, a good paste wax or spray wax is perfect. These are easy to use. They give good results.
Paste Waxes
Paste waxes are often carnauba-based. They give a deep, wet-looking shine. They are usually applied by hand.
You use a foam applicator pad. You work in small sections. Paste waxes can be a bit more work.
But they look fantastic.
Examples: Meguiar’s Ultimate Carnauba Paste Wax, P21S Carnauba Wax. These are great choices. They offer a classic look.
Spray Waxes
Spray waxes are super easy and fast. You spray them on. You wipe them off with a microfiber towel.
They are great for quick touch-ups. Or if you are short on time. They don’t last as long as paste waxes.
But they give a nice shine. Many are also great as drying aids.
Examples: Griot’s Garage Speed Shine, Chemical Guys Hybrid V7. These are good for a quick boost. They add a slickness to the paint.
Synthetic Sealants
Synthetic sealants offer longer protection. They can last 6 months or more. They are often liquid or paste.
They can be applied by hand or machine. They tend to have a sharper, more reflective shine than carnauba. If durability is your main goal, consider a sealant.
Examples: Chemical Guys JetSeal, Wolfgang Deep Gloss Paint Sealant. These offer serious protection.
For most people, starting with a good paste wax or a reliable spray wax is best. You will get a beautiful shine. And you’ll learn the process.
As you get more comfortable, you can try other types.
Applying the Wax: The Step-by-Step Process
Now for the main event! Get your wax, your applicator pads, and your microfiber towels ready. Remember: work in a cool, shaded area.
Never wax a hot car or in direct sunlight. The wax will dry too fast and be hard to remove. It can also stain.
Step 1: Gather Your Supplies
You’ll need:
- Your chosen wax (paste, liquid, or spray).
- Foam applicator pads (if using paste or liquid wax).
- Several clean, soft microfiber towels for buffing.
- Optional: A dedicated wax removal towel (softer than general buffing towels).
Step 2: Apply a Thin, Even Coat
If you have a paste wax, use a foam applicator pad. Lightly dampen the pad. Then, swirl it gently in the wax.
You don’t need a lot of wax. A little goes a long way. You want a thin, even layer.
Imagine you are painting the car. Work in small sections. About 2 feet by 2 feet is a good size.
Don’t apply wax to unpainted plastic trim. It can stain it white.
Use a back-and-forth or up-and-down motion. Avoid circular motions. This can create swirl marks.
Cover the entire painted surface. Don’t forget the door pillars and the roof. Overlap your sections slightly.
This ensures full coverage.
If you are using a spray wax, follow the product instructions. Usually, you spray a light mist. Then spread it with a microfiber towel.
Step 3: Let the Wax Dry (Haze)
This is important. You need to let the wax dry to a haze. The drying time varies.
It depends on the wax type and the weather. It usually takes about 5-15 minutes. Don’t let it dry completely to a chalky mess.
That’s too long.
How do you know it’s ready? Take your finger and gently wipe a small spot. If the wax comes off clean, it’s ready.
If it smears or is still wet, wait a bit longer. This hazing process allows the wax to bond to the paint.
Step 4: Buff Off the Haze
Grab a clean, soft microfiber towel. Fold it into quarters. This gives you eight clean surfaces.
Gently wipe away the wax haze. Start with light pressure. Use a back-and-forth or up-and-down motion.
As the haze disappears, you will start to see the shine emerge.
As a surface gets dirty, refold your towel to a clean side. Once all eight sides are used, grab a fresh towel. Don’t reuse a dirty towel.
You will just push the wax around and create streaks. Buff until all haze is gone. The paint should feel slick and smooth.
Step 5: Repeat for the Entire Car
Move to the next section. Repeat steps 2, 3, and 4. Work your way around the entire car.
Pay attention to edges and panel gaps. Make sure you get all the haze off.
Step 6: Final Inspection and Touch-Up
Once you’ve waxed the whole car, step back. Look at it in good light. Are there any missed spots?
Any streaks? Sometimes, edges of trim can hold wax residue. You can use a detail brush or a cotton swab to gently remove these.
If you see a few streaks, a quick buff with a clean, dry microfiber towel should fix them.
Waxing Speed Tips
- Work in shade: Always.
- Small sections: 2×2 feet max.
- Thin coat: Less is more.
- Don’t over-dry: Buff when hazed, not bone dry.
- Clean towels: Essential for a streak-free finish.
Real-World Scenarios and Why It Matters
Imagine this. You live in Florida. The sun beats down all year.
Without wax, your car’s paint will fade. The colors will look dull. Clear coat can even start to peel.
Wax acts as a shield. It deflects those harsh UV rays. Your car stays vibrant longer.
Or, consider someone living in the Northeast. They deal with salt on the roads in winter. This salt is corrosive.
It can eat away at paint and metal. A good coat of wax creates a barrier. This barrier helps repel the salt.
It slows down rust and corrosion. It’s a form of protection that saves money in the long run.
Think about a busy parent. They have kids eating snacks in the back seat. Juice spills happen.
Muddy shoes scuff doors. A waxed surface is slicker. It makes cleanup easier.
Many spills and marks just wipe away. Without wax, these stains can soak into the paint. They become much harder to remove.
The environment your car lives in matters. Is it parked outside mostly? Does it get rained on often?
Is there lots of dust? All these things wear down your car’s paint. Regular waxing is like giving your car a protective jacket.
It helps it withstand the daily grind.
Wax Protection Factors
Sun Exposure: UV rays cause fading and oxidation. Wax offers UV inhibitors.
Moisture: Rain, dew, and humidity can leave water spots. Wax repels water.
Road Grime: Dirt, tar, and bug splatters stick to paint. Wax makes them easier to remove.
Temperature Fluctuations: Extreme heat and cold stress paint. Wax adds a resilient layer.
What This Means for You: Knowing When It’s Normal
After you wax your car, you should notice a few things. The water will bead up on the surface. Instead of spreading out flat, water forms nice little balls.
This is called “beading.” It shows the wax is working. It’s repelling the water.
Your car will feel incredibly smooth. When you run your hand over it, it should be like glass. You won’t feel any grit.
This slickness also means dirt will have a harder time sticking.
The shine should be deeper. Colors will look richer. The metallic flakes in your paint will pop more.
It looks like it just came from the dealership.
When to Worry (or Reapply)
When does that protective layer start to wear off? You’ll notice the water no longer beads well. It starts to sheet off the car.
Or it just spreads out. This is a sure sign the wax is gone. It’s time to reapply.
If your car starts looking dull again. If dirt seems to stick more easily. If washing doesn’t make it look as clean as it used to.
These are all hints that your protection is fading.
Generally, you should aim to re-wax your car every 2 to 4 months. This depends on where you live and how you store your car. If it’s always outside, you’ll need to do it more often.
If it’s garaged, it might last a bit longer. It’s better to wax a little too often than not often enough.
Simple Wax Check
Beading: Water forms tight balls on the surface.
Slickness: Paint feels smooth like glass.
Shine: Colors are deep and gloss is high.
Dirt Repellency: Grime wipes off easily.
When to Reapply: Water sheets or spreads; paint looks dull; dirt sticks readily.
Quick Tips for a Better Wax Job
Here are some extra pointers to help you get that perfect shine.
Use the Right Towels: I can’t stress this enough. Microfiber towels are your best friend. Get plenty of them.
Use separate towels for washing, drying, and buffing. Never use old t-shirts or terry cloth towels. They can scratch your paint.
Protect Your Trim: Unpainted black plastic and rubber trim can get stained by wax. This looks terrible. You can mask these areas with painter’s tape.
Or, be very careful when applying wax. Use a foam applicator and keep it on the paint only.
Don’t Forget the Door Jambs: When you open your doors, the painted edges are exposed. They get dirty too! A quick wipe down and maybe a spray wax can protect these areas.
It makes the whole car look complete.
Work on One Panel at a Time: This is part of the “small sections” rule. Focus on one door, then the fender, then the hood. This helps you stay organized.
It ensures you don’t miss spots.
Read the Wax Instructions: Every wax is a little different. Some have specific drying times. Some suggest different application methods.
Always check the label. It’s there to help you get the best results from that particular product.
Buffing Technique Matters: When buffing, use light to moderate pressure. Don’t scrub hard. You’re not trying to rub the wax off.
You’re just removing the haze. Let the microfiber towel do the work. Hold the towel flat against the paint.
Move it gently.
Pro Waxing Habits
- Tool Care: Wash microfiber towels separately.
- Trim Protection: Mask or apply carefully.
- Edge Coverage: Don’t forget door jambs.
- Panel Focus: Work section by section.
- Product Knowledge: Read the wax label.
Frequent Questions About Car Waxing
How often should I wax my car?
For most cars, waxing every 2 to 4 months is ideal. This provides continuous protection and shine. Factors like climate, where you park (garage vs.
outdoors), and your car’s exposure to the elements will influence this frequency.
Can I wax my car in the sun?
No, you should never wax your car in direct sunlight or when the paint surface is hot. The heat will cause the wax to dry too quickly, making it very difficult to remove and likely leaving behind streaks and a dull finish. Always work in a shaded area.
What is the difference between wax and sealant?
Wax, often made from carnauba, provides a deep, warm shine and is easier to apply but lasts less time (1-3 months). Sealants are synthetic and offer longer-lasting protection (3-6+ months) with a sharper, more reflective shine. Many people use a sealant for base protection and then add a wax on top for added gloss.
Will waxing remove scratches?
A standard car wax will not remove scratches. It can fill in very fine swirl marks temporarily, making them less visible. To actually remove scratches, you need to polish the paint using abrasive compounds.
Waxing is primarily for shine and protection.
What are swirl marks, and how do I avoid them?
Swirl marks are tiny, circular scratches in the clear coat of your paint. They are often caused by improper washing and drying techniques, using dirty towels, or aggressive buffing. To avoid them: always wash and dry gently with clean microfiber, use a clay bar to remove grit before waxing, and buff wax off with clean, folded microfiber towels using light pressure.
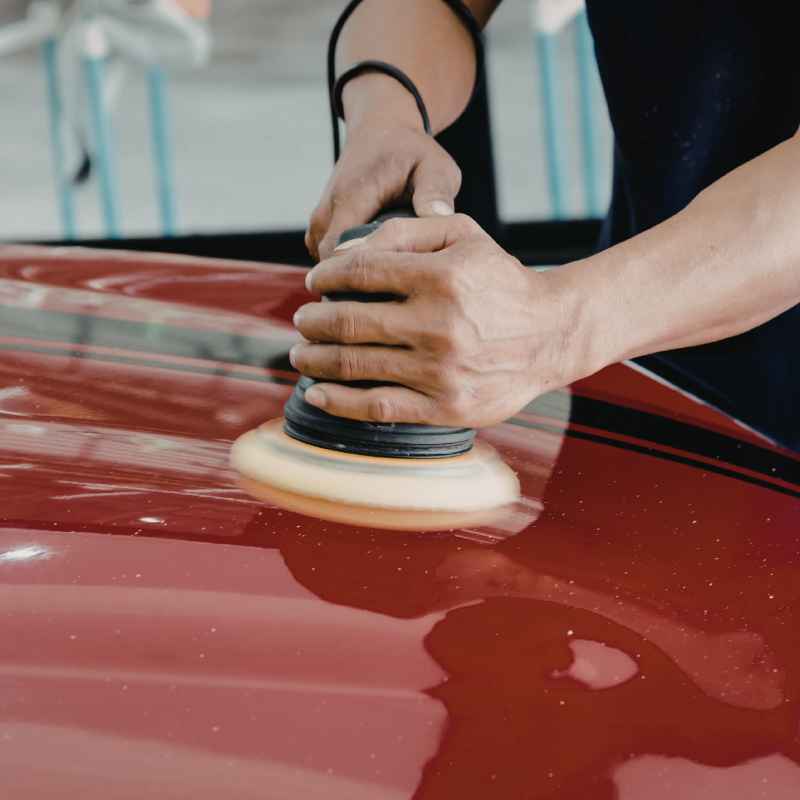
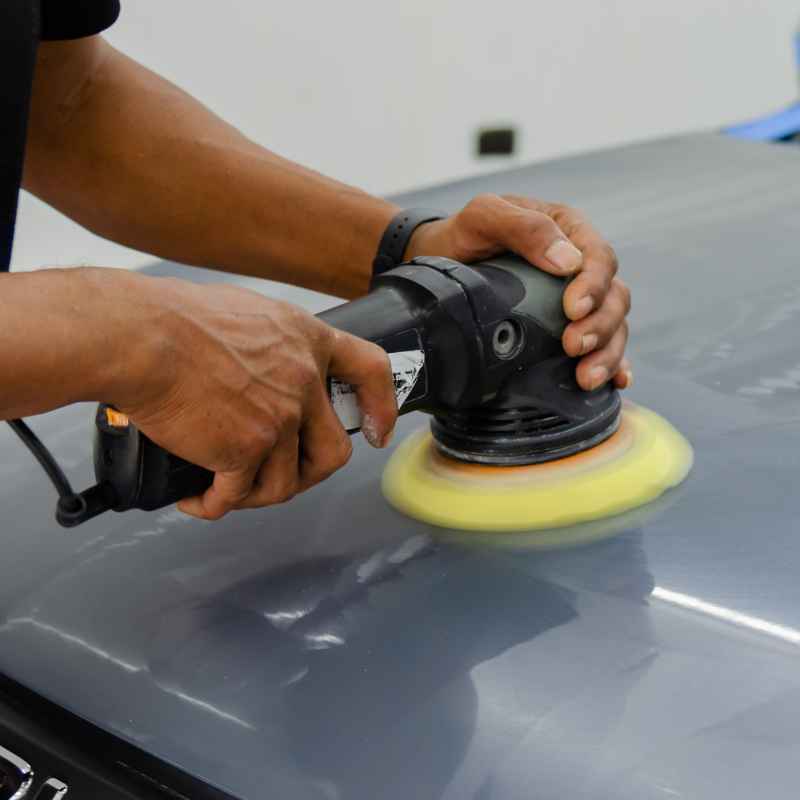
Can I use a power buffer to apply wax?
Yes, you can use a power buffer (like a dual-action polisher). It can make the waxing process faster and more even, especially on larger vehicles. However, it requires a learning curve.
For beginners, hand application with foam pads is perfectly fine and often yields excellent results. If you use a buffer, ensure you use the correct pad and speed settings for wax application.
My wax left white residue on my car’s plastic trim. How do I fix it?
This is a common issue. The best way to fix it is to use a dedicated plastic trim restorer or a specialized trim cleaner. Sometimes, a damp cloth can wipe it off.
For future applications, try to keep wax off the trim using painter’s tape or by being very careful with your applicator. If the stain is stubborn, a magic eraser (used very gently and tested first) might help, but be cautious not to damage the trim.
Putting It All Together
Waxing your car the right way is more than just a chore. It’s an investment in your car’s appearance and longevity. By taking the time to prepare your paint properly and applying the wax with care, you unlock a level of shine and protection you might not have thought possible at home.
Remember the key steps: wash and dry thoroughly, decontaminate with a clay bar, apply a thin, even coat, let it haze, and buff off with clean microfiber towels. This process shields your car from the elements. It keeps it looking its best for years to come.
So grab your supplies and give your car the treatment it deserves!