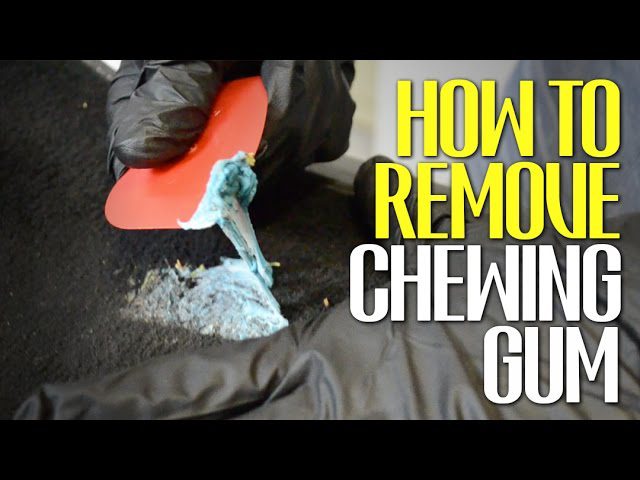
How To Follow Graco Car Seat Cover Instructions Correctly
Correctly following Graco car seat cover instructions ensures proper reassembly, maintaining the seat’s safety features. It involves careful removal, washing according to fabric care labels, and secure reattachment to avoid compromising harness fit or structural integrity.
Understanding Your Graco Car Seat Cover
Every car seat cover has a job. It protects the padding underneath from spills and messes. But it’s also part of the seat’s overall safety design.
Think of it as a skin. It needs to fit just right. Graco makes many different models.
Each one might have a slightly different cover. Knowing your specific model is the first step. This helps you find the right instructions.
The cover is usually made of fabric. This fabric is often designed to be tough. It can handle frequent washing.
Yet, it also needs to be gentle on your baby’s skin. Most covers are removable. This is a big help for cleaning.
But putting them back on can sometimes feel like a puzzle. That’s where following the instructions really shines.
The material of the cover matters a lot. Graco uses different fabrics. Some might be easy to wipe clean.
Others need a full wash. The care label is your best friend here. It tells you exactly what the fabric likes.
It might say “machine wash cold.” Or it could say “hand wash only.” Ignoring this can ruin the cover. It might shrink. It could lose its color.
Or the padding might get clumpy.
When you look at your Graco car seat, you’ll see different parts. There are straps. There are buckles.
There’s the main plastic shell. The cover is attached to this shell. It’s often held on by clips, snaps, or Velcro.
Sometimes, it’s tucked into seams. The way it’s attached is important. It helps keep the straps in the right place.
It ensures the harness fits snugly against your child. This is critical for safety. So, when you take it off, pay attention.
When you put it back on, be just as careful.
My Own Car Seat Cover Saga
I remember one particularly messy afternoon. My son, Liam, was about two years old. We were on a road trip.
He decided his yogurt pouch was a fun new toy. Before I could react, yogurt was everywhere. It was on him.
It was on the seat. It was a sticky, white disaster. My first thought was panic.
Then came the annoyance. How was I going to clean this up? I pulled over at a rest stop.
I tried wiping it down with baby wipes. It helped a little. But the yogurt had soaked into the fabric.
I knew I’d have to wash the cover when we got home. I’d removed it before, but it was a while ago. I couldn’t quite remember how it all went back together.
The straps seemed to disappear into the padding. I felt a knot of worry tighten in my stomach. Was I going to put it back wrong?
Would it still be safe? I spent a good hour, probably more, wrestling with the cover. My hands were sticky.
My patience was wearing thin. Finally, I got it on. But I wasn’t entirely sure if it was perfect.
That experience taught me a valuable lesson. Never underestimate the importance of those little instruction booklets.
Decoding the Graco Manual
Graco manuals can seem a bit daunting at first. They are filled with diagrams and text. But they are packed with vital information.
For car seat cover instructions, you’ll want to find the section related to cleaning. Sometimes, it’s listed under “Maintenance” or “Care.” If you can’t find your physical manual, don’t worry. Graco’s website is a treasure trove.
You can usually download a PDF version. Just search for your car seat model number. It’s often printed on a sticker on the seat itself.
When you find the cleaning section, read it slowly. Look for steps that specifically mention removing the cover. They will likely show you where to unfasten clips or snaps.
They might point out specific seams to pull from. Some covers have snaps on the back. Others have Velcro strips underneath.
The diagram will be your guide. It shows you the order of operations. This is important.
Taking off one part might make another part easier to access.
Pay close attention to any warnings. Graco is very serious about safety. They might warn against using harsh chemicals.
They might tell you not to use a dryer on high heat. They might have specific instructions about the harness system. For example, you usually don’t wash the harness straps themselves.
They are made of special webbing. Washing them can weaken them. Always check what parts are safe to remove and wash.
The manual will also detail the washing process. It will tell you the water temperature. It will specify if you need mild detergent.
It might advise against fabric softeners. Fabric softeners can sometimes affect the flame-retardant properties of the fabric. This is a detail you don’t want to overlook.
Always use the recommended settings. This ensures the cover comes out clean and undamaged.
Finally, the manual shows you how to put it back on. This is often the trickiest part. The diagrams will show the reverse of removal.
It will show where the cover tucks in. It will show which clips go where. Take your time.
Refer back to the diagrams frequently. It’s better to take an extra ten minutes now than to risk improper reassembly later.
Quick Guide: Finding Your Manual
- Check the Seat: Look for a sticker. It usually has your model number and sometimes a website.
- Graco Website: Go to GracoBaby.com. Find the “Support” or “Manuals” section.
- Search by Model: Enter your car seat’s model number. Download the PDF.
- Digital Copy: Save it to your phone or computer. It’s handy for future reference.
The Removal Process: Step-by-Step
Removing the cover is the first big step. Don’t rush this. Look at your seat.
Where does the fabric meet the plastic? You’ll likely see seams. You might see small clips.
Some Graco seats have the cover attached at the top. It might be under the headrest or secured by a strap. Gently pull this part free first.
You might need to push a button or lift a tab. The manual will show you exactly where.
Next, look for snaps or Velcro along the edges. These are usually on the back of the seat. They help keep the cover snug.
Carefully unsnap them. Peel away any Velcro strips. Go slowly.
Sometimes, the fabric can get caught. You don’t want to rip it. Work your way around the entire seat.
The cover should start to feel loose.
Many Graco seat covers have a part that goes around the sides. This is often a separate piece or a flap. It might tuck into the plastic shell.
Gently ease this fabric out of its slot. The goal is to detach it without forcing anything. If it feels stuck, double-check the manual.
There might be a hidden clip or a specific way to pull.
Once all the fasteners are undone, the main cover should lift off. Some covers are in one piece. Others might be two pieces: a main seat cover and a headrest cover.
Set them aside. Make sure you have all the pieces. It’s easy to miss a small flap or strap.
Keep them together so you don’t lose them.
Remember the harness straps. The cover usually has openings for these. You do not remove the harness straps themselves.
They are permanently attached to the seat’s internal system. The fabric cover simply goes around them. Make a mental note of how they are positioned.
This will help when you reassemble.
Removal Checklist
- Locate Fasteners: Find all snaps, clips, and Velcro.
- Top First: Usually, the top attachment is key.
- Work Around Edges: Unfasten sides and bottom.
- Tucked Sections: Gently release any fabric tucked into the shell.
- Keep Track: Ensure all pieces are accounted for.
Washing Your Graco Seat Cover
This is where you get to the actual cleaning part. Before you start, read the care label again. It’s usually attached to the cover itself.
It’s often a small white tag. This tag gives you the precise instructions for washing. It will tell you the water temperature.
It will specify the cycle. It will also tell you how to dry it.
Most Graco covers are machine washable. This is a huge relief for busy parents. Use a gentle cycle.
Use cold water. Cold water is best for most fabrics. It helps prevent shrinking and fading.
It’s also gentler on the material. Use a mild detergent. A small amount is usually enough.
Avoid bleach. Bleach can damage the fabric and its safety features. Also, skip the fabric softener.
As mentioned before, it can interfere with flame resistance.
If your cover is machine washable, you can likely tumble dry it. But be careful here. Always use the lowest heat setting.
Some manuals recommend air drying. Air drying is the safest bet. It completely avoids any risk of heat damage.
If you air dry, find a place where the cover can lay flat. This helps it keep its shape. You can also hang it up, but make sure it’s not stretching unnaturally.
For spot cleaning, use a damp cloth and a little mild soap. Blot the stain gently. Don’t rub too hard.
Rubbing can spread the stain. Or it can damage the fabric fibers. If the mess is fresh, try to soak up as much as possible first.
Then clean the rest. For tougher stains, you might need a specialized car seat cleaner. Always test any cleaner on a small, hidden spot first.
Make sure it doesn’t discolor the fabric.
Never wash the harness straps. These are made of special materials. Washing can compromise their strength.
They are not designed to be removed. If they are very dirty, you can usually spot clean them with a damp cloth and mild soap. Then wipe them clean with a cloth dampened only with water.
Ensure they are completely dry before using the seat again.
Washing Do’s and Don’ts
- DO: Machine wash cold on a gentle cycle.
- DO: Use mild detergent.
- DO: Air dry or tumble dry on low heat.
- DO: Check the care label for specific instructions.
- DON’T: Use bleach.
- DON’T: Use fabric softener.
- DON’T: Wash harness straps.
- DON’T: Use high heat drying.
Reassembly: The Puzzle Part
This is where you get to put all the pieces back together. It’s often the most challenging part. But if you paid attention during removal and have the manual handy, it’s manageable.
Start with the main part of the cover. Lay it out. It should look similar to how it was before removal, just cleaner.
Find the openings for the harness straps. Guide these over the straps. Make sure the straps are flat and not twisted.
This is extremely important. Twisted or bunched straps will not protect your child properly. The cover needs to lie smoothly over them.
Now, look at the manual’s diagrams for reattachment. You’ll likely be working backward from how you took it off. If there were snaps, line them up with the corresponding parts on the seat shell.
Press them firmly until they click or hold. If there was Velcro, align the strips and press them together. Make sure it’s snug.
Many Graco covers have fabric that tucks into the sides of the seat shell. Gently push this fabric into the grooves. The goal is to get it smooth and tight.
You don’t want any loose fabric. Loose fabric can get in the way of the harness. It can also be uncomfortable for your child.
If your seat has a separate headrest cover, attach that next. It usually slides on or snaps into place. Make sure it sits evenly.
Once the main cover is attached, give it a good look. Run your hands over it. Is it smooth?
Are there any wrinkles or bulges? Are all the straps lying flat? Check the harness buckle area.
The cover should not interfere with the buckle’s function. You should be able to easily buckle and unbuckle your child.
A good way to check is to practice buckling the harness. Does it go in smoothly? Does it feel secure?
If anything feels off, take a moment. Refer back to the manual. Sometimes a small adjustment makes a big difference.
It’s better to spend a few extra minutes now to ensure it’s right.
Reassembly Tips
- Refer to Manual: Use the diagrams for guidance.
- Harness First: Ensure straps are flat and smooth through the cover openings.
- Work Methodically: Reattach snaps, Velcro, and tuck edges.
- Check for Snugness: The cover should be tight and smooth.
- Test Buckle: Ensure the harness buckle functions correctly.
- Final Inspection: Look for any loose or misplaced fabric.
When to Consider Replacement Parts
Sometimes, even with the best care, car seat covers can wear out. If your cover is ripped, torn, or has holes, it’s time for a new one. These aren’t just cosmetic issues.
Tears can weaken the padding. They can also create places where small items can get lost or where the harness might not sit correctly.
Another sign is if the fabric has lost its elasticity. If it doesn’t fit snugly anymore, it might be time for a
If the fabric becomes very thin or frayed in key areas, it’s also a good indicator. These areas are often around the harness slots or where the child sits. They experience the most wear and tear.
When you need a new cover, always buy directly from Graco or an authorized retailer. Never buy a generic cover. Generic covers might not fit your specific model correctly.
They also may not meet the same safety standards as the original Graco cover. A poorly fitting cover can compromise the safety of the entire car seat. Always ensure the replacement is specifically designed for your car seat model.
The model number is crucial here.
Alternative Cleaning Methods
While machine washing is often the easiest, sometimes you might need other options. For quick cleanups, a damp cloth with a little mild soap works wonders. This is good for everyday spills.
Wipe down the cover immediately. This prevents stains from setting in.
For stubborn odors, baking soda can be helpful. Sprinkle some baking soda on the dry cover. Let it sit for a few hours, or even overnight.
Then vacuum it off thoroughly. This can absorb smells that washing might miss. Make sure the cover is completely dry before vacuuming.
Some parents use baby-safe disinfectant sprays. These can be useful if there’s been illness in the household. However, always check the product label.
Ensure it’s safe for use on car seat fabrics. Test it on an inconspicuous area first. And always follow up with a damp cloth to wipe away any residue.
For parents who are very concerned about chemicals, natural cleaners are an option. You can make a simple spray with water and white vinegar. Use a 1:1 ratio.
Spray it lightly onto the fabric. Let it air dry. Vinegar is a natural deodorizer and mild disinfectant.
The smell dissipates as it dries.
Quick Clean Solutions
- Immediate Wipe-Down: Use a damp cloth for fresh spills.
- Mild Soap & Water: Good for small spots.
- Baking Soda: For odor absorption.
- Vinegar Solution: Natural cleaner and deodorizer (test first).
Real-World Scenarios and Habits
In American homes, the car seat is a constant companion. From trips to the grocery store to doctor’s appointments, it’s always in use. This means it faces daily challenges.
Snacks, drinks, drool, and dirt are par for the course. Parents often develop habits around managing this. Some parents are diligent about cleaning up spills right away.
Others might let it go until the weekend.
The type of car seat cover material also plays a role. Some are made of woven fabrics that can absorb moisture. Others have a smoother, more wipeable surface.
If you have a seat with a very absorbent fabric, you’ll need to be more proactive. Wiping spills immediately is key. If you have a smoother fabric, you might get away with a quick wipe later.
Consider your climate too. In hotter, humid areas, moisture can linger. This can lead to mildew or odors.
In these climates, more frequent cleaning or ensuring the cover dries completely is important. If you live in a place with lots of sand or dirt, you’ll likely find your cover gets dirtier faster. Regular vacuuming can help remove loose debris.
The age of your child also influences how messy the seat gets. Infants might have issues with spit-up. Toddlers, on the other hand, are masters of the snack explosion.
Understanding these patterns helps you anticipate cleaning needs.
When is a Clean Cover Enough?
Most of the time, a thorough cleaning following Graco’s instructions is all you need. It’s amazing how fresh a seat can feel after a good wash. You’ll know it’s enough when the fabric looks clean.
There are no lingering stains. And importantly, there are no lingering odors. If it smells fresh after cleaning, that’s a great sign.
Also, check that the cover fits snugly. When it’s reattached, it should look smooth. There shouldn’t be any baggy sections.
This is your visual cue that it’s properly secured. The harness straps should sit flush against the child when buckled. If the cover is bunched up where the straps go, it might not be fitted correctly.
The fabric itself should feel good. It shouldn’t be stiff or rough from improper washing. It should still have a bit of softness.
If the fabric feels brittle or has lost its texture, that could be a sign of damage from washing or drying. However, this is less common if you follow the care instructions precisely.
When to Worry: Signs Your Cover Needs More Attention
There are a few signs that indicate you need to do more than just a standard wash. The most obvious is a persistent, unpleasant odor. If even after washing, the seat smells musty, sour, or like mildew, there might be an issue.
This could mean moisture has gotten into the padding itself, or that mold/mildew has begun to grow. In such cases, you might need to clean the seat more thoroughly, or consider replacement.
Look for signs of wear and tear. Any rips, tears, or significant fraying, especially around the harness slots, are a concern. These areas are critical for safety.
Damage here means the cover may not function as intended. It could also mean the underlying padding is exposed. Check for holes in the fabric, particularly in the seat area where your child sits.
If the cover’s fit has changed dramatically, that’s also a red flag. If it’s become too loose, it might not stay in place. This could affect harness positioning.
If it’s shrunk so much that it’s impossible to reattach correctly, it’s no longer functional. This can happen if it was washed or dried on high heat.
Also, consider the harness straps. If the cover has openings for the harness straps, check them. If the fabric around these openings is worn out, it might be time for a new cover.
The harness is your child’s lifeline in a crash. Anything that compromises its fit needs immediate attention. If you’re ever in doubt, it’s always best to contact Graco customer support.
They can advise you on specific issues with your model.
When to Be Concerned
- Lingering Odors: Persistent bad smells after washing.
- Rips and Tears: Especially near harness slots.
- Significant Fraying: Fabric wearing thin.
- Poor Fit: Cover is too loose or shrunk.
- Damaged Harness Openings: Fabric around slots is worn.

Quick Fixes and Tips for Graco Seat Covers
Here are some handy tips to make your Graco car seat cover care easier:
- Baby Wipes are Your Friend: Keep a pack in your car. For small spills, they are perfect for immediate cleanup.
- Protect Your Seat: Consider using a waterproof car seat liner underneath the cover. This adds an extra layer of protection.
- Regular Vacuuming: Use a crevice tool attachment on your vacuum cleaner. It can reach into those tricky spots and remove crumbs and debris.
- Gentle Spot Cleaning: For minor spots, always try a spot clean first before a full wash. It saves time and wear on the fabric.
- Know Your Model: Always refer to your specific Graco car seat manual. Different models have unique features and cover attachments.
- Patience is Key: Especially during reassembly, take your time. Rushing can lead to mistakes.
- Air Out the Seat: On nice days, if possible, leave your car doors open for a bit to air out the interior and the seat.
Frequently Asked Questions about Graco Car Seat Covers
Can I put my Graco car seat cover in the dryer?
Yes, but always on the lowest heat setting. High heat can cause the fabric to shrink or melt, damaging the cover. Air drying is the safest option to preserve the fabric and its protective qualities.
How often should I wash my Graco car seat cover?
There’s no set schedule. It depends on how messy it gets. Wash it when you notice significant spills, stains, or odors.
A general guideline is every few months for regular use, or immediately after major messes.
What if I lose my Graco car seat manual?
Don’t worry! You can usually find a downloadable PDF version of your manual on the Graco website. You’ll need your car seat’s model number, which is typically on a sticker on the seat itself.
Can I use bleach to clean my Graco car seat cover?
No. Bleach is too harsh for car seat fabrics. It can weaken the material and potentially damage flame-retardant properties.
Always use mild detergent as recommended by the care label.
My Graco cover smells weird even after washing. What should I do?
Persistent odors can sometimes mean moisture is trapped in the padding. Try a thorough air drying process in a well-ventilated area. You can also sprinkle baking soda on the dry cover, let it sit for several hours, then vacuum it off to help absorb odors.
Where can I buy a replacement Graco car seat cover?
Always purchase replacement covers directly from Graco or an authorized Graco retailer. Generic covers may not fit correctly and could compromise safety. Ensure the replacement is for your specific car seat model.
Conclusion
Taking care of your Graco car seat cover doesn’t have to be a chore. By understanding your manual, following the removal and washing steps carefully, and paying close attention during reassembly, you can keep your seat clean and safe. Remember that the cover is more than just fabric; it’s part of a critical safety system.
Treat it with care, and your little one will ride in comfort and security.