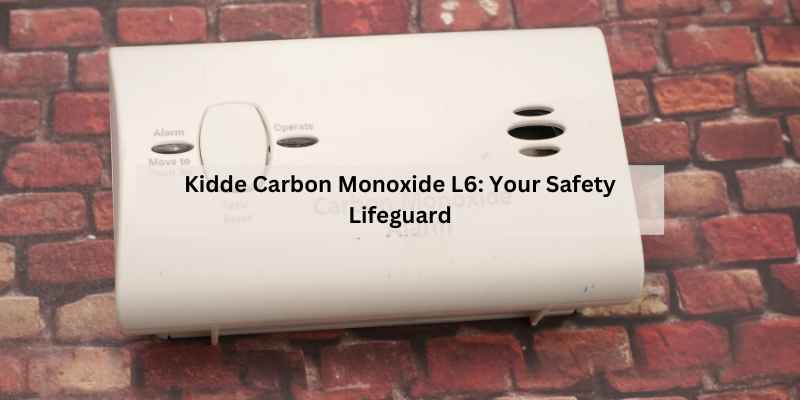
Kidde Carbon Monoxide L6 Code: What It Means and How to Fix It
Your Kidde detector starts chirping at 2 a.m. You stumble over, squint at the display, and see something that isn’t a number: L6. Not a CO reading. Not a low battery icon. Just an error code that your manual barely mentions.
Most people do one of two things. They either yank the unit off the ceiling and toss it in a drawer, or they press every button hoping the noise stops. Both approaches miss the point. The L6 code is a diagnostic message from the sensor, and ignoring it puts your household at risk.
Kidde
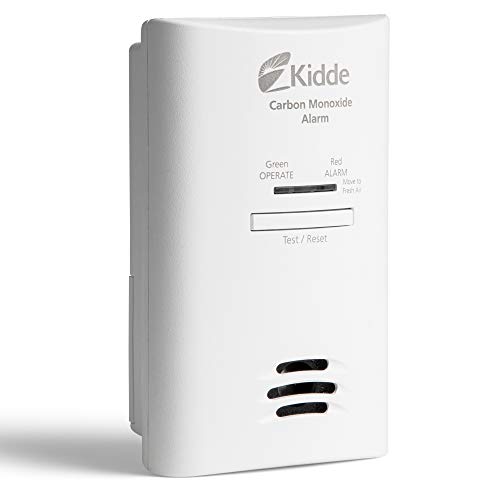
Kidde Carbon Monoxide Detector, Plug-in Carbon Monoxide…
- Easy Installation - simply plug-in to a standard, 120V outlet in your home
- 2-AA battery backup provides protection during a power outage
- 85-decibel alarm announces when carbon monoxide is detected
This guide walks through what L6 actually means, how it differs from other error codes like Lb, and the exact steps to clear it. You’ll also learn when the code means the unit has reached its end-of-life and must be replaced immediately. By the end, you’ll know whether your alarm is safe to keep or needs to go.
If you’re in the market for a new unit rather than troubleshooting an old one, the Kidde plug-in carbon monoxide detector with AA battery backup is a solid choice. It uses the same third-edition sensor technology, gives you a visible LED status light, and records peak CO levels so you know what happened while you were away. It’s a straightforward replacement that installs in under a minute.
What Does the L6 Code Mean on a Kidde Detector?
The L6 code is a fault indicator, not a carbon monoxide reading. It tells you the internal self-diagnostic system has detected a problem with the sensor or the device’s electronics. Think of it like a check-engine light for your alarm.
Kidde uses a series of letter-and-number codes to communicate specific failures. L6 typically points to a sensor malfunction or a communication error between the sensor and the main processor. It can appear on standalone CO alarms and combo smoke/CO units, though the behavior varies slightly by model.
On combo units like the KN-COPP-3, the L6 code might show alongside a blinking red LED. On standalone detectors, you’ll often hear a double chirp every 30 to 60 seconds. The pattern matters. A true CO alarm produces four rapid beeps followed by a pause. An error code chirp is usually a single or double beep on a longer cycle.
Here’s the critical part: L6 is not the same as a low battery warning. Low battery produces an Lb code or a simple battery icon. L6 means something inside the unit has failed or is failing. Replacing the battery might clear it temporarily, but the underlying fault will likely return.
L6 vs. Lb: Critical Differences You Must Know
Confusing these two codes is common, and it’s also dangerous. The fix for one does nothing for the other.
| Code | Meaning | Chirp Pattern | Typical Fix |
|---|---|---|---|
| L6 | Sensor or internal electronics fault | Double chirp every 30–60 seconds | Hard reset, cleaning, or replacement |
| Lb | Low battery | Single chirp every 60 seconds | Replace the battery with fresh alkaline |
| End-of-Life (EOL) | Unit has exceeded 10-year lifespan | Double chirp every 30 seconds, persistent | Replace the entire unit |
| CO Alarm | Carbon monoxide detected | 4 beeps, pause, 4 beeps | Evacuate, call 911, ventilate |
The table above is your first diagnostic step. If you hear four beeps in a row, stop troubleshooting and get outside. That’s a real CO event. If you hear a single chirp, check the battery first. If you hear a double chirp and see L6, move to the fix steps below.
One more distinction worth noting: some Kidde models display Err or E4 instead of L6. These are all variations of the same fault family. The troubleshooting approach stays the same.
Step-by-Step Guide to Fix the L6 Error
Before you do anything else, rule out a real leak. If you smell anything odd, feel dizzy, or have a headache, leave the house and call emergency services. The L6 code is usually a hardware fault, but you don’t gamble with carbon monoxide. If the alarm has been chirping for hours and you feel fine, proceed with the following steps.
Step 1: Remove and Inspect the Alarm
Take the unit off its mounting plate. For plug-in models, unplug it from the outlet. Look at the battery drawer and the sensor vents. You’re checking for three things: corrosion, dust, and insects.
Corrosion on the battery terminals looks like a white or greenish powder. It prevents proper electrical contact and can trigger fault codes. If you see corrosion, use a dry cloth or a soft brush to clean the terminals. Do not use water or cleaning sprays. If the corrosion is heavy, the unit may be beyond saving.
Dust inside the sensor vents is another culprit. Carbon monoxide sensors work by measuring chemical changes in a gel-filled cell. Heavy dust can interfere with airflow and cause false fault readings. Hold the unit upside down and gently tap it to dislodge loose debris.
Step 2: Replace the Battery Correctly
Most Kidde CO alarms use a 9V alkaline battery. This detail matters more than you think. Lithium batteries and rechargeable batteries have different voltage curves. They can cause the unit to report incorrect battery status or trigger fault codes.
Use a fresh, name-brand 9V alkaline battery. Avoid off-brand cells that may have manufacturing defects. Open the battery drawer, remove the old battery, and wait 30 seconds before inserting the new one. Make sure the polarity matches the diagram inside the drawer. A reversed battery can damage the unit instantly.
If the battery drawer is loose or won’t close properly, the unit may not maintain consistent contact. This can cause intermittent L6 codes. A temporary fix is to wedge a small piece of cardboard against the battery, but this is a stopgap. A defective battery drawer is grounds for replacement.
Step 3: Perform a Hard Reset
A hard reset clears the unit’s internal memory and forces it to re-run its startup diagnostics. This is the most effective fix for a transient L6 error.
- Remove the battery.
- Press and hold the test/reset button for 20 seconds. This drains any residual charge from the capacitors.
- Leave the unit without power for at least 5 minutes.
- Reinstall the fresh battery.
- Reattach the unit to its mounting plate or plug it back in.
When power returns, the alarm should chirp once and the LED should flash red briefly. This indicates a successful startup. If the L6 code reappears within a few minutes, the fault is persistent and the unit needs replacement.
Step 4: Clean the Sensor and Vents
If the hard reset didn’t work, the sensor itself may be contaminated. Use a can of compressed air to blow out the vents. Keep the nozzle a few inches away to avoid damaging the sensor. You can also use a soft-bristled brush to sweep away surface dust.
Do not use vacuum cleaners. The suction can damage the delicate sensor membrane. Do not use solvents, alcohol, or household cleaners anywhere near the unit. These chemicals can permanently disable the CO sensor.
After cleaning, repeat the hard reset process. If L6 still appears, the sensor has likely failed and cannot be repaired. No amount of cleaning or resetting will bring it back.
When L6 Means End-of-Life (EOL): How to Tell
Kidde carbon monoxide detectors have a lifespan of 10 years from the date of manufacture, not the date of purchase. After that, the sensor degrades and can no longer reliably detect CO. The unit is designed to fail closed, meaning it will eventually lock into an error state.
Look for the manufacture date printed on the back or side of the unit. It’s usually a four-digit code like 0922, meaning September 2026. If your unit is approaching or past the 10-year mark and showing L6, don’t bother troubleshooting. The sensor is at the end of its useful life.
Some Kidde models display End or a flashing EOL message. Others just show L6. If your unit is old, treat L6 as a death sentence for the device. Replacement is the only safe option.
There’s a common misconception that replacing the battery resets the 10-year clock. It doesn’t. The clock starts when the unit is manufactured and never stops. Even if the alarm looks new and works fine, an old unit is a liability.
How to Test if Your Alarm is Working After the Fix
Once you’ve cleared the L6 code, you need to verify the unit actually functions. A silent alarm isn’t necessarily a working alarm.
Press and hold the test button for 3 to 5 seconds. The alarm should sound with four loud beeps, followed by a brief pause, then four more beeps. The pattern should match a real CO alarm. If the sound is weak, muffled, or doesn’t occur, the speaker or the sensor is failing.
Check the LED indicator. On most Kidde models, a green or red LED flashes every 30 to 60 seconds during normal operation. The specific color varies by model, so check your manual. If the LED is off or stuck on a solid color, the unit is not functioning properly.
For units with a digital display, verify it shows a reading of 0 after the test. Any residual number above zero, even briefly, indicates the sensor is detecting something. If the display shows a number other than 0 after the test, the sensor may be contaminated or damaged.
You can also use a canned CO test gas, available at most hardware stores. Spray it near the unit and see if it triggers the alarm. This is the most reliable way to confirm the sensor works. It’s an extra expense, but it’s cheaper than a new unit if you’re unsure.
Safety First: Ruling Out a Real Carbon Monoxide Leak
Here’s the scenario that keeps safety experts up at night: the alarm shows L6, you assume it’s a false positive, and you silence it. Meanwhile, there’s a slow leak from a faulty furnace. The alarm can’t detect CO because the sensor is dead. You have no warning until symptoms appear.
If your alarm displays L6 and you have any reason to suspect a leak, follow this protocol:
- Press the test/hush button to silence the chirp temporarily.
- Open windows and doors to ventilate the space.
- Evacuate everyone, including pets.
- Call your gas utility or a qualified HVAC technician to test for CO.
- Do not re-enter the home until a professional gives the all-clear.
Common CO sources include gas furnaces, water heaters, fireplaces, and attached garages. If you have any of these, a faulty alarm is not something to ignore. The L6 code means the unit cannot be trusted to do its job.
You can learn more about how CO behaves in a home by reading about carbon monoxide without gas sources. It’s more common than you’d think, especially with attached garages or generators running near windows.
Warranty and Replacement Options for Defective Units
Kidde offers a limited warranty on their detectors, typically covering defects in materials and workmanship for a set period. The standard warranty is 5 years from the date of purchase, but this varies by model. Check your user manual or the back of the unit for the specific warranty duration.
If your unit is under warranty and showing L6, you may qualify for a free replacement. You’ll need the following:
- The manufacture date (printed on the unit)
- The model number
- The date of purchase (receipt helps)
- A description of the error code
Contact Kidde customer support directly. Their phone number is on the back of the unit and on their website. Be prepared to describe the L6 code and the steps you’ve already taken. They may ask you to cut the power cord or remove the battery before shipping a replacement, to prevent the defective unit from being used again.
If the unit is out of warranty, replacement is your only option. Don’t buy a used detector. You have no idea how old it is or how it was stored. A new unit costs less than a single trip to the emergency room.
For a reliable new unit, consider the Kidde carbon monoxide detector with battery backup. It’s a plug-in model that keeps working during power outages, which is exactly when CO risks spike. Check the current price on Amazon before ordering.
Frequently Asked Questions
Is the L6 code the same as a low battery warning?
No. Low battery is indicated by an Lb code or a battery icon. L6 indicates a sensor or internal hardware fault. Replacing the battery may clear L6 temporarily if the fault is power-related, but it won’t fix a dead sensor.
Can I silence the L6 chirp without fixing the problem?
Yes, the hush button will temporarily silence the alarm, usually for 8 to 10 minutes. But the chirp will return. Silencing the alarm does not resolve the underlying fault. If the sensor is dead, you’re living without CO protection.
Why does my Kidde detector show L6 after I replaced the battery?
This usually means the fault is not battery-related. The sensor itself may be failing, or the unit’s internal memory is corrupted. Perform a hard reset by removing the battery and holding the test button for 20 seconds. If L6 reappears, replace the unit.
How long do Kidde carbon monoxide detectors last?
All Kidde CO alarms have a 10-year lifespan from the date of manufacture. After that, the sensor degrades and the unit should be replaced. The manufacture date is printed on the back of the device. If your unit is older than 10 years, replace it immediately.
What should I do if my alarm shows L6 and I smell gas?
Leave the house immediately. Do not flip any light switches or use the phone inside. Call 911 from outside or a neighbor’s home. If you suspect a gas leak, do not attempt to troubleshoot the alarm until the utility company or fire department has cleared the building.
Final Verdict: Is Your Alarm Safe to Keep?
An L6 code is never something to ignore, but it’s also not always a death sentence for the unit. In about a third of cases, a hard reset and fresh battery clears the fault. In the rest, the sensor has genuinely failed.
The decision tree is simple:
- Unit under 10 years old? Try the hard reset and cleaning steps.
- Unit over 10 years old? Replace it. No troubleshooting will help.
- L6 returns after a reset? Replace it. The sensor is unreliable.
- Four-beep alarm pattern? Evacuate and call 911. That’s a real CO event.
Never trust an alarm that has shown L6 and then cleared it without a full test. Run the test button and, if possible, use a CO test gas to confirm the sensor responds. A working alarm is the only thing standing between you and an invisible killer.
If you’re replacing an old unit, take a moment to understand how CO moves through a house. The guide on opening a window for carbon monoxide explains why ventilation alone isn’t a reliable safety strategy. A functional detector is your first line of defense.
Keep the receipt, note the manufacture date, and set a reminder to replace the unit in 10 years. Your future self will thank you.
Products related to this article
Sponsored / affiliate links. As an Amazon Associate I earn from qualifying purchases. I may earn additional commission from eligible campaigns.