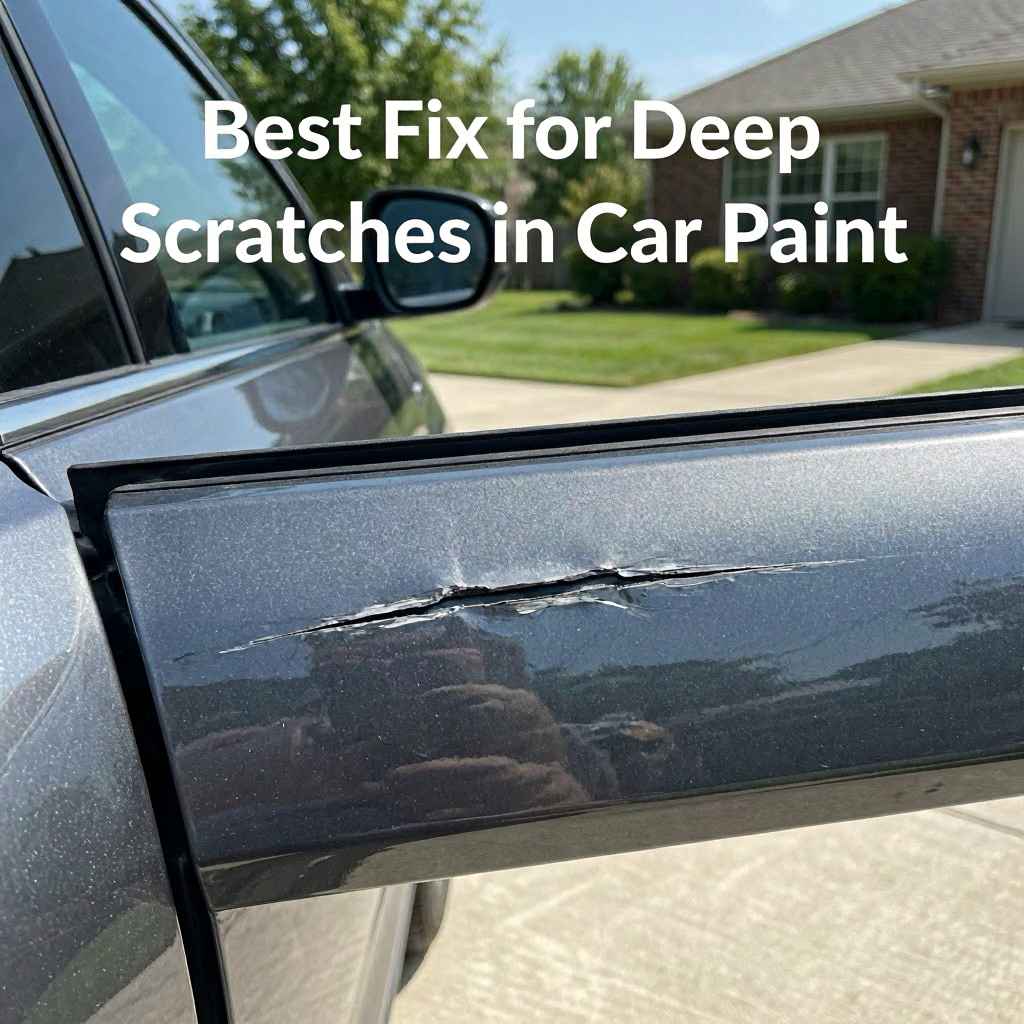
Best Fix for Deep Scratches in Car Paint
Fixing deep scratches on your car’s paint can seem like a big job, especially if you’re new to car care. It’s easy to get confused about what products to use or which steps to follow. Many people worry about making the scratch look worse.
But don’t worry! We’ve got a simple, step-by-step way to get that great finish back. This guide will show you the Best Fix for Deep Scratches in Car Paint.
Get ready to make your car look like new again.
Assessing Deep Scratches for the Best Fix
Before you can fix a scratch, you need to know how deep it really is. This first step is super important because it tells you what kind of repair you’ll need. A shallow scratch is different from one that goes down to the metal.
Knowing the depth helps you choose the right tools and products. It prevents you from wasting time and money on the wrong fix. Let’s learn how to look closely at those scratches and decide on the right plan.
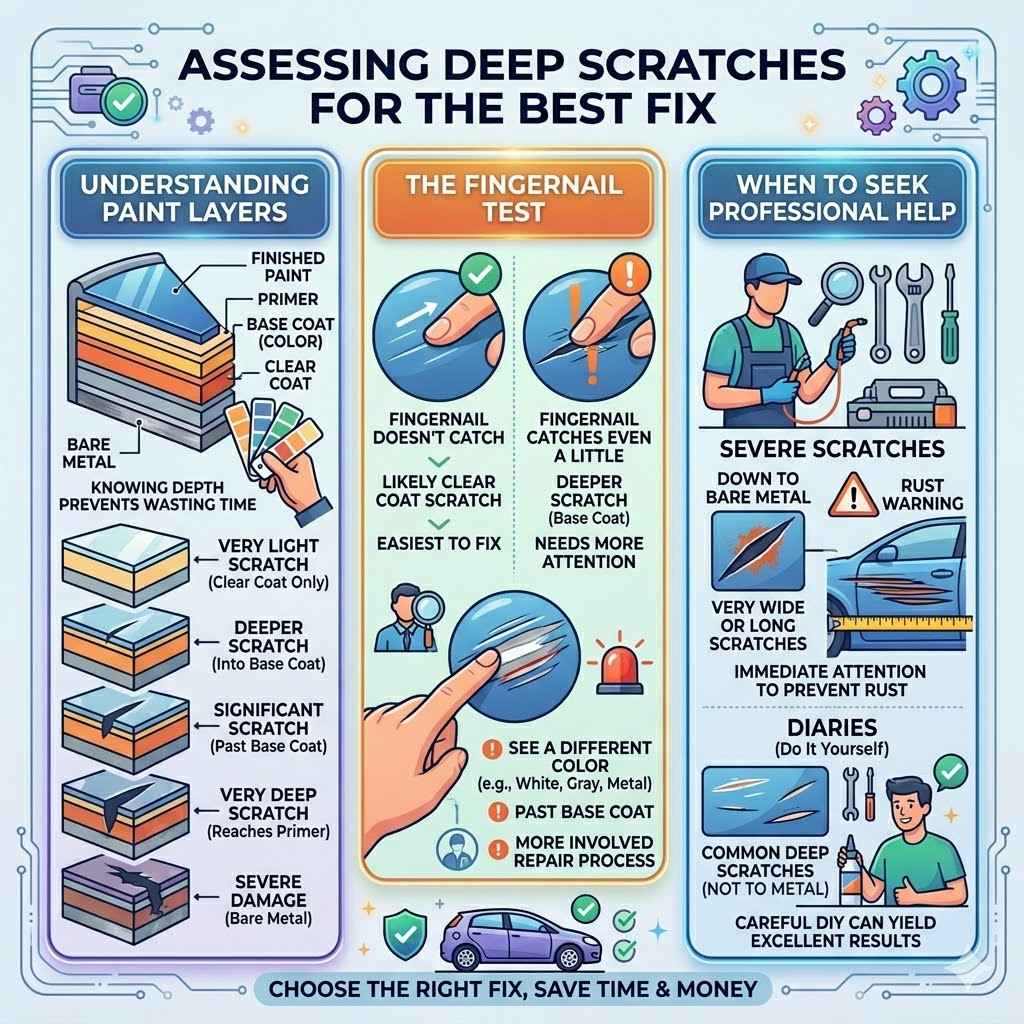
Understanding Paint Layers
Your car’s paint isn’t just one color layer. It’s built up in stages, like a cake. The first layer is the primer, which helps paint stick and stops rust.
Then comes the base coat, which is the color you see. On top of that is the clear coat, a protective layer that makes the paint shiny and guards against the weather.
When you see a scratch, it has gone through one or more of these layers. A very light scratch might only be in the clear coat. A deeper one will go through the base coat too.
If it’s very deep, it might even reach the primer or bare metal. Knowing this helps you figure out how far the damage goes.
The Fingernail Test
A simple way to check scratch depth is the fingernail test. Gently run your fingernail across the scratch. If your nail doesn’t catch on the scratch, it’s likely a clear coat scratch.
These are usually the easiest to fix.
If your fingernail catches on the scratch even a little bit, it means the scratch has gone through the clear coat and into the base coat. This is a deeper scratch and needs more attention.
If you can see a different color underneath the scratch, like white, gray, or even metal, it means the scratch has gone past the base coat. This is a significant scratch and requires a more involved repair process.
When to Seek Professional Help
While many scratches can be fixed at home, some are too severe for DIY repairs. If a scratch has gone down to the bare metal, it needs immediate attention to prevent rust. Also, very wide or long scratches might be better handled by a professional detailer.
They have specialized tools and experience for these tough jobs.
For most common deep scratches that haven’t reached the metal, a careful DIY approach can yield excellent results. This guide will focus on those manageable repairs.
Choosing the Right Repair Method for Deep Scratches
Once you know how deep the scratch is, you can pick the best way to fix it. For deeper scratches, you’ll need more than just a quick polish. You’ll likely need products that can fill or rebuild the paint layer.
The key is to match the repair to the damage.
Paint Scratch Repair Kits
There are many kits designed for fixing car scratches. Some come with small bottles of touch-up paint that match your car’s color. Others include compounds and fillers that can smooth out the scratch.
These kits are often the best starting point for deeper scratches. They aim to fill the gap left by the scratch. This makes the surface smooth again and less visible.
Always choose a kit that matches your car’s paint code. You can usually find this code on a sticker inside your car’s door jamb or in the owner’s manual.
Touch-Up Paint Explained
Touch-up paint is essentially a small amount of your car’s original paint. It comes in a small bottle with a brush or a pen applicator. For deep scratches, touch-up paint is used to fill the void left by the scratch.
It’s important to apply it carefully to avoid making the area look messy.
The paint needs to dry completely. After drying, you might need to gently level the touch-up paint to match the surrounding area. This often involves using a very fine grit sandpaper or a rubbing compound.
Rubbing Compounds and Polishes
Rubbing compounds are slightly abrasive. They work by gently removing a tiny amount of clear coat or paint around the scratch. This helps to level the surface and blend the scratch in.
Polishes are less abrasive and are used after compounds to restore shine.
For scratches that have gone through the clear coat but not into the color layer, a good rubbing compound can often make them disappear. For deeper scratches, they are usually used as a finishing step after filling the scratch.
Understanding Fillers and Leveling
When a scratch is deep, you need to fill it. Some repair kits use a clear filler that hardens. This filler sits in the scratch, bringing the surface up to the level of the surrounding paint.
Once the filler is dry and cured, you then use compounds to level it.
Leveling is the process of making the filled area smooth and even with the rest of the paint. This requires patience and the right tools. Too much aggressive sanding can remove too much paint, making the problem worse.
Step-by-Step Guide to Fixing Deep Scratches
Now that you know what to use, let’s walk through the process. This method focuses on fixing scratches that have gone into the base coat but not to the metal. It’s a common scenario for many car owners.
Step 1 Clean the Area Thoroughly
First, wash the area around the scratch really well. Use car wash soap and water. This removes any dirt, dust, or grime that could get into the scratch and cause more damage or a bad finish.
After washing, dry the area completely with a clean microfiber towel. You want a spotless surface to work on. Any debris left behind can cause more scratches when you start the repair process.
Step 2 Inspect and Prepare
Use the fingernail test again to confirm the scratch depth. If it’s deep, you might need to lightly sand the edges of the scratch very gently. This is to remove any raised paint edges.
Use very fine-grit sandpaper, like 2000 or 3000 grit, wet.
Always sand in the direction of the scratch. This helps to keep the sanding marks less noticeable. After sanding, clean the area again to remove any sanding dust.
Step 3 Apply Touch-Up Paint or Filler
If you are using touch-up paint, apply it carefully with the small brush or pen. You want to fill the scratch without getting too much paint on the surrounding areas. Apply thin layers.
Let each layer dry before applying the next.
If you are using a filler product, follow the kit’s instructions. Usually, you apply it to fill the scratch and then let it cure. The goal is to build up the scratched area until it’s level with the rest of the paint.
Step 4 Level the Dried Paint or Filler
Once the touch-up paint or filler is completely dry, it’s time to level it. This is a critical step for a smooth finish. You can use a rubbing compound and a foam applicator pad.
Work the compound into the filled area using light to moderate pressure. This gently grinds down the high spots of the touch-up paint or filler. Continue until the filled area is flush with the surrounding paint.
After leveling, you might see some light scuff marks from the compound. This is normal.
Step 5 Polish and Protect
Now, use a finer polish to remove any haze or light scratches left by the rubbing compound. Apply a small amount of polish to a clean microfiber towel and buff the area. This restores the shine.
Finally, apply a coat of car wax or sealant to the repaired area. This protects the fresh paint and the surrounding clear coat. It also helps to blend the repair into the rest of the car’s finish.
Dealing with Very Deep Scratches
Sometimes scratches are so deep they expose the metal underneath. These are the most challenging to fix at home. Rust can start forming quickly, so it’s important to act fast.
The repair for these scratches is more involved.
Primer and Clear Coat Application
If you’ve sanded down to the primer or metal, you’ll need to reapply those layers. First, clean the exposed area thoroughly. Then, apply a thin coat of automotive primer.
Let it dry according to the product instructions.
Once the primer is dry, you can apply your touch-up paint. Build it up in thin layers. After the base coat is dry, you’ll need to apply clear coat.
This protects the color and adds shine.
Wet Sanding Techniques
For advanced users, wet sanding can be used to level the newly applied layers of paint and clear coat. This involves using very fine grit sandpaper (3000 grit and higher) with water. It helps to create a perfectly smooth surface before polishing.
Wet sanding requires a very light touch and patience. It’s easy to sand too much and damage the surrounding paint. Practice on scrap material if you are unsure.
When Professional Help is Best
For scratches that go down to the bare metal and are quite large, professional repair might be the safest and most effective option. Auto body shops have the equipment and expertise to repair these damage types properly. They can ensure the metal is treated to prevent rust and that the paint match is seamless.
A professional can also perform paint blending, which is difficult to achieve perfectly at home. This ensures the repaired area looks like it was never scratched.
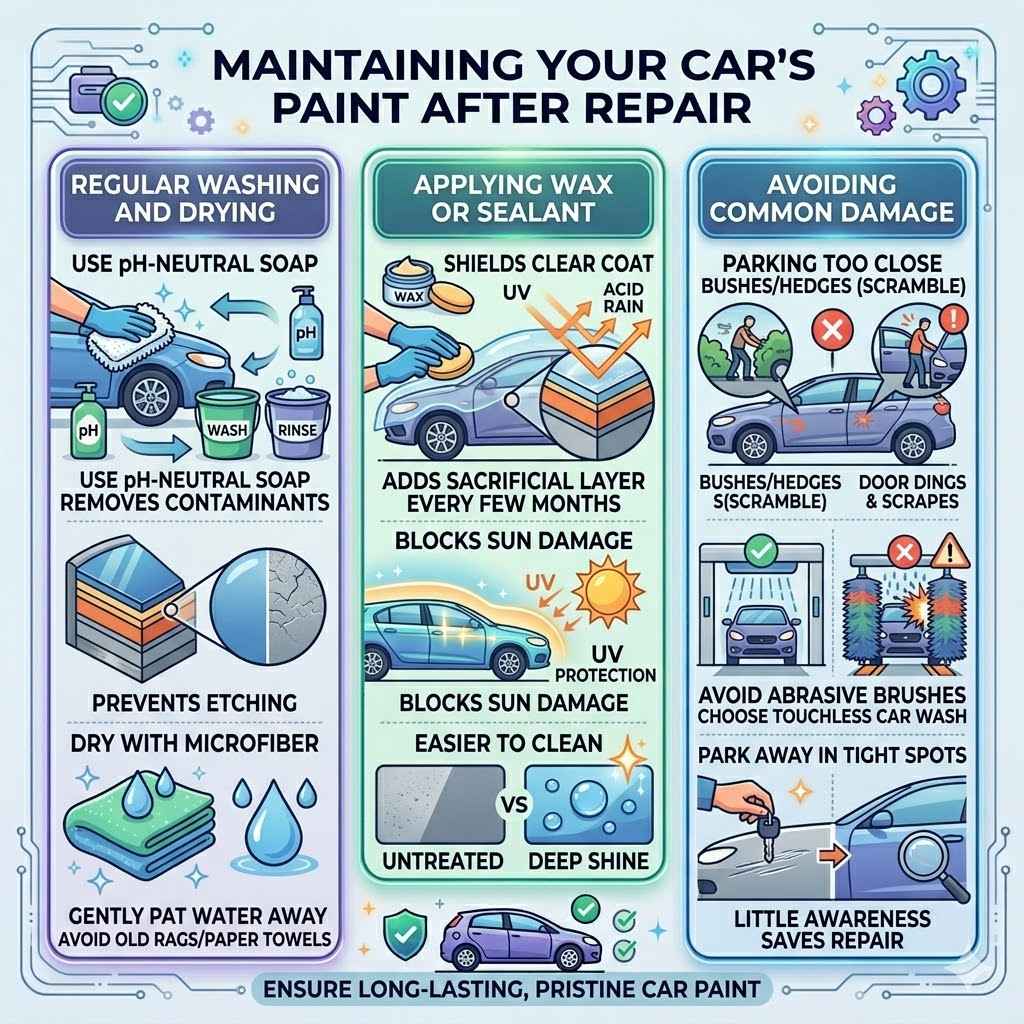
Maintaining Your Car’s Paint After Repair
After you’ve successfully fixed those deep scratches, keeping your car’s paint in good shape is key. Proper maintenance prevents new scratches and keeps your car looking its best. Good habits go a long way.
Regular Washing and Drying
Wash your car regularly with pH-neutral car soap. This removes dirt and contaminants that can etch into the paint over time. Always use a clean wash mitt and a separate rinse bucket.
When drying, use clean, soft microfiber towels. Avoid using old rags or paper towels, which can scratch the paint. Gently pat or blot the water away.
Applying Wax or Sealant
Applying a quality car wax or paint sealant every few months is a great way to protect your paint. Wax and sealants add a sacrificial layer that shields the clear coat from UV rays, acid rain, and other environmental hazards.
This protective layer also makes the paint easier to clean and adds a deep shine. Look for products that offer good durability and UV protection.
Avoiding Common Paint Damaging Situations
Be mindful of situations that can easily scratch your car’s paint. Parking too close to bushes or hedges can cause scratches. Also, avoid automatic car washes with abrasive brushes if you want to keep your paint pristine.
When parking in tight spots, try to park away from other cars to reduce the risk of door dings and accidental scrapes. A little awareness can save you a lot of repair work down the line.
Frequently Asked Questions
Question: How long does a car scratch repair take
Answer: The time it takes to repair a deep scratch can vary. Simple touch-ups might take an hour or two. More involved repairs, especially those requiring multiple layers of paint and drying time, could take a full day or even longer.
Question: Can I fix a scratch that went down to the metal
Answer: Yes, but it is more complex. You will need to clean the metal, apply a rust inhibitor, prime it, then apply touch-up paint and clear coat. For best results, professional help is often recommended for metal scratches.
Question: How often should I wax my car after scratch repair
Answer: After repairing a scratch and applying a sealant or wax, it’s a good idea to reapply wax or sealant every 2-3 months to maintain protection and shine.
Question: What is the difference between rubbing compound and polish
Answer: A rubbing compound is more abrasive and is used to remove deeper imperfections and level surfaces. A polish is less abrasive and is used to refine the surface and restore shine after compounding.
Question: Can I use toothpaste to fix car scratches
Answer: While toothpaste contains mild abrasives and might help with very light clear coat scratches, it is not recommended for deep scratches. It lacks the necessary fillers and protective qualities for more significant damage.
Summary
Fixing deep car paint scratches is manageable with the right approach. Understanding paint layers and using appropriate products like touch-up paint and fillers are key. Following a step-by-step process of cleaning, filling, leveling, and protecting ensures a smooth finish.
For the most severe damage, professional help is a wise choice. Regular car care will keep your paint looking great.