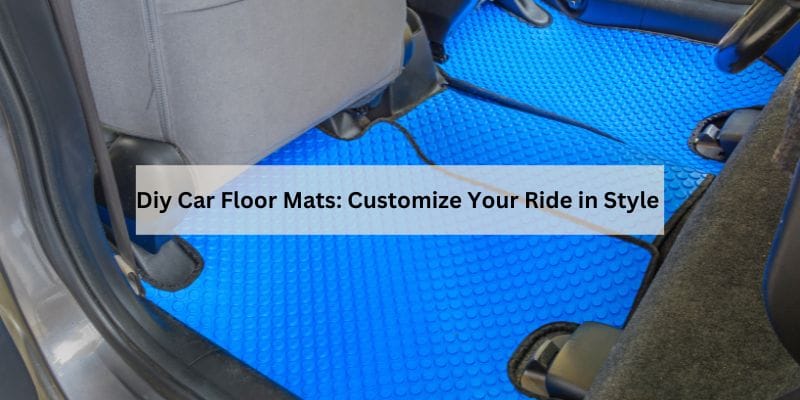
DIY Car Floor Mats: The Pro-Grade Guide to a Factory-Quality Fit
You drop a coffee cup between your legs on the morning commute. The lid pops. Before you can react, a brown wave spreads across the carpet. That stain will sit there for years, laughing at every cleaning product you throw at it. This is the exact moment most people start thinking about making their own floor mats.
Store-bought universal mats slide around, curl at the edges, and never quite cover the dead pedal. Custom-fit sets from dealerships cost an arm and a leg. DIY car floor mats sit right in the middle: you get a perfect fit for the price of raw material and a few hours of work.

JAOGAUS
Floor Mats for Honda Pilot 2009-2015 (Fit…
- Custom Fit: The floor mats fit for Honda Pilot 2009 2010 2011 2012 2013 2014 2015 (Fit for 2009-2015 Honda Pilot EX/EX-L/LX/SE/Tou…
- TPE Material: The floor mats is made from heavy-duty thermoplastic elastomer (TPE). They are highly resilient and resistant to def…
- Non-Slip Design: The anti-slip buckles at the bottom of the floor mats are adapted to your car model and can be firmly fixed in pl…
This guide walks you through the whole process with an engineering mindset. You’ll learn which materials hold up, how to make a template that matches complex floor contours, and how to finish edges so they don’t fray or let water through. I’ve made these mistakes so you don’t have to.
If the process sounds like more effort than you want to invest, a quality pre-made set like the JAOGAUS floor mats for Honda Pilot delivers that custom fit without the template work. They use 3D-scanning technology to match the exact floor pan, so you get the same precision without cutting anything yourself.
Why Make Your Own Car Floor Mats?
The biggest reason is fit. Your car’s floor pan has curves, humps, and recesses that a rectangular rubber mat will never cover. Dirt and water find those gaps and settle into the factory carpet. Once that happens, the smell and staining are nearly impossible to reverse.
Cost is the second reason. A sheet of quality rubber or marine carpet runs $40 to $80. A full custom set from a brand name costs $150 to $300. You’re saving real money, and you get to choose the exact material and color you want.
There’s also the satisfaction factor. When you pull a mat out that fits your transmission hump like a glove, you’ll never look at a universal mat the same way again.
Choosing the Right Material (and What to Avoid)
Material choice determines everything: how long the mats last, how easy they are to clean, and how much effort cutting takes. Most people grab whatever rubber mat is on sale. That’s a mistake.
You need a material that won’t curl in summer heat, won’t crack in winter cold, and can be cut cleanly without shredding. Here’s how the three main options stack up.
Comparing Carpet, Rubber, and Felt
| Material | Cost per Square Foot | Durability | Ease of Cutting | Waterproofing | Best Use Case |
|---|---|---|---|---|---|
| Marine Carpet | $4–$8 | High; resists UV and mildew | Moderate; needs a sharp blade and straight edge | Poor unless treated; backing is usually rubber | Pickup trucks, work vehicles, heavy foot traffic |
| Rubber (TPE or EPDM) | $3–$6 | Very high; flexible in extreme temps | Easy; cuts cleanly with a utility knife | Excellent; naturally impermeable | All-weather protection, winter slush, muddy boots |
| Recycled Felt | $2–$4 | Low to medium; compresses over time | Very easy; scissors work fine | None; acts like a sponge | Garage or shop use, temporary solutions |
My recommendation for daily drivers is TPE rubber. It handles the widest range of conditions, doesn’t off-gas like PVC, and you can cut it with a standard utility knife. Marine carpet looks nicer in a truck, but you’ll fight water intrusion forever unless you seal every edge perfectly.
Skip recycled felt entirely for floor use. It absorbs moisture, holds odors, and breaks down within a year. It’s fine for a shop bench, not for a footwell.
Tools and Supplies You’ll Need
Gather these before you start. Running to the hardware store mid-project with a half-cut mat in your trunk is a pain.
- Utility knife with fresh blades (buy a pack of 10; dull blades tear rubber)
- Heavy-duty scissors for trimming carpet or felt
- Long straightedge or metal ruler (at least 24 inches)
- Marker or chalk for tracing (chalk works better on dark rubber)
- Masking tape or painter’s tape
- Heat gun or hairdryer for molding curves
- Sandpaper (80-grit) for roughing surfaces before adhesive
- Contact cement or spray adhesive
- Rubber edge trim (sold by the foot at auto parts stores)
- Grommet kit and a hammer
One thing people forget: a work surface you don’t mind cutting on. A piece of plywood or a scrap of MDF works perfectly. Cutting on a concrete floor will dull your blade in seconds.
How to Measure Your Car Floor Perfectly
Measurements are where most DIY floor mats fail. People measure the visible carpet area and forget about the vertical walls, the dead pedal, and the slope under the seat. Your mat needs to cover all of it.
Start by cleaning the floor. Vacuum out debris and wipe down the carpet. A dusty surface will shift your template and give you a sloppy fit.
Measure the length from the firewall (where the carpet meets the dashboard) to the rear edge under the seat. Measure the width at the widest point, usually near the door sill. Write these numbers down, but don’t cut anything yet. Flat measurements lie.
Creating a Paper Template for Complex Curves
For a footwell with a transmission hump, seat rails, or deep contours, a flat measurement won’t work. You need a template that captures the 3D shape. Use craft paper or a roll of brown packing paper.
Lay the paper over the floor and press it into the contours with your hands. Tape it in place along the edges. Use the handle of a screwdriver to push the paper into the creases where the floor meets the wall. This is where most people rush, and it shows in the final fit.
Trace the outline of the floor pan onto the paper. Mark the locations of the seat rails, the transmission hump, and any retention hooks. Cut the paper along your lines, then test-fit it in the car. Adjust with scissors until it sits flat and covers everything.
Transfer the paper template to your material and trace around it. Add a 1-inch margin on every side. You’ll trim this down later; it’s much easier to remove material than to add it.
Cutting and Shaping Your Mats
Cutting rubber is straightforward, but technique matters. Use a sharp blade and cut on a stable surface. Score the rubber along your line, then go over it a second time. Don’t try to cut through in one pass; you’ll end up with jagged edges.
For curves, make short, controlled cuts. A long sweeping cut will pull the blade off course. Keep a spare blade handy and swap it out the moment you feel resistance.
After the initial cut, test-fit the mat in the car. It will be too big, which is correct. Mark the spots that need trimming and take it back to your workbench. Repeat this process two or three times. Each iteration gets you closer to a perfect fit.
Handling Transmission Humps and Seat Rails
Transmission humps are the hardest part. The material needs to bend over a raised center section without creasing or leaving gaps. A heat gun makes this possible.
Heat the rubber along the line where it needs to bend. Work in small sections, heating for 15-20 seconds and then pressing the material over the hump. Hold it in place until it cools. The rubber will hold that shape permanently. This works with TPE and EPDM, but be careful not to overheat; bubbling or melting ruins the material.
Seat rails need relief cuts. These are small V-shaped notches cut into the edge of the mat so it can wrap around the rail without bunching. Cut a notch, fold the material over, and secure it with contact cement. Sand the area first so the adhesive actually bonds.
Adding Non-Slip Backing and Retention Clips
A mat that slides around is worse than no mat at all. It bunches under the pedals, which is a genuine safety hazard. You have three options for keeping your mats in place, and you should use at least two of them.
First, add a non-slip backing. You can buy spray-on rubberized coating or adhesive-backed mesh. Spray-on coating is easier to apply but wears off in about six months. Adhesive mesh lasts longer but requires careful alignment to avoid bubbles.
Second, install grommets for your car’s factory retention hooks. Most vehicles have hooks or posts in the floor pan. Mark their locations on your mat, punch a hole with a grommet kit, and insert the grommet. This locks the mat to the floor and prevents all forward movement.
Third, use Velcro strips as a backup. Apply the hook side to the mat and the loop side to the factory carpet. Press firmly to seat it. Velcro works especially well for the driver’s side, where heel pressure tends to shift mats forward over time.
If your car doesn’t have factory hooks, the non-slip backing guide covers additional retention methods that work with any vehicle.
Waterproofing and Edge Finishing (The Missing Step)
This is where most DIY guides leave you hanging. They tell you to cut the mat and stop. Then you wonder why the edges fray after a month and water seeps through to the carpet below. Edge finishing is not optional.
For rubber mats, the edges are already sealed. But raw cut edges are sharp and can catch on your shoes. Install rubber edge trim along the perimeter. It snaps over the edge, protects the cut line, and gives a finished look. You’ll find it in the automotive section of most hardware stores, sold by the foot.
For carpet or felt mats, you must seal the edges to prevent fraying. The best method is heat-sealing with a soldering iron or a hot knife. This melts the fibers together, creating a hard, sealed edge. If you don’t have a hot knife, use binding tape. Fold it over the edge and sew or iron it in place. It’s slower, but it works.
Waterproofing spray is essential for carpet mats. Apply a silicone-based spray to the entire surface, paying extra attention to the edges and corners. Let it dry completely, then apply a second coat. This creates a barrier that makes water bead up and roll off instead of soaking in. Reapply every six months or after every deep cleaning.
For rubber mats, skip the spray. TPE and EPDM are already waterproof. Adding a spray just leaves a sticky residue that attracts dirt.
Installation and Daily Maintenance Tips
Installation is simple once your mats fit correctly. Place them in the car, align the retention hooks with the grommets, and press down firmly. Check that the mats don’t interfere with the pedals. Press each pedal to the floor and make sure the mat doesn’t curl up or block travel.
Maintenance depends on material. Rubber mats need a wipe-down with a damp cloth or a rinse with a hose. Let them dry completely before reinstalling; trapped moisture causes mildew. For deep cleaning, use a mild soap solution and a stiff brush. Avoid harsh chemicals like bleach or solvent-based cleaners, which degrade the rubber.
Carpet mats need vacuuming weekly and a spot treatment when stains appear. Blot stains immediately with a clean cloth. For set-in stains, use a carpet cleaner formulated for automotive use. After cleaning, reapply waterproofing spray to restore the protective layer.
One habit that extends mat life: shake them out weekly. Dirt and grit act like sandpaper, grinding away at the material surface. A quick shake removes the abrasive particles before they do damage.
Frequently Asked Questions
How long does it take to make a full set of DIY car floor mats?
Plan for four to six hours total. The first mat takes the longest because you’re creating the template. The passenger and rear mats go faster since you’ve already worked out the process. Add an extra hour if you’re heat-molding around a transmission hump.
Can I use the old floor mats as a template?
Yes, if they’re the same shape as the floor pan. Factory mats are usually accurate templates. Aftermarket universal mats are not; they’re cut to fit multiple vehicles, so they have excess material in some areas and gaps in others. Use them as a starting point, but verify the fit against the actual floor.
What’s the best material for a car that sees heavy rain and snow?
TPE rubber, without question. It’s completely waterproof, flexible in cold temperatures, and wipes clean with a cloth. Marine carpet with a rubber backing works if you seal the edges perfectly, but it requires more maintenance to keep water from seeping through the seams.
How do I stop the mat from sliding under the pedals?
Use a combination of retention methods. Install grommets for factory hooks if your car has them. Add a non-slip backing spray or adhesive mesh. Velcro strips along the front edge provide extra security. Any single method can fail; two or three together rarely do.
Is it worth buying a custom-fit set instead of making my own?
That depends on your tolerance for detail work. Making your own saves money and gives you complete control over material and color. But a pre-made custom set, like the top-rated floor mats from a reputable brand, guarantees a perfect fit with zero effort. If your time is worth more than the $60 to $100 you save, buy the set.
Final Verdict: Is It Worth the Effort?
DIY car floor mats are worth it if you enjoy the work and want a specific material or color that isn’t available off the shelf. The process is forgiving; you can always trim more, and mistakes are cheap to fix.
If you’re not a hands-on person, the effort will frustrate you. Template making requires patience, and heat molding takes practice. A bad DIY mat that slides around or lets water through is worse than a decent universal mat.
Here’s what I’d do if I were starting over:
- Choose TPE rubber for anything that sees weather; it’s the most forgiving material to cut and the easiest to clean.
- Spend the extra hour on a paper template. It’s the difference between a mat that fits and a mat that sort of fits.
- Use a heat gun for transmission humps; forcing cold rubber creates creases that never flatten out.
- Install grommets for factory retention hooks before you add any other anti-slip measures.
- Seal every edge, even on rubber mats. Edge trim prevents catching and looks professional.
- Reapply waterproofing spray on carpet mats every six months; it wears off faster than you think.
- Check the cleaning guide for maintenance routines that keep your mats looking new.
Making your own mats is a weekend project with a tangible payoff. You’ll never look at a $20 universal mat the same way again, and your carpet will thank you.
Products related to this article
Sponsored / affiliate links. As an Amazon Associate I earn from qualifying purchases. I may earn additional commission from eligible campaigns.