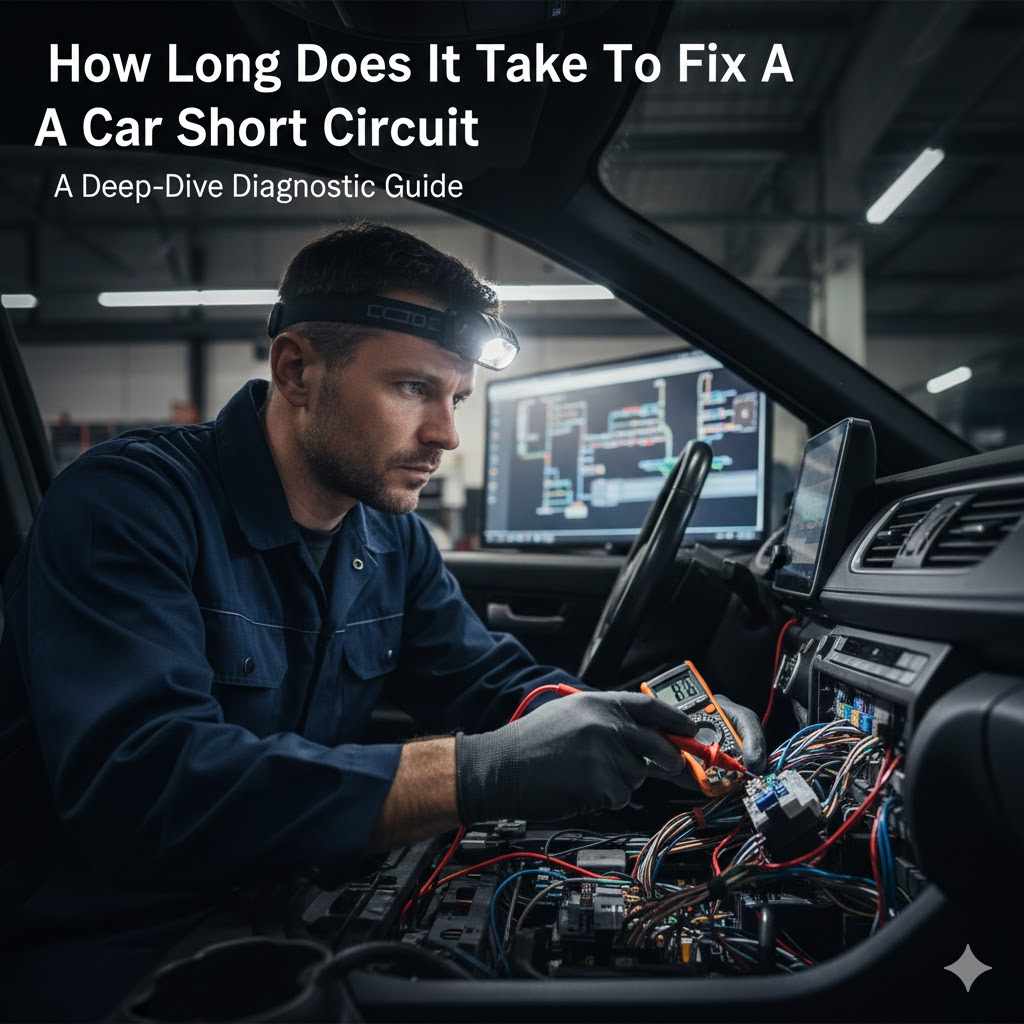
How Long Does It Take To Fix A Car Short Circuit
Figuring out How Long Does It Take to Fix a Car Short Circuit? can be a tricky puzzle for many car owners. It’s not always a simple answer because car electrical systems are quite complex. When a short circuit happens, it’s like a tiny electrical hiccup that can cause all sorts of strange problems.
For those who aren’t mechanics, finding and fixing these issues can feel overwhelming. But don’t worry! This guide will walk you through everything step by step.
We’ll make it easy to understand so you can get your car back in perfect working order. Let’s see what’s involved in getting your car’s electrical system running smoothly again.
Understanding Car Short Circuits and Their Causes
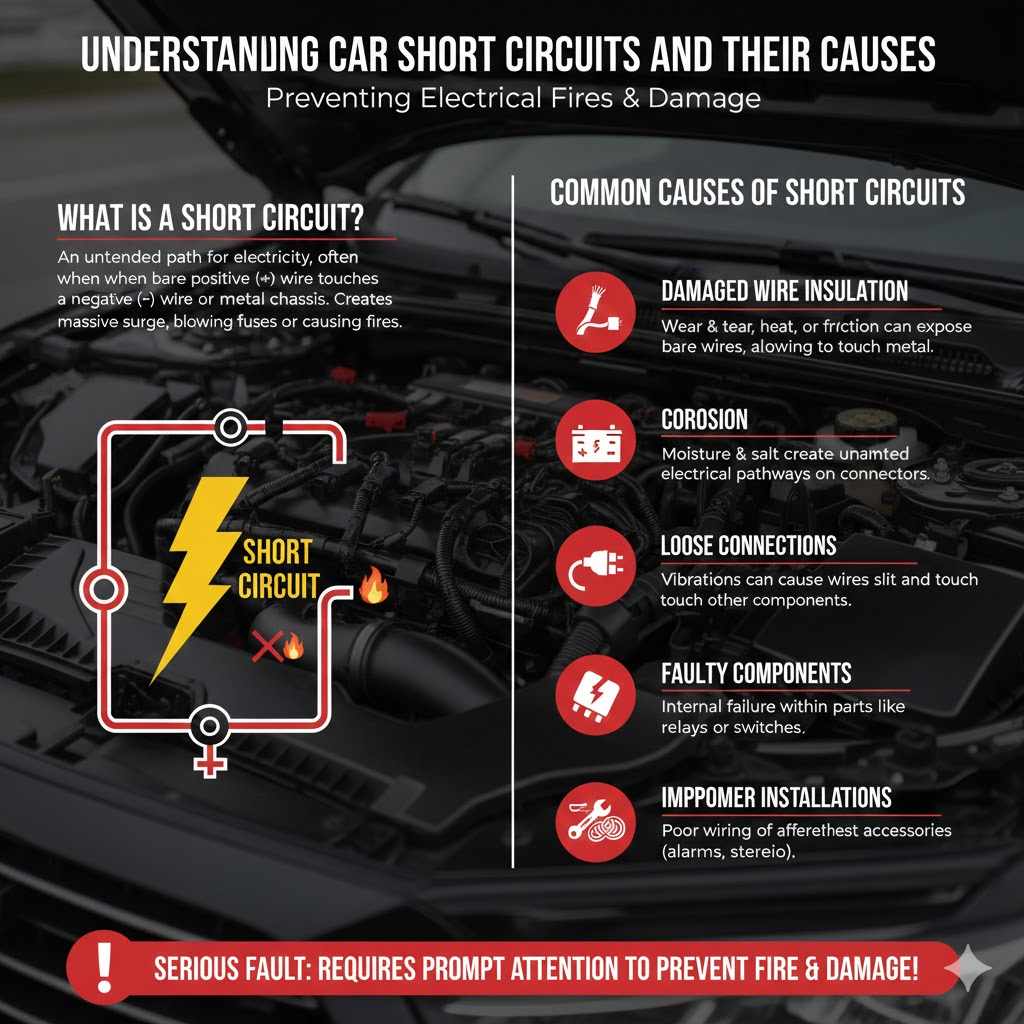
A car short circuit is an unintended path for electricity to flow, usually bypassing the normal circuits. This happens when the insulation around wires gets damaged, wires touch each other, or components fail. When a short circuit occurs, it can draw too much current, which can blow fuses, damage electrical components, or even cause fires. It’s a serious electrical fault that needs prompt attention to prevent further damage.
What is a Short Circuit?
A short circuit is a low-resistance path that allows electrical current to bypass its intended route. In a car, this often means a positive (+) wire touching a negative (-) wire or a metal chassis. This bypass creates a massive surge of electricity.
Think of it like a water pipe. If you have a pipe designed to carry water to a faucet, and suddenly a hole appears right at the start that lets all the water leak out before it even gets to the faucet, that’s like a short circuit. The water (electricity) is going somewhere it shouldn’t, and not reaching its destination. This rapid discharge can generate a lot of heat very quickly.
Common Causes of Short Circuits
Several things can lead to a short circuit in your vehicle. Age and wear are major culprits.
Damaged Wire Insulation: Over time, wires in your car can get brittle, cracked, or frayed. This often happens due to constant movement, heat, or contact with sharp metal edges. When the protective coating wears off, the bare wire can easily touch other wires or metal parts.
For example, a wire bundle running along the engine bay might rub against a hot engine component or a sharp bracket. The friction can wear down the insulation. Once the copper wire is exposed, it’s a prime candidate for causing a short if it touches metal.
Corrosion: Moisture and road salt can cause corrosion on electrical connectors and terminals. This corrosion can create unintended electrical pathways, essentially acting like a jumper cable between circuits.
Imagine a fuse box where the metal terminals holding the fuses are covered in a green, powdery substance. This corrosion can spread and start bridging the connections between adjacent fuses, causing them to blow or short out.
Loose Connections: Vibrations from driving can cause electrical connectors to loosen. If a wire is not securely connected, it might slip out and touch something it shouldn’t.
A connector that plugs into a light bulb, for instance, might become loose. If the exposed metal of the wire within the connector then touches the metal housing of the headlight assembly, a short circuit can occur.
Faulty Components: Sometimes, the electrical component itself can fail internally, creating a short. This could be a starter motor, an alternator, or even a simple switch.
If a relay, which acts like an electrical switch, has its internal contacts welded together or breaks apart, it can create a direct short. This would allow current to flow constantly, even when it’s not supposed to.
Improper Installations: Aftermarket accessories, like alarms, stereos, or extra lights, are sometimes installed incorrectly. Poor wiring jobs or using the wrong gauge wire can lead to insulation damage or wires touching.
A common mistake is tapping into an existing wire without properly insulating the connection. If the bare wire from the new accessory touches the original car wire or nearby metal, a short is likely.
This section helps you understand the basic problem and why it happens. Knowing the cause is the first step to fixing it. We’ll discuss how to find these issues next.
Diagnosing a Car Short Circuit
Finding a short circuit is often the most time-consuming part of the repair. It requires patience, a good understanding of your car’s electrical system, and the right tools. The goal is to systematically isolate the faulty circuit or component.
Tools Needed for Diagnosis
You’ll need a few key tools to effectively track down a short circuit. These tools help you test for continuity, voltage, and resistance, which are all crucial for electrical troubleshooting.
Multimeter: This is your most important tool. A digital multimeter (DMM) can measure voltage, current, and resistance. You’ll use it to check for continuity (if a circuit is complete) and to measure voltage drops, which can indicate a problem.
For example, to check for a short, you’d disconnect a component and test for resistance between its wires and the car chassis. If you get a very low resistance reading (close to zero ohms), it indicates a direct short.
Test Light: A simple test light can quickly show if a circuit is receiving power. It’s less precise than a multimeter but faster for initial checks.
You can connect a test light between a power source and ground. If the bulb lights up, power is present. If it doesn’t, there’s likely an open circuit or a blown fuse.
Wiring Diagrams: These are essential blueprints for your car’s electrical system. They show how each circuit is laid out, what components are involved, and the color codes of the wires. You can usually find these in a car repair manual specific to your vehicle’s make and model.
A wiring diagram will show you that the power for your headlights comes from a specific fuse, goes through a headlight switch, and then to the bulbs. Knowing this path helps you trace the problem.
Circuit Breaker Finder / Noid Light Set: For more advanced diagnosis, specialized tools can help. A circuit breaker finder sends a signal through a fuse or circuit and allows you to locate the affected circuit using a probe. Noid lights are used for diagnosing issues with fuel injection systems.
The Diagnostic Process
The process usually involves checking fuses, then tracing circuits methodically.
1. Check Fuses and Relays: Start with the easiest part. Look at your car’s fuse boxes (there are often two: one under the hood and one inside the cabin). Visually inspect all the fuses. A blown fuse will have a broken wire inside it.
If you find a blown fuse,
2. Isolate the Circuit: Once you know which circuit is shorted (because its fuse keeps blowing), you need to isolate it. This means disconnecting components one by one until the fuse stops blowing.
For example, if the fuse for the radio keeps blowing, you would disconnect the radio, then any amplifiers, then the antenna power wire, and so on. When you disconnect a specific item and the fuse no longer blows when you turn on the ignition or the relevant system, you’ve found the faulty component or wiring connected to it.
3. Perform Continuity and Resistance Tests: With the circuit isolated, use your multimeter. Disconnect both ends of a suspected wire. Test for continuity between the wire and the car’s metal chassis (ground). A reading of near zero ohms means the wire is directly shorted to ground.
You can also test for continuity between what should be separate wires in the harness. If you find continuity where there shouldn’t be, that pinpoints a short between those two wires.
4. Use a Jumper Wire or Test Light (Carefully!): Sometimes, a quick test can help. With a suspect circuit identified, you can temporarily disconnect the power source wire leading to that circuit. Then, connect a jumper wire or a high-wattage test light from the power source to the wire that goes to the component. If the jumper wire or test light gets very hot or glows brightly, it indicates a heavy draw, confirming a short.
This method needs extreme caution. If the short is severe, it can damage the jumper wire or test light. It’s best for experienced users.
This thorough approach to diagnosis can take anywhere from 30 minutes to several hours, depending on the complexity and accessibility of the wiring.
How Long Does It Take to Fix a Car Short Circuit? Factors Involved
The actual repair time for a short circuit can vary wildly. It depends on what caused the short, where it is located, and the skill of the person doing the repair. There’s no single answer, but we can look at the common scenarios.
Severity and Location of the Short
A simple fix is often a blown fuse or a loose connection. A complex issue involves wires hidden deep within the dashboard or engine harness.
Minor Issues: If the problem is a single, easily accessible fuse that has blown, replacing it takes seconds. If a wire has simply come loose from a connector and is visible, reattaching it might take only a few minutes. These are the best-case scenarios.
For instance, a wire connecting to a fog light might have vibrated loose and is touching the metal fender. Snapping it back into place and securing it could take less than five minutes.
Moderate Issues: These involve tracing a short through a harness or replacing a damaged section of wire. This might require removing trim panels, parts of the dashboard, or undercarriage components to get to the wiring. This can easily take 1 to 3 hours.
Consider a short in the wiring that powers your power windows. The harness runs through the door panel and into the car’s body. Accessing and repairing a frayed wire within this bundle could involve disassembling the door.
Major Issues: The worst-case scenarios involve heavily damaged wire harnesses, shorts deep inside the engine control unit (ECU), or shorts that have caused melted plastic and wire insulation over a large area. These repairs can take many hours, or even days, and may require professional specialized tools and knowledge.
Imagine a short circuit that caused significant melting in the main engine harness. This harness contains dozens of wires. Repairing it might involve cutting out damaged sections, carefully splicing in new wires, and properly insulating everything. This could take a full day or more.
Accessibility of the Faulty Wiring
How easy it is to reach the problem area dramatically affects repair time.
Under the Hood: Some engine bay wiring is relatively exposed. Other parts are hidden behind engine components, making access difficult.
A short on a battery cable is usually easy to find and fix. A short within a complex sensor harness near the engine block can be very hard to reach.
Inside the Cabin: Dashboards are often packed with wires, support structures, and components. Removing dashboard parts can be time-consuming and requires care to avoid breaking clips or damaging surfaces.
Fixing a short in a door harness involves removing the interior door panel. This usually takes about 30 minutes per door.
Under the Vehicle: Wiring for lights, sensors, and drivetrain components is often routed underneath the car. Access might require lifting the vehicle on a lift or jack stands, which adds setup time and safety considerations.
Repairing a trailer wiring harness, which is often located underneath the chassis, might take an hour or two if the connections are corroded or wires are damaged by road debris.
The Role of Experience and Skill
A seasoned mechanic with years of electrical troubleshooting experience will likely find and fix a short circuit much faster than a DIYer tackling it for the first time. Their familiarity with common problem areas and diagnostic techniques saves a lot of guesswork.
DIYer vs. Professional: A beginner might spend half a day just trying to locate a subtle short circuit that a professional could pinpoint in an hour. The mechanic also knows the proper repair techniques and materials to ensure the fix lasts.
If you’re new to car repair, figuring out how to remove dash panels without breaking them can take extra time. A mechanic knows which clips to release and in what order.
Specialized Tools: Some repairs might require specialized tools that a DIYer might not own, such as a serpentine belt tool for easier access to certain engine components, or a special crimper for electrical connectors. Professionals have these readily available.
Using a tool that can precisely measure current draw can help a professional quickly identify a parasitic drain that’s causing a fuse to blow, saving hours of trial and error.
Time Estimates Based on Scenario
Quick Fix (30 minutes – 1 hour): Blown fuse, loose visible wire, simple connector repair.
Moderate Repair (2 – 4 hours): Repairing a section of a wire harness, removing dashboard components to access wiring.
Complex Repair (4+ hours to multiple days): Extensive harness damage, hard-to-reach shorts, systemic electrical faults.
It’s also important to factor in diagnostic time, which is often the longest part. You can’t fix what you can’t find.
Case Studies and Real-Life Examples
Let’s look at a few examples to illustrate how long these repairs can take in practice. These scenarios highlight the variability in short circuit repairs.
Case Study 1: The Mysterious Interior Light Drain
A car owner noticed their car battery was dying overnight. They brought it to a shop, suspecting a parasitic drain. The technician began the diagnostic process by disconnecting the battery and testing for current draw.
They first checked fuses related to interior lights, the radio, and accessories. The fuse for the interior lights was drawing a significant amount of current, even when all doors were closed and the car was off. This indicated a short or a faulty component on that circuit.
The technician then removed the interior light bulbs, but the drain persisted. Next, they systematically checked the wiring associated with the dome lights, map lights, and the door switches. After about an hour, they discovered that a wire leading to the glove box light had frayed against a metal bracket and was intermittently touching the chassis.
The repair involved carefully rerouting the wire and adding electrical tape to protect the insulation. The entire diagnostic and repair process took approximately 1.5 hours.
Case Study 2: Intermittent Engine Stalling
A driver experienced their car stalling intermittently while driving. The check engine light also came on and off. The dealership’s diagnostic scan revealed a P0300 code (random misfire). After checking for common issues like spark plugs and fuel injectors, they suspected an electrical fault.
The technicians began tracing the engine wiring harness. They found that a specific harness connector near the transmission was corroded and had loose pins. This caused intermittent connection issues for sensors like the crankshaft position sensor and camshaft position sensor.
Diagnosing this required disconnecting and inspecting multiple sensors and their wiring. It took several hours to identify the corroded connector as the primary issue. The repair involved cleaning the connector terminals thoroughly and applying dielectric grease to prevent future corrosion. The full repair, including extensive diagnostic checks of related sensors, took about 4 hours.
Real-Life Scenario: The Smell of Burning Wires
A car owner reported smelling burning wires when they turned on their headlights. This is a clear sign of a short circuit that is drawing excessive current and generating heat. The car was towed to a repair shop.
The mechanic started by inspecting the headlight wiring. They found that the wiring harness leading to the driver’s side headlight had melted plastic and damaged insulation, likely from a previous minor impact or rubbing against a sharp edge. The headlight bulb itself was also shorted internally.
The repair involved replacing the headlight bulb, carefully cutting out the damaged section of the wiring harness, and splicing in a new section of wire using heat-shrink connectors to ensure a solid, insulated connection. This repair required access from both the front of the car and under the fender liner. The mechanic estimated this took around 2 hours to complete safely and effectively.
These examples show that the time taken can range from under two hours for accessible issues to several hours for more complex electrical problems.
How to Prevent Short Circuits
While not all short circuits can be prevented, you can take steps to reduce the risk. Proper maintenance and careful handling of your car’s electrical system are key.
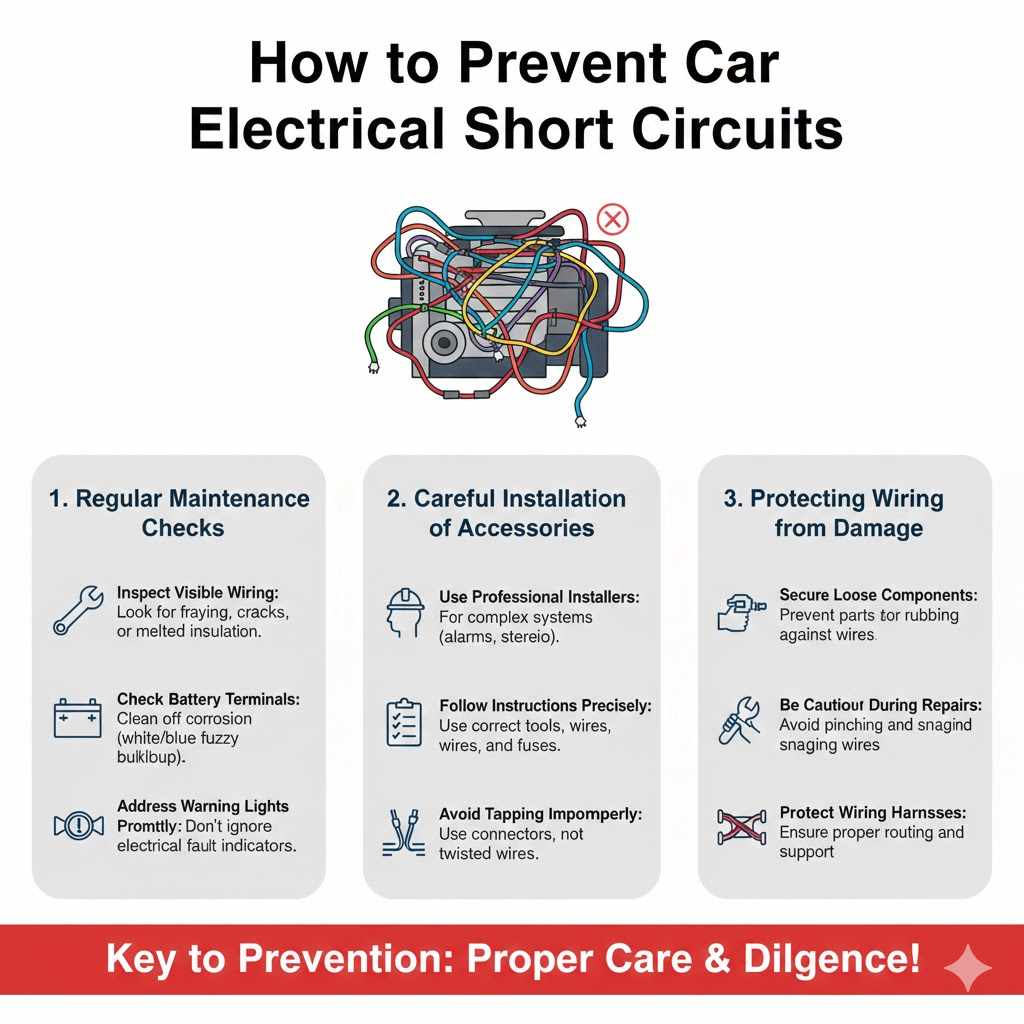
Regular Maintenance Checks
Keeping up with your car’s general maintenance can help catch potential electrical problems before they escalate into short circuits.
Inspect Visible Wiring: Periodically check the wiring that is easily accessible under the hood or in the door jambs. Look for any signs of fraying, cracking, or melted insulation. Gently tug on wires to ensure they are securely connected.
For instance, after an oil change, take a minute to look at the large wiring harnesses. See if anything looks out of place or is rubbing against other components.
*Check Battery Terminals: Ensure your battery terminals are clean and free of corrosion. Corroded terminals can sometimes cause poor connections that might be mistaken for shorts, or the corrosion itself can create unintended electrical paths.
If you see white or blue fuzzy buildup on the battery posts, clean it off with a wire brush and a baking soda solution.
*Address Warning Lights Promptly: If your car’s check engine light or other electrical warning lights come on, don’t ignore them. These lights are indicators of potential problems, including electrical issues that could lead to shorts.
A battery warning light might mean your alternator is failing, which can cause voltage fluctuations that stress electrical components and wiring.
Careful Installation of Accessories
Aftermarket additions can be a common source of short circuits if not installed correctly.
Use Professional Installers: For complex accessories like alarms, car stereos, or performance chips, it’s often best to have them installed by a qualified professional. They have the knowledge and tools to ensure the wiring is done correctly and safely.
A professional installer will use proper connectors, wire gauges, and insulation methods, minimizing the risk of future electrical faults.
Follow Instructions Precisely: If you are installing accessories yourself, read and follow the installation instructions very carefully. Use the correct tools and components. Never force a connection or bypass safety features.
When wiring a dash camera, for example, ensure you’re tapping into the correct power source and using an inline fuse to protect the circuit from overcurrent.
Avoid Tapping into Existing Wires Improperly: When adding accessories that need power, avoid simply stripping insulation and twisting wires together. This creates weak connections that can easily fail or short. Use proper crimp connectors, solder connections, or adapter harnesses designed for your vehicle.
A professionally installed aftermarket remote start system will use specialized harnesses that plug into the vehicle’s existing wiring without any cutting or splicing.
Protecting Wiring from Damage
Wiring harnesses are designed to be durable, but they can still be damaged by external factors.
Secure Loose Components: Ensure that any components mounted near wiring harnesses are secure. Loose parts can rub against wires and cause damage over time.
If your car’s battery tray is loose, the movement could cause battery cables to rub against other parts of the engine bay.
Be Cautious During Repairs: When working on other parts of your car, be mindful of the surrounding wiring. Avoid pinching wires with tools or letting them snag on parts you are removing or installing.
When replacing a headlight bulb, be careful not to pull on the wires connected to the bulb socket.
By taking these preventative measures, you can significantly reduce the chances of experiencing a short circuit and the associated repair time and costs.
Frequently Asked Questions
Question: How much does it cost to fix a car short circuit?
Answer: The cost can range widely from about $100 for a simple fuse replacement or minor wire fix to over $1,500 for complex wiring harness repairs. Diagnosis alone can cost $100-$200 at a shop.
Question: Can a short circuit damage other parts of my car?
Answer: Yes, a severe short circuit can overload and damage other electrical components, blow multiple fuses, or even cause fire damage if not addressed quickly.
Question: How do I know if my car has a short circuit?
Answer: Common signs include blown fuses, electrical components not working or acting strangely, a burning smell, or a battery that dies quickly.
Question: Is it safe to drive a car with a short circuit?
Answer: It is generally not safe to drive a car with a confirmed short circuit, especially if it is causing electrical system failures or a burning smell, as it can worsen damage or pose a fire risk.
Question: Can I fix a short circuit myself?
Answer: Simple shorts, like a blown fuse or a loose wire, can often be fixed by DIYers with basic tools. However, complex shorts require advanced diagnostic skills and tools, making professional repair advisable.
Summary
The time it takes to fix a car short circuit truly varies. Simple issues like a blown fuse might take minutes. More complex problems requiring tracing and repairing damaged wiring can take several hours. Factors like the short’s location, accessibility, and the skill of the technician play a big role. Thorough diagnosis is key, and preventative maintenance can help avoid future problems. Getting it fixed promptly ensures your car’s electrical system stays safe and reliable.