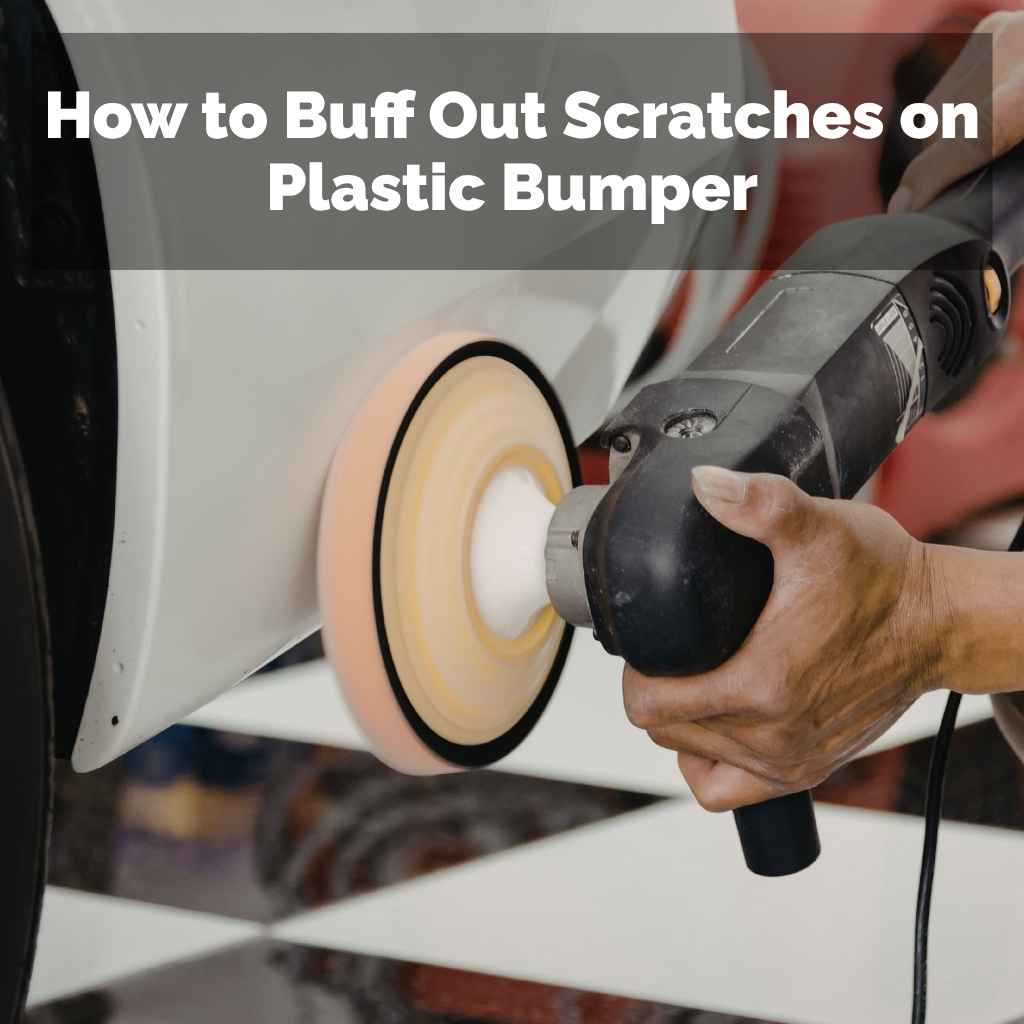
How to Buff Out Scratches on Plastic Bumper
Fixing up your car can feel tricky sometimes, especially when you see those annoying scratches on your plastic bumper. Many people worry that they’ll make it worse or that it’s too hard to do themselves. But don’t fret!
It’s actually quite doable, and we’re here to show you exactly how to do it. This guide will walk you through simple steps to make those scratches disappear, making your car look great again without a fuss.
How to Buff Out Minor Scratches on Plastic Bumper
This section covers the essentials for tackling those superficial marks that haven’t gone deep into the plastic. We’ll explore the basic methods and tools you’ll need to bring back a smooth finish. It’s about using gentle techniques to lift the damaged layer without causing harm.
Getting rid of these light blemishes can significantly improve your car’s appearance.
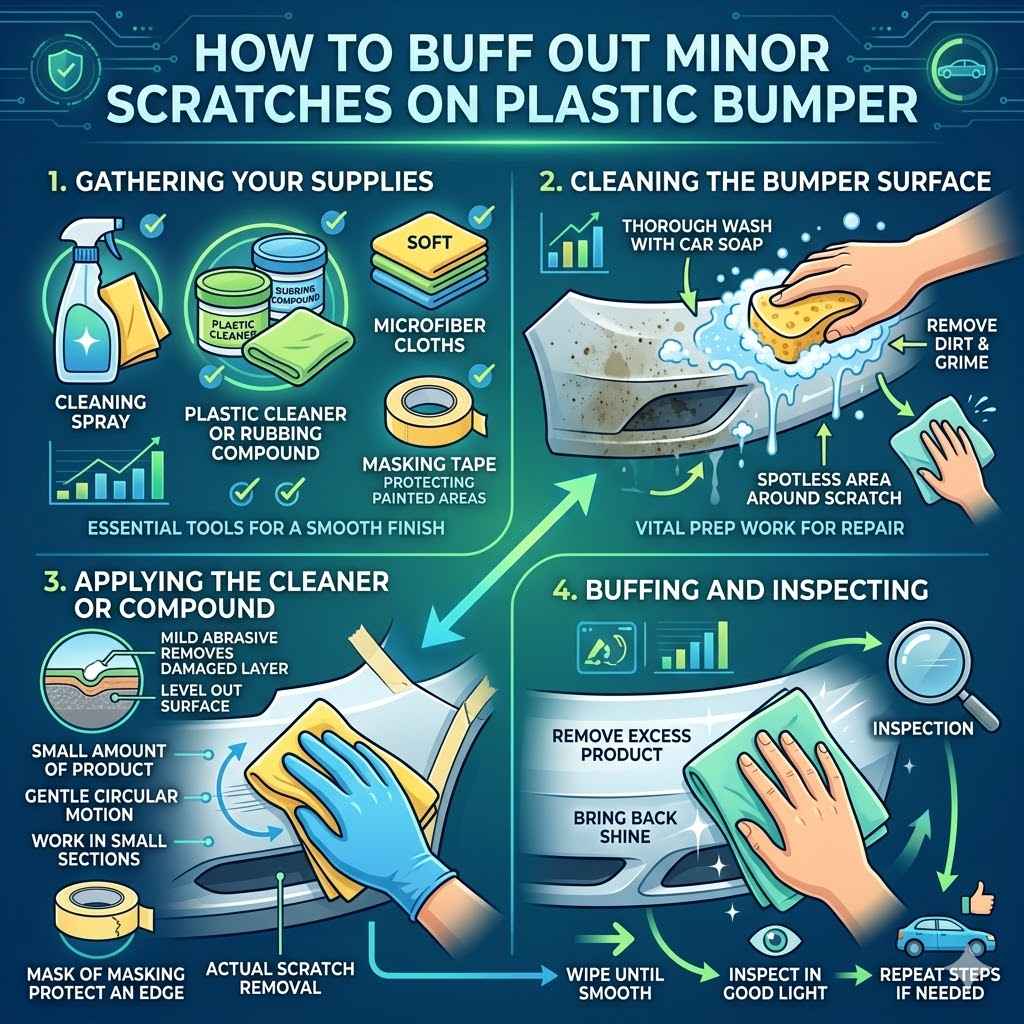
Gathering Your Supplies
Before you start, having the right stuff is super important. Think of it like getting your toolbox ready for any job. You’ll want a good cleaning spray to start.
This removes dirt and grime so you can see the scratch clearly. Then, you’ll need some plastic cleaner or a rubbing compound designed for car parts. These have a mild abrasive quality that helps level out the surface.
Microfiber cloths are also key. They are soft and won’t add more scratches. You might also need masking tape to protect areas around the scratch.
- Cleaning Spray: This is your first step to ensure a clean surface. A good car wash soap mixed with water or a dedicated automotive surface cleaner works best. It removes loose dirt, dust, and debris that could cause further scratching during the buffing process. Always spray generously and wipe clean with a microfiber towel to avoid trapping grit.
- Plastic Cleaner or Rubbing Compound: These are the workhorses for scratch removal. Plastic cleaners are often gentler for very light marks, while rubbing compounds have slightly more grit to tackle deeper surface imperfections. Look for products specifically labeled for automotive plastic bumpers. They are formulated to be effective yet safe for the material.
- Microfiber Cloths: You’ll need several of these. They are essential for applying products, wiping away residue, and buffing the surface to a shine. Their soft, lint-free nature prevents micro-scratches that can occur with harsher materials like paper towels or old rags. Having a clean cloth for each stage is a good practice.
- Masking Tape: This is used to protect painted areas adjacent to the plastic bumper. If your bumper has chrome trim or painted sections, taping them off will prevent accidental buffing or damage to these areas. It ensures precision and keeps your repair confined to the target scratch.
Cleaning the Bumper Surface
The very first thing you must do is give the bumper a thorough wash. Any dirt or grit left on the surface can act like sandpaper when you start rubbing. Use a mild car soap and plenty of water.
Rinse it off completely and dry it with a clean microfiber towel. Make sure the area around the scratch is spotless. This prep work is vital for a smooth repair.
For very light dirt, even a simple rinse with water followed by drying can be enough. But for most situations, a gentle wash is best. This removes oils and contaminants that might interfere with the cleaning or buffing agents.
Applying the Cleaner or Compound
Once the bumper is clean and dry, it’s time to apply your chosen product. Put a small amount of plastic cleaner or rubbing compound onto a clean microfiber cloth. Don’t use too much; a little goes a long way.
Gently rub the product over the scratch in a circular motion. Work in small sections. The goal is to lightly abrade the plastic around the scratch, making it level with the rest of the surface.
If you’re using a rubbing compound, start with a light touch. You can always add more pressure if needed. The idea is to remove just enough material to blend the edges of the scratch.
This process is what actually removes the damage.
Buffing and Inspecting
After rubbing the product into the scratch, take a clean, dry microfiber cloth. Buff the area in a separate circular motion. This removes any excess product and starts to bring back the shine.
You’ll want to wipe until the area looks smooth and the scratch is less visible. Inspect your work in good light. If the scratch is still there, you might need to repeat the rubbing and buffing steps.
Be patient, as multiple applications might be necessary for stubborn marks.
It’s important to keep the pressure consistent. Uneven pressure can lead to uneven results. Always work in a shaded area; direct sunlight can cause the product to dry too quickly, making it harder to work with and potentially leaving streaks.
How to Buff Out Deeper Scratches on Plastic Bumper
When scratches are more than just surface level, you’ll need a slightly different approach. These deeper marks might catch your fingernail. This section explains how to handle them with more robust methods, including fine-grit sandpaper and polishing compounds.
It’s about carefully removing more material to level the surface. Success here means your bumper can look almost new again.
Assessing Scratch Depth
First, run your fingernail gently across the scratch. If your nail doesn’t catch, it’s likely a shallow scratch. If your nail catches, even a little, it’s a deeper scratch.
This simple test helps you decide which methods are appropriate. Deeper scratches require more careful work to avoid damaging the surrounding plastic.
Always be conservative with deeper scratches. It’s better to make multiple light passes than one heavy one. You can always remove more material, but you can’t put it back.
Using Fine-Grit Sandpaper
For deeper scratches, you might need to use very fine-grit sandpaper, starting with something like 1500-grit. Wet sanding is often best. Dip the sandpaper in water or a mild soap solution.
Sand the scratch in small, overlapping strokes. Always sand in one direction across the scratch. This helps create a uniform surface.
After sanding, the area will look dull. This is normal. The key is to ensure the scratch is no longer catching your fingernail.
After sanding, move to a finer grit, like 2000 or 2500-grit, still wet sanding. This smooths out the marks left by the coarser grit.
When wet sanding, keep the surface wet at all times. This lubricates the sandpaper and prevents it from clogging up. It also carries away the plastic particles being removed, reducing the risk of creating new scratches.
Progressing to Polishing Compounds
Once you’ve sanded the scratch smooth and your fingernail no longer catches, you’ll need to polish the area. This step restores the shine. Start with a medium-cut polishing compound.
Apply it to a clean microfiber applicator pad. Work it into the sanded area using small, circular motions.
Rub firmly but not aggressively. The compound contains fine abrasives that will remove the dullness from the sanding marks and start to bring back clarity. After applying the compound, wipe away the residue with a clean microfiber cloth.
If the finish is still a bit dull, move to a fine-cut polishing compound or swirl remover. These products have even smaller abrasives that refine the finish. Apply and buff them the same way.
The goal is to match the gloss of the surrounding plastic.
Applying a Plastic Protectant
After you’ve polished the area to a smooth, shiny finish, it’s a good idea to apply a plastic protectant or a car wax. This shields the repaired area from UV rays and environmental damage. It also helps maintain the shine.
Apply the protectant according to the product’s instructions, usually by wiping it on and then buffing it off with a clean cloth.
A good protectant can prevent future fading and minor scuffs. It adds an extra layer of defense to your newly repaired bumper. Many protectants also enhance the color and depth of the plastic.
Real-Life Example: The Garage Door Bump
Sarah accidentally bumped her car’s plastic bumper against the garage door frame. It left a noticeable white scuff mark about 4 inches long. She was worried about the cost of repair.
Using a plastic cleaner and a microfiber cloth, she first cleaned the area thoroughly. Then, she applied a small amount of automotive rubbing compound to the scuff. She rubbed it gently in circular motions for about two minutes.
She wiped away the residue with a clean cloth. The scuff mark was significantly reduced but still slightly visible. Sarah repeated the process twice more.
On the third try, the scuff was gone, and the bumper looked smooth and shiny again. She felt a great sense of accomplishment saving money and fixing her car herself.
Tools and Techniques for Extreme Scratches
Sometimes scratches are very deep, almost like gouges, or there are multiple deep ones. These might seem impossible to fix with simple rubbing. This part will guide you through more involved techniques.
We’ll look at using specialized fillers and even touch-up paint for severe damage. Getting these right requires patience and a steady hand, but they can restore your bumper’s look significantly.
When to Consider Plastic Fillers
If a scratch is so deep that it creates a noticeable depression in the plastic, or if there’s a small chip missing, plastic fillers might be necessary. These are special compounds designed to fill in damaged areas. They harden and can be sanded smooth to match the surrounding bumper.
This is a more advanced repair, but it’s a common solution for significant damage.
Before using a filler, ensure the damaged area is completely clean and dry. Any moisture or dirt trapped within the scratch or chip will prevent the filler from adhering properly. Sanding the edges of the damaged area lightly can also help the filler bond better.
Applying Plastic Filler
Follow the instructions on your chosen plastic filler carefully. Typically, you’ll mix a two-part compound. Apply the mixed filler to the scratch or chip using a plastic spreader or putty knife.
Press it down firmly to ensure it fills the entire void. Slightly overfill the area, as the filler will shrink a bit as it cures.
Let the filler cure completely according to the product’s instructions. This could take several hours. Rushing this step will lead to a poor result.
Patience is crucial here to allow the filler to harden properly.
Sanding and Shaping the Filler
Once the filler is fully cured, you’ll need to sand it down to match the bumper’s surface. Start with a medium-grit sandpaper (around 400-grit) and work your way up to finer grits (800, 1500, 2500-grit). Wet sanding is recommended, especially with finer grits, to keep the dust down and achieve a smoother finish.
The goal is to make the sanded area perfectly flush with the surrounding plastic. Check your progress frequently by running your hand over the area. You want to feel a smooth transition with no bumps or dips.
This shaping is critical for a seamless repair.
Using Touch-Up Paint or Color Restorers
After sanding and polishing the filled area, it might still look different from the rest of the bumper. This is where touch-up paint comes in. You’ll need to find a paint that matches your car’s color code.
Apply thin, even coats of touch-up paint to the repaired area. Allow each coat to dry before applying the next.
If the bumper is black plastic and has scuffs that have removed the color, a black plastic trim restorer can work wonders. These products often contain mild solvents that can re-dissolve and redistribute the original colorants in the plastic, effectively hiding the scuffs and restoring a uniform look. Always test these products on an inconspicuous area first.
Sample Scenario: The Parking Lot Mishap
Mark’s car, a dark grey sedan, had a nasty scratch and a small chip on its rear plastic bumper from a low-speed parking lot incident. The scratch was deep enough to catch his nail, and a small piece of plastic was missing. He decided to try fixing it himself.
He cleaned the area and used a plastic filler kit, mixing the two parts and spreading it over the damaged spot. After it cured for several hours, he started sanding. He began with 400-grit sandpaper, then moved to 800, 1500, and finally 2500-grit wet sandpaper.
The area became smooth and flush with the bumper. Since his car’s paint code was hard to match precisely for touch-up, he opted for a high-quality black plastic trim restorer. He applied it evenly to the entire bumper.
The repair blended in well, and the restorer gave the whole bumper a nice, uniform finish. Mark was pleased with the result, saving hundreds of dollars he would have spent at a body shop.
Statistics on Bumper Scratches
According to a survey of car owners, 65% reported having at least one scratch or scuff mark on their car’s bumper within the first two years of ownership. The majority of these were minor to moderate, suggesting that DIY solutions like buffing are a common need. Another study found that cosmetic repairs to car bumpers, including scratches and scuffs, can add an average of 5-10% to a car’s resale value if addressed promptly and effectively.
This highlights the importance of maintaining your bumper’s appearance.
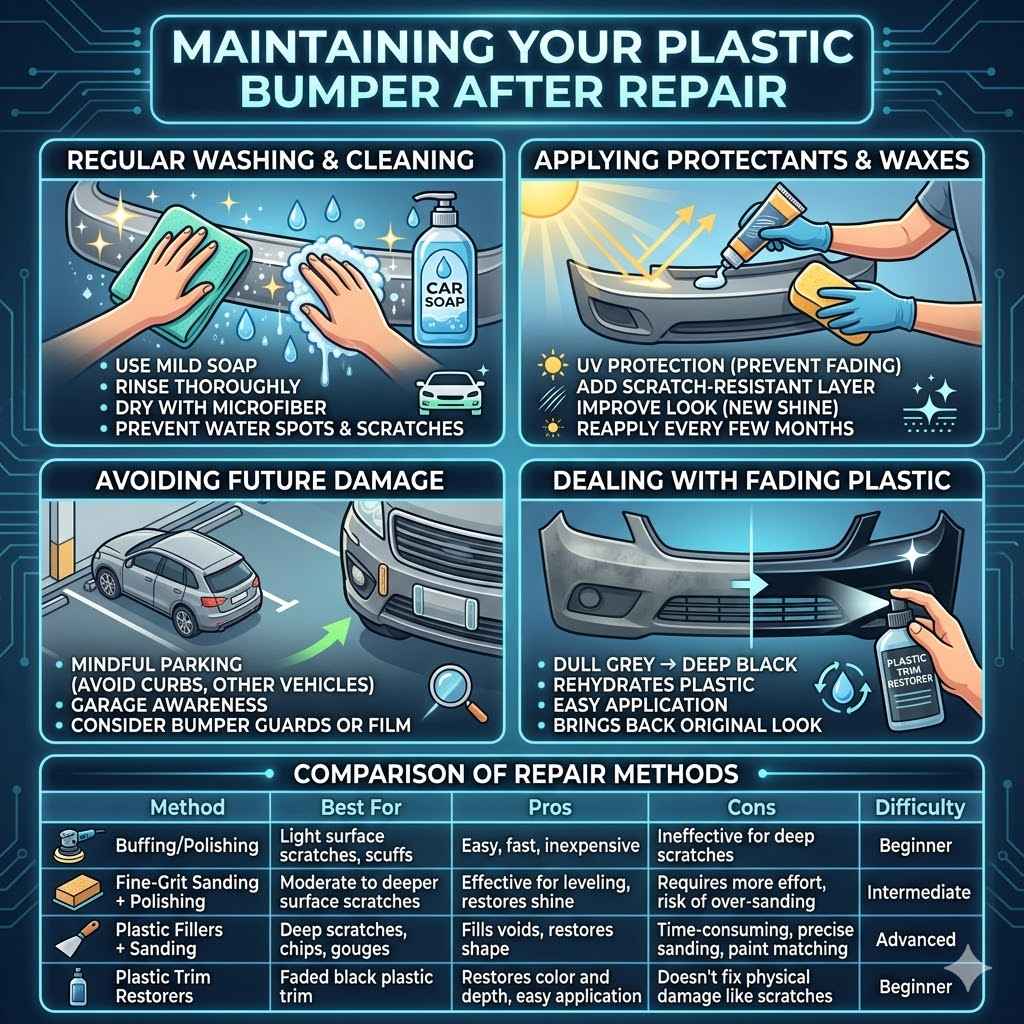
Maintaining Your Plastic Bumper After Repair
Keeping your plastic bumper looking its best after you’ve buffed out scratches is all about ongoing care. This part focuses on simple habits and products that help prevent new damage and keep the plastic looking fresh. Regular cleaning and protection are your best friends here.
They make future repairs easier and keep your car looking sharp.
Regular Washing and Cleaning
Just like the rest of your car, your plastic bumper needs regular washing. Dirt, mud, road salt, and bird droppings can all degrade the plastic over time if left unchecked. Use a mild car wash soap and plenty of water.
Always rinse thoroughly to remove all soap residue. Dry the bumper with a clean microfiber towel to prevent water spots.
Paying attention to the bumper during your regular car washes will catch minor issues before they become major problems. Small twigs or debris that might cause scratches can be removed easily during a wash.
Applying Protectants and Waxes
After washing and drying, consider applying a plastic protectant or a car wax formulated for exterior trim. These products offer several benefits. They help prevent the plastic from fading due to UV exposure from the sun.
They also add a layer of protection against minor scuffs and environmental contaminants.
Many plastic protectants leave a nice sheen, making the bumper look newer. Look for products that offer UV protection, as this is a major cause of plastic degradation and discoloration over time. Reapply these protectants every few months, or as recommended by the product manufacturer.
Avoiding Future Damage
Prevention is always better than cure. Be mindful when parking, especially in tight spots. Avoid parking too close to curbs or other vehicles.
If you have a garage, be aware of the space when pulling in and out. These simple precautions can save you a lot of hassle and potential damage.
Consider installing bumper guards or clear protective films on vulnerable areas if you frequently encounter parking challenges or live in an area with rough roads. These can absorb minor impacts and prevent scratches.
Dealing with Fading Plastic
Over time, black plastic bumpers can fade to a dull grey due to sun exposure. While buffing won’t fix fading, specific products called plastic trim restorers can bring back the deep black color. These products often contain chemicals that rehydrate and restore the plastic’s original appearance.
Apply these restorers evenly to the clean, dry plastic. They usually require no buffing and simply need time to soak in. The results can be dramatic, making an old, faded bumper look almost new again.
Comparison of Repair Methods
| Method | Best For | Pros | Cons | Difficulty |
|---|---|---|---|---|
| Buffing/Polishing | Light surface scratches, scuffs | Easy, fast, inexpensive | Ineffective for deep scratches | Beginner |
| Fine-Grit Sanding + Polishing | Moderate to deeper surface scratches | Effective for leveling, restores shine | Requires more effort, risk of over-sanding | Intermediate |
| Plastic Fillers + Sanding | Deep scratches, chips, gouges | Fills voids, restores shape | Time-consuming, requires precise sanding, paint matching may be needed | Advanced |
| Plastic Trim Restorers | Faded black plastic trim | Restores color and depth, easy application | Doesn’t fix physical damage like scratches | Beginner |
Frequently Asked Questions
Question: Can I use toothpaste to buff out scratches on a plastic bumper?
Answer: While some people have success with toothpaste on very minor clear coat scratches on painted surfaces, it’s generally not recommended for plastic bumpers. Toothpaste has inconsistent abrasive properties and can potentially damage or dull the plastic finish, especially on textured or painted bumpers. It’s better to use products specifically designed for automotive plastics.
Question: How long does it take to buff out a scratch on a plastic bumper?
Answer: For light scratches that can be buffed out with a plastic cleaner or rubbing compound, it might only take 5-15 minutes. Deeper scratches that require wet sanding and multiple polishing stages could take anywhere from 30 minutes to a couple of hours, depending on the depth and your technique.
Question: Do I need special tools to buff out bumper scratches?
Answer: For minor scratches, you primarily need microfiber cloths and a suitable cleaning or polishing compound. For deeper scratches, you might need fine-grit wet/dry sandpaper and potentially a polishing machine (though hand buffing is often sufficient for smaller areas). Plastic filler kits and applicators are for more severe damage.
Question: How can I tell if a scratch is too deep to buff out?
Answer: The easiest test is the fingernail test. Gently run your fingernail across the scratch. If your nail catches on the scratch, it’s likely too deep for simple buffing and may require sanding or filling.
If your fingernail glides over it smoothly, buffing or polishing might be effective.
Question: Will buffing affect the color of my plastic bumper?
Answer: For unpainted black plastic bumpers, buffing itself will not change the color, but aggressive rubbing could potentially dull the finish. If the scratch has removed color, buffing won’t restore it; that’s where touch-up paint or trim restorer comes in. For painted bumpers, using the correct products and techniques is crucial to avoid removing or altering the paint color.
Summary
Fixing scratches on your plastic bumper is a manageable DIY task. You learned how to tackle light scuffs with simple cleaners and compounds, and how to handle deeper marks using fine-grit sandpaper and fillers. Consistent cleaning and protection will keep your bumper looking great.
With the right tools and a little patience, you can restore your bumper’s appearance effectively.