How to Restore Faded Black Plastic Auto Trim, by Fade Level
Faded black plastic trim usually comes back with the same four steps: wash it, let it dry completely, wipe it with 70-90% alcohol (Solution Finish’s prep direction), then apply a restorer, a ceramic coat or trim paint. Which product fits depends on how far gone the plastic is: lightly faded, heavily faded, chalky or cracked. This guide matches each condition to a method and quotes what the maker pages say about coats, drying and cure times.
Why Does Black Plastic Trim Fade?
Per Turtle Wax, sunlight breaks plastic down over time and affects the oils that keep the material flexible and the color dark. With enough exposure, the loss of oil can even lead to cracks. Turtle Wax also lists humidity, salt air and road salt as factors.
Turtle Wax says fading on vehicles parked outdoors in the Sun Belt can start from 6-12 months, versus 2-3 years for garage-kept cars. Those are the maker’s own figures, not measurements from this site.
The same page names the usual problem areas: bumpers, side mirror housings, door handles, rocker panels, window trim, grille surrounds and pillar covers. Rubber or plastic window seals, it adds, can develop a white chalky bloom. If you are comparing products rather than learning the method, our plastic trim restorer roundup covers the options.
Pick for Faded Black Trim You Can Wipe Down
 |
Solution Finish Black Trim Restorer, Silicone-Free, Plastic & Vinyl, 12 oz ($33.99 on Amazon when checked 2026-10-14) Best for: Faded black plastic or vinyl trim that you can wash, dry and wipe down first. The maker’s page lists bumpers, trim, mud flaps and wiper blades. Why we picked it: The maker’s page describes a silicone-free, VOC-compliant formula with natural oils that dries to a non-glossy finish, and it gives plain directions: sponge on a small amount, then buff off the excess. Main drawback: The maker says the plastic must be completely dry and wiped with 70-90% alcohol first, and that the product is not for painted or glass surfaces, so it has to be wiped off immediately if it lands on them. |
As an Amazon Associate we earn from qualifying purchases. Spec-based pick from the listing, not a hands-on test.
Which Method Fits Your Trim: Light Fade, Heavy Fade, Chalky or Cracked?
The maker pages describe different handling by condition, so this table pairs each condition with the method the makers support. Cost figures are Turtle Wax’s own.
| Trim condition | What the maker page says | Method to try | DIY or pro |
|---|---|---|---|
| Light fade (gray, still smooth) | Turtle Wax: with only light fading, a standard restorer should do the job. | Wash, dry, alcohol wipe, one thin coat of a restorer. | DIY. Turtle Wax puts home restoration at $10-$20 in products. |
| Heavy fade (dull gray to nearly white) | Turtle Wax: moderate to heavy fading might need multiple coats; apply a second coat after the first has dried; another application after 24 hours might be needed. | Restorer, then a second coat once the first is dry to the touch. | DIY. |
| Chalky bloom | Turtle Wax: with a heavy build-up of chalky residue, a light abrasive pad can remove some of it before the restorer goes on. | Clean, work the chalk off lightly with a pad, then restore. | DIY. A detailing service is $75-$100 per Turtle Wax. |
| Greasy or streaky from an old product | Turtle Wax: when older products left an uneven layer or greasy feel, start from scratch and use an all-purpose cleaner to remove the old product. | All-purpose cleaner first, then reapply thinly. | DIY. |
| Cracked or brittle | Turtle Wax: restorers cannot fix physical cracks or severe brittleness; structural damage needs a replacement. | Replace the part. A restorer will not close cracks. | Parts replacement. Turtle Wax says a replacement bumper can mean hundreds of dollars. |
| Worn, and you want a new finish | Dupli-Color describes its Trim & Bumper Paint as formulated to restore faded worn plastic cladding. | Trim paint instead of a restorer. See our plastic dye for car trim guide. | The page read does not say. |
What You’ll Need to Get Started
- Wax-free car wash detergent (Cerakote names Dawn dish soap as an example).
- An all-purpose cleaner or trim prep product to remove previous buildup (Turtle Wax).
- 70-90% alcohol for the prep wipe (Solution Finish).
- A microfiber sponge applicator and towel (Solution Finish), plus gloves (Cerakote’s kit includes two sets).
- Optional masking tape near paint (Turtle Wax), and a light abrasive pad for heavy chalky residue only.
The maker pages read here listed no ventilation, skin-contact or flammability directions, so follow the label and safety data sheet that come with your product.
Step 1: Clean the Trim Thoroughly
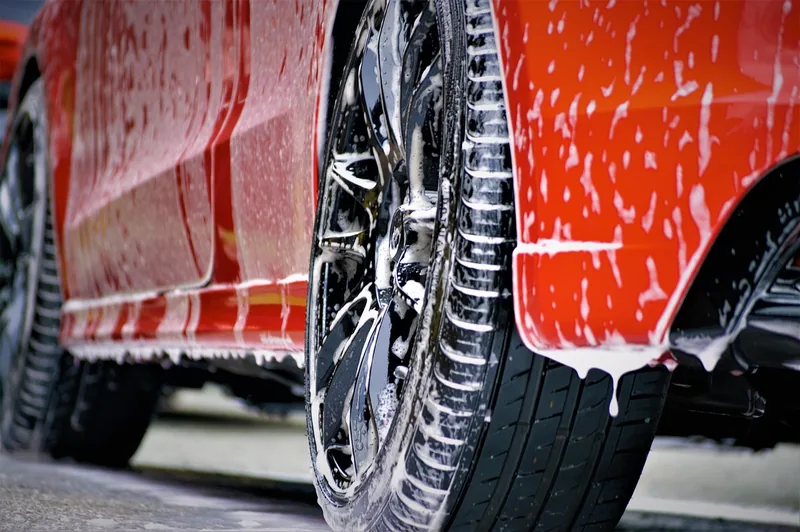
Start with a wash. Cerakote’s directions are to wash and dry the surface thoroughly with a detergent that does not contain wax, and it says to open and close the doors, trunk and hood several times to free trapped water. Turtle Wax adds that you should clean the trim with an all-purpose cleaner or a specific trim prep product to remove previous buildup.
Old wax and dressing are the usual culprits. Our black plastic cleaner guide lists cleaners, and the guide on removing wax from plastic car parts covers white residue left in textured trim.
Step 2: Prep the Surface for Restoration
Turtle Wax says to make sure the area is completely dry and cool, and to avoid direct sunlight because UV rays interfere with bonding and curing and added heat can make a product dry too quickly. Work in a garage or in the shade.
For Solution Finish, the maker’s page calls prep the step where things go wrong. The plastic has to be completely dry, then wiped down with 70-90% alcohol to dissolve any silicone-based products and flush the pores. The page adds that degreasers and decontaminating products can leave a film or particles that stop the restorer absorbing.
Directions differ by product. Cerakote’s steps call for a wash and a completely dry surface but name no alcohol wipe, so follow the label on what you bought. If any product touches paint or glass, Cerakote says to remove it immediately with a clean dry cloth.
Step 3: Apply a Plastic Restorer Product
Liquid restorers go on with an applicator or cloth; Cerakote’s Trim Coat comes as pre-wet wipes. The sequence below follows Turtle Wax’s general directions and Solution Finish’s product-specific ones.
- Start small. Turtle Wax says a few drops on the applicator is enough and that too much can leave a greasy finish. Solution Finish says more is not better.
- Apply a thin, even coat. Turtle Wax describes a circular motion with light pressure, working the product into texture while watching crevices.
- Buff off excess where the maker says to. Solution Finish goes on with a microfiber sponge, then the excess surface oil is buffed off with a towel.
- Let it dry. Turtle Wax says allow 5-10 minutes without touching, then add another coat if the directions call for one.
- Keep it dry while it cures. Turtle Wax says a full cure may take 2-6 hours depending on the product. Cerakote’s minimum is 1 hour before driving or exposing the trim to moisture.
On severely faded trim, Turtle Wax says a first coat may not look perfect: add a second coat after the first has dried, then allow several hours to cure. The finish may look glossier at first and usually settles as it cures.
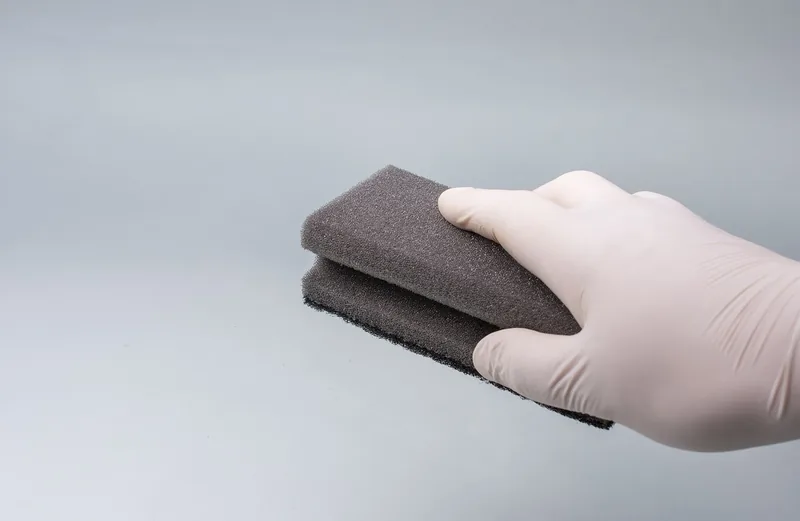
Cerakote’s wipe-on method is simple: wearing the provided gloves, wipe the trim in overlapping passes, rotate the wipe so every side is used, and open a new pack when the wipe gets dry or soiled.
Step 4: Seal and Protect the Trim
Turtle Wax describes a trim restorer as doing four jobs at once: pigment that fills in lost color, conditioning oils that replace plasticizers lost to UV, UV inhibitors, and a built-in sealant against moisture. The look is restored immediately, but it needs ongoing application to keep the protective barrier.
Lifespan claims come from the makers, not from testing here. Turtle Wax says standard polymer-based restorers last 4-8 weeks and graphene or ceramic formulas 3-6 months or more. Cerakote guarantees one coat of its Trim Coat for at least 200 washes. Turtle Wax adds that reapplying builds deeper color over time.
None of the maker pages read describe a separate UV spray over a restorer that already lists UV protection, so check your label before stacking products. For the product picture, see our best car trim restorers for plastic and trim restorer sprays guides.
Dye, Coating or Dressing: What Each Product Type Is
These are the makers’ own descriptions, condensed. They tell you what each type claims to do, not how well it performs.
| Product type | What the maker page says | Watch for |
|---|---|---|
| Pigmented restorer | Turtle Wax: pigment fills lost color; oils, UV inhibitors and sealant are built in. Mothers says Back-to-Black removes light oxidation, dirt, wax residue and surface film. | Too much looks greasy (Turtle Wax). |
| Oil and polymer restorer | Solution Finish: silicone-free, VOC-compliant, natural oils, non-glossy, non-greasy finish. Sponge on, buff off the excess. | Not for painted or glass surfaces. |
| Ceramic coating | Cerakote: a ceramic coating, not a trim dressing; bonds to the pores of unpainted plastic trim and cures. Wipe on, wait at least 1 hour. | Needs a completely dry surface. |
| Trim dressing | Turtle Wax: enhances existing color and adds shine for maintenance, not for restoring faded surfaces. | Faded trim needs restoring first. |
| Trim paint | Dupli-Color: Trim & Bumper Paint is formulated to restore faded worn plastic cladding (Fade-X Technology). The page read lists no steps. | A bigger change than a wipe-on. |
Tire shine is a different product: Turtle Wax says it is naturally shiny and built to resist fling-off, while trim restorers tend toward matte or satin.
Does the Heat Gun Trick Work?
Treat it as unverified. None of the pages read for this guide (Turtle Wax, Solution Finish, Cerakote, Mothers, Dupli-Color) describe a heat gun, so there are no heat-gun steps here and no verdict on safety. Turtle Wax says the opposite about heat: added heat can make product dry too fast and leave streaks.
Common Mistakes to Avoid
| Mistake | What the maker page says | Fix |
|---|---|---|
| Skipping prep | Solution Finish: preparation is where things go wrong; wipe dry plastic with 70-90% alcohol. | Wash, dry, and follow your label. |
| Working in direct sun | Turtle Wax: UV interferes with bonding and curing; heat causes streaks. | Work in shade on cool, dry trim. |
| Applying too much or to damp plastic | Turtle Wax: too much looks greasy. Cerakote: completely dry surface only. | Thin coats; release trapped water first. |
| Product on paint or glass | Cerakote: remove immediately with a clean dry cloth. Turtle Wax: masking is optional but safer. | Mask and wipe at once. For painted parts see our paint peeling guide. |
| Expecting repairs | Turtle Wax: restorers cannot fix cracks or severe brittleness. | Replace cracked parts; for scratches see our bumper scratch guide. |
Maintenance Tips to Keep Your Trim Looking Great
- Wash regularly: Turtle Wax says road salt and bird droppings can corrode plastic trim.
- Park in a garage when you can; a covered carport also reduces UV exposure (Turtle Wax).
- Reapply on your product’s schedule, which Turtle Wax says ranges from a few weeks to several months, and catch fading early.
Bumpers take the most sun and road damage, so our guide to restoring black plastic bumpers picks up where this one leaves off.
FAQs
What causes black plastic trim to fade?
Per Turtle Wax, sunlight breaks plastic down and depletes the oils that keep it flexible and dark. Humidity, salt air and road salt speed the damage, and enough oil loss can lead to cracks that a restorer cannot fix.
How long does trim restorer last?
The makers differ. Turtle Wax says standard restorers last 4-8 weeks and graphene or ceramic formulas 3-6 months or more. Cerakote guarantees one coat of Trim Coat for at least 200 washes. These are company claims, not tests by this site.
Can trim restorer fix cracked plastic?
No. Turtle Wax says restorers cannot fix physical cracks or severe brittleness, and structural damage needs a replacement part. A restorer is for color and condition while the plastic is still undamaged.
Is trim restorer the same as trim dressing or tire shine?
No. Turtle Wax says a restorer contains pigment to restore lost color, while a dressing enhances existing color for maintenance. Tire shine is naturally shiny, while restorers tend toward matte or satin.
Is it safe to use a heat gun on plastic trim?
None of the maker pages read for this guide describe it, so there is no sourced answer and no steps here. Turtle Wax does warn that added heat can make restorer dry too quickly and streak.
Sources read: the Turtle Wax trim restoration page and faded rubber trim how-to, the Solution Finish product page, the Cerakote Trim Coat product page and instructions, the Mothers Back-to-Black product page, and the Dupli-Color Vinyl, Trim & Trunk paint page. Cost, lifespan and cure-time figures are the makers’ own.
Products related to this article
Sponsored / affiliate links. As an Amazon Associate I earn from qualifying purchases. I may earn additional commission from eligible campaigns.