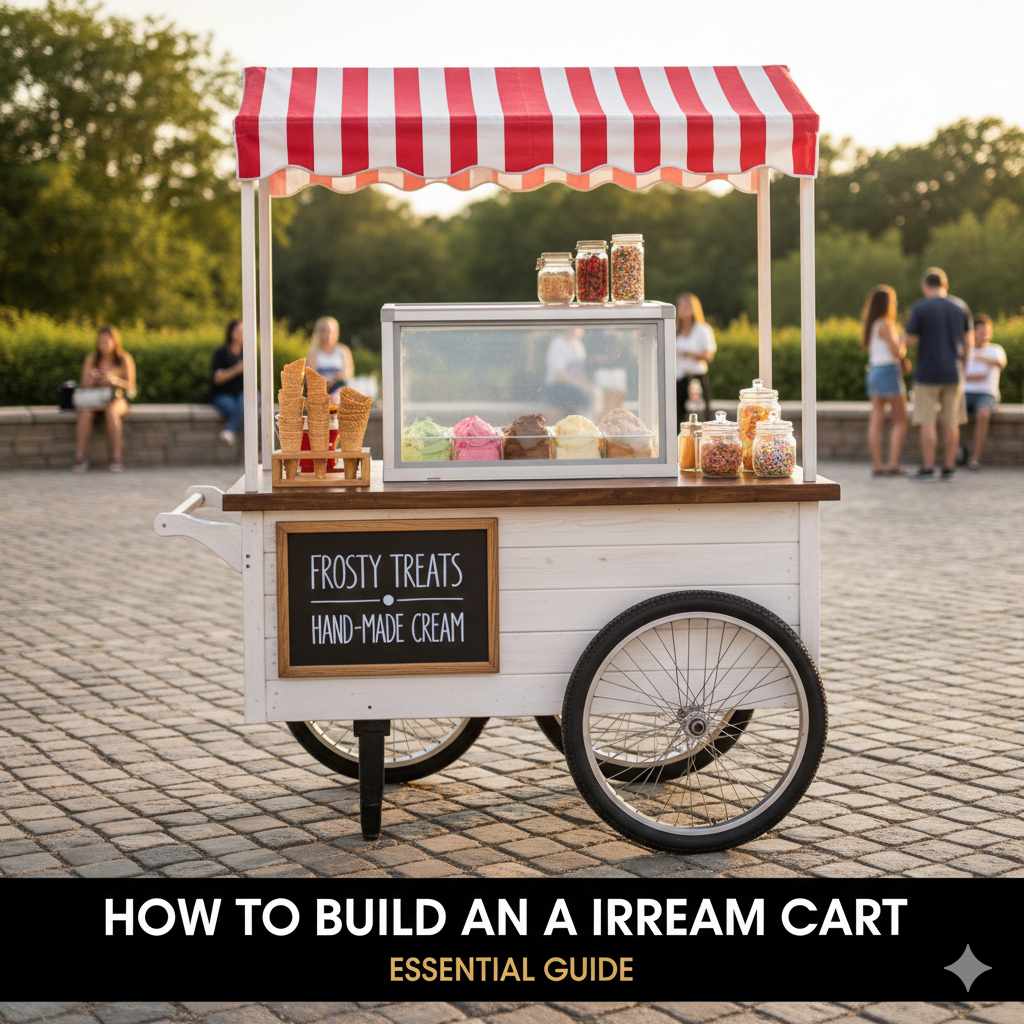
How to Build an Ice Cream Cart: Essential Guide
Build your own ice cream cart with this easy-to-follow guide! We’ll cover everything you need, from design ideas to essential tools and step-by-step construction. Get ready to bring sweet treats and smiles wherever you go!
Hey there, DIY enthusiasts! Ever dreamt of serving up delicious frozen delights on your own terms? Maybe you’ve got a great ice cream recipe or a small business idea budding. Whatever your reason, building your own ice cream cart can seem like a fun project, but it can also feel a bit daunting. Where do you start? What materials do you need? Don’t worry! I’m here to break it all down for you. Think of me as your friendly guide, steering you through this project with clear, simple steps. By the end, you’ll have the confidence and knowledge to build a fantastic ice cream cart that’s ready for any summer day.
This guide will walk you through everything from choosing a design that fits your needs to gathering the right tools and materials. We’ll cover the construction process step-by-step, making sure it’s easy to understand for beginners. Get ready to create something truly special that brings joy to others!
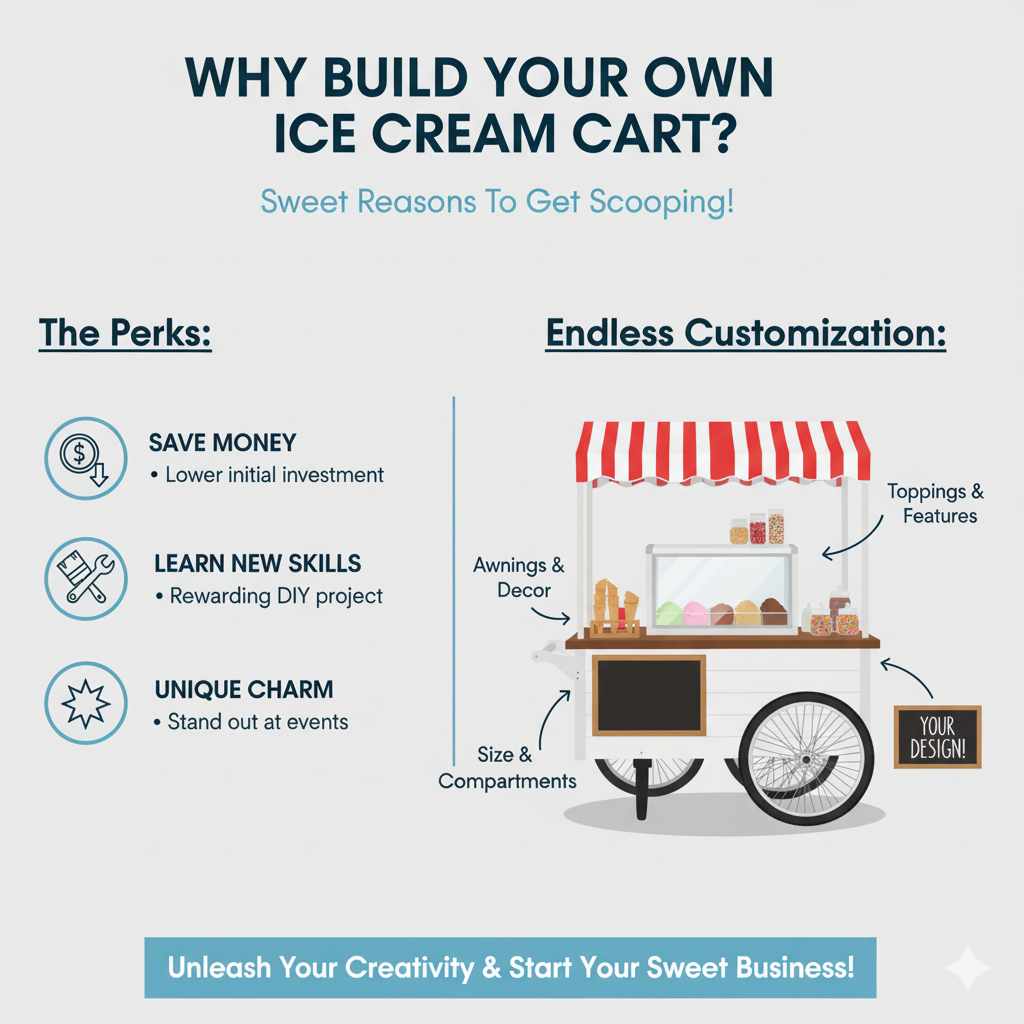
Why Build Your Own Ice Cream Cart?
There are many great reasons to consider building your own ice cream cart. It’s not just about saving money, though that’s a definite perk! Customization is a huge advantage. You can design a cart that perfectly suits your specific needs, whether it’s for personal use at backyard parties or for a budding business. Think about it: you can choose the size, the compartments, the color, and even add special features like awnings or decorative elements.
It’s also a fantastic way to learn new skills and build something with your own hands. The satisfaction of creating a functional and attractive item from scratch is incredibly rewarding. Plus, a custom-built cart can be a real head-turner, adding a unique charm to your events or business. For those looking to start a small ice cream business, a self-built cart can significantly lower your initial investment compared to purchasing a pre-made one.
Planning Your Ice Cream Cart Project
Before you grab your tools, let’s do some smart planning. This is the most crucial step to ensure your project goes smoothly and you end up with a cart you love. We’ll cover design considerations, essential features, and how to sketch out your ideas.
1. Define Your Needs and Purpose
First, ask yourself: What will this cart be used for?
- Personal Use: Will it be for family gatherings, birthday parties, or BBQs? This might mean a smaller, more portable design.
- Business Use: Are you planning to sell ice cream at local events, festivals, or on the street? This requires a cart that’s robust, meets health codes (check your local regulations!), and can hold a good amount of product and supplies.
- Type of Ice Cream: Will you be selling pre-packaged ice cream, soft-serve, or scoops? This will influence your cooling requirements and how you store everything.
2. Design Considerations
Once you know the purpose, you can start thinking about the design. Here are some key elements to consider:
- Size: How much space do you have for storage and transport? How much product do you need to carry?
- Mobility: Will it be pushed, pulled, or motorized? What kind of wheels are best for the surfaces you’ll be using (pavement, grass, gravel)?
- Storage: How will you keep the ice cream frozen? This usually involves an insulated chest or compartment. Think about space for spoons, napkins, toppings, and cleaning supplies too.
- Aesthetics: What look are you going for? Classic, modern, whimsical?
- Budget: How much are you willing to spend on materials and tools?
3. Sketching Your Design
Don’t worry if you’re not an artist! A simple sketch is all you need. Grab a piece of paper and a pencil, and start drawing.
- Basic Shape: Draw the overall outline of your cart.
- Key Components: Mark where the ice cream storage will go, the handle, wheels, and any serving areas.
- Dimensions: roughly jot down the estimated measurements for each part.
- Features: Add details like an umbrella holder, a small shelf for toppings, or a cash drawer idea.
Looking at examples can be really helpful! Browse online for “ice cream cart designs” or “food cart ideas” to get inspiration. Sites like Pinterest and Etsy often showcase unique and practical designs.
Essential Tools and Materials
Gathering the right tools and materials beforehand makes the building process much smoother. Here’s a list of common items you’ll likely need. Don’t worry if you don’t have them all; many can be borrowed or purchased at reasonable prices.
Tools You’ll Need
These are the workhorses for your project. Safety first!
- Measuring Tape: For accurate measurements.
- Pencil or Marker: For marking cut lines.
- Saw: A handsaw is basic, but a circular saw or jigsaw will make cutting wood much faster and cleaner. A circular saw is a good all-around choice for DIYers.
- Drill and Drill Bits: For creating holes for screws and bolts.
- Screwdriver Set (or Drill Bits): For driving screws.
- Wrench or Socket Set: If you’re using bolts.
- Sandpaper or Sanding Block: For smoothing rough edges.
- Safety Glasses: Absolutely essential to protect your eyes.
- Work Gloves: To protect your hands.
- Clamps: To hold pieces together while you fasten them.
- Paint Brushes or Rollers: For finishing the cart.
- Utility Knife: For various cutting tasks.
Materials You’ll Need
The specific materials will depend on your design, but here are common choices:
- Wood: Plywood (¾ inch for the main structure, ¼ inch for panels), lumber (like 2x4s or 1x4s for framing). Consider pressure-treated lumber for parts that might get wet.
- Fasteners: Wood screws, bolts, nuts, washers.
- Wheels: Durable, appropriate size for your cart and terrain. Look for pneumatic (air-filled) tires for a smoother ride or solid rubber tires for durability.
- Insulation: Foam board insulation (polystyrene or polyisocyanurate) is excellent for keeping the cold in.
- Lining Material: A waterproof liner for the insulated compartment, like thin plastic sheeting or a food-grade liner.
- Hinges and Latches: For lids and doors.
- Handle Material: Wood, PVC pipe, or metal tubing.
- Paint or Stain: For protection and aesthetics.
- Optional: Awning material (canvas, vinyl), decorative trim, signage.
Tip: To ensure your cart is safe for food, research FDA guidelines for food facility construction. This is especially important if you plan to sell commercially.
Step-by-Step Guide to Building Your Ice Cream Cart
Now for the fun part – building! This guide outlines a common approach using wood construction. Remember to adapt these steps to your specific design and skill level. Always measure twice and cut once!
Part 1: Building the Base Frame
The base provides the foundation and support for your cart.
- Cut Your Lumber: Cut your 2×4 lumber (or similar) to the dimensions of your desired base. For example, two long pieces and two shorter pieces to form a rectangle.
- Assemble the Frame: Arrange the pieces into a rectangle. Use wood screws to join the corners. Ensure the frame is square by measuring the diagonals – they should be equal.
- Add Support (Optional): If your cart will be large or carry a lot of weight, consider adding cross-braces in the center of the frame for extra strength.
Part 2: Constructing the Insulated Compartment
This is where your ice cream will live, so it needs to be well-insulated.
- Cut Plywood Panels: Cut ¾-inch plywood to create the sides, bottom, and top (for the lid) of your insulated box. The size will depend on your chosen ice cream containers or cooler.
- Assemble the Box: Screw the side panels to the base panel of the box. Then, attach the remaining side panels to form a sturdy box.
- Install Insulation: Cut foam board insulation to fit snugly inside the box against all the interior walls and the bottom. You can use a strong adhesive or friction fit.
- Line the Box: Cover the inside of the insulated box with your waterproof lining material. Staple or glue it in place, ensuring there are no gaps where moisture can seep in.
- Build the Lid: Create a lid using plywood. Attach insulation to the underside of the lid, just like you did for the box. Ensure the lid fits snugly over the box.
Part 3: Attaching the Wheels
Good wheels make a cart easy to move.
- Determine Wheel Placement: Decide where the wheels will attach to the base frame. They should be positioned to provide stability.
- Mount Wheel Hardware: Most wheels come with plates or axles. Securely attach these to the underside of your base frame using sturdy bolts, nuts, and washers. Make sure they are firmly attached.
- Attach the Wheels: Slide or bolt the wheels onto their respective mounts.
Part 4: Building the Outer Body and Serving Area
This is the visible part of your cart and where you’ll interact with customers.
- Frame the Body: Use 1×4 or 2×4 lumber to build a frame around your insulated box and resting on the base. This frame will give the cart its overall shape.
- Attach Exterior Panels: Cut ¼-inch or ½-inch plywood to cover the outside of the frame. Screw these panels in place.
- Create a Serving Counter: Design a sturdy counter area. This could be a simple shelf or a more elaborate countertop extending from the main body.
- Add Trim and Details: Use decorative trim to cover edges and give your cart a polished look.
Part 5: Adding the Handle and Finishing Touches
These elements make the cart functional and attractive.
- Attach the Handle: Mount a sturdy handle to the back of the cart. This could be a piece of wood, metal tubing, or a thick PVC pipe. Ensure it’s securely fastened.
- Install Hinges/Latches: Attach hinges to the lid of the insulated compartment so it opens and closes smoothly. Add a latch to keep it securely closed.
- Sand and Smooth: Sand down all rough edges and surfaces until they are smooth. This is important for both safety and the final finish.
- Paint or Stain: Apply your chosen paint or stain. For outdoor use, opt for weather-resistant exterior paint. You might need two coats.
- Add Accessories (Optional): Install an umbrella holder, a small awning, or decorative elements.
Table: Tool and Material Cost Estimates
This table provides a rough estimate for materials and tools. Prices can vary widely based on your location and where you shop.
| Item | Estimated Cost (USD) | Notes |
|---|---|---|
| Wood (Plywood, Lumber) | $50 – $200 | Depends on size and type of wood. |
| Wheels (Set of 2-4) | $30 – $150 | Heavy-duty rubber or pneumatic tires are more expensive. |
| Insulation Foam Board | $20 – $50 | For box lining. |
| Fasteners (Screws, Bolts) | $10 – $30 | |
| Hinges, Latches | $10 – $30 | |
| Paint/Stain & Brushes | $20 – $60 | Exterior grade recommended. |
| Basic Hand Tools (If you don’t have them) | $50 – $200+ | Saw, drill, sandpaper, tape measure. |
| Power Tools (If you don’t have them) | $100 – $500+ | Circular saw, jigsaw, power drill. |
| Total Estimated Cost | $290 – $1270+ | This is a wide range, heavily dependent on tool ownership and material choices. |
Tips for a Durable and Functional Cart
Beyond the basic steps, here are some pro tips to make your ice cream cart truly stand out and last.
- Waterproofing: Pay extra attention to waterproofing the entire exterior, especially the base and any areas exposed to weather. Use exterior-grade sealants and paints.
- Ventilation: If you’re using a cooler inside, ensure there’s some minimal airflow to prevent ice cream from becoming too frosty or to allow meltwater to drain properly (if applicable to your setup).
- Heavy-Duty Wheels: Opt for wheels that can support the weight of your cart when fully loaded. If you plan to navigate uneven terrain, pneumatic tires offer a smoother ride.
- Ergonomics: Think about the height of the handle and the serving counter. Make sure they are comfortable for you to operate.
- Easy Cleaning: Design with cleaning in mind. Smooth surfaces, fewer nooks and crannies, and waterproof materials will make post-event cleanup a breeze.
- Food Safety Surfaces: Ensure all surfaces that come into contact with food (or the containers holding food) are made of food-grade, easily cleanable materials.
- Cooling Efficiency: For maximum cooling, pre-chill your insulated compartment and use plenty of ice packs or dry ice (handle with extreme care!).
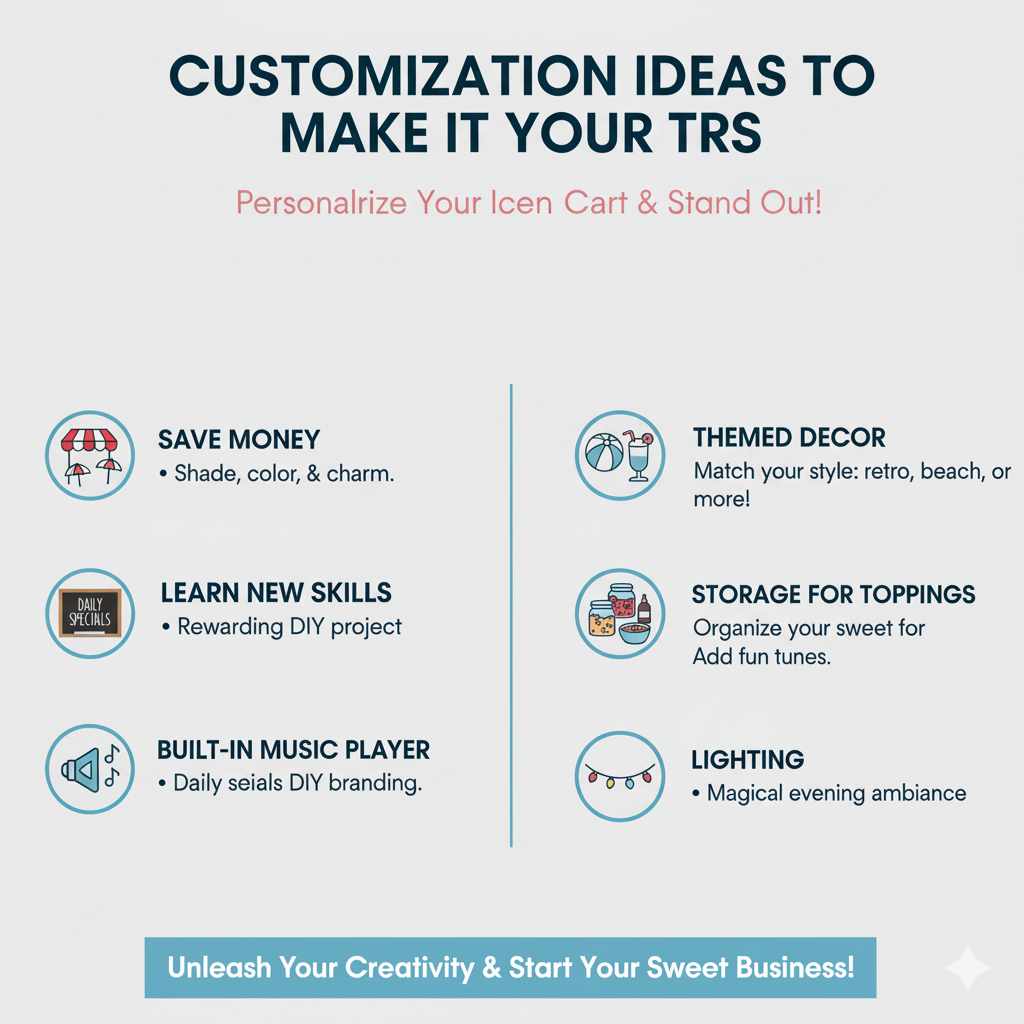
Customization Ideas to Make It Yours
Once the basic structure is built, you can add personal touches to make your cart unique!
- Awnings and Umbrellas: Provide shade for your products and customers, and add a splash of color.
- Themed Decor: If you have a specific theme (like a retro diner or a beach party), add decorative elements that match.
- Chalkboard Signage: A chalkboard panel is perfect for writing daily specials or your business name.
- Storage for Toppings: Build small shelves or compartments specifically for ice cream toppings like sprinkles, sauces, or cherries.
- Built-in Music Player: For a really fun touch, integrate a small, weather-resistant Bluetooth speaker.
- Lighting: Battery-powered LED string lights can add a magical touch for evening events.
Frequently Asked Questions (FAQ)
Q1: Is building an ice cream cart difficult for a beginner?
A: Building a basic ice cream cart can be a manageable project for a beginner if you take it step-by-step and have a clear plan. This guide breaks down the process into simple stages, and you can start with a less complex design.
Q2: What’s the best material for the insulated compartment?
A: For excellent insulation, a combination of rigid foam board (like polystyrene or polyisocyanurate) lining the inside of a plywood box is a common and effective choice. Ensure it’s well-sealed and waterproofed.
Q3: How do I ensure my ice cream stays frozen?
A: Proper insulation is key! Use thick foam boards. Pre-chill the cart. Use high-quality ice packs or, for longer events and colder temperatures, consider dry ice (with appropriate safety precautions). Keeping the lid closed as much as possible also helps.