How To Change Light Bulb In Car The Essential Guide
To change a light bulb in your car, first identify the correct replacement bulb using your owner’s manual. Access the burnt-out bulb, typically from behind the headlight assembly or inside the trunk for taillights. Disconnect the power wiring, remove the old bulb, and insert the new one without touching the glass. Reconnect the wiring and test the light before reassembling everything.
A burnt-out light bulb on your car is more than just an annoyance. It’s a safety issue that can get you a ticket. You might think a trip to the mechanic is your only choice. But what if I told you that changing a car light bulb is one of the easiest and most satisfying jobs you can do yourself? It’s true! You don’t need to be a car expert or have a garage full of fancy tools.
Many people feel intimidated by what’s under the hood, but this task is surprisingly simple. With just a little guidance, you can fix it in minutes, save money, and feel a great sense of accomplishment. In this guide, I’ll walk you through every step in plain, simple language. Let’s light up the road safely and get you back to driving with confidence.
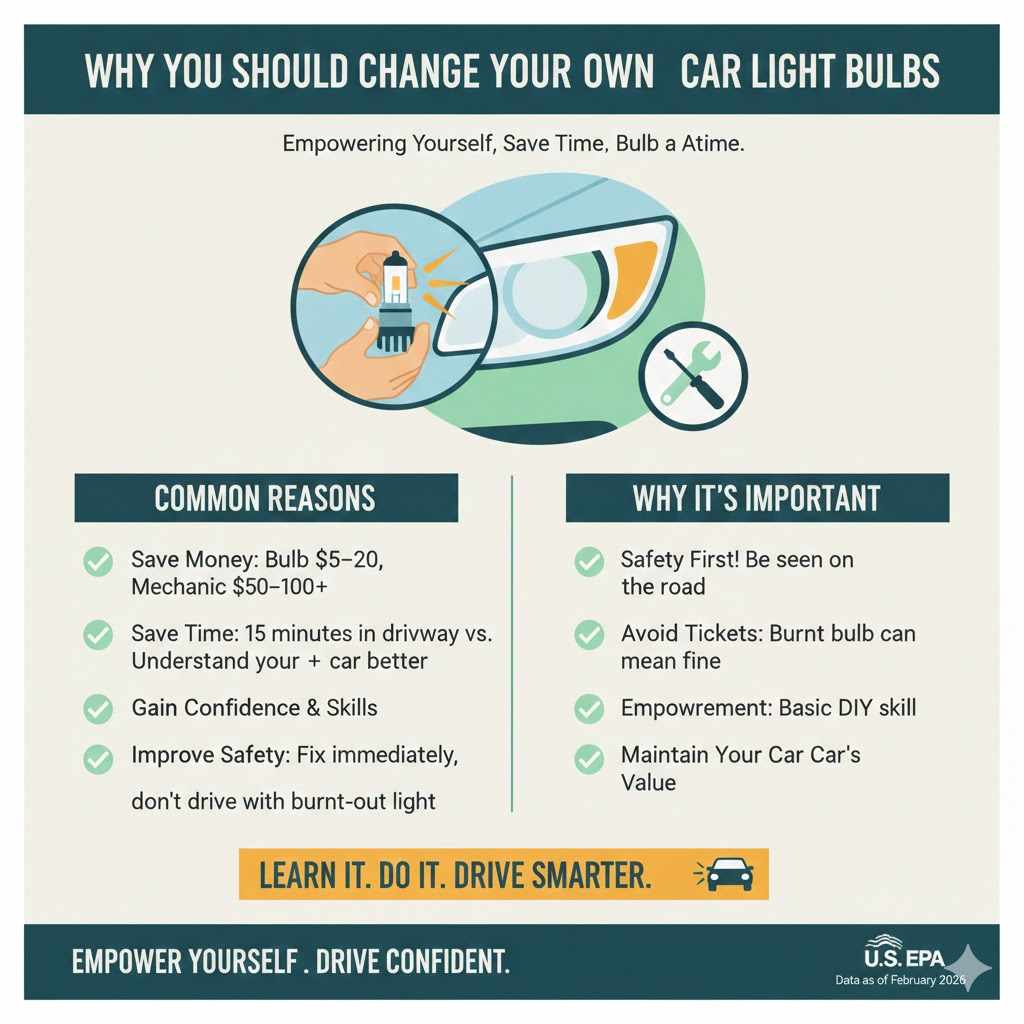
Why You Should Change Your Own Car Light Bulbs
Before we grab our tools, let’s talk about why this is such a great skill to have. It’s not just about fixing a broken light; it’s about empowering yourself as a car owner. Taking a few minutes to handle this yourself comes with some fantastic benefits.
- Save a Lot of Money: A replacement bulb can cost anywhere from $5 to $20. A mechanic, however, might charge you $50 to $100 or even more for the same job, factoring in labor. That’s money you can keep in your pocket for gas, snacks, or your next road trip.
- Save Valuable Time: Think about the time it takes to call a repair shop, schedule an appointment, drive there, wait for the repair, and drive back. You could spend an hour or more on this simple task. Doing it yourself can take as little as 15 minutes, right in your own driveway.
- Gain Confidence and Skills: Every small repair you do builds your confidence. You start to understand your car better and realize you are more capable than you thought. This simple task can be the first step toward tackling other basic maintenance jobs.
- Improve Your Safety: Knowing how to change a bulb means you can fix it immediately. You won’t have to drive with a burnt-out light while waiting for a shop to open, which keeps you and other drivers safer on the road.
Learning this basic skill is a win-win. It’s practical, saves you money, and gives you a confidence boost every time you see those bright lights working perfectly.
Safety First: A Quick Checklist Before You Begin
Your safety is the most important thing. Car repair is very safe when you take a few simple precautions. Before you even open your hood or trunk, run through this quick safety checklist. It only takes a minute and ensures your experience is smooth and accident-free.
- Park on a Flat, Level Surface: Working on a slope is risky. Make sure your car is on level ground where it won’t roll.
- Turn Off the Engine: Never work on your car while the engine is running. Turn it off, put it in park, and engage the parking brake.
- Let the Engine Cool Down: Engine parts, especially around the headlights, can get extremely hot. If you’ve just been driving, give the car at least 30 minutes to cool down to avoid burns.
- Wear Protective Gloves: A pair of simple work gloves or nitrile gloves will protect your hands from dirt, grease, and sharp edges. They also prevent the oils from your skin from getting on the new bulb.
- Consider Safety Glasses: While not always necessary for a bulb change, it’s a good habit. Safety glasses protect your eyes from any dust or debris that might fall while you’re working.
Following these simple rules will make the job easy and keep you safe. Now, let’s figure out which bulb you need.
Finding the Right Bulb for Your Car
Using the wrong bulb is a common mistake that can lead to frustration. Cars use many different types of bulbs for headlights, taillights, turn signals, and interior lights. Finding the exact one you need is simple if you know where to look. Here are three easy ways to identify the correct replacement bulb.
1. Check Your Owner’s Manual
Your car’s owner’s manual is your best friend. It contains a wealth of information, including a section on maintenance and bulb replacement. Look in the index for “bulbs” or “lighting.” The manual will list the specific bulb number (e.g., H11, 9005, 7443) for each light on your vehicle. This is the most reliable method.
2. Use an Online Bulb Finder
If you can’t find your manual, the internet is here to help. Most major auto parts websites have an online “bulb finder” tool. You simply enter your car’s year, make, and model, and the tool will show you a list of all the bulbs your car uses. It’s fast, easy, and accurate.
3. Look at the Old Bulb
Once you remove the old, burnt-out bulb, the bulb number is usually printed on its base. It might be in small text, so you may need good lighting to see it. Simply take the old bulb with you to the auto parts store, and an employee can help you find an exact match.
Common Types of Car Bulbs
To give you an idea of what you might be looking for, here’s a table of some common bulb types and where they are typically used. Your car will have a specific combination of these.
| Bulb Number | Common Use | Description |
|---|---|---|
| H11 | Low Beam Headlights, Fog Lights | A very common single-filament halogen bulb used in modern cars. |
| 9005/HB3 | High Beam Headlights | A powerful single-filament bulb designed for maximum distance visibility. |
| 3157 / 7443 | Brake Lights, Taillights, Turn Signals | These are dual-filament bulbs. One filament is for the running light, and a brighter one activates for the brake or signal. |
| 194 / 168 | License Plate Lights, Side Markers, Interior Lights | A small wedge-style bulb used in many different low-power applications around the car. |
| H4 / 9003 | Headlights (High and Low Beam in one) | A dual-filament bulb that handles both high and low beam functions in a single unit. |
Tools You Will Need
One of the best parts about this job is that you don’t need a complicated toolset. For most cars, you’ll only need a few basic items you probably already have at home.
- The New Bulb(s): Make sure you have the correct replacement bulb before you start.
- Gloves: Nitrile or clean cloth gloves are essential to protect the new bulb from oils on your hands.
- A Screwdriver: A simple Phillips head or flathead screwdriver may be needed to remove screws holding a light assembly in place.
- A Rag or Paper Towel: Useful for wiping away any dirt or dust from the area.
- Flashlight or Headlamp (Optional): If you’re working in a dimly lit garage or at dusk, a light source can make it much easier to see what you’re doing.
That’s it! With these simple tools, you’re ready to get started. Let’s move on to the step-by-step instructions.
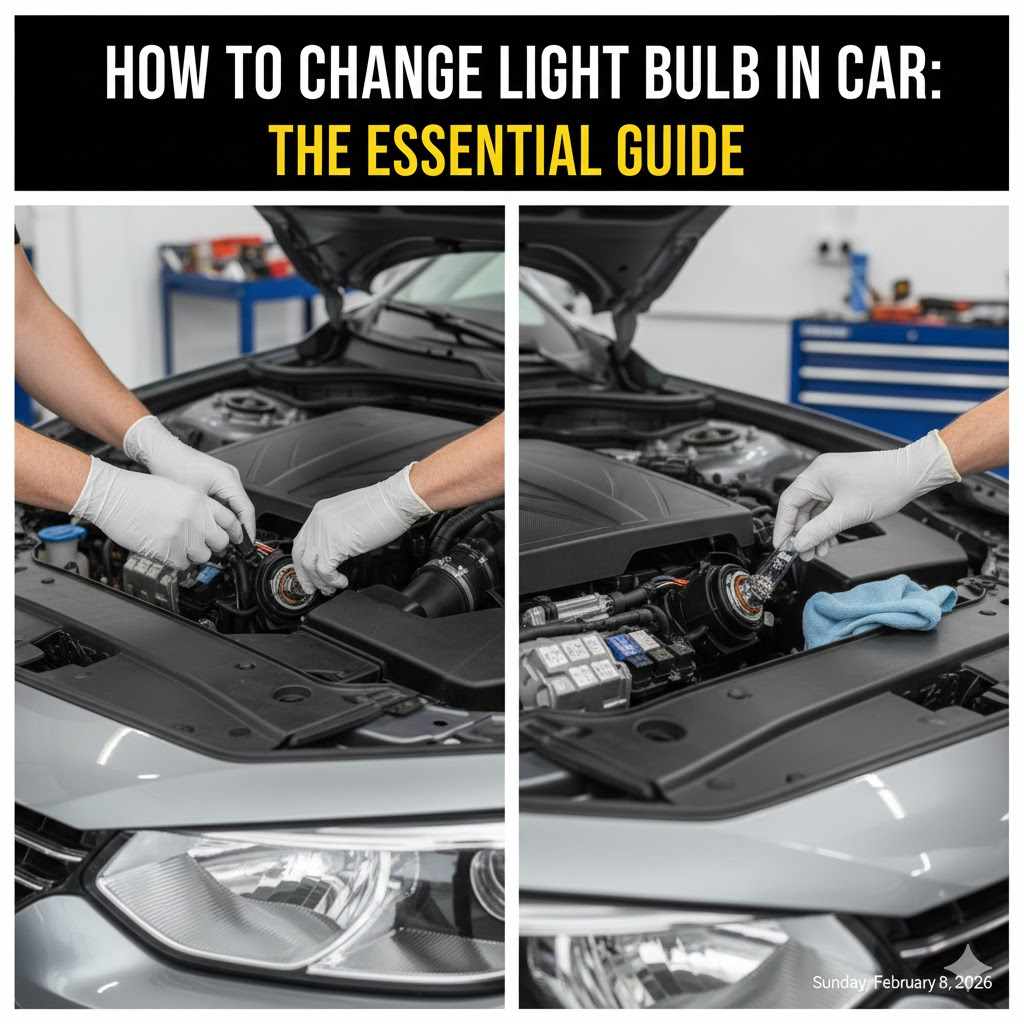
Step-by-Step Guide: How to Change a Headlight Bulb
The headlight is the most common bulb to burn out. While every car is a little different, the basic process is very similar for most vehicles. We will focus on the most common method: accessing the bulb from behind the headlight assembly inside the engine bay.
Open the Hood and Locate the Headlight Assembly
With your car turned off and cool, open the hood and secure it with the prop rod. Go to the side with the burnt-out bulb. You will see the back of the headlight unit, which looks like a plastic housing with wires and connectors attached to it.
Remove the Dust Cover
Most headlights have a round, plastic or rubber dust cover on the back to protect the bulb from moisture and dirt. This cover usually twists off (like a jar lid) or pulls straight off. Remove it and set it aside in a safe place.
Disconnect the Electrical Connector
The bulb is powered by an electrical wire that plugs into its base. This is called the wiring harness or connector. It has a small plastic clip that you need to press or lift to release it. Once you press the clip, gently wiggle and pull the connector straight off the bulb. Never pull by the wires themselves, as this can damage them.
Remove the Old Bulb
Now you can see the base of the old bulb. It’s usually held in place by one of two things: a metal retaining clip or the bulb simply twists and locks into place.
– For retaining clips: This is a thin metal wire. You’ll need to push it in and to the side to release the tension. The clip will then swing out of the way, allowing you to pull the bulb straight out.
– For twist-lock bulbs: Simply turn the bulb counter-clockwise about a quarter turn. You will feel it release, and then you can pull it straight out.
Prepare and Insert the New Bulb
This is the most important step! Take your new bulb out of its packaging. Do not touch the glass part of the bulb with your bare hands. The oils from your skin can create hot spots on the glass, causing the bulb to burn out very quickly. Always handle it by the plastic or metal base. If you accidentally touch the glass, wipe it clean with a soft cloth and some rubbing alcohol.
Carefully insert the new bulb into the socket. It should slide in easily. If it doesn’t, check its alignment. Most bulbs have tabs or notches that only allow them to be inserted one way.
Secure the New Bulb
If your car has a retaining clip, swing it back into place and secure it. You should feel it lock back over the base of the bulb. If you have a twist-lock style, turn it clockwise a quarter turn until it feels snug.
Reconnect the Electrical Connector and Test the Light
Push the electrical connector back onto the base of the new bulb until you hear or feel it click into place. Now, before you put everything back together, it’s time to test it! Turn on your car’s headlights and check that the new bulb is working. This simple check can save you the headache of reassembling everything only to find out something is wrong.
Replace the Dust Cover and Close the Hood
If the new bulb is shining brightly, turn off the lights and your car. Put the dust cover back on, making sure it’s sealed tightly to keep moisture out. Close the hood, and you’re done! You’ve successfully changed your headlight bulb.
What If I Can’t Reach the Bulb?
Some cars, especially newer, more compact models, have very crowded engine bays. If you can’t easily reach the back of the headlight, the manufacturer may have designed a different way to access it. Two common alternatives are:
- Through the Wheel Well: You may need to turn your steering wheel all the way to one side to get access to a small panel in the plastic wheel well liner. Removing a few screws or clips on this panel can give you direct access to the back of the headlight.
- Removing the Headlight Assembly: In some cases, the entire headlight unit must be removed from the car to change the bulb. This sounds scary, but it’s often just a matter of removing two or three bolts. For a task like this, a quick search on YouTube for your specific car model (“how to change headlight 2015 Honda Civic,” for example) can provide a helpful visual guide.
How to Change a Taillight or Brake Light Bulb
Changing a taillight, brake light, or turn signal bulb is often even easier than changing a headlight. The process is very similar, but the access point is different. You’ll almost always access these bulbs from inside the trunk or cargo area.
- Open the Trunk or Hatch: Park your car, turn it off, and open the trunk.
- Locate the Access Panel: Look at the area directly behind the taillight assembly. You will usually find a small, removable fabric or plastic panel. Sometimes it’s held on by plastic clips or a simple knob you can turn by hand.
- Remove the Bulb Socket: Behind the panel, you’ll see the back of the taillight assembly with wires leading to several bulb sockets. Identify the socket for the burnt-out bulb. Grab the plastic socket and twist it a quarter turn counter-clockwise. It will then pull straight out of the assembly with the bulb still attached.
- Replace the Bulb: The old bulb usually just pulls straight out of the socket. Some may require a slight push and twist. Pop the new bulb into the socket.
- Test and Reassemble: Before putting the socket back in, have a friend press the brake pedal or turn on the lights to make sure the new bulb works. Once confirmed, insert the socket back into the light assembly and twist it clockwise to lock it in. Replace the access panel, and you’re finished!
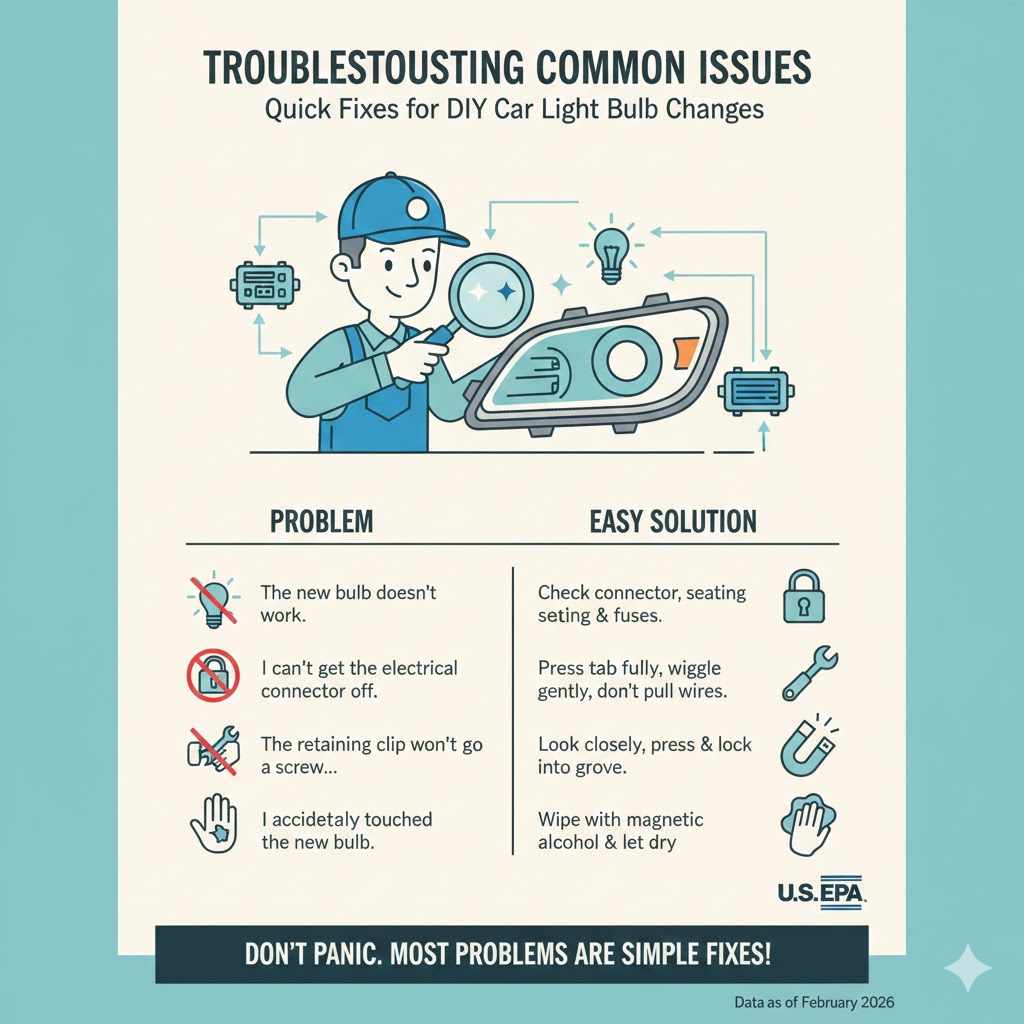
Troubleshooting Common Issues
Even a simple job can have a hiccup or two. Don’t worry! Most problems have very simple solutions. Here’s a quick guide to some common issues you might encounter.
| Problem | Easy Solution |
|---|---|
| The new bulb doesn’t work. | First, check that the electrical connector is pushed on all the way. Second, make sure the bulb is seated correctly in its socket. If it’s still not working, the issue might be a blown fuse. Check your owner’s manual for the fuse box location and diagram. A visual check of the vehicle’s fuse can tell you if it’s blown. |
| I can’t get the electrical connector off. | These connectors can be stiff from dirt and heat. Make sure you are pressing the release tab fully. Wiggle the connector side-to-side gently while pulling. Do not pull on the wires. |
| The retaining clip won’t go back on. | Take a close look at how the clip is designed to work. It usually needs to be pressed in and then moved to the side to lock into its groove. It might take a couple of tries to get the feel for it. |
| I dropped a tool or a screw in the engine bay. | This happens to everyone! A magnetic pickup tool is a lifesaver for retrieving metal objects. You can find them for a few dollars at any auto parts or hardware store. |
| I accidentally touched the new bulb. | No problem. Just take a clean, lint-free cloth or paper towel, dampen it with a little rubbing alcohol, and gently wipe the glass part of the bulb. Let it dry completely before installing it. |
Frequently Asked Questions (FAQ)
1. How do I know which light bulb is out?
The easiest way is to have a friend help. Turn on your headlights, high beams, and turn signals one by one while your friend walks around the car. Have them press the brake pedal so you can check the brake lights. For a quicker check, you can park facing a garage door or wall at night to see the reflection of your front lights.
2. Should I replace both headlight bulbs at the same time?
Yes, it’s highly recommended. Headlight bulbs are made to have a similar lifespan. If one has burned out, the other is likely not far behind. Replacing them in pairs ensures that both of your headlights have the same brightness, color, and lifespan, which is safer for night driving.
3. Why can’t I touch a halogen bulb with my bare hands?
The oil and residue from your fingers create an intense hot spot on the bulb’s quartz glass when it heats up. This temperature imbalance causes the glass to become brittle and can lead to the bulb failing very quickly, sometimes within hours of installation. Always use gloves or a clean cloth.
4. How much does it cost to have a mechanic change a light bulb?
While the bulb itself is cheap ($10-$20), labor costs can add up. Most repair shops will charge for a minimum amount of labor time, typically 30 minutes to an hour. This can result in a final bill ranging from $50 to over $150, especially for high-end cars or difficult-to-access bulbs.
5. What is the difference between Halogen, LED, and HID bulbs?
Most cars come with standard halogen bulbs, which are affordable and easy to find. HID (High-Intensity Discharge) and LED (Light-Emitting Diode) bulbs are brighter, last much longer, and have a whiter, more modern look. While you can upgrade, it’s important to buy a high-quality conversion kit that’s designed for your specific vehicle to ensure proper beam pattern and avoid blinding other drivers.
6. Is changing a car light bulb difficult?
Not at all! For the vast majority of cars, it is considered one of the easiest DIY maintenance tasks. It typically requires no special skills and only basic tools. With this guide, a beginner can confidently complete the job in 15-30 minutes.
7. How long do car headlight bulbs usually last?
The lifespan of a headlight bulb depends on the type. Standard halogen bulbs typically last between 500 and 1,000 hours of use. For the average driver, this translates to about two to four years. LED and HID bulbs have a much longer lifespan, often lasting 10 years or more.
Conclusion: You Did It!
Congratulations! You’ve just learned one of the most practical and money-saving skills a car owner can have. By following these simple steps, you’ve not only fixed a problem but also taken a huge step toward becoming more confident and self-sufficient with your vehicle. You now know how to identify the right part, use basic tools, and safely perform a repair that many people overpay for.
The next time you see a car with a burnt-out light, you can smile knowing you have the knowledge to fix it in minutes. Keep that confidence going, and don’t be afraid to tackle other simple maintenance tasks. Your car and your wallet will thank you for it. Happy driving!