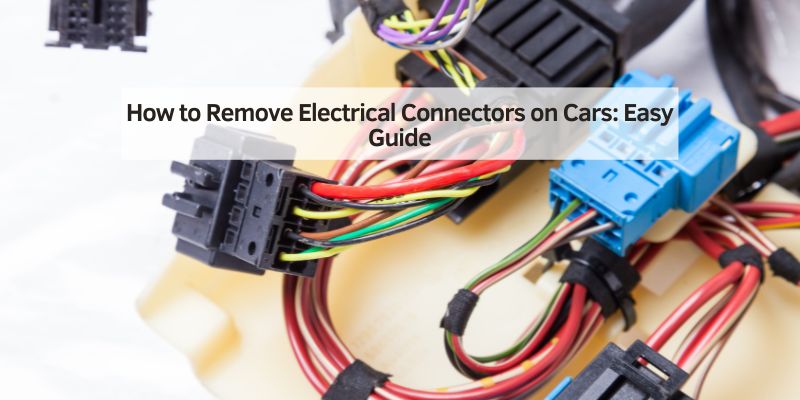
How to Remove Electrical Connectors on Cars: Easy Guide
Removing electrical connectors on cars without breaking the clips comes down to one rule: release the locking tab before pulling. Most broken connectors happen because someone pulled first and pressed the tab second. Push-tab connectors need thumb pressure on the tab while pulling the housing — never the wires. Lever-lock connectors (common on Ford, GM, and newer vehicles) have a rotating lever that must be flipped up before the connector separates. Bolt-type connectors just need a wrench. This guide covers all three types, how to handle Ford-specific connectors, fragile connector tips, and how to reconnect without causing future failures.
Quick Answer
To remove car electrical connectors: (1) disconnect the battery first, (2) find the locking tab or lever, (3) press or flip the release while gripping the connector housing — not the wires, (4) pull straight out. For Ford lever-lock connectors, rotate the lever 90° before pulling. Never force a connector — if it won’t move after the tab is released, check for a secondary lock or hidden clip.
Preparing Your Workspace
Collect the tools you need before starting: a flat-head screwdriver, needle-nose pliers, a wrench for bolt-type connectors, and a small flashlight. A dedicated connector removal tool (a plastic pick set or automotive trim tool) is worth having — it releases locking tabs without cracking the plastic housing the way a metal screwdriver can. Wear gloves to protect your hands from sharp edges on wire harnesses, and safety glasses if working near the battery. Set everything on a tray or in a magnetic parts dish so small clips don’t roll away.
Most importantly: always disconnect the car battery before touching any electrical connector. Even with the ignition off, many circuits stay live. A short circuit from an accidental contact can blow a fuse, damage a control module, or cause a spark near fuel lines. Disconnect the negative terminal first, wait 60 seconds for capacitors to discharge, then proceed.
Identifying Connector Types
Cars use three main connector types, each with a different release mechanism. Knowing which type you have before touching it prevents the most common breakage:
| Connector Type | How to Identify | How to Release | Common On |
|---|---|---|---|
| Push-tab | Small plastic tab on one side of housing | Press tab with thumb while pulling housing straight out | Most vehicles, sensors, lighting |
| Lever-lock | Rotating plastic lever or flip-up arm on the side | Rotate lever 90° or flip arm up, then pull straight out | Ford, GM, newer vehicles, large connectors |
| Bolt-type | Hex bolt or nut through center of connector | Loosen bolt with correct wrench, lift connector straight off | Battery terminals, ground straps, heavy-duty circuits |
| Pin connector | Individual metal pins in a plastic housing, no visible tab | Use a pin removal tool to push the retaining clip inside | Engine harness, behind dashboards |

Disconnecting Battery
- Locate the battery (usually under the hood, sometimes in the trunk or under a seat on some vehicles).
- Put on safety gloves and glasses.
- Ensure the engine is fully off and keys are out of the ignition.
- Use a wrench to loosen the negative (black/−) cable clamp first.
- Remove the negative cable and fold it away from the terminal so it can’t accidentally contact.
- Loosen and remove the positive (red/+) cable.
- Wait 60 seconds before touching any connectors — this lets control module capacitors discharge.
If your car has a short circuit issue you’re diagnosing, the battery disconnect also clears stored fault codes — note this before disconnecting if you need to read codes first.
Removing Push-Tab Connectors
Push-tab connectors are the most common type on passenger vehicles. The tab is usually on the top or side of the connector housing. Here’s the correct technique:
- Locate the tab — look carefully around all four sides of the housing.
- With one hand, firmly grip the connector housing (never the wires).
- With the other hand, press the tab with your thumb.
- While holding the tab pressed, pull the connector straight out — no twisting.
- If it doesn’t move, wiggle very slightly side to side while maintaining tab pressure.
- If still stuck after wiggling, inspect for a secondary lock — a small sliding piece or additional clip that must be moved first before the main tab works.
Some connectors have two tabs on opposite sides — both must be pressed simultaneously. Use two fingers or a trim removal tool to compress both sides before pulling.
Detaching Bolt-Type Connectors
Bolt-type connectors use a threaded fastener to maintain the connection pressure. Common on battery terminals, ground straps, and high-current circuits. Use the correct wrench size — rounding the bolt head with an undersized wrench is a common mistake. Loosen the bolt fully but don’t remove it from the housing if it’s captive (many bolt-type connectors keep the bolt trapped so it can’t be lost). Once loose, lift the connector straight up. Avoid pulling on the cable — grip the connector body. Check for corrosion at the contact surface and clean with a wire brush before reconnecting.
Handling Fragile Connectors
Recognizing Fragile Components
Older connectors (10+ years), connectors in hot locations like near the exhaust manifold, and very small connectors (O2 sensors, MAP sensors, injectors) are the most fragile. Signs of fragility: discolored or brittle-looking plastic, visible cracks in the housing, or white powder residue (indicates heat damage). On aged connectors, the plastic loses flexibility and the tab will snap instead of flex if pressed too hard. Approach these with a trim tool instead of a screwdriver to distribute pressure, and spray a small amount of electrical contact cleaner on the joint first to loosen corrosion that may be fusing the connector.
Tips for Gentle Removal
Use needle-nose pliers only to grip the housing — never to pry. If a connector is truly stuck after the tab is released, the problem is usually corrosion or swollen rubber seals. A spray of electrical contact cleaner into the joint, waited 30 seconds, then a gentle rock (not twist) side-to-side while pulling will free most stubborn connectors. If a connector breaks during removal, replacement pigtail connectors are widely available from auto parts stores — the damaged section can be cut and spliced.
How to Disconnect Ford Electrical Connectors
Ford vehicles commonly use lever-lock connectors on engine harnesses, ABS modules, and transmission connectors. These look like push-tab connectors but have a rotating plastic lever or hinged arm on the side. Attempting to pull a Ford lever-lock connector without rotating the lever first will break the housing every time. The correct procedure:
- Locate the lever or hinged arm on the side of the connector (it sits flush when locked).
- Use a flat-head screwdriver or your fingernail to rotate the lever 90° away from the connector body — it should flip up or out with light pressure.
- Once the lever is in the open position, grip the connector housing and pull straight out.
- The connector should slide free with no resistance — if it doesn’t, the lever isn’t fully rotated.
GM vehicles use a similar lever-lock system on many connectors. Dodge/Chrysler connectors more commonly use push-tabs but with a secondary locking clip — a small slide that must be moved toward the tab before the main tab can be pressed. Consult the vehicle’s factory service manual or a connector reference site for model-specific diagrams on unusual connectors.
Avoiding Common Mistakes
- Pulling on the wires: This breaks the crimp between the pin and the wire inside the connector — the connection will fail intermittently and be very hard to diagnose. Always grip the housing.
- Twisting the connector: Connectors are designed to pull straight out. Twisting bends the pins and cracks the housing.
- Using a metal screwdriver on the tab: Metal on plastic tabs chips or snaps the tab. Use a plastic trim tool.
- Skipping the battery disconnect: Live circuit contact can blow the ECU or cause a fire near fuel vapor.
- Ignoring the secondary lock: Many connectors have a small sliding secondary lock that must be moved before the main tab will release. If the tab won’t press or the connector won’t move after pressing the tab, look for this secondary lock.
- Working in poor light: You’ll miss hidden clips and tabs. Use a flashlight — a headlamp is ideal for keeping both hands free.
Reconnecting Electrical Connectors
Before reconnecting, inspect the connector for bent pins, corrosion (green or white powder on the contacts), and damaged seals. Clean corroded contacts with electrical contact cleaner and a small wire brush. Apply a small amount of dielectric grease to the connector’s rubber seal and contact pins — this prevents corrosion and makes future removal easier without affecting electrical conductivity.
To reconnect: align the connector with the housing (most are keyed so they only fit one way), push straight in until you hear or feel a definite click, then gently tug to confirm it’s locked. On lever-lock connectors, push the connector in first and then rotate the lever back to its locked position. Reconnect the battery — positive first, then negative — and test the circuit. Use a multimeter to verify voltage if the circuit controls a critical system. Learn more about maintaining your car’s audio wiring connectors for specific connector types used in car stereo installs.

Top Pick: Automotive Connector Removal Tool Set

Automotive Connector Removal Tool Set
Plastic pick and hook set specifically shaped for releasing locking tabs on push-tab and lever-lock connectors. Prevents the cracking and snapping that metal screwdrivers cause on aged plastic housings.
- Best for: Any connector removal job — replaces using a flat screwdriver on plastic tabs
- Why we picked it: Plastic tips won’t snap brittle tabs or scratch surrounding trim
- Main drawback: Tips can flex on very stiff lever-lock connectors — use two tools for those
More electrical connector tools
 Option 1 Electrical Contact Cleaner Spray
|
 Option 2 Automotive Wire Terminal & Crimp Kit
|
 Option 3 Dielectric Grease for Electrical Connectors
|
As an Amazon Associate we earn from qualifying purchases.
Frequently Asked Questions
How do you release electrical connectors from a car?
Disconnect the battery first. Find the locking mechanism — a push tab, rotating lever, or bolt — and release it before pulling. Grip the connector housing (not the wires) and pull straight out. For lever-lock connectors common on Ford and GM vehicles, rotate the lever 90° before pulling. Never force a connector that won’t move after the tab is released — there’s likely a secondary lock or hidden clip you haven’t found yet.
How to remove electrical wire connectors?
Always work on the connector housing, not the wires. For push-tab types: press the tab and pull the housing. For lever-lock types: rotate the lever first, then pull. For bolt-types: loosen the bolt with a wrench, then lift the connector. If you need to remove an individual wire pin from inside the housing, use a pin removal tool to push the retaining clip from the back of the connector — do not pull on the wire from the front.
How do you remove a pin from an automotive connector?
Use a purpose-made pin removal tool sized to match the terminal — these are inexpensive plastic or metal picks available at any auto parts store. Insert the tool from the wire side of the connector (the back), push the small retaining clip that locks the pin in its cavity, then gently pull the wire and pin out from the same side. Never push pins out from the front — you’ll damage the terminal face. Check the pin for corrosion or damage before reinserting.
How to disconnect a Chevy or Ford electrical connector?
Ford connectors commonly use lever-lock systems — find the lever on the side of the connector, rotate it 90° to the open position, then pull the connector straight out. Chevy/GM connectors often use push-tab designs but with a secondary sliding lock — slide the lock toward the tab first, which allows the tab to flex and release. Both designs require the locking mechanism to be fully disengaged before the connector will pull free. Using a plastic trim tool rather than a screwdriver avoids snapping the plastic lever or tab.