How to Clean the Interior Roof of Your Car Without Damage
Clean your car’s interior roof with a foam-safe upholstery cleaner applied lightly to a cloth, straight overlapping strokes instead of circles, and 6 to 12 hours of open-air drying afterward. The headliner is glued fabric over a foam backing, so the two mistakes that ruin one are soaking it with water and scrubbing in circles—both loosen the adhesive or knot the fibers. I’ve cleaned headliners on my own trucks and SUVs for years, and everything below is the process that’s actually held up.
Why I Started Cleaning My Car’s Headliner
BEST FOR HEADLINER-SAFE STAIN REMOVAL
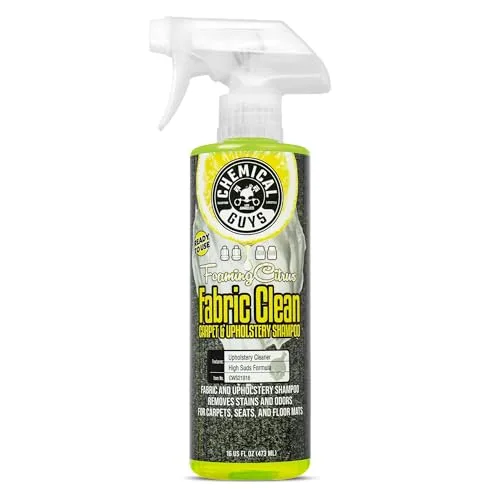 |
Chemical Guys Citrus Fabric & Carpet Cleaner (16 oz) – $9.99 This ready-to-use foam spray clings to fabric instead of running, which is exactly the light, low-moisture application this guide recommends for headliner cleaning.
|
A while back, I noticed my truck’s headliner had a weird stain—probably from my kid’s sticky hands or a spilled coffee. It bugged me every time I got in the car. I ignored it for a while, but the dirt started spreading, and it made the whole interior feel dingy. That’s when I decided to roll up my sleeves and figure out how to clean it myself. I didn’t want to pay a detailing shop $100 or more, so I experimented with household items and a few car-specific products. What I learned transformed my car’s interior, and now I love sharing these tips. A clean headliner doesn’t just look good—it makes every drive feel better.
What Is a Car’s Headliner and Why Does It Get Dirty
The headliner is the fabric or material covering the ceiling of your car’s interior. It’s usually made of cloth, foam-backed fabric, or sometimes vinyl in older cars. It’s there to make your car look nice, reduce noise, and insulate the cabin. But it’s a magnet for dirt. Dust settles on it, smoke leaves yellow stains, and accidents like spilled drinks or kids’ messes add to the mess.
I learned this when I found a mystery stain on my SUV’s headliner after a road trip. Turns out, my dog’s muddy paw had brushed against it when he jumped in the back. Headliners are tricky because they’re delicate and often glued to a foam backing, so you can’t scrub too hard. Knowing what you’re dealing with helps you clean it right.
Tools and Supplies You’ll Need
Before you start, gather some supplies. I keep things simple to save money, but you want the right tools to avoid damaging the headliner. Here’s what I use:
- Microfiber cloths: Soft and gentle, perfect for wiping without scratching.
- Soft-bristled brush: A toothbrush or upholstery brush works for stubborn spots.
- All-purpose cleaner: I use a car-safe cleaner or a mix of dish soap and water.
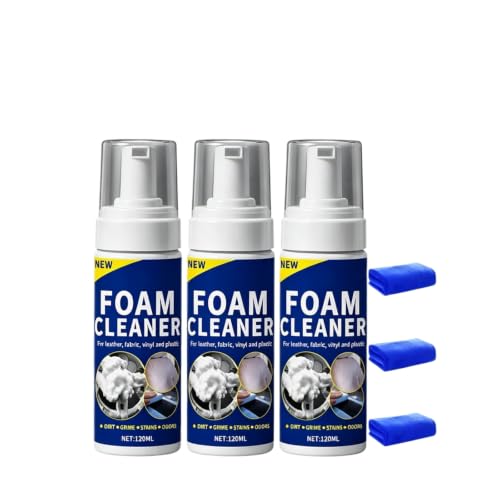
- Upholstery cleaner: For tough stains, a foam cleaner is a game-changer.
- Bucket and water: For diluting cleaners and rinsing cloths.
- Spray bottle: Makes applying cleaner easier.
- Vacuum with brush attachment: To suck up loose dirt.
- Gloves: To keep your hands clean.
You can find most of these at AutoZone or Walmart for $20–$40 total. I got a great upholstery cleaner for $10 that’s lasted me years. Make a list before you shop so you’re ready to go.
Step 1: Vacuum the Headliner
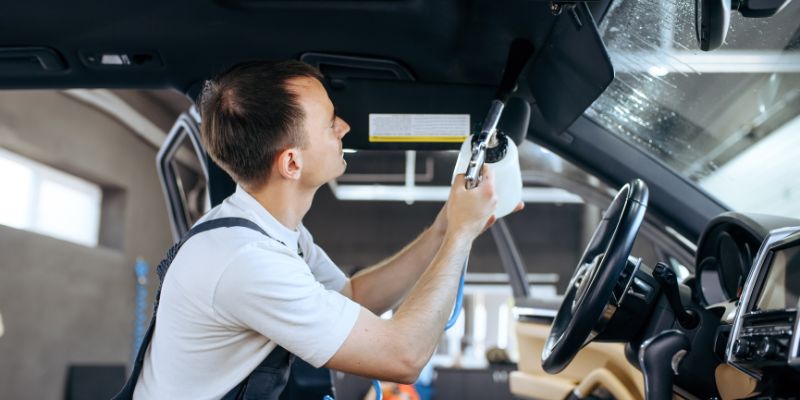
The first thing I do is vacuum the headliner to remove loose dust and dirt. This step is crucial because scrubbing a dirty surface can grind grime deeper into the fabric. I use a vacuum with a soft brush attachment to gently lift debris. Start at one end, like the front windshield, and work your way back in small sections.
When I cleaned my sedan’s headliner, I noticed tons of dust coming off, especially near the sunroof. Go slow and don’t press too hard—you don’t want to tear the fabric or loosen the glue. If you don’t have a vacuum, a dry microfiber cloth can work, but it’s messier. This step sets you up for a cleaner result.
Step 2: Spot-Test Your Cleaner
Before you go all-in, test your cleaning solution. I learned this after accidentally fading a spot on my old car’s headliner with a too-strong cleaner. Mix a small amount of all-purpose cleaner with water (I use a 1:10 ratio of soap to water) or use a dedicated upholstery cleaner. Spray a tiny bit on a hidden spot, like near the rear window, and dab it with a microfiber cloth. Wait a few minutes to make sure it doesn’t discolor or damage the fabric.
If it looks good, you’re ready to proceed. I always keep a spare cloth handy to blot up excess cleaner. This step saves you from a costly mistake, especially on delicate headliners.
Step 3: Clean Light Dirt and Dust
For general cleaning, I start with a mild solution. Spray your diluted cleaner lightly onto a microfiber cloth—not directly on the headliner, as too much liquid can soak the foam backing and loosen the glue. Wipe in straight, overlapping strokes instead of circles—circular scrubbing braids the short headliner fibers into little knots you can’t brush back out, and it tends to spread a stain wider instead of lifting it. I work in sections, about the size of a dinner plate, to keep things manageable.
When I cleaned my wife’s SUV, the headliner was just dusty, no major stains. A quick wipe with a damp cloth made it look brand new. If you notice the cloth getting dirty, swap it for a clean one. Rinse your clothes often to avoid spreading grime. This step handles most light dirt and keeps your headliner fresh.
Step 4: Tackle Tough Stains
Stains are where things get tricky. I’ve dealt with everything from coffee spills to greasy fingerprints. For tough spots, I use a foam upholstery cleaner. Spray a small amount onto the stain, let it sit for a minute, and gently scrub with a soft-bristled brush. I used a toothbrush on a ketchup stain in my truck, and it worked like magic.
Blot from the outer edge of the stain inward with a clean microfiber cloth—working outside-in keeps the stain from spreading wider as you lift it. Don’t scrub too hard—you could fray the fabric or push the stain deeper. If the stain persists, repeat the process but don’t soak the area. I once spent 20 minutes on a stubborn ink mark, but patience paid off. For really tough stains, like smoke residue, a mix of vinegar and water (1:1 ratio) can help, but test it first.
Step 5: Deal with Smoke and Odor
If your car’s headliner smells like smoke or mildew, you’ll need extra steps. I bought a used car once that reeked of cigarettes, and the headliner was the worst offender. After cleaning, I sprayed a fabric deodorizer lightly over the surface and let it air out with the windows down. Baking soda works too—sprinkle it on, let it sit for a few hours, then vacuum it up.
For mildew, I use a vinegar-water mix and a fan to dry the headliner quickly. Don’t let it stay wet too long, or you’ll risk mold. Open all the doors and park in a sunny spot if you can. This trick saved my old sedan from a musty smell after a leaky sunroof.
Step 6: Dry the Headliner Properly
Drying is super important. A wet headliner can sag or grow mold, and I learned this after leaving mine damp overnight. Use a dry microfiber cloth to blot up excess moisture after cleaning. Then, open all the doors and windows to let air circulate. If you’re in a humid part of the USA, like Florida, set up a fan or park in the sun to speed things up.
I once used a hairdryer on a low, cool setting for a small spot, but be careful—heat can damage the glue. Plan on a full 6 to 12 hours of open-air drying, doors or windows cracked, before you close the car up for the night—that’s the window most detailers give a headliner so moisture doesn’t work into the foam backing and start a sag. A good drying job keeps your hard work looking great.
Common Headliner Materials and How to Clean Them
Not all headliners are the same, and I’ve cleaned a few types. Here’s a quick guide based on my experience:
| Material | Description | Cleaning Tips |
|---|---|---|
| Cloth/Fabric | Most common, soft and fuzzy | Be gentle, minimal water to protect the glue |
| Foam-Backed | Thick, padded feel | Be gentle, minimal water to protect glue |
| Vinyl | Smooth, found in older cars | Wipe with all-purpose cleaner, less delicate |
| Suede/Alcantara | Luxe, velvety texture | Use dry foam cleaner, soft brush only |
When I cleaned a vinyl headliner in my classic Mustang, I used a simple soapy solution, and it was way easier than fabric. Knowing your material helps you avoid damage.
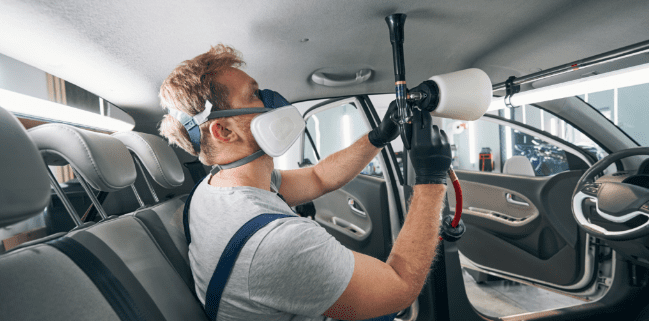
Mistakes to Avoid When Cleaning
I’ve made plenty of mistakes, so let me save you some trouble. First, don’t use too much water. Soaking the headliner can loosen the glue, causing it to sag. I did this once and had to pay a shop to re-glue it. Second, avoid harsh chemicals like bleach—they’ll fade or stain the fabric. Third, don’t scrub too hard. A heavy hand can tear the material or create bald spots.
Finally, don’t skip the spot test. I thought I could skip it once with a “safe” cleaner, and it left a weird mark. Take your time, and your headliner will thank you.
How Often Should You Clean Your Headliner
I clean my car’s headliner about once a year, or whenever I notice dirt or smells. If you smoke, have kids, or drive with pets, you might need to clean every six months. My dog loves sticking his head out the window, and I’ve noticed more dust on the headliner because of it. Regular vacuuming—say, monthly—can keep dirt from building up, making deep cleans easier.
If you live in a dusty part of the USA, like Arizona, or a humid area like Louisiana, you might need to clean more often. A quick wipe-down can prevent stains from setting in.
Tips for Keeping Your Headliner Clean
Prevention is easier than cleaning. I’ve learned a few tricks to keep my headliner looking good. First, avoid touching it. Fingerprints and oils from your hands can leave marks. If you have kids, teach them not to touch the ceiling—I put a “no hands” rule in my car.
Second, keep your car’s interior clean overall. Dust from the seats or dashboard can settle on the headliner. I vacuum my car monthly to keep dirt in check. Third, use a sunshade to block UV rays, which can fade the headliner over time. Finally, if you smoke, crack a window to reduce residue buildup. These habits have kept my SUV’s headliner spotless for years.
When to Call a Professional
Sometimes, DIY isn’t enough. I tried fixing a sagging headliner once, and it was a disaster—the glue wouldn’t hold. If your headliner is torn, sagging, or has deep stains, a pro might be worth it. Detailing shops in the USA charge $50–$150 for a headliner clean, depending on the damage. For major repairs, like re-gluing, expect $200 or more.
If you’re dealing with mold or heavy smoke damage, pros have industrial tools that work better than household stuff. I took my used car to a detailer for smoke odor, and they used an ozone machine that I couldn’t replicate at home. Weigh the cost against the hassle, but most cleaning jobs are DIY-friendly.
Budgeting for Your Cleaning Project
Cleaning your headliner doesn’t have to break the bank. I spent about $25 on supplies for my first clean: microfiber cloths, a brush, and upholstery cleaner. If you already have a vacuum, you’re halfway there. Here’s a rough cost breakdown:
- Microfiber cloths: $5–$10 for a pack.
- Upholstery cleaner: $8–$15.
- Soft brush: $3–$10.
- All-purpose cleaner: $5–$10.
Shop at places like Walmart or Amazon for deals. I also check Dollar Stores for cheap clothes. Set a budget of $30–$50, and you’ll have enough for multiple cleans.
Where to Find Inspiration and Resources
Need ideas or help? I love browsing car forums like Reddit’s r/AutoDetailing for tips from other enthusiasts. YouTube has great tutorials—just search “clean car headliner” for step-by-step videos. I learned my vinegar trick from a video that had thousands of views. Local auto parts stores like O’Reilly Auto Parts are also great for supplies and advice. I once asked an employee for the best upholstery cleaner, and they pointed me to a $10 gem.
If you’re stuck, car shows or detailing shops can inspire you. I saw a pristine headliner on a classic car at a show, and it motivated me to keep mine spotless.
The Joy of a Clean Car Interior
There’s nothing like sliding into a car with a clean headliner. After I finished cleaning my truck’s ceiling, it felt like I’d upgraded the whole vehicle. The interior looked brighter, smelled fresh, and made every drive more enjoyable. It’s a small job that makes a big difference, especially if you spend hours in your car like I do.
Conclusion
Cleaning the interior roof of your car might seem daunting, but it’s a project anyone can tackle with a little know-how. From vacuuming dust to tackling stains, I’ve learned that patience and the right tools make all the difference. My cars have never looked better, and I’ve saved hundreds by doing it myself. Whether you’re dealing with a coffee spill, pet hair, or just years of dust, you can transform your headliner and make your car feel like a sanctuary. So, grab some microfiber cloths, put on your favorite playlist, and get to work. Your car deserves it, and you’ll love the results. Happy cleaning!
FAQs
How often should I clean my car’s headliner?
Clean it once a year or when you notice dirt or stains. If you have pets or smoke, every six months is better.
Can I use household cleaners on my headliner?
Yes, but be careful. A mild mix of dish soap and water works, but test it first to avoid damage.
What’s the best way to remove stains from a headliner?
Use a foam upholstery cleaner and a soft brush. Spray lightly, scrub gently, and blot with a microfiber cloth.
Will cleaning my headliner make it sag?
Not if you’re careful. Avoid soaking it with water, and dry it thoroughly to protect the glue.
Can I clean a suede or Alcantara headliner?
Yes, but use a dry foam cleaner and a soft brush. Be extra gentle to avoid damaging the texture.
What do I do if my headliner smells like smoke?
Clean it with a vinegar-water mix, then use a fabric deodorizer. Air it out with windows open to remove the odor.
Products related to this article
Sponsored / affiliate links. As an Amazon Associate I earn from qualifying purchases. I may earn additional commission from eligible campaigns.