How to Clean a Car Interior: 8-Step Guide for Every Surface
Cleaning a car interior completely takes 1–2 hours and requires vacuum, upholstery cleaner, microfiber cloths, an all-purpose cleaner, and glass cleaner. The correct order is: work top to bottom — dashboard before seats, seats before floor, windows last — so falling debris does not contaminate surfaces you already cleaned. This guide covers all 8 steps in order, including how to handle fabric vs. leather seats differently, how to remove odors properly (not just mask them), and which common cleaning mistakes cause damage.
How to clean a car interior in 8 steps: (1) Clear out clutter; (2) Vacuum seats, floor, and crevices; (3) Clean floor mats separately; (4) Clean seats — upholstery cleaner for fabric, dedicated leather cleaner + conditioner for leather; (5) Wipe dashboard, console, and door panels with diluted all-purpose cleaner; (6) Clean windows with ammonia-free glass cleaner; (7) Eliminate odors with baking soda or enzymatic cleaner; (8) Apply plastic protectant to dashboard. Do windows last — every other step creates overspray that lands on glass.
Why Keeping Your Car Interior Clean Matters
A clean car interior protects resale value, reduces allergen buildup from dust and pollen, and prevents surface damage that accumulates from embedded grit and UV exposure. Dust particles act as an abrasive on soft surfaces when pressed in by contact — seats, armrests, and door panels all degrade faster when grime is left in place. Spills that reach carpet backing cause mold growth that is difficult to remediate without professional extraction. Regular cleaning every 2–3 months prevents all of these outcomes at low cost and effort.
What You’ll Need to Clean Your Car Interior
Having the correct supplies before starting saves time and prevents the wrong product from damaging a surface. Here is what is needed for a complete interior clean:
| Item | Purpose | Where to Find It |
|---|---|---|
| Vacuum cleaner (with attachments) | Removes dirt, crumbs, and debris before wet cleaning | Home, auto stores, or rent one |
| Microfiber cloths | Wipes surfaces without scratching | Auto stores, supermarkets |
| Soft-bristle brush | Scrubs tough spots on seats and carpets | Auto stores, hardware stores |
| All-purpose cleaner (APC) | Cleans dashboard, console, and door panels safely | Auto stores, online |
| Upholstery cleaner | Tackles stains on fabric seats and carpet | Auto stores, online |
| Leather cleaner and conditioner | Cleans and conditions leather seats without drying | Auto stores, online |
| Glass cleaner (ammonia-free) | Streak-free cleaning; safe for tinted windows | Auto stores, supermarkets |
| Bucket and car wash soap | Cleans rubber or vinyl floor mats | Auto stores, supermarkets |
| Trash bags | Collects garbage during declutter step | Supermarkets, home |
| Cotton swabs or old toothbrush | Cleans tight spots like vents, buttons, and seams | Home, drugstores |
| Spray bottle | Dilutes all-purpose cleaner to correct ratio | Hardware stores, supermarkets |
The minimum viable kit for a basic clean is: vacuum, microfiber cloths, and all-purpose cleaner. Add upholstery or leather cleaner for seats and glass cleaner for windows to cover a full detail.
Step 1: Clear Out the Clutter
Remove everything that does not belong in the car — trash, receipts, loose items, empty cups, and anything stored under seats or in the back. Empty all storage compartments: glove box, center console, door pockets, and trunk. This creates unobstructed access for vacuuming and prevents items from shifting into areas you are trying to clean. Takes 5–10 minutes and makes every subsequent step faster.
Step 2: Vacuum Every Nook and Cranny
Vacuum before any wet cleaning — this removes loose dirt and debris so that wet cleaners do not spread particles into the fabric. Work from the top down: start with seats (crevice tool between cushions and along seams), then dashboard and console, then door panels, then floor and carpet. Slide seats all the way forward to reach the floor behind them, then all the way back to reach in front.
Use the brush attachment on the dashboard and soft surfaces to avoid scratching. Use the crevice tool in narrow gaps — along door seals, around the base of the center console, and between seat rails. Vacuum floor mats before removing them to prevent distributing that dirt inside the car.
Step 3: Clean the Floor Mats
Remove floor mats and clean them separately. For rubber or all-weather mats, take them outside, spray with a hose, apply car wash soap, scrub with a stiff brush, and rinse thoroughly. Let them air dry completely before reinstalling — wet mats trap moisture under them and cause musty odor in the carpet. For fabric mats, spray with upholstery cleaner, scrub with a soft brush, and blot dry with a microfiber cloth. Set in the sun to dry while completing the rest of the interior.
Step 4: Tackle the Seats
Seat cleaning method depends on the material. Fabric and leather require completely different products — using the wrong one causes damage.
For fabric seats: vacuum first to remove loose particles. Spray upholstery cleaner on one section at a time (not the whole seat at once — avoids over-wetting). Scrub with a soft-bristle brush in circular motions to lift stain particles from fiber. Wipe with a clean microfiber cloth. For set-in stains — coffee, ketchup, juice — allow the cleaner to dwell for 3–5 minutes before scrubbing. Repeat if needed. Do not over-saturate the fabric; excess moisture soaks into the foam backing and can cause mold if it does not dry fully.
For leather seats: use a dedicated leather cleaner — not all-purpose cleaner, not vinegar, not dish soap. These strip the leather’s natural oils and dry it out. Apply leather cleaner to a microfiber cloth (not directly to the seat), wipe in gentle circular motions, then buff dry. Follow immediately with leather conditioner to restore moisture and flexibility — this prevents cracking, especially in dry climates. Condition every 3–6 months whether or not the seats look dirty.
Step 5: Wipe Down Hard Surfaces
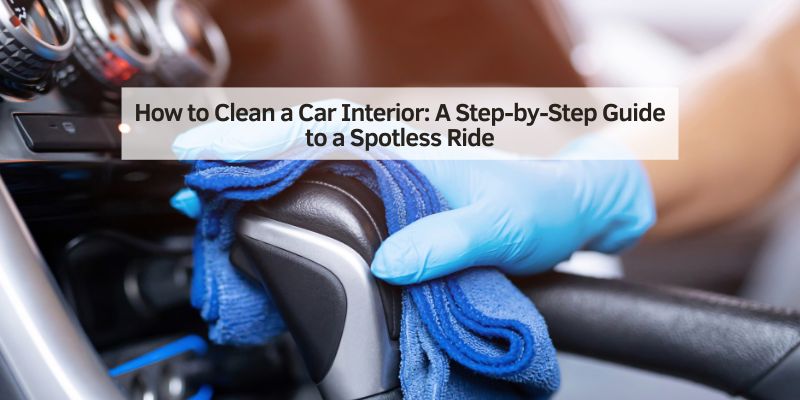
Clean the dashboard, center console, door panels, and steering wheel with all-purpose cleaner diluted per label directions. Spray the cleaner onto a microfiber cloth, not directly onto the surface — direct spray near electronics or vents can cause fluid infiltration. Wipe in overlapping sections to avoid missing spots. The steering wheel is high-contact and accumulates oils from hands — clean it thoroughly with APC, then dry with a second cloth.
For vent slats and tight gaps around buttons, use a soft-bristle brush, foam paint brush, or cotton swab. These catch dust that a cloth cannot reach. After cleaning, apply a water-based plastic protectant to hard surfaces to restore a matte finish and provide UV protection. Avoid silicone-based protectants on the dashboard — they create a reflective glare on the windshield that affects driving visibility.
Step 6: Clean the Windows and Mirrors
Clean windows last — every step before this creates overspray and residue that drifts onto glass. Use ammonia-free glass cleaner; ammonia damages window tint film and will cause it to bubble or peel over time. Spray the cleaner onto a microfiber cloth, not the glass. Wipe in straight vertical strokes on one pass, then horizontal strokes on the second pass — crossing directions makes streaks visible and easy to spot.
For the windshield, roll each window down a half inch before cleaning to reach the top edge where grime collects. Clean the rearview and side mirrors with the same ammonia-free cleaner. When cleaning the rear window’s interior surface, wipe parallel to the defroster wire traces rather than across them to avoid breaking the heating elements — see our complete rear window guide for more on defroster care and what the rear window is officially called. If tinted windows are present, confirm “ammonia-free” on the product label — not all glass cleaners marketed for cars are ammonia-free.
Step 7: Tackle Odors
Air fresheners mask odors but do not eliminate them. The source of the smell must be treated for permanent removal.
- General musty or food odors: Sprinkle baking soda liberally on fabric seats and carpet. Let it sit for 15–20 minutes to absorb odor-causing compounds, then vacuum completely. Repeat for strong odors.
- Pet odors: Use an enzymatic cleaner specifically formulated for pet odors — enzymatic cleaners break down organic compounds at the molecular level rather than masking them. Standard upholstery cleaners do not fully remove pet odor.
- Smoke odors: Leave a small bowl of activated charcoal in the car overnight with windows closed. Charcoal absorbs airborne odor compounds. Follow up with an ozone treatment if the smell persists — many detailing shops offer ozone odor elimination as a service.
- Mildew from moisture: Locate and dry the source (wet floor mat, trunk leak, damp carpet). Apply a mildew-specific cleaner, then allow full drying with doors open.
Step 8: Add the Finishing Touches
Apply water-based plastic protectant to the dashboard and door panels after cleaning — this restores color, adds UV protection, and creates a surface that repels dust more effectively than bare plastic. For leather seats, apply conditioner now if not done in Step 4. Reinstall the dry floor mats. Organize any items being returned to the car — a small console organizer for charging cables and sunglasses prevents immediate re-cluttering.
If using an air freshener, choose a light, understated scent. Strong air fresheners are often a signal to buyers during resale inspections that odors are being masked — a subtle or neutral scent is preferable.
Maintenance Tips to Keep Your Interior Clean
- Quick vacuum weekly: A 10-minute pass with a handheld vacuum prevents crumbs and grit from embedding into fabric.
- Wipe hard surfaces monthly: A microfiber cloth with diluted APC removes dust before it becomes grime.
- Use floor mats: All-weather rubber mats are easier to rinse clean than carpet and protect the original floor from staining.
- No eating in the car: Food crumbs are the primary source of embedded fabric stains and attract insects and rodents over time.
- Keep a small trash receptacle in the car: A collapsible bin or bag prevents trash from accumulating on the floor.
- Park in shade or a garage: UV exposure fades and cracks interior surfaces — especially dashboard plastic and leather — over time.
Common Mistakes to Avoid
- Skipping the vacuum before wet cleaning: Wet cleaner applied over loose dirt spreads particles into fabric fibers rather than lifting them. Always vacuum first.
- Using household cleaners: Bleach, dish soap, and general-purpose household cleaners damage automotive surfaces — they can discolor upholstery, strip leather oils, and leave residue that attracts more dirt.
- Over-wetting fabric seats and carpet: Excess moisture soaks into padding and carpet backing, causing mold and mildew that is very difficult to remediate without professional equipment. Use minimal product — spray the cloth, not the surface.
- Using ammonia-based glass cleaner on tinted windows: Ammonia degrades window tint adhesive and causes bubbling and peeling. Use ammonia-free cleaner only.
- Cleaning windows before finishing other surfaces: Dashboard wiping, seat scrubbing, and product applications all generate mist and particles that land on glass. Always clean glass last.
- Using dark-colored cloths on light interiors: Dark microfiber can transfer color to light-colored surfaces. Use light-colored cloths on beige or gray interiors.
- Putting damp floor mats back in the car: Reinstalling wet mats traps moisture under them and creates a musty smell within days. Ensure mats are fully dry before reinstalling.
Conclusion
A complete car interior cleaning takes 1–2 hours and follows a specific sequence: vacuum first, clean from top to bottom, and save windows for last. The biggest quality difference between DIY and professional detailing is usually the products used — automotive-specific cleaners on each surface type rather than generic household products. Consistent light maintenance (weekly vacuum, monthly wipe-down) reduces the time and effort required for each full clean and keeps the interior in better condition between sessions.
FAQs
How often should I clean my car’s interior?
A full clean every 2–3 months is sufficient for most drivers. Weekly quick maintenance — a 10-minute vacuum and wipe-down — prevents heavy buildup between full sessions. Adjust frequency based on use: vehicles driven with children, pets, or food require more frequent cleaning.
Can I use household cleaners on my car interior?
No. Household cleaners like bleach or dish soap can discolor upholstery, strip leather oils, and leave residue that attracts more dirt. Use automotive-specific cleaners for each surface type: upholstery cleaner for fabric, leather cleaner for leather, and ammonia-free glass cleaner for windows.
What’s the best way to remove stains from fabric seats?
Apply upholstery cleaner to the stained area, let it dwell 3–5 minutes for set-in stains, then scrub with a soft-bristle brush and blot with a clean microfiber cloth. Repeat for stubborn stains. Do not over-saturate — excess moisture promotes mold in the seat padding. For fresh spills, blot immediately rather than rubbing, which spreads the stain.
How do I clean leather seats without damaging them?
Use a dedicated leather cleaner applied to a microfiber cloth (not sprayed directly on the seat). Wipe gently in circular motions, then buff dry. Follow with leather conditioner to restore moisture and prevent cracking. Never use vinegar, dish soap, or all-purpose cleaner on leather — all strip the protective surface and dry out the material over time.
Why does my car still smell after cleaning?
Odors embedded in carpet backing, seat foam, or HVAC systems do not disappear from surface cleaning alone. Treat the source: baking soda for general odors, enzymatic cleaner for pet odors, activated charcoal for smoke. If the smell persists after thorough cleaning, the HVAC cabin air filter may be the source — replace it and run the system on fresh air mode with windows down.
Can I clean tinted windows with regular glass cleaner?
Only if the cleaner is ammonia-free. Ammonia damages tint adhesive and causes bubbling or peeling over time. Check the product label — even cleaners marketed for cars sometimes contain ammonia. Use a cleaner specifically rated for tinted windows if in doubt.